

Ever dreamed of holding a piece of Earth's ancient history in your hand? Finding a fossil is a direct connection to a world millions of years gone. It’s rarely about luck. The real secret is learning to combine a little geological know-how with a sharp eye for detail, turning a simple hike into a genuine prehistoric treasure hunt.
Your Journey into Deep Time Starts Here
This guide will walk you through the entire process, from pinpointing promising locations packed with sedimentary rock—like sandstone, limestone, and shale—to safely preserving what you discover. We’re not just talking about collecting cool rocks; we’re talking about learning to read the story the landscape tells and finding your own place in it.
The key is knowing where to look. Fossils aren't found everywhere. They are almost exclusively found in layers of sedimentary rock, which are often exposed by natural erosion. Think badlands, creek beds, cliffsides, and even road cuts.
What to Expect on Your Adventure
Fossil hunting is an incredible hobby that blends scientific curiosity with a love for the outdoors. It's a hands-on way to engage with the natural world, offering something for every age.
- A Connection to the Past: Each find is a tangible link to an ancient ecosystem. You might find a shell from a prehistoric sea or a leaf impression from a long-lost forest.
- Outdoor Exploration: It gets you outside, exploring new landscapes and forcing you to pay close attention to the ground beneath your feet in a way you probably never have before.
- A Lifelong Hobby: The skills you learn—from identifying rock types to careful excavation—can easily fuel a passion that lasts a lifetime.
This entire process is built on active engagement and exploration. If you want to dive deeper into why this kind of hands-on activity is so powerful, you can learn more about discovery-based learning in our detailed article, which explains how it builds curiosity and critical thinking.
The real thrill of fossil hunting is that moment of discovery—when you realize the shape you've spotted isn't just another rock, but the remnant of a life that existed long before humans walked the Earth.
Before you grab your gear, let's look at the big picture. The table below provides a quick roadmap of the adventure ahead, breaking down the key stages of any successful hunt.
The Fossil Hunter's Roadmap at a Glance
This table provides a quick summary of the essential stages involved in a successful fossil hunting expedition, from initial research to the final preservation of your find.
| Stage | Key Objective | Essential Tools |
|---|---|---|
| Research & Scouting | Identify promising locations with exposed sedimentary rock. | Geological maps, GPS, online forums |
| Field Expedition | Safely explore the site and identify potential fossils. | Rock hammer, eye protection, backpack |
| Recovery & Excavation | Carefully remove the fossil without causing damage. | Brushes, dental picks, wrapping material |
| Preservation & Curation | Clean, stabilize, and document your find at home. | Soft brushes, consolidants, storage boxes |
Think of this as your game plan. Nailing each stage is what separates a frustrating day out from one that ends with a truly amazing discovery.
Finding Your Fossil Hotspots
Successful fossil hunting begins before you even step outside. It's less about luck and more about knowing where to look. The biggest shift you can make is moving from aimless wandering to a strategic search, and that starts with one simple rule: fossils are almost always found in sedimentary rock.
These are the rocks formed from ancient layers of sand, silt, and mud that settled at the bottom of old rivers, lakes, and oceans. Over millions of years, this sediment buried plants and animals and hardened into stone, creating the perfect tomb for a future fossil. So, your first mission is to find where these layers are exposed today.
Decoding the Geological Landscape
Think of the earth as a giant layer cake, with different rock types stacked on top of each other. Your goal is to find where time and weather have cut a slice into that cake, revealing the older, fossil-rich layers underneath.
These sweet spots appear in predictable places. Learning to recognize them is one of the most important skills you can develop as a fossil hunter.
- Road Cuts: When construction crews blast through a hill to build a highway, they do us a huge favor. They create clean, accessible cross-sections of rock strata that are perfect for searching.
- Creek Beds and Riverbanks: Water is nature's excavator. It constantly carves through sediment, tumbling rocks around and uncovering fossils that have been locked away for eons.
- Badlands and Canyons: These dramatically eroded landscapes are absolute treasure troves. The constant work of wind and water means fresh layers of ancient ground are always being exposed.
By focusing your energy on these types of locations, you dramatically boost your odds of finding something incredible.
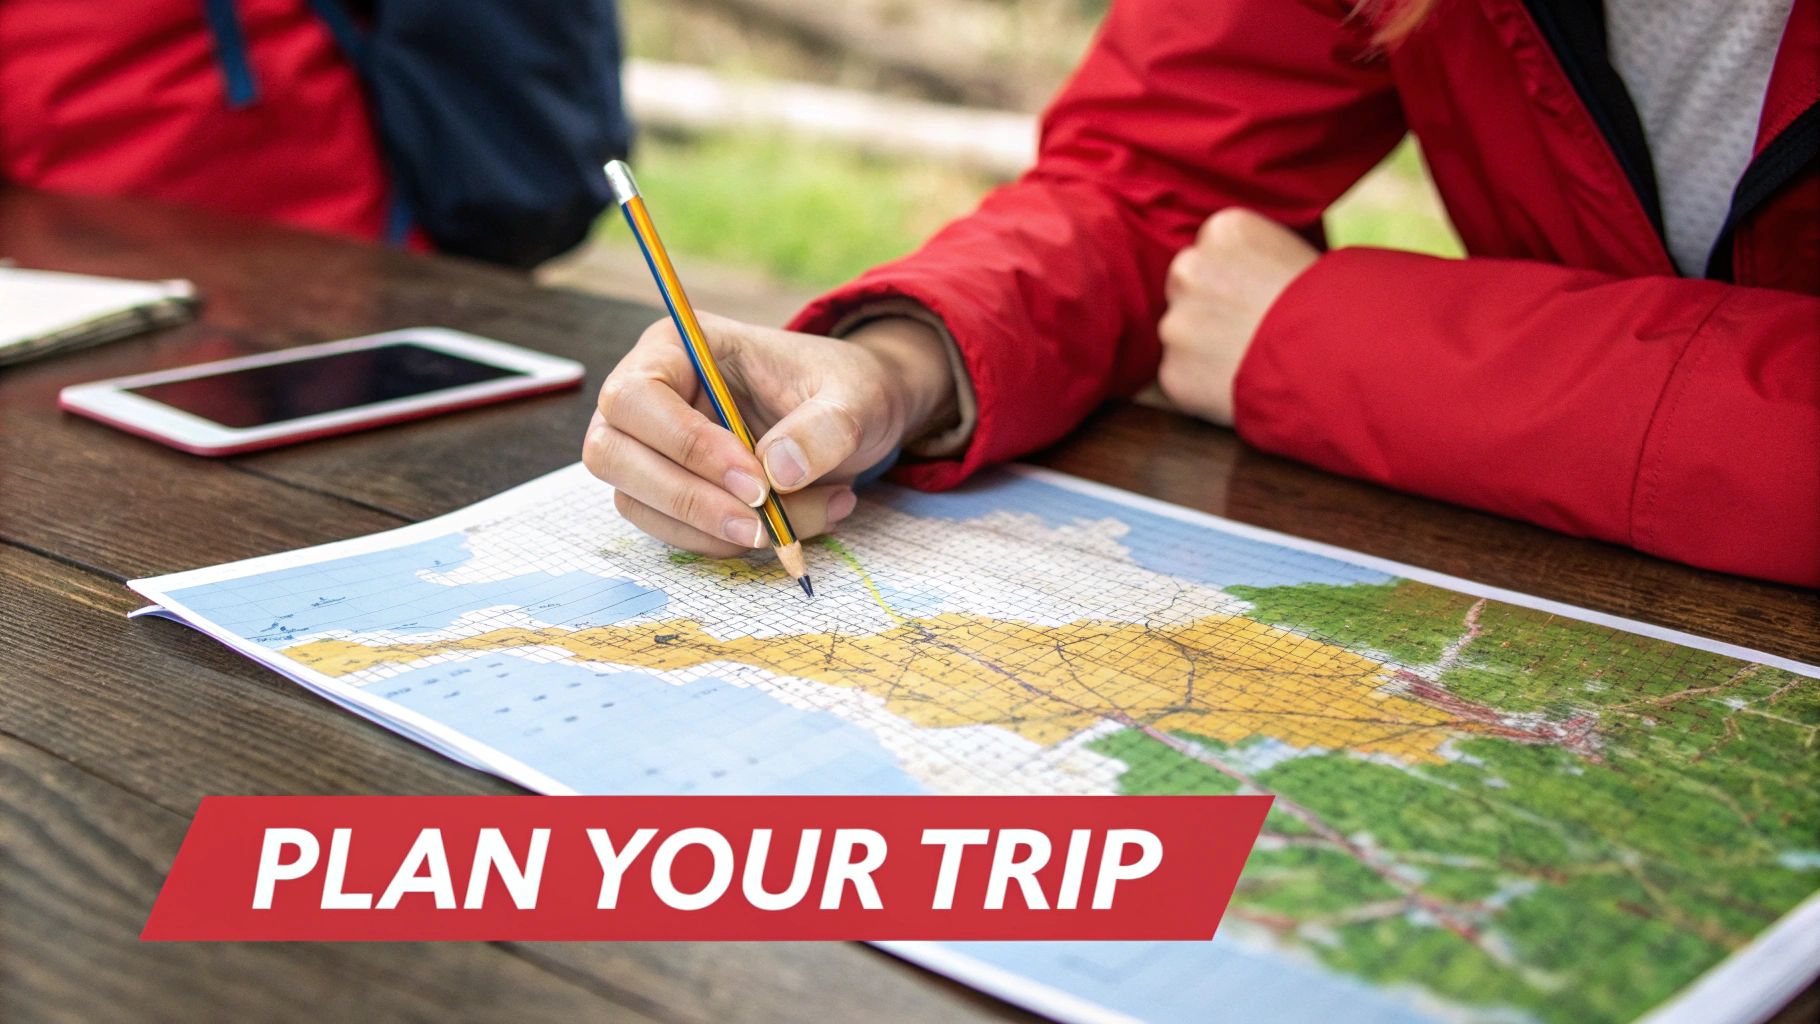
Using Maps to Pinpoint Prime Locations
Here's the good news: you don't have to guess where sedimentary rock is. Geologists have already mapped it out for you. Online geological maps and surveys are your secret weapon for finding promising sites without ever leaving your couch. These resources color-code different rock formations by type and age, letting you zero in on areas with high fossil potential.
It’s this understanding of geology that separates pros from amateurs. Globally, dinosaur fossils have been found on all seven continents, with over 320 species identified from the United States and China alone. That’s because paleontologists target specific, well-known formations, like the Hell Creek Formation in Montana or the famous fossil beds of Utah.
Actionable Tip: Your local university's geology department or state geological survey website is often the best place to start. A quick search for "geological map of [your state]" can unlock a wealth of digital resources to guide your search.
These tools turn fossil hunting from a game of chance into a calculated search. You can identify public lands that have the right kind of rock and plan your trip with a real purpose. For families, this map-reading research can be a fantastic pre-trip activity. It builds excitement and understanding in the same way that fun science kits for kids get them fired up about a new project.
Building Your Fossil Hunter's Toolkit
Having the right gear can be the difference between a day of frustration and the thrill of a lifetime find. But you don't need to break the bank to get started. A good fossil hunter's kit is about being prepared, and it grows with you as your skills develop.
The best tool you have is one you were born with: your eyes. Learning to spot the subtle shapes, textures, and colors that signal a fossil is a skill you'll hone over time. That said, a few key pieces of equipment will make your hunt safer, easier, and more successful.
The Basic Field Kit
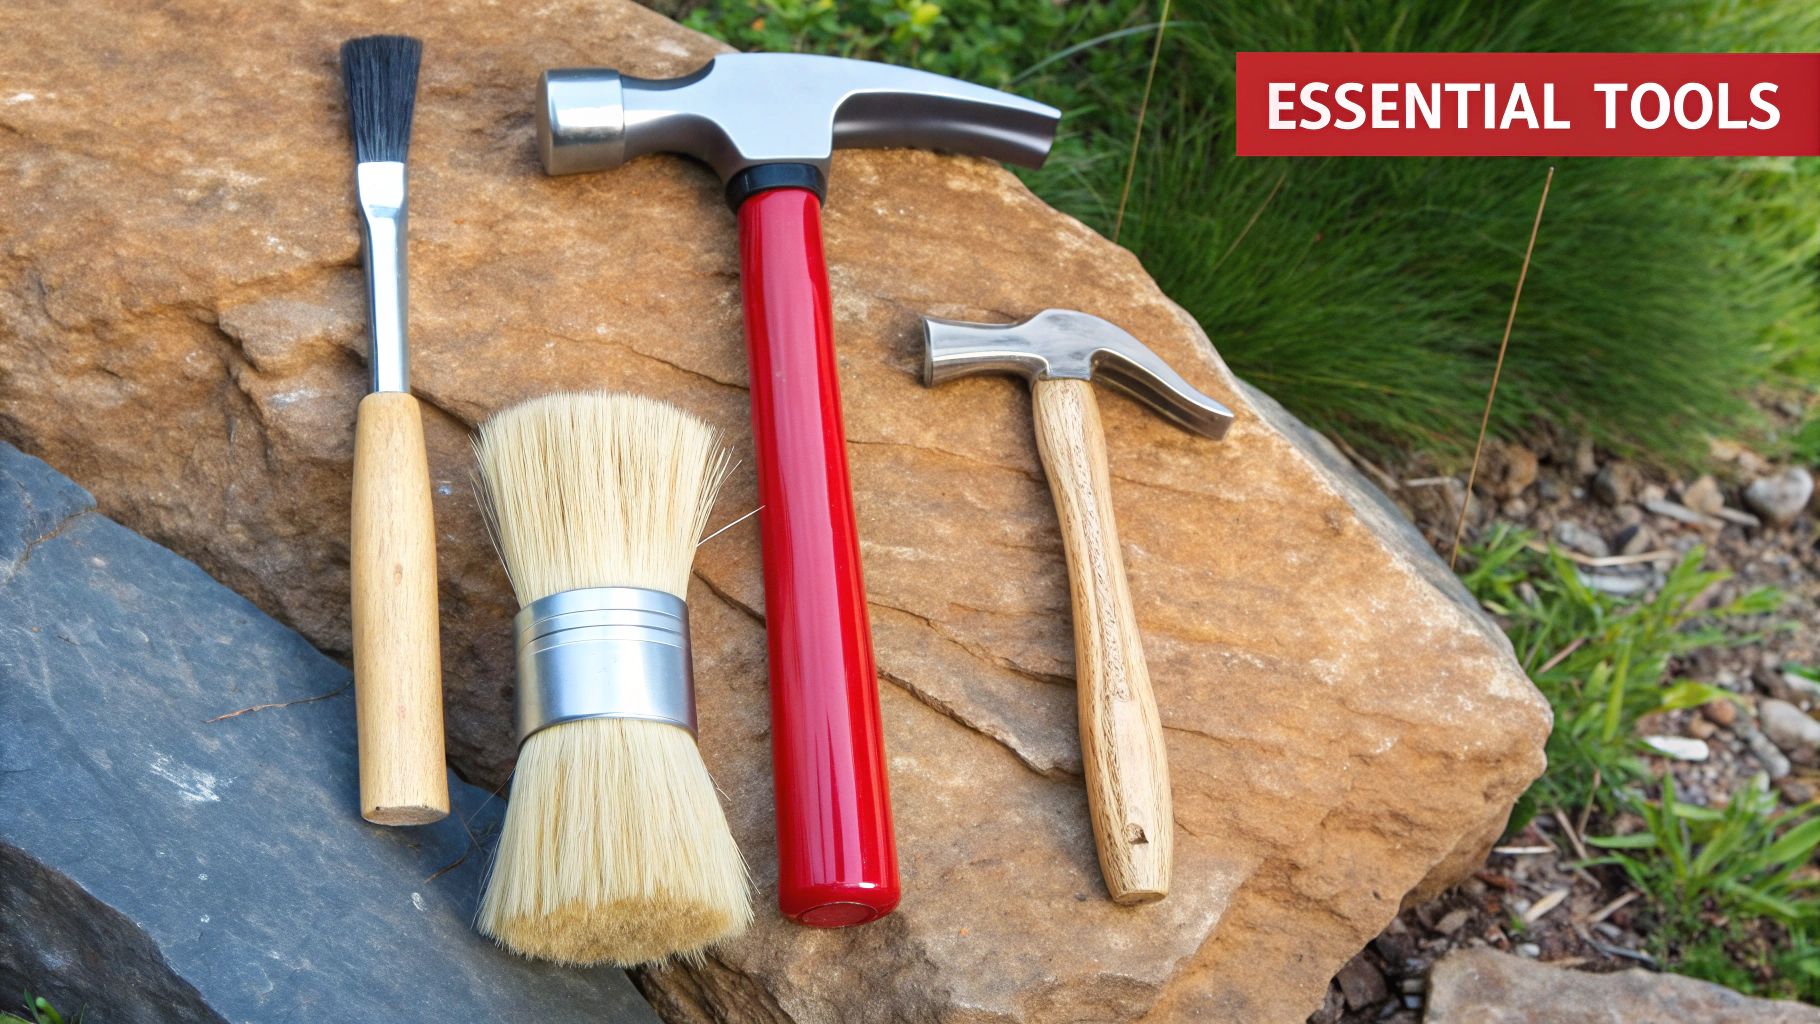
Think of these items as your non-negotiables. This is the equipment that should be in your backpack every single time you head out, whether it's your first dig or your five-hundredth.
- Geologist's Rock Hammer: This is not your toolbox claw hammer. A proper rock hammer has a flat face for breaking rocks and a sharp pick on the other end for prying apart delicate layers of shale. It’s the single most essential tool you'll carry.
- Safety Glasses: No excuses here. Rock chips fly in unpredictable directions when you're hammering, and your eyesight is priceless. Always wear them.
- GPS or Smartphone: Finding a great spot is only half the battle. You need to be able to find it again! Dropping a pin lets you return to a promising layer or accurately report a major discovery to a local museum or university.
- Soft Brushes: Once you see something promising, you need to clear away the loose dirt and dust. A few cheap paintbrushes of different sizes are perfect for gently revealing a delicate fossil without scratching it.
A common mistake beginners make is grabbing a standard hammer from their garage. Those are made for soft nails, not hard rock. They can shatter and send dangerous metal shards flying. Invest in a real geologist's hammer—it's designed for the job.
If you're just starting out or want a great way to introduce your kids to the hobby, a pre-made kit can be a fantastic way to learn the ropes. For example, a quality dinosaur fossil dig kit gives you a feel for the tools and techniques in a fun, controlled way before you tackle the wilderness.
Essential vs. Advanced Fossil Hunting Gear
As you get more serious about the hobby, you'll naturally want to add more specialized tools to your arsenal. This table breaks down what you absolutely need to start versus what you might want to add later for more complex digs.
| Tool | Purpose | Essential for Beginners? | Recommended for Advanced? |
|---|---|---|---|
| Rock Hammer | Breaking rock, splitting layers. | Yes | Yes |
| Safety Glasses | Eye protection from rock chips. | Yes | Yes |
| Magnifying Glass | Inspecting small details on finds. | Yes | Yes |
| Chisels | Precision rock splitting and removal. | No | Yes |
| Dental Picks | Delicate cleaning in the field. | No | Yes |
| Plaster & Burlap | Creating a field jacket for large finds. | No | Yes |
Don't feel like you need to buy everything at once. Your toolkit should evolve. Start with the basics, figure out what kind of hunting you enjoy most, and add new gear as your needs and ambitions grow.
Mastering Techniques in the Field
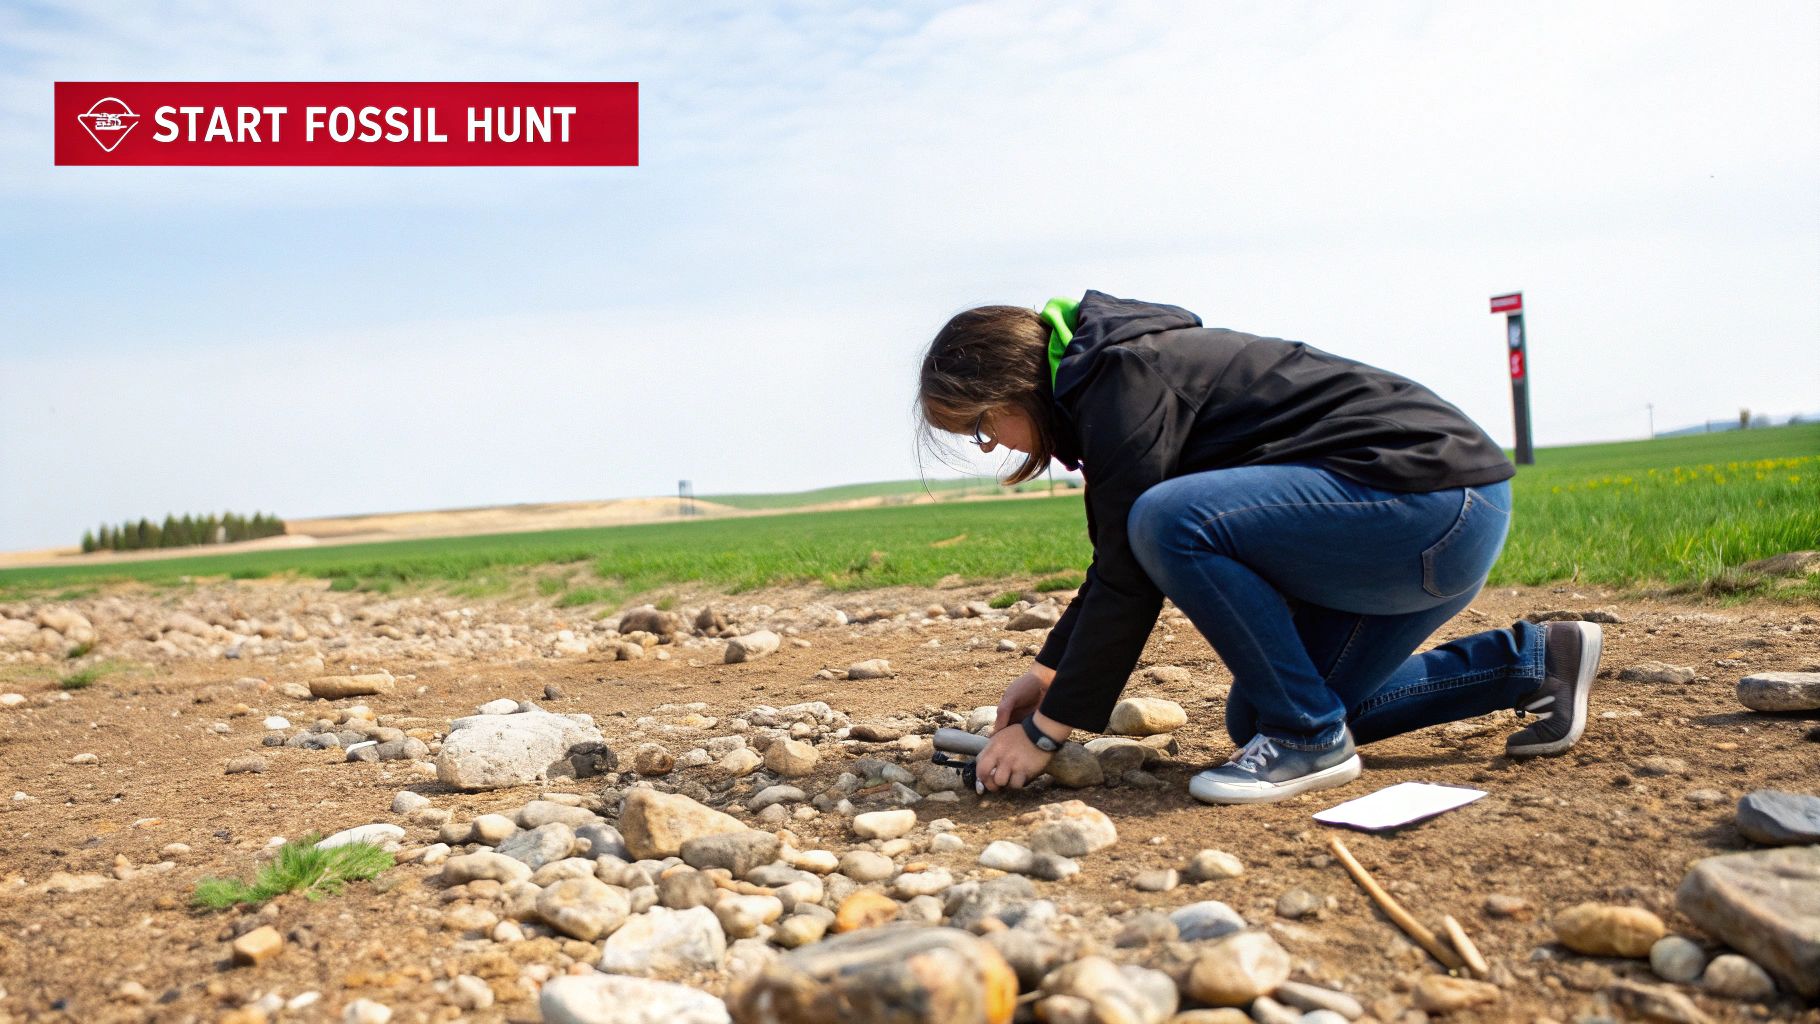
You’ve done the research, you've scouted a killer location, and now something catches your eye—a shape, a texture, that just doesn't belong. This is where the real work begins. Forget brute force; being a great fossil hunter is all about patience, keen observation, and knowing the right moves.
Your approach depends on where you are. In places like creek beds or on loose scree slopes, you’ll mostly be surface collecting. Erosion has done the heavy lifting for you here, washing fossils free from the surrounding rock. Your job is to gently sift through gravel and scan the ground, looking for anything with an unusual pattern, symmetry, or shape.
But when a fossil is still locked inside solid rock, the game completely changes. Now you're not just a collector, you're an excavator. And the first rule of excavation? Slow and steady wins the race.
The Delicate Art of Excavation
The main goal is to expose just enough of the fossil to see what you're dealing with—its size, its condition—without breaking it. Start by using your soft brushes to sweep away any loose dirt and debris. This simple first step is crucial because it reveals the true outline of your find.
If the fossil is partially stuck in rock, it's time for the rock hammer and chisels. Always chip away from the fossil, never directly toward it. The vibrations alone can be enough to fracture a fragile specimen. Think of yourself as a sculptor carefully revealing a masterpiece, not a construction worker demolishing concrete.
A classic rookie mistake is trying to free the entire fossil right there on the spot. Unless it's a small, tough find, that’s usually a recipe for disaster. The rock around it, which we call the matrix, is actually providing critical support.
Documenting Your Discovery
Before you even think about pulling a significant find out of the ground, you need to become its biographer. Good documentation preserves the fossil’s scientific context, which is just as valuable as the fossil itself. Without it, you’ve just got a cool-looking rock.
- Take Detailed Field Notes: Write down the date, time, and exact GPS location. Describe the rock layer, how the fossil was positioned, and anything else you notice about the site.
- Photograph Everything In Situ: Snap pictures from every angle before you touch a thing. Throw a coin or your rock hammer in the shot to give it a sense of scale.
- Map the Location: A quick sketch of the area is perfect. Note a few key landmarks and where the fossil was in relation to them.
Remember, the story of a fossil begins the moment you find it. Your notes and photos are the first chapter, capturing a scene that will be gone forever once the fossil is removed. This initial record-keeping is a cornerstone of responsible fossil hunting.
From a practical standpoint, this whole process relies on knowing you're in the right place to begin with. Fossils are almost always found in sedimentary rocks—places where sand, silt, and organic material were buried quickly millions of years ago. Your maps and GPS get you to the right geological formations, but it's these careful excavation techniques that bring the fossils home safely.
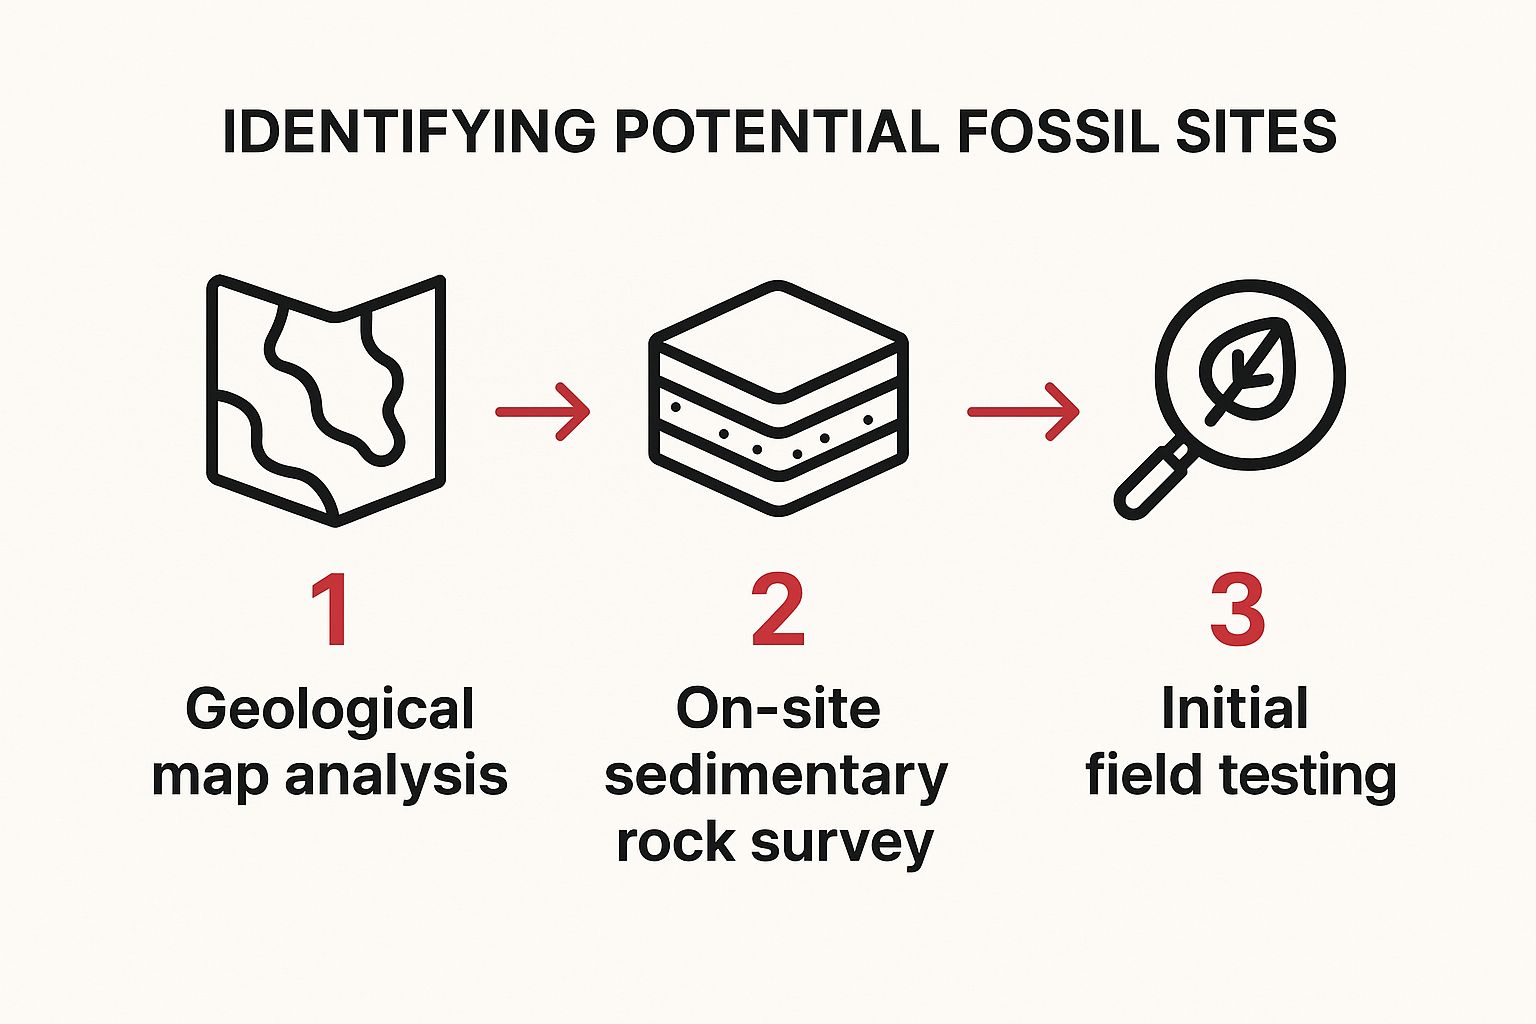
The infographic above is a great starting point, showing how geological knowledge helps you narrow down your search. For bigger specimens, you might even need to create a plaster jacket—a protective cast made by wrapping the fossil and its matrix in plaster-soaked burlap strips. It's an advanced technique, but knowing when to stop digging and prepare for a major recovery is a skill in itself.
These field techniques are fantastic examples of hands-on learning activities, building both practical skills and a deep appreciation for the science behind the hunt.
Preserving Your Prehistoric Treasures
Finding a fossil in the field is an incredible thrill, but that's just the beginning of the adventure. Once you bring that piece of prehistoric life home, you become its caretaker. What you do next will determine if it survives for another week or another century.
Proper cleaning and preservation are skills every fossil hunter has to learn, usually through a bit of trial and error. It’s a delicate process that demands patience above all else. Rushing this stage can easily undo all your hard work, permanently damaging an irreplaceable piece of natural history.
Gentle Cleaning Techniques for Your Finds
Your first instinct might be to grab a scrub brush and get all that dirt off, but that's often the worst thing you can do. The goal is to gently remove the loose dirt and surrounding rock—the matrix—without scratching or weakening the actual fossil.
Believe it or not, the best tools for the job are often the simplest.
Soft-bristled paintbrushes and old toothbrushes are perfect for dusting away loose sediment. For the more stubborn bits of matrix clinging to the fossil, a good set of dental picks gives you surgical precision. You can carefully flake away tiny pieces of rock without harming the fossil's surface. Always work slowly and with good lighting.
A critical rule learned over the years is to never use harsh chemicals or any kind of sealant like varnish or shellac. These can react with the minerals in the fossil in unpredictable ways, causing it to crack, change color, or even crumble apart down the road. Gentle brushing and plain water are almost always the right answer.
Of course, not all fossils are created equal. A tough, solid piece of petrified wood can handle more vigorous brushing with water. On the other hand, a delicate fossilized leaf impression could be destroyed by anything more than the light touch of a dry, soft brush. You have to adapt your technique to the specimen.
Stabilizing and Storing Your Collection
Sometimes, a fossil is just too fragile to hold itself together. Specimens that are porous, flaky, or full of fractures might need a little help. This is where a consolidant comes in handy. It’s a specialized, reversible glue that soaks deep into the fossil's pores and hardens, strengthening it from the inside out. Professionals and museum labs often rely on products like Butvar B-76 for this purpose.
Once your finds are clean and stable, getting organized is the next big step. There's nothing worse than having a fantastic find but completely forgetting where you found it. Good curation turns a pile of rocks into a meaningful scientific collection.
- Label Everything: Use a small dab of white paint to create a clean spot for writing a catalog number directly on the specimen.
- Keep Detailed Notes: In a dedicated notebook or a spreadsheet, log that number with all the critical data: what it is, when you found it, and most importantly, the precise GPS coordinates of the discovery site.
- Safe Storage: Use acid-free boxes lined with soft foam padding. This protects your finds from physical damage and slows down decay from environmental changes.
Following these steps transforms you from just a collector into a true curator of your own personal museum. You’re not just keeping a rock; you’re preserving the incredible story it tells.
Common Questions About Fossil Hunting
Heading out on your first fossil hunt is exciting, but it often kicks up a lot of questions. Getting clear, practical answers before you go is key to making sure your adventure is safe, fun, and respectful to both the land and the science. Knowing the ground rules turns a simple hobby into a responsible scientific pursuit.
Is It Legal to Collect Fossils I Find?
This is the big one, and the short answer is: it all comes down to land ownership. The rules change drastically from one place to another, so you absolutely must do your homework before you pick up a single thing.
On most public lands managed by the Bureau of Land Management (BLM) or the U.S. Forest Service, you can usually collect common invertebrate and plant fossils for your personal collection without a permit. However, vertebrate fossils—dinosaurs, mammals, fish, anything with a backbone—are a different story. They're protected by federal law, and you need a scientific permit to excavate them.
Key Takeaway: Collecting anything inside a National Park or National Monument is strictly illegal. No exceptions. If you're on private land, you must get explicit, written permission from the landowner first. Always verify the local rules before you go.
What if I Find Something That Looks Important?
Let's say you stumble upon something that gives you goosebumps—a string of vertebrae, a big tooth, or something else that looks rare. Your job instantly changes from collector to citizen scientist. The most important thing you can do is leave it exactly where you found it.
Yanking a fossil out of the ground can destroy priceless information about its age and the environment it came from. That context is everything.
Instead, here's your action plan:
- Don't touch it. Seriously. The rock around it is part of the story.
- Take clear photos from multiple angles. Place a coin or your pocketknife next to it for scale.
- Pin the exact GPS coordinates on your phone.
- Make notes about the area: the type of rock, nearby landmarks, anything that could help someone find it again.
Once you have that documentation, get in touch with the geology department at a local university, a natural history museum, or your state's geological survey. They have the experts who can figure out what you've found and organize a proper excavation if it's significant.
How Do I Tell a Fossil from a Weird-Looking Rock?
Learning to spot a real fossil versus a "pseudofossil"—a rock that just happens to look like one—is a skill that gets better with practice. It can be tricky at first, but you'll start to notice the little giveaways.
Fossils often have textures and patterns you don't see in regular rocks. Look for the fine grain in petrified wood or the intricate, symmetrical patterns on a seashell imprint. Regular rocks are rarely that organized.
There’s also a classic field trick for bone: the "tongue test." Because fossilized bone is porous, it will often stick just a tiny bit to your tongue. A smooth, non-porous rock won't. If you're still not sure, take a good picture and ask for a second opinion from an online fossil forum or a local rockhounding club. You can find more helpful information by checking out our frequently asked questions page.
At Playz, we believe curiosity is the engine of discovery. By asking the right questions and seeking out knowledge, you can transform a walk in the woods into a journey through deep time. Explore our collection of science kits and toys to fuel your family's next great adventure at https://www.playzusa.com.