

Starting your microscopic journey? The best microscopes for beginners are all about delivering clear, bright views with simple controls—not about chasing mind-boggling magnification numbers. If you want to explore solid objects like insects, rocks, or a cool feather, a stereo microscope is your best bet. But to see the tiny cells on a prepared slide, a compound microscope is the tool for the job. And for getting younger kids truly hooked? A digital model that displays the image on a screen can be a game-changer.
Your Adventure into the Microscopic World Starts Here
Imagine your child's face lighting up as they see a seemingly boring grain of sand transform into a cluster of shimmering, glassy crystals. That's the spark of discovery we're aiming for. This guide is your map to that world, cutting through the confusing jargon to help you pick a microscope that ignites genuine curiosity. Our goal is simple: to help you choose a tool that not only works but also inspires a real, lasting love for science.
We're going to skip the marketing hype that shouts about huge magnification numbers. Instead, we’ll focus on what truly matters for a fantastic first experience—optical quality and ease of use. These are the real keys to unlocking a hidden universe.
What You Will Discover in This Guide
This guide breaks down everything you need to know. We’ll walk you through the main types of microscopes, the features you absolutely need, and which models are best suited for different ages. By the end, you'll feel confident that your first step into microscopy will be a resounding success.
You’ll gain actionable insights on how to:
- Distinguish between compound, stereo, and digital microscopes.
- Identify the key specifications that guarantee a sharp, bright image.
- Match a microscope's features to your child's age and interests.
- Find exciting activities that turn this science tool into a portal for play.
Key Takeaway: Exploring the unseen world is more than a hobby—it’s the heart of scientific thinking. When you give a child the right tool, you're not just offering them a new toy; you're providing a whole new way to see their world. This kind of benefits of hands-on learning is vital for building critical thinking skills.
As you start this scientific adventure, having a basic grasp of research methodology for beginners can make your explorations even more rewarding. Every great discovery, big or small, starts with the simple principles of observation and asking questions.
Choosing Your First Microscope: Compound vs. Stereo
So, you're ready to dive into the microscopic world. Fantastic! Your first step is a single, crucial choice that will shape everything your young scientist sees. Not all microscopes are built for the same job, and picking the right one is the key to unlocking those "wow" moments.
Think of it this way: are you trying to see the secrets hidden inside a leaf, or do you want to explore the intricate patterns on its surface? That’s the core difference.
A compound microscope is like having a super-zoom lens. It’s designed to let you peer through incredibly thin slices of objects to see what’s happening inside. This is the classic microscope you probably remember from science class, perfect for examining prepared slides of things like onion cells or a drop of pond water teeming with life.
On the other hand, a stereo microscope is more like a pair of 3D explorer goggles. It offers lower magnification but provides a stunning three-dimensional, right-side-up view of whole objects. It's the go-to tool for getting a close-up look at the surface of a cool bug, a piece of rock, or the detailed weave of your shirt.
Compound Microscopes: A Look Inside
Compound microscopes use a series of lenses to achieve high levels of magnification, typically ranging from 40x to 1000x. This is powerful enough to see things like the nucleus inside a plant cell or tiny microorganisms wriggling in water.
Because the light source shines up from the bottom and must pass through your specimen, samples need to be transparent or sliced paper-thin. This is why they are almost always used with specimens mounted on glass slides.
This makes them the best choice for:
- Viewing prepared biological slides (cells, tissues, etc.)
- Examining bacteria and other microorganisms in liquids
- Looking at thin cross-sections of plants or insects
Pro Tip: Compound microscopes are for looking through things. They reveal a flat, 2D image of a hidden world, but at an incredibly detailed level. If your goal is to see cells, this is the microscope you need.
Stereo Microscopes: The 3D Explorer
Stereo microscopes, also called dissecting microscopes, offer much lower magnification—usually between 10x and 40x. But their magic isn't in the power; it's in the perspective. They use two separate optical paths (one for each eye), which creates a fantastic 3D image with real depth perception.
This makes them incredibly intuitive, especially for younger kids. You can just grab a small, solid object—a flower petal, a coin, a crumb—and place it directly on the stage to examine it. That immediate, hands-on approach is perfect for satisfying a child's curiosity about the world around them.
A Simple Comparison to Find Your Ideal Microscope
Feeling a little overwhelmed? No worries. This quick-glance table can help you decide which type of microscope is the right fit for your young scientist's current interests.
| Microscope Type | Best For Viewing | Typical Magnification | Ideal For Ages |
|---|---|---|---|
| Compound | Transparent or thinly sliced items on slides (cells, pond water, tissues) | High (40x–1000x) | 10+ (with supervision) |
| Stereo | Solid, opaque objects you can hold (insects, rocks, flowers, coins) | Low (10x–40x) | 6+ (very kid-friendly) |
Ultimately, the best guide is knowing what your child wants to explore. If they’re fascinated by cells and invisible creatures, a compound scope is the winner. If they love collecting rocks, bugs, and flowers, a stereo scope will bring that collection to life.
This chart helps visualize that simple decision-making path to get your kid inspired.
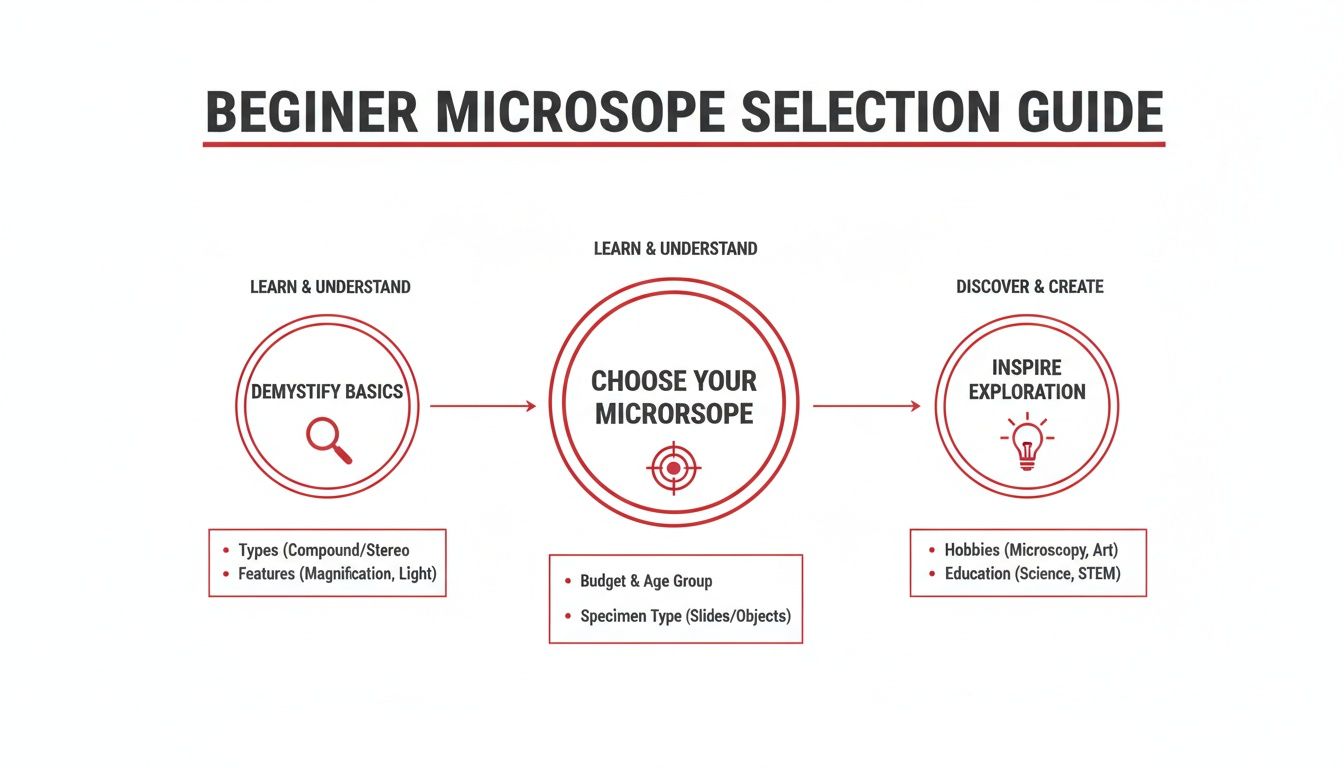
As the graphic shows, demystifying the types, choosing the right tool, and sparking that initial curiosity are the core steps to success. And it's clear more and more parents are seeing the value. The global education microscope market was valued at USD 411.11 million in 2024 and is projected to keep growing, which shows just how many families are investing in these powerful learning tools. You can learn more about the growth of the education microscope market.
Getting this fundamental difference right—compound vs. stereo—ensures you get the best microscope for beginners based on what they actually want to see.
What Really Matters in a Beginner Microscope
It’s easy to get lost in a sea of technical specs when shopping for a first microscope. Marketers love to plaster huge magnification numbers like 1200x on the box, but honestly, for a beginner, that's mostly just noise.
When you boil it all down, only a few features truly make the difference between a microscope that sparks wonder and one that ends up collecting dust in a closet.
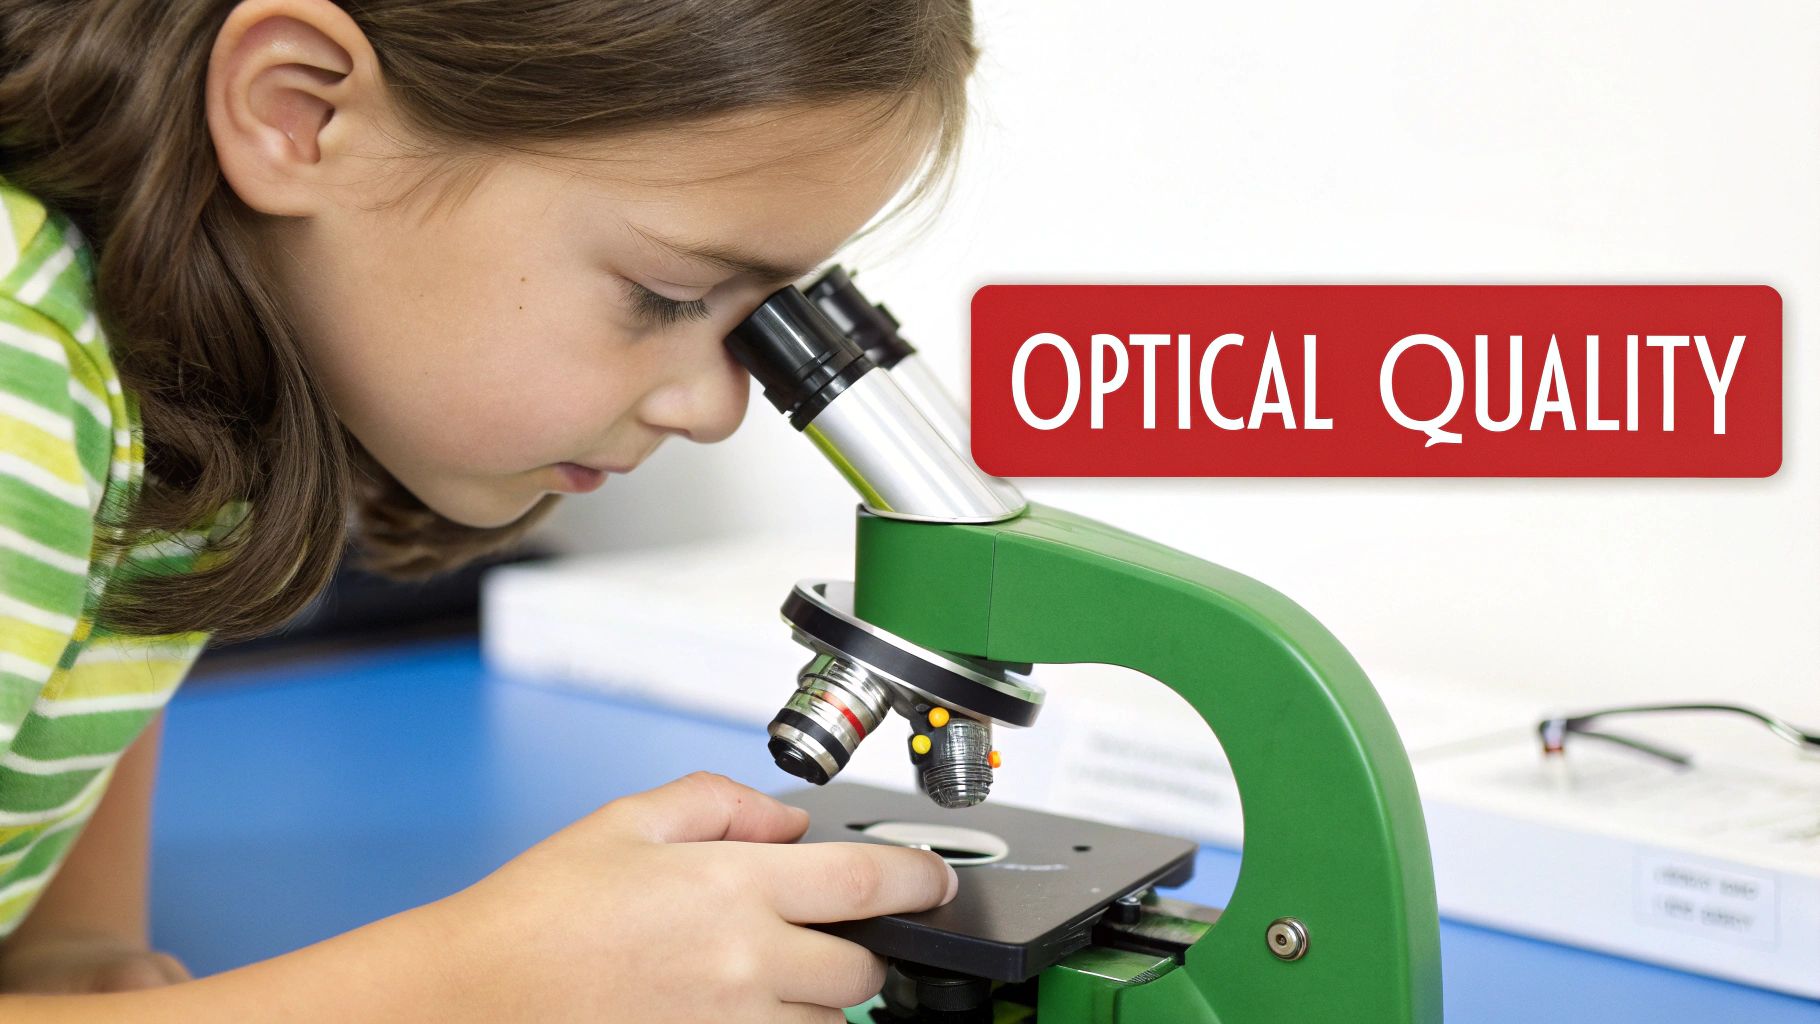
Forget the hype. The single most important factor is optical quality. This one thing separates the good from the gadgets.
Prioritize Crystal-Clear Optics
Think of a microscope's optics like the lens on a good camera. A camera with a zillion megapixels is useless if the lens is just a cheap piece of plastic—your photos will be blurry and disappointing. It’s the exact same principle here.
High-quality optics means the microscope uses real glass lenses. Glass delivers a sharp, bright, and color-accurate image. In contrast, many cheap "toy" microscopes use plastic lenses that produce a dim, fuzzy view, which will frustrate any curious kid in minutes.
So, how do you spot good optics?
- Look for descriptions that specifically mention achromatic objectives or glass optics.
- Scan reviews for comments about clear, crisp images.
- Always choose a scope with lower, clearer magnification (like 400x) over one advertising a blurry 1200x.
Illumination Is Non-Negotiable
You can't see what isn't lit up. This simple truth makes good illumination the second pillar of a great beginner microscope. All those incredible details—like the veins in a leaf or the tiny cells of an onion skin—are only visible when you shine a light on them.
Most quality beginner scopes come with built-in LED lighting. LEDs are perfect because they're bright, don't get hot (which is important for looking at live critters), and are energy-efficient. Some of the best models have lights both below the stage (for slides) and above it (for solid objects), a fantastic feature that offers maximum versatility.
Key Takeaway: A brilliant light source is just as crucial as a clear lens. Without good illumination, even the best optics are useless. Look for adjustable LED lighting to get the perfect view of every specimen.
Build Quality and Ease of Use
Finally, a first microscope needs to be easy to use and tough enough to survive enthusiastic hands. A wobbly plastic frame is a recipe for frustration; the slightest bump can knock the image out of focus.
Instead, look for a model with a sturdy metal frame. This provides the stability you need for clear, steady viewing. Just as important are the focus knobs. They should be large, easy for small hands to grip, and turn smoothly without any jerky movements. A scope with both a coarse focus (for big adjustments) and a fine focus (for tiny tweaks) makes getting that perfectly sharp image much easier.
Making science a rewarding, hands-on experience is the whole point, and having the right equipment is a huge part of that. You can read more about how to make learning fun in our related article.
Matching a Microscope to Your Child's Age
Picking the right first microscope is less about the specs and more about the kid. It’s all about matching the tool to their stage of development. If it's too complicated, frustration will set in, and the microscope will start collecting dust. But if it’s too simple, their curiosity will quickly outgrow it. The sweet spot is finding that perfect balance between power and play.
For a young explorer, a microscope should feel like a natural part of their world—a tool that’s as intuitive and tough as their favorite building blocks. It needs to invite them to poke, prod, and experiment without worrying about breaking something delicate. As kids get older, their needs shift from just looking at cool stuff to conducting their own little investigations.
Young Explorers (Ages 5-8)
For this age group, one word is key: simplicity. Kids from 5 to 8 are all about tangible, immediate discovery. They want to grab a beetle from the garden, a fuzzy leaf, or a sparkly rock and see it up close right now. There’s no patience for preparing slides.
A low-power stereo microscope is the perfect match here. These are the workhorses of early science—durable, with big focus knobs made for small hands, and they offer a fantastic 3D view of whole objects. The payoff is instant and amazing, which is exactly what a young mind needs to stay hooked.
- Look for: A super sturdy build, simple controls, and low magnification (around 20x is plenty).
- Avoid: Complicated compound microscopes with tiny adjustment knobs and fragile glass slides.
Curious Elementary Students (Ages 8-12)
By this age, kids have more patience and can follow a few steps to get to the "wow" moment. They’re ready to graduate from looking at things to looking through them. This is the ideal time to introduce a good entry-level compound microscope.
They can learn to make simple wet-mount slides with a drop of pond water or a thin slice of onion skin, unlocking a hidden world of cells and microorganisms. A digital microscope that hooks up to a computer is also a fantastic choice, letting them snap pictures and share their discoveries with anyone who will listen. Being able to show off what they found makes the science feel real and important.
Budding Scientists (Ages 12+)
Once they hit middle school, kids are ready for a real scientific instrument, not a toy. A more advanced compound microscope with finer controls and higher magnification will support them through school projects and deeper personal explorations.
You’ll want to look for models with both coarse and fine focus knobs, a mechanical stage that lets them move slides with precision, and multiple objective lenses that can reach at least 400x magnification.
At this stage, the microscope should be a genuine scientific tool. It needs to have the power and precision to keep up with their growing intellect and more structured school assignments.
This age group is a big reason why interest in home science is booming. The global beginner microscope market was valued at around $350 million in 2023, largely driven by families wanting to bring hands-on experiments home. You can read more about the beginner microscope market trends here.
Lining up the right microscope with your child’s age and interests is what turns a simple gift into a gateway for discovery. Our guide to the best STEM toys for kids has even more ideas for feeding that scientific curiosity.
Unlocking Fun with Hands-On Science Activities
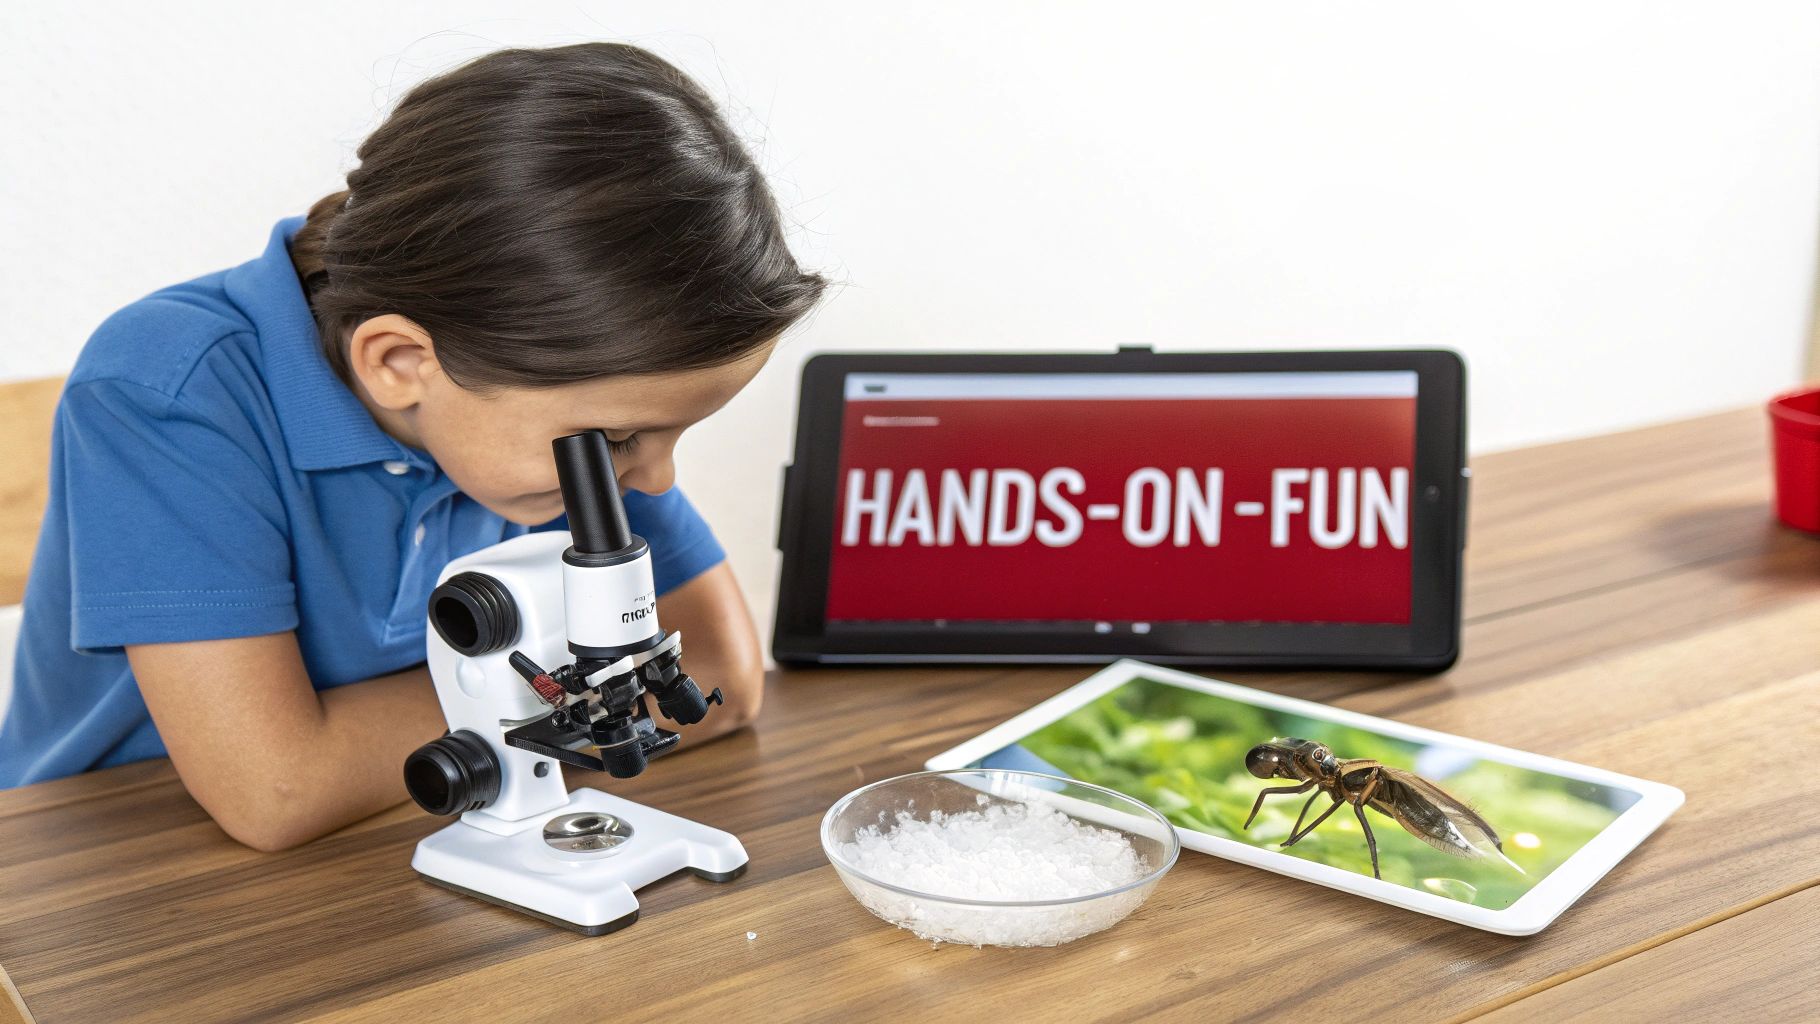
A great microscope is the key, but a curious mind is what truly unlocks the adventure. Once you have the right tool, the real fun begins: transforming your home into a mini-laboratory of discovery. This is where a simple scientific instrument becomes a portal to endless hours of fun and learning.
The secret to keeping a kid engaged is showing them the hidden wonders in everyday objects. Forget about expensive prepared slides—your kitchen, backyard, and even a t-shirt drawer are treasure troves of microscopic marvels just waiting to be explored.
Easy Activities to Kickstart Your Exploration
Getting started is as simple as grabbing something from around the house and sticking it under the lens. Here are a few exciting, no-fuss activities that bring science to life and show off the power of even the best microscopes for beginners.
-
Kitchen Crystal Quest: Sprinkle a few grains of sugar or salt onto a blank slide. Under the microscope, they stop being tiny specks and transform into beautifully structured, translucent crystals. It's a fantastic first look at how different substances have unique geometric shapes.
-
Fabric Fiber Detective: Snip a single thread from a cotton shirt, a wool sock, or a nylon jacket. You’ll be amazed by the intricate weaves and textures you can see up close. It’s fun to compare the smooth, uniform fibers of synthetics to the rougher, more natural look of wool.
-
Pond Water Safari: A single drop of water from a local pond, birdbath, or even a forgotten puddle can reveal a bustling community of microscopic organisms. This activity is pure, live-action biology. Kids get to watch tiny creatures like amoebas or paramecia zip around in their own little world.
Pro Tip: When you’re looking at pond water, always start with the lowest magnification. This gives you a wider view, making it way easier to spot any movement. Once you find something interesting, then you can switch to a higher power to zoom in for a closer look.
Supercharge Learning with Science Kits
Pairing your new microscope with a hands-on science kit creates a complete ecosystem for discovery. Think about it: a crystal-growing kit lets a child cultivate their own specimens from scratch and then examine the results of their experiment up close.
This approach walks them through the entire scientific method. They form a hypothesis ("I think the blue crystals will be bigger"), conduct an experiment, and then use the microscope to observe and analyze their results. Suddenly, they're not just looking at something—they're doing real, active science. You can find more ideas to foster this kind of learning in our guide to fun hands-on science activities.
To round out these practical experiments, it can also be helpful to explore how using video as a schooling resource can offer different learning pathways for young explorers.
Ultimately, these activities transform a microscope from just a tool into a catalyst for countless hours of engaging, hands-on discovery.
Common Questions About Beginner Microscopes
Diving into the world of microscopes for the first time? You've probably got a few questions. That's totally normal. Let's walk through some of the most common things parents and teachers ask, so you can feel confident guiding your young scientist on their journey of discovery.
The goal here is to clear up any confusion and make microscopy feel accessible, fun, and free of frustration.
Is Higher Magnification Always Better?
It’s an easy trap to fall into—seeing a box that screams 1200x magnification and thinking, "that must be the best one!" But honestly, for a beginner, that massive number is often more of a marketing gimmick than a useful feature. The real MVP is optical quality.
Good optics—meaning real glass lenses instead of cheap plastic—are what give you a clear, bright, and sharp image. Slapping an extremely high magnification on poor-quality lenses just results in a dark, blurry mess that’s impossible to use. It’s the fastest way to turn excitement into frustration. A crystal-clear view at 400x is infinitely better than a fuzzy blob at 1200x.
Key Takeaway: Don't get wowed by the biggest number on the box. Prioritize the quality of the glass lenses and the sturdiness of the build. A sharp, stable image is the true sign of a great beginner microscope.
Can We Look at Things Other Than Prepared Slides?
Absolutely! This is where the real fun begins. A huge part of owning a microscope is the thrill of exploring the world right in front of you, and you definitely don't need a lab full of pre-made slides to do it.
A stereo microscope is king for this kind of spontaneous exploration. You can place almost any small, solid object directly on the stage and get an instant 3D view. Think of things like a fly's wing, a flower petal, a cool rock, or even the fabric of your t-shirt. It's immediate, amazing, and perfect for younger kids.
If you have a compound microscope, you can easily make your own simple "wet mount" slides right at the kitchen table. All it takes is a blank slide, a drop of water, and a coverslip to check out things like:
- A single drop of pond water (it's a whole universe in there!)
- Your own cheek cells
- A paper-thin slice of onion skin
This DIY approach is fantastic for sparking curiosity, encouraging resourcefulness, and letting kids lead their own discoveries. For more answers to common questions, check out our detailed frequently asked questions page.
How Do I Clean and Care for Our New Microscope?
Taking good care of your microscope is pretty simple, and it ensures you’ll get years and years of use out of it. Teaching these habits early also instills a great sense of responsibility and respect for scientific tools.
First, always carry the microscope with two hands—one holding the arm and the other supporting the base. When it’s not in use, pop the dust cover on. This keeps grime from settling on the lenses and all the moving parts.
When it's time to clean the lenses, only use special lens paper and a designated lens cleaning solution. Never use a paper towel or the corner of your shirt! Regular cloths have abrasive fibers that can scratch the delicate lens coatings, permanently ruining the view. Finally, get your child in the habit of always starting with the lowest power objective lens before moving up to the higher magnifications.
At Playz, we believe that getting your hands dirty is the key to unlocking a lifelong passion for science. Our science kits are designed to work perfectly alongside a beginner microscope, transforming your living room into a laboratory of discovery and making complex concepts tangible and exciting. Explore our world of educational fun at Playz!