

Welcome to a world where humble paper plates transform into extraordinary creations. Hands-on activities are more important than ever for fostering creativity and practical skills. This guide is your ultimate resource for 10 incredible crafts from paper plates that go far beyond simple coloring. We’ve curated a list of projects that are not only fun and budget-friendly but are also packed with educational value, subtly weaving in concepts from art, science, and engineering.
Each idea in this roundup is designed to be a complete mini-project. You will find a clear materials list, age recommendations, and step-by-step guidance. From wearable animal masks that inspire imaginative play to intricate 3D models that teach STEM principles, each craft nurtures fine motor skills, boosts problem-solving abilities, and creates lasting memories. If you're looking for even more creative ways to banish boredom, especially when the weather keeps you indoors, explore these fantastic fun rainy day crafts for kids, many of which can be adapted for paper plates. Get ready to turn a simple stack of plates into a universe of learning and fun, proving that the best toys don't always come from a box.
1. Paper Plate Animal Masks
Paper plate animal masks are a classic craft that transforms a simple plate into a wearable piece of art. Children decorate the plate to resemble an animal, cut out eye holes, and add an elastic string to hold it in place. This project is a fantastic way to blend artistic expression with imaginative play, making it a staple in both classrooms and homes.
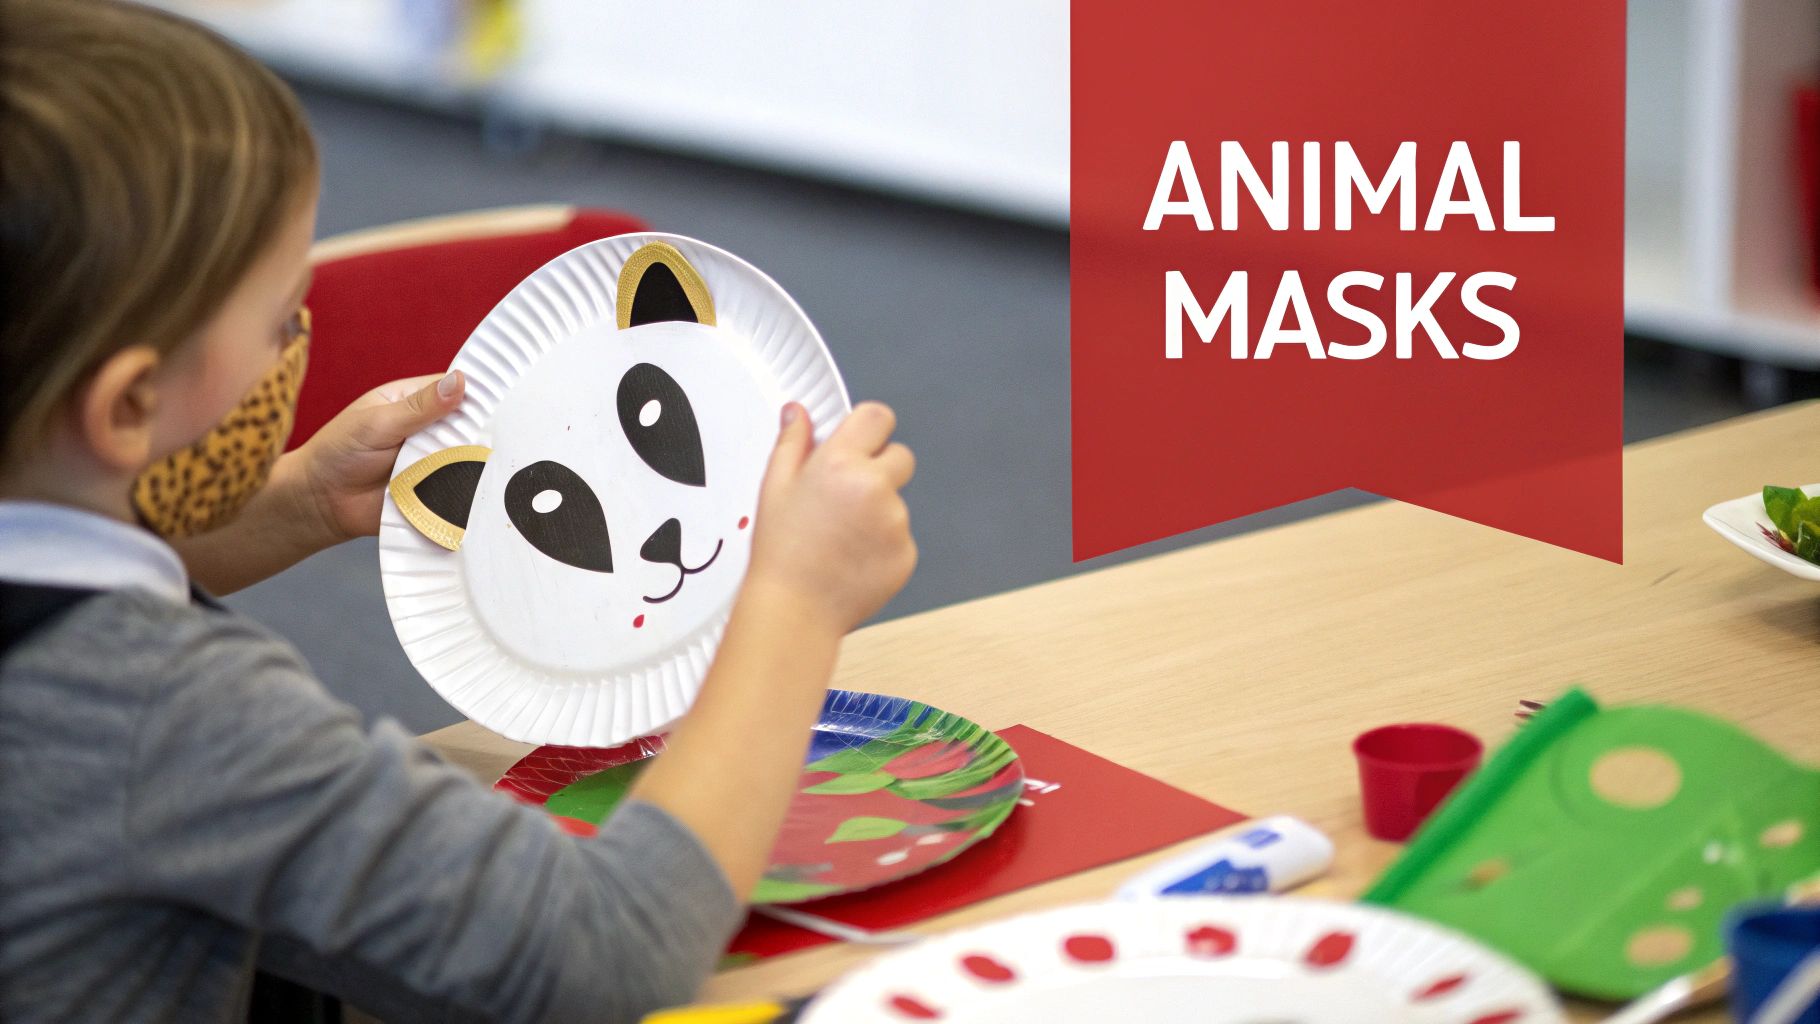
This craft is incredibly versatile, perfect for birthday party activities, classroom lessons on animal habitats, or simply a fun afternoon. For younger children, teachers can pre-cut the eye holes for safety and provide templates for features like ears and noses. For inspiration on whimsical and friendly animal faces, you can explore a variety of cartoon pet designs to guide your creations.
Actionable Tips for Better Masks
- Boost Durability: Use heavy-duty or laminated paper plates to ensure the masks withstand enthusiastic play. A flimsy plate will tear easily.
- Safe Attachments: Secure the elastic string with a stapler, then cover the staple on the inside with a small piece of tape to prevent scratches.
- Add Learning Value: Before crafting, discuss the unique features of the chosen animal. Talk about why a lion has a mane or why a rabbit has long ears to incorporate simple biology concepts.
- Mess-Free Color: Try fabric paint markers instead of regular markers, as they are less likely to bleed on the paper plate’s surface and offer vibrant colors.
2. Paper Plate Sun Catchers
Paper plate sun catchers are a delightful craft that turns a basic plate into a stunning piece of window art. The center of the plate is cut out, leaving the rim as a frame, and the open space is filled with translucent materials like tissue paper or cellophane. When hung in a sunny spot, these creations catch the light, casting beautiful, colorful patterns into the room. This project is a wonderful way to explore concepts of light, color mixing, and design.
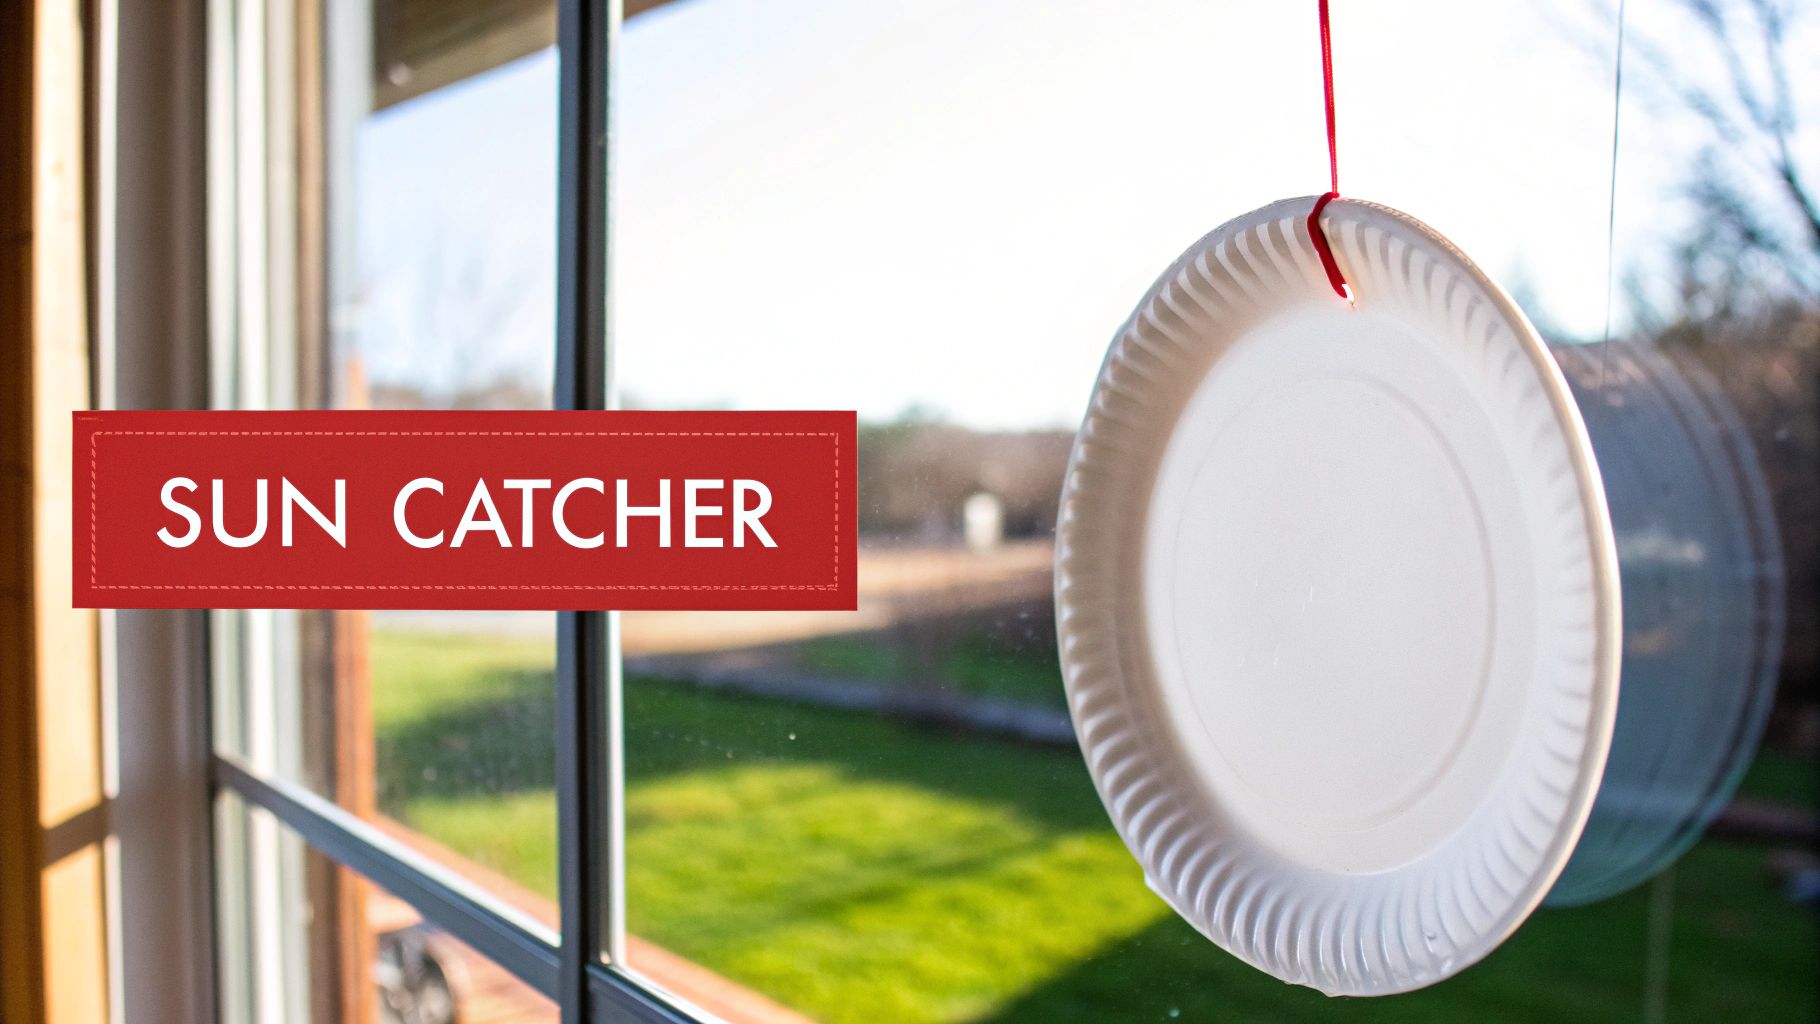
This craft is perfect for seasonal activities, like creating flower designs in the spring or snowflake patterns in the winter. In a classroom setting, it can be a hands-on science experiment demonstrating how light passes through different materials. The process of arranging colorful pieces allows children to express their creativity while developing fine motor skills. These simple yet beautiful crafts from paper plates brighten any space and offer a fantastic learning opportunity.
Pro-Tips for Vibrant Sun Catchers
- Create a Sturdy Frame: After cutting out the center, use two paper plates glued together for the rim. This creates a more durable and rigid frame for the sun catcher.
- Use Contact Paper for Less Mess: For younger kids, use clear self-adhesive contact paper. Stick it to one side of the plate frame, have children arrange their tissue paper pieces on the sticky surface, and then seal it with another piece of contact paper.
- Teach Color Theory in Action: Encourage children to overlap different colors of tissue paper to see new colors emerge. This is a simple, visual way to teach the basics of color mixing.
- Invisible Hanging Trick: Use a thin fishing line to hang the sun catcher. It creates a magical effect, making the colorful disc appear to float in the window.
3. Paper Plate 3D Butterfly and Insect Projects
Three-dimensional butterfly and insect crafts elevate the humble paper plate into a stunning tactile art piece. Children fold, cut, and stack plates to form dimensional bodies, wings, and legs, creating surprisingly lifelike models. This hands-on project is a fantastic way to teach children about insect anatomy while they create impressive art suitable for display.
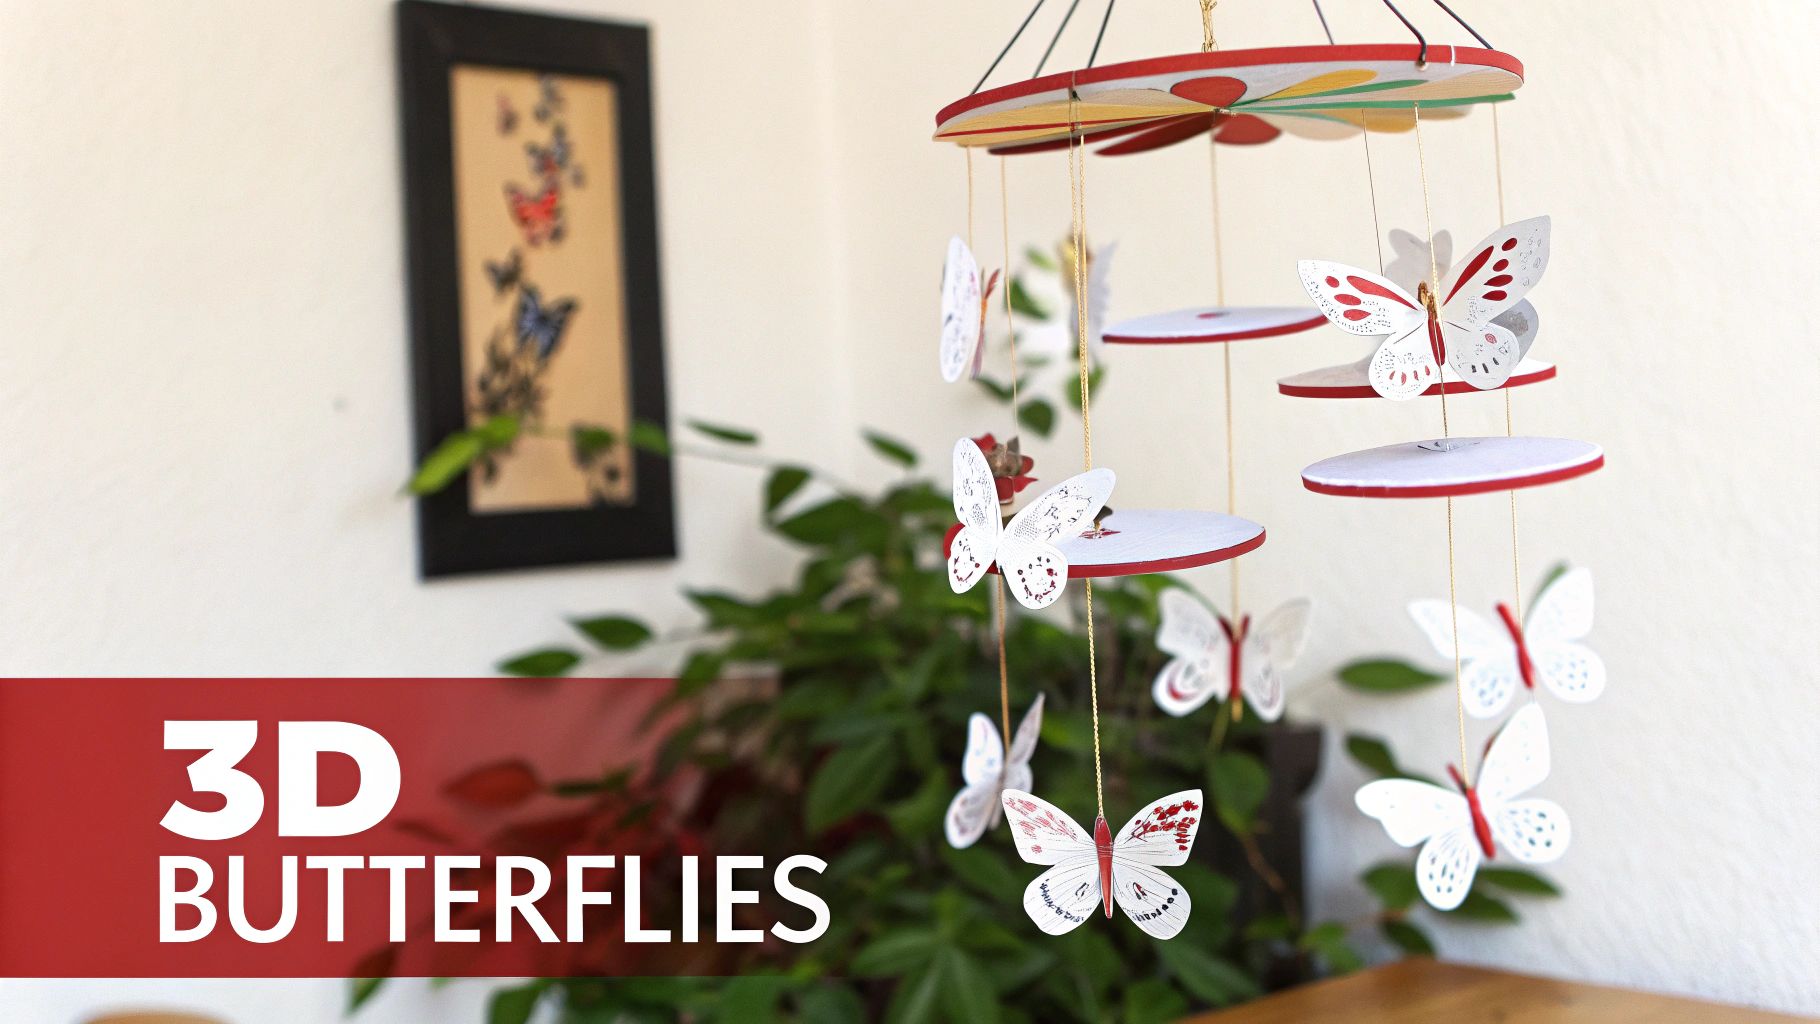
This craft is perfect for spring classroom displays, life science units where students build insect replicas, or summer camp projects with a nature theme. The resulting creations are so beautiful they can be used to make museum-quality mobiles for a bedroom or learning environment. Watching a simple plate transform into a detailed insect is a truly rewarding experience for young artists.
Tips for Realistic 3D Insects
- Create Realistic Proportions: Use multiple paper plates of varying sizes. For example, use a small plate for the head, a medium one for the thorax, and a large one folded for the wings.
- Secure Attachments: For a durable bond between the body parts and wings, have an adult use a hot glue gun. For a kid-safe alternative, a strong craft glue or stapler will also work well.
- Add Anatomical Details: Enhance your insect with pipe cleaner antennae or twisted paper legs. This small step adds significant realism and is a great learning opportunity.
- Laminate for Durability: To give the wings a lasting shine and protect them from wear and tear, consider laminating them after they have been decorated.
4. Paper Plate Spinning Tops and Fidget Toys
Paper plate spinning tops and fidget toys are a fascinating project that blends art with basic physics. By decorating a plate and attaching a simple spinning mechanism like a pencil or dowel, children can create a toy that demonstrates principles of motion and balance. This craft is an excellent way to introduce concepts like rotational motion and centrifugal force in an engaging, hands-on manner.
These spinning crafts from paper plates are perfect for STEM-focused activities at school or home. They can be used in a classroom to demonstrate physics concepts, as calming fidget toys in a sensory room, or as the main event in a friendly spinning top competition. The process of designing, building, and testing the tops provides a complete and satisfying learning experience.
How to Build the Perfect Spinning Top
- Perfectly Centered for a Perfect Spin: Use a pushpin to create a perfectly centered hole. This is crucial for a stable, long-lasting spin.
- Balance First, Decorate Later: Test the spin before decorating. If the top wobbles, adjust the balance by adding small weights like coins or washers taped to the underside.
- Enhance Stability with Weight: Add weight to the outer rim of the plate using modeling clay or tape-secured coins to improve the spinning duration and stability.
- Create Mesmerizing Designs: Encourage kids to draw symmetrical patterns or spirals. These create amazing visual effects when the top is spinning at high speed.
- Hold a Spin-Off Contest: Turn the craft into a game by hosting spinning contests. Use a stopwatch to see whose top can spin the longest, adding a fun element of competition.
5. Paper Plate Flower Garden Display
Paper plate flower gardens transform humble plates into vibrant, three-dimensional floral arrangements. By cutting, layering, and painting plates, children can create beautiful blossoms that can be assembled into a stunning wall display or a tabletop garden. This project is a wonderful way to explore nature, art, and basic design principles.
This craft is ideal for seasonal classroom decorations, such as a spring-themed art display, or as a heartfelt, handmade Mother's Day gift. It offers a creative way to learn about botany and flower structures, making it a perfect activity for a nature unit. The final garden can be mounted on a dark background for a striking visual contrast that brightens any room.
Tips for a Blooming Garden
- Create Depth with Layers: Layer different sizes of paper plates, with the smallest on top, to give your flowers a realistic, multi-petaled look.
- Vary Your Petal Shapes: Experiment with different cutting styles for the plate edges. Try creating scalloped, pointed, or wavy petals to mimic different types of flowers like daisies, tulips, or sunflowers.
- Add Realistic Greenery: Use green paper plates to cut out leaves. Attach them to stems made from green paper straws, craft sticks, or even real twigs for a more natural feel.
- Incorporate Botanical Accuracy: Before painting, look at pictures of real flowers with your child. Discuss their colors and shapes to inspire more detailed and accurate creations.
6. Paper Plate Building Blocks and Geometric Structures
This craft transforms humble paper plates into versatile, three-dimensional building blocks. By folding, stacking, and interlocking plates, children can engineer towers, cubes, pyramids, and abstract sculptures. This STEM-focused project is a brilliant way to introduce foundational concepts of engineering and geometry through hands-on construction.
These building blocks are perfect for classroom STEM challenges, like who can build the tallest tower, or for math units exploring 3D shapes. They offer an inexpensive and accessible way to develop spatial reasoning, problem-solving skills, and an intuitive understanding of structural integrity. It is an ideal project for makerspaces or at-home engineering explorations that require minimal supplies but offer maximum creative potential.
Engineering Tips for Stronger Structures
- Precise Folds are Key: For younger children, pre-score the folding lines with a ruler and a butter knife. This ensures cleaner, more consistent geometric shapes.
- Use Secure Connections: Use paper clips or brad fasteners to connect the folded plates, allowing for more stable and complex structures that can be easily modified.
- Build with a Purpose: Introduce design challenges, such as building a bridge that can hold a small toy car or a tower that meets a specific height requirement.
- Embrace Failure as a Learning Opportunity: When a structure collapses, use it as a teaching moment. Discuss why it fell and brainstorm ways to reinforce the design, introducing concepts like bases of support and weight distribution.
7. Paper Plate Constellation and Astronomy Projects
Paper plate constellation crafts transform simple disposable plates into powerful tools for astronomy education. Children can research famous star patterns, punch holes in the plate to match the stars' positions, and then shine a light through to project the constellation onto a wall. This project brilliantly merges artistic creation with foundational space science concepts, making it an engaging STEM activity.
This craft is ideal for a homeschool unit on space, a classroom science project, or even a planetarium-style display in a school library. By creating their own star viewers, children gain a hands-on understanding of star patterns, celestial navigation, and the mythology behind the constellations. It’s a wonderful way to bring the night sky indoors and make learning about astronomy interactive and memorable.
Tips for Astronomical Accuracy
- Provide Visual Aids: Offer printed constellation maps so children can accurately place their star holes. For younger kids, you can pre-mark the dots on the plate.
- Create Clean Holes for Stars: Use a standard three-hole punch or a large-gauge needle to create consistent, clean holes for the "stars."
- Enhance Your Star Projector: Use a small LED flashlight or a smartphone light behind the plates for a dramatic and clear projection effect in a dark room.
- Deepen the Learning Experience: Encourage children to research the mythology behind their chosen constellation's name to add a layer of storytelling and history to the science lesson.
8. Paper Plate Mosaic Art Projects
Paper plate mosaics transform simple plates into intricate works of art by cutting them into small, colorful tiles. Children arrange these pieces on a backing surface, like construction paper or a whole paper plate, to create images or abstract patterns. This project is a fantastic way to develop fine motor skills, color recognition, and spatial reasoning, turning everyday materials into a sophisticated art form.
This craft is exceptionally adaptable, making it suitable for a wide range of settings. It can be used for large-scale collaborative murals in a classroom, therapeutic art activities in special education, or even as a tool to teach art history by recreating famous artworks. The process of sorting, arranging, and gluing requires patience and concentration, offering a calming and rewarding creative experience for children.
Mastering Your Mosaic Masterpiece
- Prep Tiles for Little Hands: For younger children, pre-cut colored paper plates into various shapes and sizes to make the assembly process smoother and safer.
- Use a Template for Guidance: Provide a printed, full-size design for children to follow. This offers a helpful guide for placing the mosaic pieces and building their confidence.
- Organize Your Colors: Before starting, sort the cut paper plate pieces by color into separate containers or sections of a tray. This makes finding the right "tile" much easier.
- Seal and Protect Your Art: Once the mosaic is complete and the glue is dry, apply a thin coat of clear acrylic sealant or watered-down PVA glue to protect the artwork and give it a glossy finish.
9. Paper Plate Puppet Theater and Story Props
Paper plate puppets and props bring storytelling to life, transforming simple plates into characters and scenery for dramatic play. Children can design plates to represent characters from a book, create original figures, or even craft background elements like the sun or clouds. This activity is a powerful tool for fostering literacy, communication, and creative expression.
This craft is ideal for literacy centers, library story times, or at-home performances. It encourages children to reenact favorite tales or invent entirely new narratives, boosting their confidence and public speaking skills. A large cardboard box can easily be converted into a stage, creating a complete theatrical experience. These crafts from paper plates are perfect for collaborative projects where kids write, direct, and perform their own shows.
Tips for a Spectacular Puppet Show
- Create Easy-to-Use Stick Puppets: Glue a large craft stick or a sturdy paper straw to the back of each decorated plate to serve as a handle for easy manipulation.
- Build a Simple Theater Stage: Use a large cardboard box for the stage. Cut a large rectangular window for the performance area and let children paint and decorate it.
- Encourage Scriptwriting: Help older children write simple scripts or storyboards for their shows to practice narrative structure and dialogue.
- Add Movable Parts for Expression: Use brass paper fasteners to attach movable arms, legs, or other features to the puppets, allowing for more expressive gestures during the performance.
10. Paper Plate Science Demonstration Models
Paper plates can be transformed into powerful educational tools for demonstrating complex scientific concepts. By serving as the base for a model, a simple plate can illustrate everything from planetary orbits to the water cycle, making abstract ideas tangible and interactive for young learners. These crafts from paper plates are an excellent way to bridge the gap between theoretical knowledge and hands-on understanding.
This STEM-focused project is perfect for classroom lessons, science fair entries, or homeschooling activities. For example, a water cycle model could use a brass fastener to allow a paper arrow to spin, pointing to evaporation, condensation, and precipitation stages. A planetary model can show orbital mechanics by layering two plates, one with the sun and another with planets that can be rotated. This approach turns passive learning into an engaging, kinesthetic experience.
Crafting Effective Science Models
- Add Interactive Elements: Use brass paper fasteners to create moving parts, like a spinning arrow on a weather wheel or rotating planets in a solar system model.
- Label Everything for Clarity: Encourage clear labeling of all components. This reinforces scientific vocabulary and ensures the model is easy to understand.
- Use Color Coding to Explain: Assign specific colors to different elements or stages in a process, such as using blue for water in a water cycle or different colors for arteries and veins in a circulatory system model.
- Test Functionality Before Presenting: Before presenting the model, ensure all moving parts work correctly and that the information is accurate and easy to follow.
10 Paper Plate Crafts Comparison
| Project | 🔄 Complexity (Implementation) | ⚡ Resources & Time | ⭐ Expected outcomes (Quality) | 📊 Ideal use cases (Impact) | 💡 Key advantages / tips |
|---|---|---|---|---|---|
| Paper Plate Animal Masks | Low 🔄 — simple cutting & decorating | Very low ⚡ — basic supplies; 15–30 min | ⭐⭐⭐ — encourages creativity & role-play | Classroom crafts, parties, preschool storytelling | 💡 Budget-friendly; pre-cut holes for little hands; use heavy plates |
| Paper Plate Sun Catchers | Low–Med 🔄 — hole‑punching & weaving | Low ⚡ — tissue/cellophane; 20–45 min; punch tool | ⭐⭐⭐⭐ — high visual impact; teaches light/color | Window displays, art/science cross‑lessons | 💡 Use 3‑hole punch; laminate tissue; hang with fishing line |
| Paper Plate 3D Butterfly & Insects | Med–High 🔄 — folding, layering, multi‑step | Moderate ⚡ — several plates & embellishments; 45–60+ min | ⭐⭐⭐⭐ — dimensional, educational, display‑ready | Life science units, displays, camps | 💡 Provide step‑by‑step guides; adults handle hot glue; laminate wings |
| Paper Plate Spinning Tops & Fidgets | Medium 🔄 — precise centering & balance | Low–Moderate ⚡ — weights, spinning axle; 20–40 min | ⭐⭐⭐ — functional toys; teaches rotation & balance | STEM demos, sensory rooms, friendly competitions | 💡 Center holes carefully; add washers for stability; test balance first |
| Paper Plate Flower Garden Display | Medium 🔄 — careful cutting & layering | Moderate ⚡ — many plates; 60+ min for detailed displays | ⭐⭐⭐⭐ — gallery‑quality decor; botanical learning | Classroom displays, gifts, art therapy | 💡 Use templates; layer sizes for depth; mount on dark backing |
| Paper Plate Building Blocks & Structures | Med–High 🔄 — folding/interlocking engineering | Low ⚡ — plates + fasteners; iterative build time varies | ⭐⭐⭐⭐ — strong STEM & spatial reasoning outcomes | STEM challenges, geometry lessons, makerspaces | 💡 Pre‑score folds; use brads/struts for strength; start simple |
| Paper Plate Constellation & Astronomy | Medium 🔄 — accurate hole placement & planning | Low–Moderate ⚡ — punch + LED/backlight; 30–60 min | ⭐⭐⭐⭐ — interactive astronomy learning; projection demos | Astronomy units, planetarium displays, homeschool projects | 💡 Provide constellation maps; use LEDs/backlight; label stars |
| Paper Plate Mosaic Art | High 🔄 — cutting many small pieces; detailed layout | Moderate–High ⚡ — time‑intensive (hours); glue, templates | ⭐⭐⭐⭐ — sophisticated visuals; fine motor & planning skills | Collaborative murals, art history lessons, therapy | 💡 Pre‑cut pieces for kids; work in sections; seal with acrylic |
| Paper Plate Puppet Theater & Story Props | Low–Med 🔄 — simple construction + stage setup | Low ⚡ — plates, sticks, cardboard; 20–60 min | ⭐⭐⭐ — builds literacy, language, confidence | Storytime, literacy centers, school performances | 💡 Create stick puppets & backdrop; write simple scripts; record shows |
| Paper Plate Science Demonstration Models | High 🔄 — research, moving parts, accuracy required | Moderate ⚡ — plates, fasteners, labels; variable build time | ⭐⭐⭐⭐ — strong conceptual understanding; presentation tool | Science projects, classroom demonstrations, fairs | 💡 Research topic; label parts; test mechanisms before presentation |
Start Your Creative Journey Today
You've just journeyed through ten incredible transformations, witnessing how the humble paper plate can become a gateway to imagination, science, and artistic expression. From the simple joy of creating animal masks to the intricate construction of geometric structures, it’s clear that the potential locked within this everyday item is nearly limitless. The true value of these crafts from paper plates lies not just in the final product, but in the invaluable process of creation itself. Each snip of the scissors, stroke of a paintbrush, and fold of the paper is a building block for critical skills.
As we've explored, these activities are more than just ways to pass an afternoon. They are carefully designed launchpads for learning. The 3D butterfly project introduces concepts of symmetry and form, while the spinning tops provide a hands-on lesson in physics and rotational motion. By creating constellation viewers or science demonstration models, children aren't just memorizing facts; they are actively engaging with complex ideas, making them tangible, understandable, and memorable.
Key Takeaways for Your Crafting Adventure
The most significant insight is that a craft’s educational power is amplified when you focus on the process over perfection. Encourage questions, celebrate "happy accidents," and allow for creative detours. The goal isn't a flawless replica of an example but a unique creation that reflects your child's personality and understanding.
- Integrate Learning Naturally: Weave in questions and observations. While making a suncatcher, ask, "What do you think will happen when the light shines through this colored tissue paper?"
- Embrace Cross-Disciplinary Fun: Notice how these projects blend art with STEM (Science, Technology, Engineering, and Math). The paper plate flower garden is as much about botany and life cycles as it is about color and design.
- Adapt and Innovate: Use the ideas in this listicle as a foundation. Challenge your child to combine concepts. Could you make an animal mask puppet for your puppet theater? Or create mosaic art that depicts a real constellation?
Your Actionable Next Steps
Don't let this inspiration fade. The next step is to turn these ideas into action and make creativity a regular part of your routine.
- Choose Your First Project: Pick one craft from the list that genuinely excites you and your child. Starting with a project that sparks immediate interest is the best way to build momentum.
- Gather Your "Core Four" Supplies: Ensure you have the basics on hand: paper plates, scissors, glue, and a versatile set of coloring tools like markers or paint. Having these ready removes a major barrier to spontaneous creativity.
- Create a "Creation Station": Designate a small, accessible area for crafting. A simple bin with supplies or a corner of a table is all you need. This makes starting a project less of a chore and more of a go-to activity.
By embracing these crafts from paper plates, you are doing more than just keeping little hands busy. You are nurturing curiosity, building problem-solving skills, and creating lasting memories. The confidence a child gains from turning a simple plate into a spinning top or a beautiful piece of art is a powerful force that will serve them well beyond the craft table.
Ready to take hands-on learning to the next level? The same principles of interactive, play-based education that make these paper plate crafts so effective are at the heart of every science kit we design at Playz. Explore our award-winning STEM kits at Playz and discover even more ways to make learning an unforgettable adventure.