

Cracking open a new crystal growing kit is always exciting, but the real magic starts with a little bit of prep work. Getting your space ready isn't just a boring first step—it’s the secret to growing those big, brilliant crystals instead of a cloudy little cluster. Think of it as building a perfect, undisturbed nest for your crystal to grow.
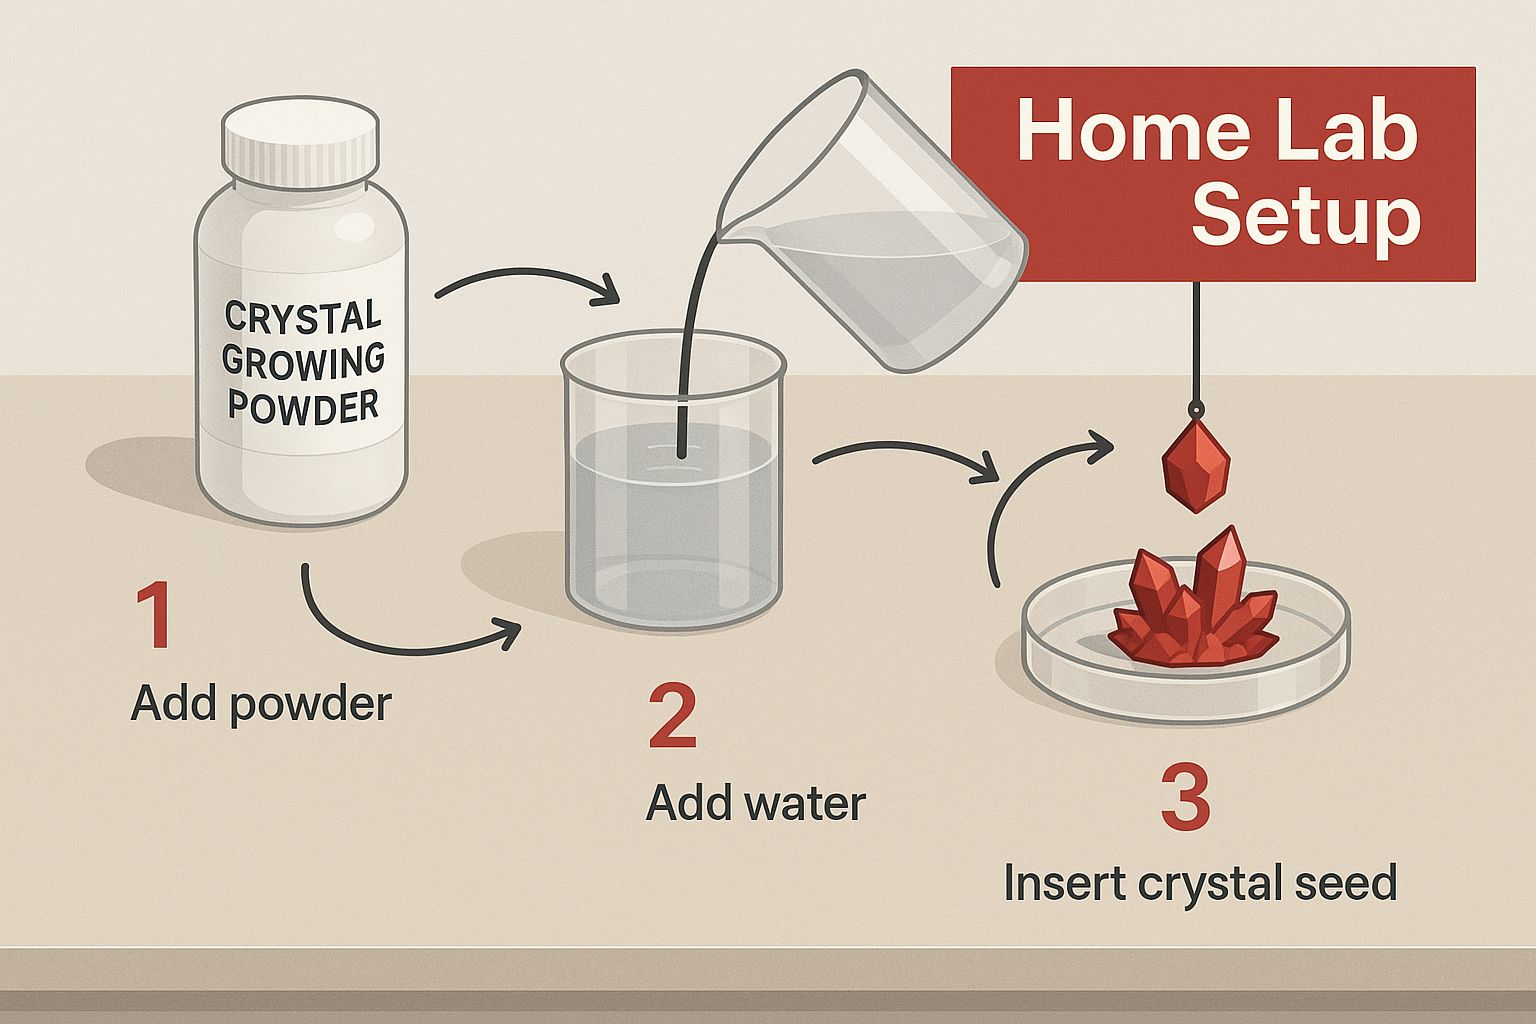
Setting Up Your Home Crystal Laboratory
First things first, you need to find the perfect spot for your experiment. This isn't about needing a sterile, high-tech lab; it's about finding a quiet, stable corner of your home. Crystals are delicate. They need a calm environment to form those beautiful, complex shapes we're all hoping for.
The biggest enemies of a growing crystal are sudden changes. This means finding a spot away from busy hallways, windows that get blasted with sun, or vents that kick on and off. Why? Even tiny vibrations from someone walking by or a quick temperature shift can mess up the crystallization process, leaving you with disappointing results.
Creating the Ideal Growing Environment: An Actionable Checklist
The name of the game here is consistency. Once your crystal starts forming, you want its world to stay as predictable as possible. A wobbly table or a dusty shelf can introduce problems you won't see until it's too late.
Here are a few actionable tips to get the setup just right:
- Find a Quiet Corner: A countertop in a spare room or a sturdy shelf that doesn't get bumped is perfect. I'd strongly recommend keeping it away from a sunny window where the temperature can swing wildly from morning to afternoon.
- Wipe It Down: Give your chosen surface a quick wipe. Dust is a major troublemaker. If particles fall into your solution, they can act as extra "seeds," which sounds good but usually just leads to a crusty mess on top instead of one big crystal.
- Get Organized: Lay everything from the kit out on a paper towel or clean cloth. Take a moment to identify each component—the growing powder, seed rock, container, and stirrer. Knowing what's what before you start mixing makes the whole process go much smoother.
Before you start, it’s a good idea to quickly check that you have all the necessary components and know what each one does.
Your Crystal Kit Component Checklist
Here's a quick rundown of what's in your kit. Understanding each piece's role is key to a successful experiment.
| Component | What It Does | Pro Handling Tip |
|---|---|---|
| Growing Powder | The essential chemical compound that will dissolve in water to form the crystal structure. | Pour it slowly into the hot water to avoid clumps and ensure it dissolves completely. |
| Seed Rock | Provides the starting point or "seed" for the crystal to begin growing on. | Avoid touching it with your bare hands. Natural oils from your skin can interfere with growth. |
| Growing Container | The vessel where the magic happens. It holds the solution and protects the crystal as it forms. | Make sure it’s completely clean and dry before you add any ingredients. |
| Stirring Stick | Used to dissolve the powder thoroughly into the water to create a supersaturated solution. | Stir until the water is completely clear and you can't see any undissolved powder at the bottom. |
Having everything laid out and ready to go makes the next steps feel less like a chemistry test and more like a fun project.
As this guide shows, a little organization goes a long way. This kind of hands-on activity is why science kits for kids are so great—they turn abstract ideas like crystallization into something you can see and touch.
Mixing The Perfect Supersaturated Solution
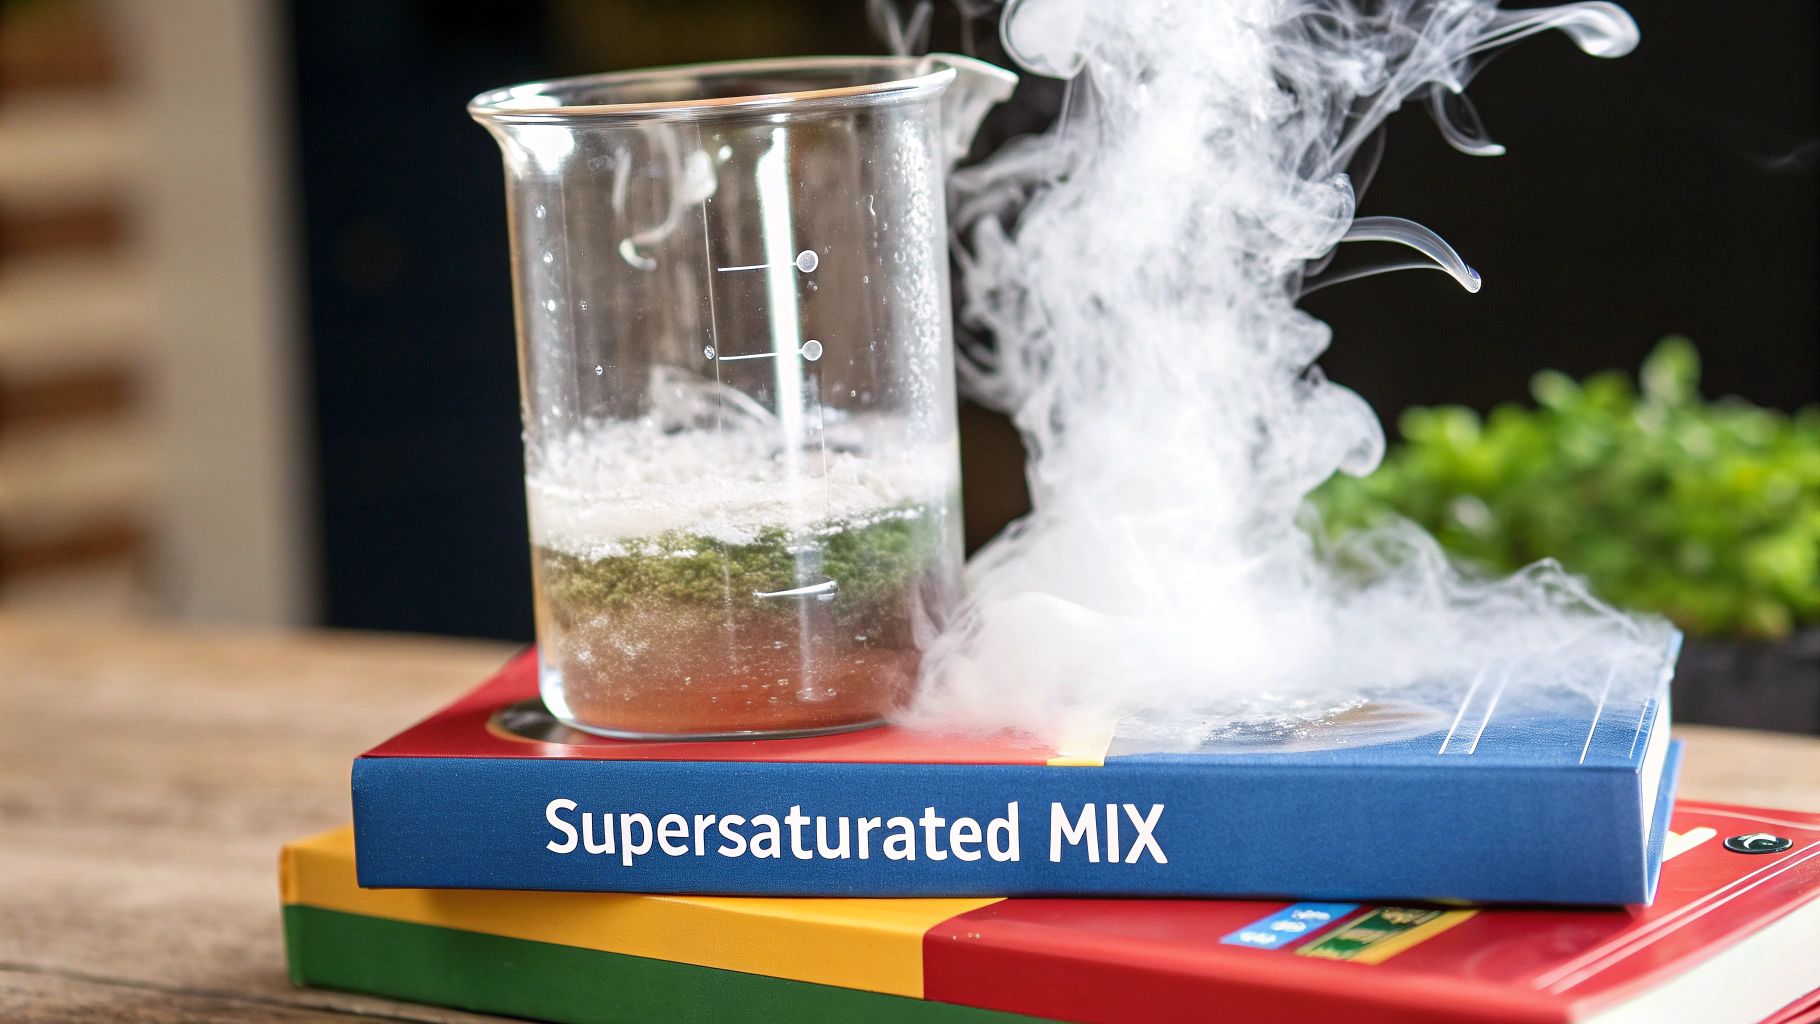
The real secret to growing impressive, chunky crystals isn't some kind of magic—it's all about chemistry. Specifically, it's about creating what's called a supersaturated solution. That might sound a little intimidating, but it just means you've dissolved the absolute maximum amount of crystal powder the water can possibly hold. Nailing this step is the single most important part of the whole process.
A practical example is making sweet tea. When you add the first spoonful of sugar to hot tea, it disappears right away. But if you keep adding more and more, you'll eventually hit a point where the sugar just sinks to the bottom, no matter how much you stir. A supersaturated solution is that sweet spot right before the powder gives up and stops dissolving.
Why Using Hot Water is Non-Negotiable
I can't stress this enough: you have to use very hot water. It’s a non-negotiable part of getting great results. Why? Hot water molecules are zipping around with tons of energy, which lets them dissolve way more powder than cold or even lukewarm water ever could. This creates that rich, soupy environment your crystals need to get big and beautiful.
- Pro Tip: If you can, use distilled water. Tap water has all sorts of extra minerals and impurities that can get in the way of the crystallization process, sometimes leading to cloudy or smaller crystals.
- What to Look For: You'll know the solution is ready when it turns completely clear. If you still see little grains of powder floating around or the water looks murky, just keep stirring gently. They'll disappear eventually.
Key Takeaway: Creating a perfect supersaturated solution is less about exact measurements and more about observation. The goal is to load the water with as much crystal powder as possible, pushing it to its absolute limit without leaving undissolved particles behind.
This whole process is a fantastic, hands-on lesson in chemistry. Understanding how things dissolve and re-form is at the heart of so many awesome science experiments for kids at home.
Once your solution is crystal clear and perfectly mixed, be careful! Pour it gently into the growing container. If you slosh it around too much, you might trigger tiny, unwanted crystals to start forming way too early.
Navigating The Seeding And Growing Phase
Alright, this is where the real magic happens. You’ve mixed the perfect supersaturated solution, and now it’s time to give those crystals a place to call home. This part of the process, called "seeding," is where your patience really starts to pay off.
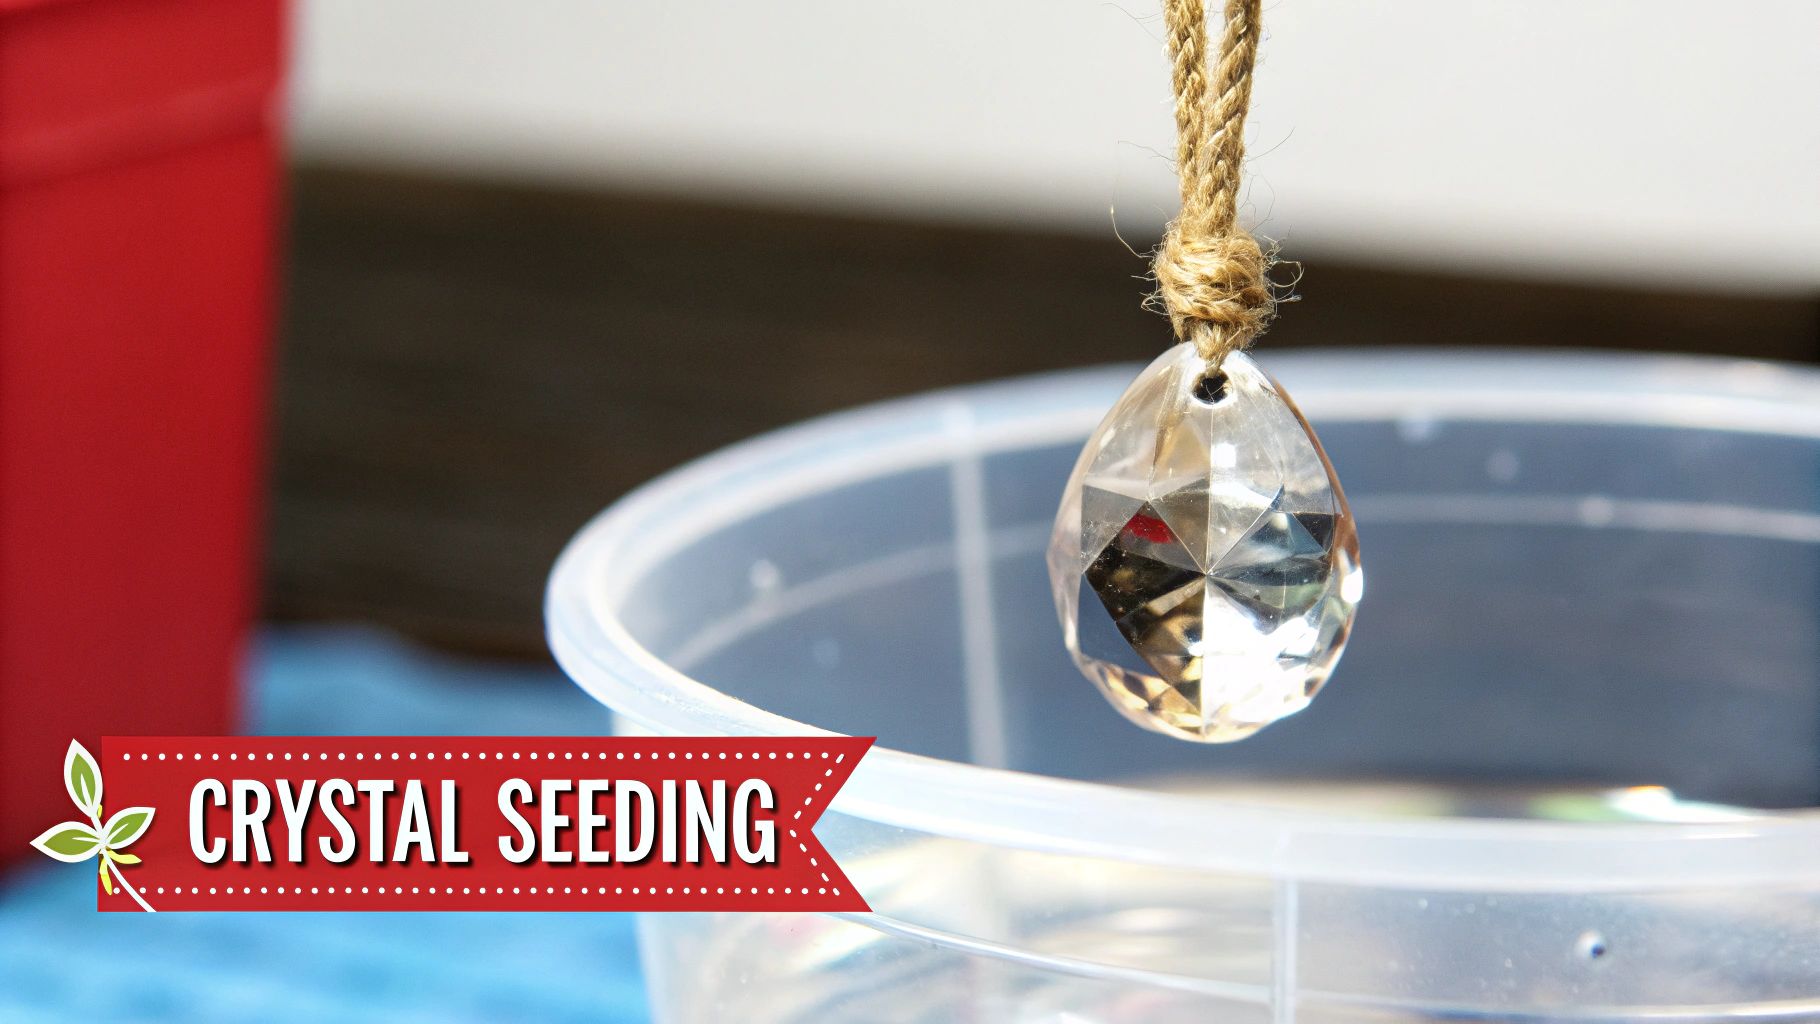
Think of the seed rock as a single, ideal starting point for crystal formation. If you skip this, the crystals might just form randomly all over the container. You’ll end up with a carpet of tiny, unimpressive shards instead of one big, beautiful gem.
To get it right, wait until your solution has cooled down a bit. Then, gently lower the seed rock into the very center of your container. You want it resting flat on the bottom, not touching the sides.
The Art Of Patient Observation
Now for the hardest part of any crystal growing kit: waiting. The absolute best approach is to "set it and forget it." For a crystal to form its delicate, geometric structures, it needs a totally undisturbed environment.
Even small bumps or changes can throw things off course:
- Vibrations: Just walking heavily past the container can send tiny shockwaves through the solution. This can actually fracture the crystal lattice as it’s forming.
- Temperature Swings: A consistent room temperature is your best friend here. Sudden drops or spikes in temperature can make the growth stall out or become lumpy and irregular.
Expert Insight: The most successful crystals grow in a quiet, stable spot. Find a corner where the container won't be bumped, moved, or hit by drafts for several days. Stability is everything if you want large, well-defined crystals.
This hands-on process is a fantastic way to get into materials science. It’s no wonder the global market for these kits is expected to hit USD 350 million by 2033—they make complex science feel fun and accessible.
If watching these transformations gets you excited about geology, you might also love our Playz Volcanic Eruption & Lava Lab Science Kit. It’s another great project that brings earth science to life.
Solving Common Crystal Growing Problems
Even when you follow the instructions perfectly, science sometimes has its own plans. If your crystals aren't growing the way you expected, don't sweat it! Most of the time, it's a common hiccup that's easy to fix with a little detective work. Think of it less like a failure and more like your first lesson in experimental science.
The most common frustration we see is when nothing grows at all. Nine times out of ten, the culprit is water that wasn't quite hot enough when you mixed in the powder. If the water is just warm instead of hot, it can't dissolve all the powder it needs to, leaving you with a weak solution that just doesn't have enough material to build crystals.
Another sneaky issue can be the environment. Too many vibrations from a shaky table or big swings in room temperature can spook the crystals before they even get a chance to form.
Diagnosing Unwanted Results: From Crust to Clumps
So, you grew something... but it doesn't look like the epic gem on the box. Maybe it's a crusty layer on top or a bunch of tiny, cloudy bits at the bottom. These are classic signs that one little thing went off track.
- Crusty Top Layer: This is what happens when dust or tiny, undissolved bits of powder are left floating in your solution. Each particle acts like a tiny seed, and thousands of them compete, forming a crust on the surface instead of letting one big crystal grow underneath.
- Cloudy or Small Crystals: This is a tell-tale sign that your solution cooled down way too fast. A sudden drop in temperature forces the crystals to crash out of the solution quickly, trapping impurities and resulting in a cloudy, messy-looking clump instead of a clear, defined structure.
Key Takeaway: Most crystal growing problems trace back to three things: solution saturation, temperature stability, or contamination. By controlling these variables, you dramatically increase your chances of growing a brilliant, well-formed crystal.
Turning these little setbacks into "aha!" moments is what science is all about. For more ideas on how to turn challenges into wins, check out our guide on how to develop problem-solving skills. It’s a superpower for science and for life.
Crystal Troubleshooting Quick Guide
Sometimes you just need a quick cheat sheet to figure out what went wrong. Use this table to quickly identify and resolve the most common setbacks you might face while growing your crystals.
| The Problem | What's Likely Happening | How You Can Fix It |
|---|---|---|
| No growth at all | The solution wasn't saturated. The water wasn't hot enough to dissolve all the powder. | Gently reheat the solution (with adult help!) until all powder dissolves. Find a warmer, more stable spot to let it cool slowly this time. |
| A crust formed on top | Contamination from dust or undissolved particles created too many "seed" points on the surface. | Reheat to dissolve the crust. Strain the hot liquid through a coffee filter into a clean jar to remove impurities. Let it cool again. |
| Lots of small, cloudy crystals | The solution cooled too quickly, forcing rapid, messy crystal formation. | Reheat to dissolve everything again. Move the jar to a draft-free spot and insulate it with a towel to slow down the cooling process. |
| Crystals stopped growing | The solution has reached equilibrium—it has run out of available material to add to the crystals. | Your crystal is likely as big as it can get with the current solution! You can try making a new, saturated solution and transferring your crystal to it. |
Don't be discouraged if your first attempt isn't perfect. The best scientists learn by trying again.
If you run into an issue, the fix is usually pretty simple: just reheat the solution to dissolve everything again, make a small adjustment, and start the cooling process over. With a little patience, you'll get that stunning result you're looking for.
How to Harvest and Display Your Crystal
After all that patient waiting, the big moment is finally here! It's time to meet your crystal creation. Harvesting is a delicate dance, though, because the structure is still pretty fragile. The goal is to get it out of the leftover solution without chipping or breaking any of those beautiful, sharp edges you worked so hard to grow.
First, carefully pour out the remaining solution. Then, using a pair of tweezers or even a plastic spoon, give the crystal a gentle nudge to loosen it from the bottom of the container.
Once it's free, lift it out slowly and set it on a paper towel to air dry. Whatever you do, resist the temptation to wipe it! Wiping can leave behind lint or even scratch the surface, which will dull its sparkle.
Creating a Showcase for Your Gem
After your crystal is completely dry (this can take a few hours), it's time to put it on display. You’ve turned a simple science project into a genuine work of art, and it deserves a place of honor.
Here are a few simple but effective ways I’ve seen kids show off their crystals:
- Small Display Stand: A simple acrylic or wooden stand can really elevate your crystal, letting the light catch all its different facets.
- Protective Case: A clear plastic or glass box not only looks professional but also keeps your crystal safe from dust and accidental bumps.
- DIY Diorama: This is where you can get really creative. Build a tiny scene for your crystal to live in! We’ve got some great tips for making miniature worlds in our guide to cardboard craft ideas.
Pro-Tip: The best displays do two things: they protect the crystal while also highlighting its unique shape and color. Try placing it near a window or under a small desk lamp to really make it shine.
Following the instructions in a crystal growing kit is about more than just a fun afternoon. It actually supports a growing industry that’s projected to hit USD 1.5 billion by 2032, building the skills of our future scientists and engineers. When kids complete a project like this, they’re participating in a much bigger world of discovery.
Frequently Asked Questions About Crystal Growing Kits
Even with the best instructions laid out in front of you, a few questions are bound to pop up. Getting a handle on the common hiccups before you start is the best way to make sure your first crystal-growing experiment is a huge success.
Let's dive into some of the questions we hear all the time.
How Long Does It Really Take to Grow a Crystal?
This is easily the number one question. You're excited and want to see results! While you'll likely spot some serious growth within the first 24-48 hours, patience is your best friend here. For those really impressive, big, and beautifully formed crystals, you need to let them grow completely undisturbed for about 4 to 7 days. The final size really depends on the specific kit and how steady you can keep the temperature and environment.
What are the Pros and Cons of Crystal Kits?
Thinking about getting a kit? Here’s a quick breakdown to help you decide.
| Pros 👍 | Cons 👎 |
|---|---|
| Engaging & Educational: Turns abstract chemistry into a tangible, visual project. | Patience Required: The best results take several days of waiting. |
| Inspires Curiosity: A successful project often leads to more questions and a deeper interest in science. | Environmental Sensitivity: Results depend on a stable, undisturbed location. |
| Affordable Fun: A low-cost way to have a hands-on science experience at home. | Adult Supervision Needed: Hot water requires help from a grown-up. |
Why Did My Crystal Stop Growing or Turn Out Pale?
A few simple tricks can make a world of difference between a decent crystal and a spectacular one. What if your crystal comes out looking a bit pale or washed out? It all comes down to the concentration of your solution.
- Make absolutely sure every last speck of the colored powder is dissolved in the hot water. Scrape the packet clean!
- If the solution isn't fully saturated, the color just won't be as deep and vibrant in the final crystal.
- Keep stirring until the water is completely clear and there are no grains at the bottom. Only then should you add your seed rock.
What if your crystal just... stops growing? It's probably reached what's called equilibrium. This is a natural endpoint where the solution can't release any more material to add to the crystal. A sudden, big drop in temperature can also stop the process in its tracks.
It's pretty amazing to see how popular these kits have become worldwide. In fact, the Asia Pacific region alone is projected to see the crystal growing market expand by about 6.0% over the next decade. This just goes to show how important it is to have clear, easy-to-follow guides for everyone, from kids in science class to hobbyists at home. You can dig into more of the market data in this detailed crystal growing equipment report.
Ready to kick off your own amazing science adventure? At Playz, our whole mission is to create awesome, hands-on science kits that make learning something you'll never forget.
Explore our collection of science kits and start discovering today!