


Your child is already halfway into the project in their mind. They've picked the flavor, planned the sign, and decided who gets to ring the bell when the first customer walks up. You, meanwhile, are standing in the garage looking at scrap wood, a folding table, or a hardware store list and wondering what version of this idea is doable by Sunday afternoon.
That's the right place to start.
A good lemonade stand doesn't need to be fancy. It needs to fit the child, the time you have, and the kind of day you want to create. For one family, that means a painted plywood stand with a real counter and a hand-lettered menu. For another, it means a borrowed table, a bright poster board sign, and a child proudly taking exact change from neighbors. Both count. Both teach something real.
Why a Lemonade Stand Is Worth Building This Summer
A child standing behind a little counter changes the energy of the whole afternoon. A folding table suddenly feels like a storefront. A bell on the edge of the stand feels official. The first sale feels huge, even if it's just a neighbor buying one cup and saying, “Good luck.”
That moment earns the weekend.
A lemonade stand has lasted because it's simple and familiar. The idea has been documented in the United States since at least 1873, when the earliest known lemonade stands were reported in Brooklyn and operated from streetcars, and by the 19th century the format had already spread nationally as a recognizable small business model, according to Lemonade Day's history notes. That long history is part of why the project still works so well now. Kids understand it quickly, and adults can scale it up or down without losing the lesson.
It teaches more than one thing at once
You're not only figuring out how to build a lemonade stand. You're giving a child a layered project.
- Hands-on building: younger kids can sand, wipe dust, paint, and help hold parts in place
- Business basics: older kids can help choose pricing, count cups, and track sales
- Math practice: every batch, sign, and handful of change turns into real arithmetic
A toddler usually wants ownership without the risky tools. That works beautifully here. Let them choose colors, press painter's tape, or hand you screws one at a time. A tween often wants real responsibility. Let them measure board length, mark pencil lines, and learn how to drill a pilot hole safely.
Practical rule: Build the stand to match the child, not the internet photo.
It creates a longer learning arc
The stand itself may take one weekend, but the learning keeps going after the paint dries. Kids start asking better questions. How many cups do we think we'll sell? Should the sign be bigger? Why did more people stop between lunch and dinner than in the morning?
That mix of outdoor play, independence, and problem-solving is part of why projects like this stay memorable. If you're leaning into summer projects that get kids moving and making, this guide on benefits of outdoor play pairs nicely with a lemonade stand weekend.
What follows is the version I'd recommend to most families. Start with a simple build, adapt it by age, keep safety and local rules in view, and let the child do enough of the work that the finished stand feels like theirs.
Materials, Tools, and Safety Gear You'll Need
Before any cutting starts, gather everything in one place. That reduces the stop-and-start feeling that can make a kid wander off halfway through the fun part.
For a basic wooden stand, you don't need ornate materials. You need a few boards, sturdy fasteners, and tools you can control well.
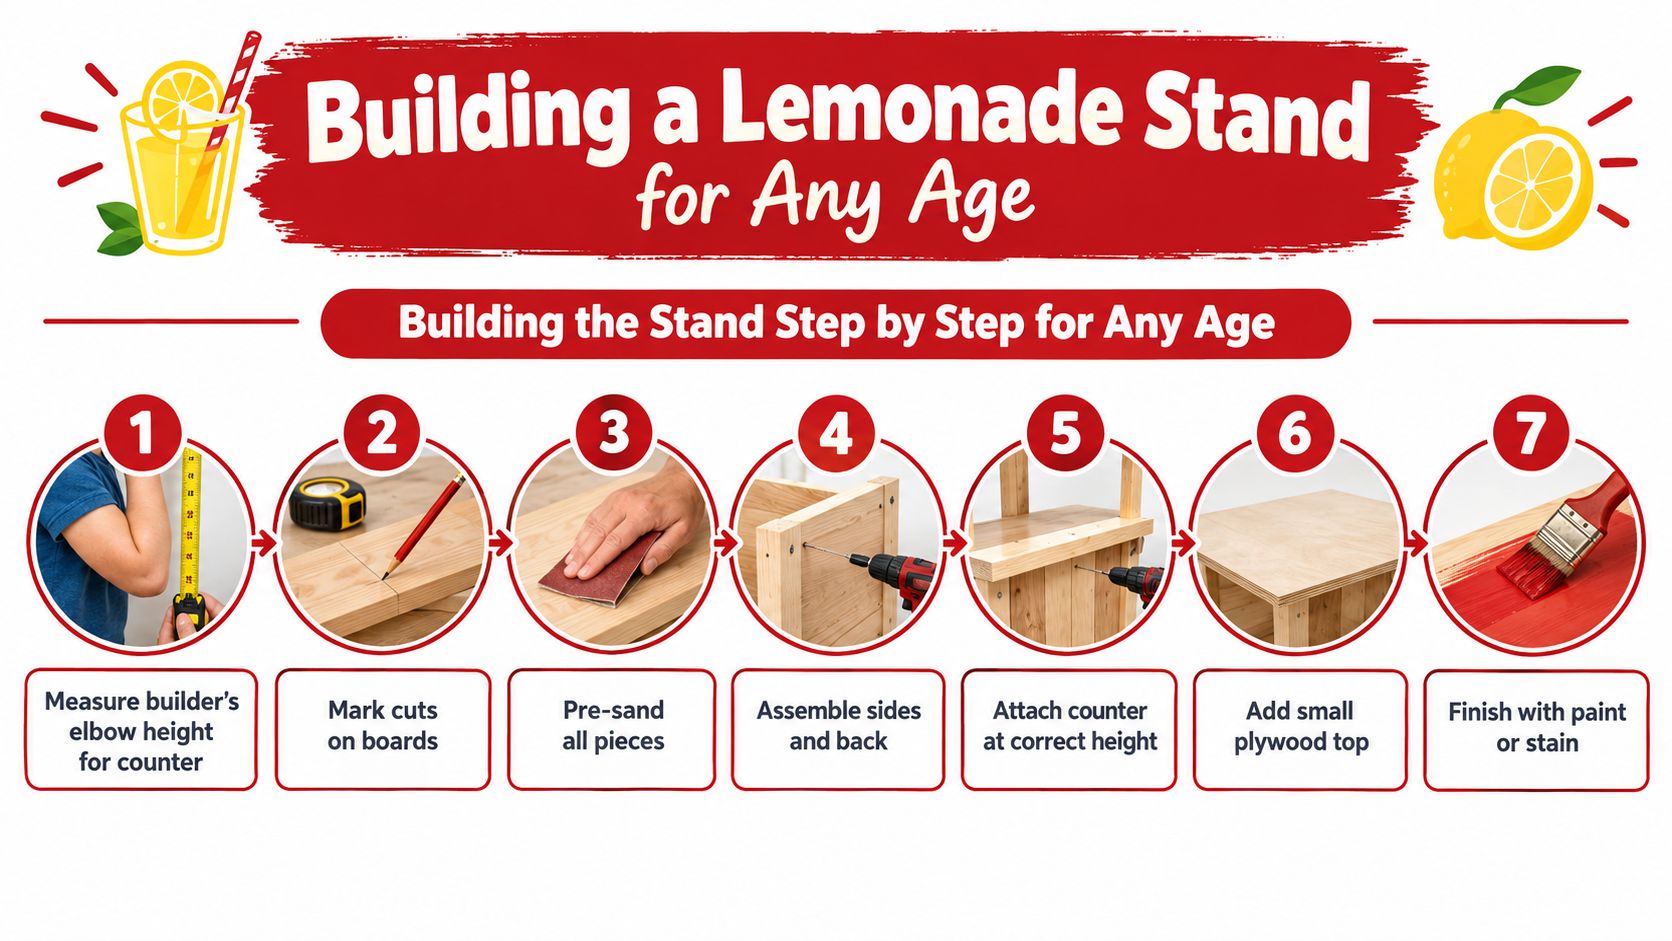
Basic materials for a simple wooden lemonade stand
Here's a practical shopping list for a weekend build:
- Three pine boards: use these for the two sides and the back panel
- One wider board for the counter: this becomes the serving shelf
- One small plywood top: good for a header, roof cap, or sign panel
- Wood screws: better than nails for a beginner-friendly, sturdy build
- Wood glue: adds strength and helps pieces stay aligned during assembly
- Sandpaper: coarse enough to knock down splinters, finer for the last pass
- Exterior paint or stain: better for repeat use and storage in a garage or shed
If your child wants to serve drinks with lids for easy carrying, especially at a park meetup or family event, it can help to look at options for buy paper cup lids before sale day so your cup choice and lid size match.
Tools that help and tools to skip
Most families can handle this build with:
- A saw
- Drill with bits
- Measuring tape
- Square
- Pencil
- Clamps
- Hammer
That said, the smartest shortcut for younger builders is often pre-cut lumber. Many hardware stores will cut boards for you, which removes the part of the project that causes the most stress. Kids still get the satisfying jobs: sanding, layout marks, painting, and simple assembly help.
For families who enjoy repeat build projects, backyard forts, or role-play setups, these DIY play structures can spark good ideas for reusable design choices like foldable panels or lighter materials.
Skip heavy power saws, brad nailers, and sharp tools that require a long lesson before a child can use them confidently.
Safety gear that's worth putting out first
Set out safety gear before the boards hit the floor.
- Kid-sized safety glasses: a child is more likely to wear gear that fits
- Work gloves: useful for carrying rough lumber and painted pieces
- Dust mask for paint prep: especially when sanding old surfaces or applying finish
- Small first-aid kit nearby: cuts and scrapes are easier to handle when you don't have to hunt for bandages
One more honest note. If your child is very young, don't aim for “they helped build it” in every phase. Aim for “they had a real role.” That's enough.
Building the Stand Step by Step for Any Age
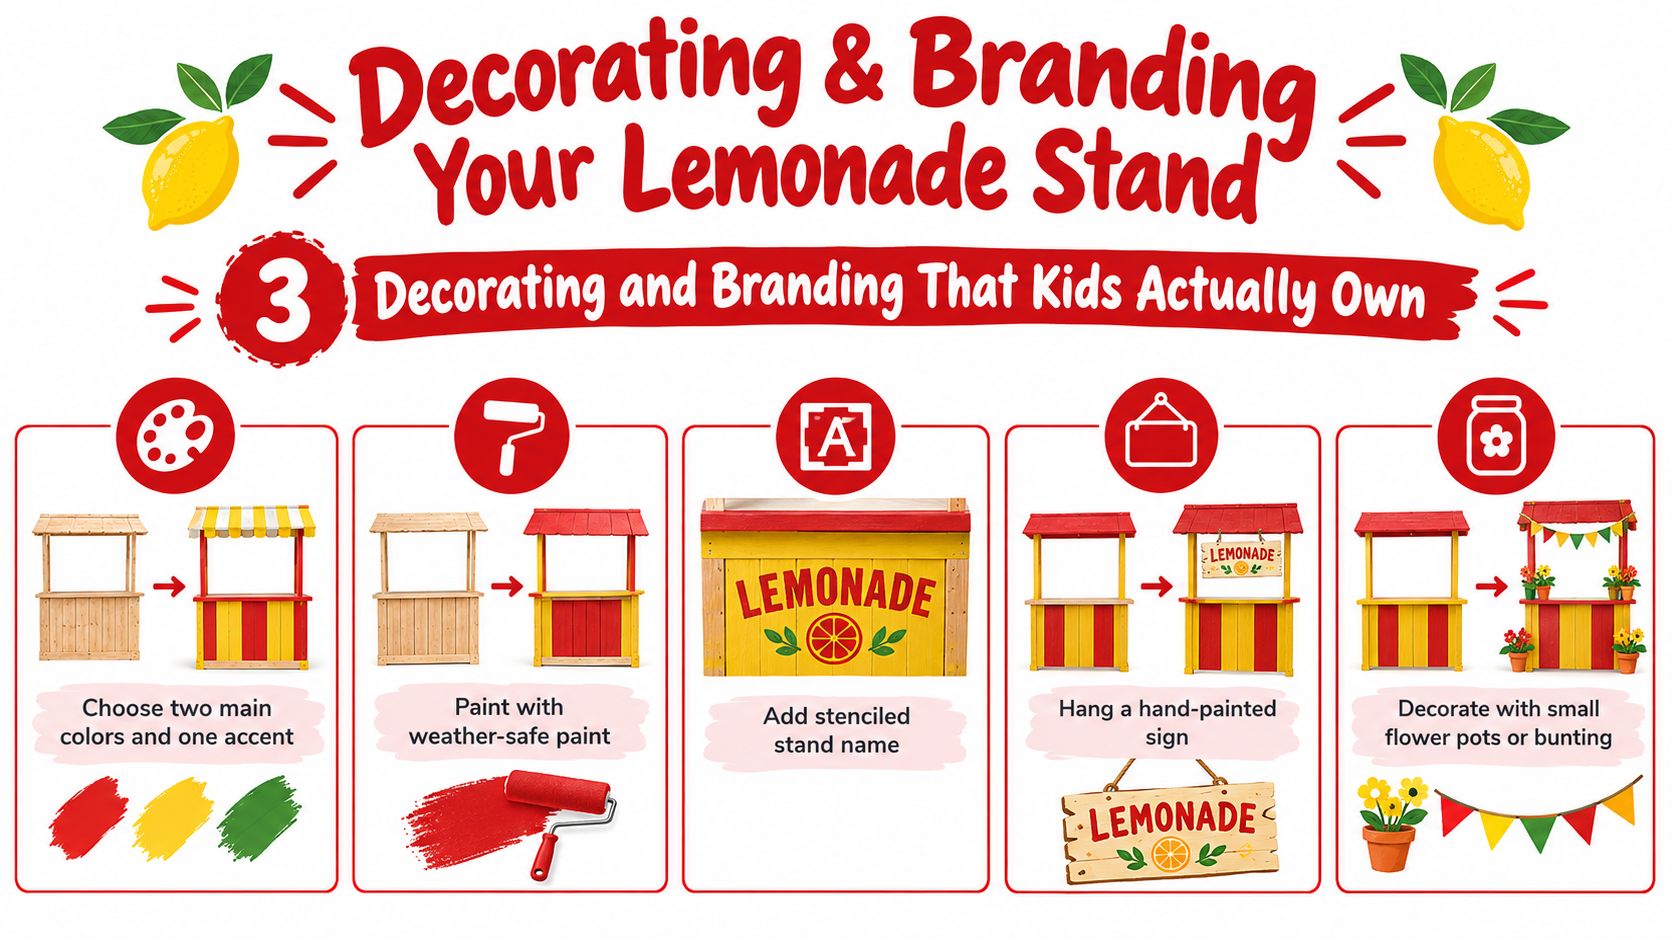
A child-sized lemonade stand works best when you size it to the seller instead of copying a fixed blueprint. Start by measuring the child's elbow height while they're standing comfortably. That gives you a much better counter height than a random plan from the internet.
Mark your cuts on the boards with a pencil, then pre-sand every piece before assembly. Sanding first is easier on small hands because flat boards are simpler to hold and less awkward than a partly built stand.
The frame that keeps the stand steady
Build the body first. Attach the two side panels to the back board using wood glue and pilot holes. Pilot holes matter with soft pine because they help prevent splitting when you drive in screws.
Once those three pieces are square, add the front supports and then the counter shelf. If the stand wobbles even a little at this stage, add back cross-bracing before you move on. A stand that racks side to side feels flimsy fast, especially once a child leans on it during selling.
Pre-drill every screw hole. It takes longer up front and saves frustration later.
For tweens, this is often the best point to hand over the drill after a short safety demonstration. Show them how to brace the board, keep fingers clear, and drive a screw without forcing it. Most older kids love this part because the project suddenly starts looking real.
What younger kids can do without losing ownership
Toddlers and early elementary kids usually do best with an adult driving the build while the child handles visible, tactile jobs.
Good jobs for little builders include:
- Holding a clamp lightly while you position pieces
- Hand-sanding corners and edges
- Wiping sawdust with a rag
- Choosing where the sign panel sits
- Painting broad surfaces with a small roller or brush
If your child likes pretend play builds in general, projects like a pillow fort build often show the same pattern. Kids care less about technical perfection and more about whether they can say, “I made this.”
A quick visual walkthrough can help if your child wants to see another build in action:
Finishing so it lasts beyond one afternoon
After assembly, do a final sanding pass over every edge the child will touch. Round over rough corners by hand if needed. Then apply primer and two coats of exterior paint. Let the stand cure overnight before the first sale so sticky hands don't leave fingerprints in soft paint.
That overnight wait is usually harder for kids than the build itself. It helps to use that time for menu planning, cup counting, and sign design so the momentum doesn't disappear.
Decorating and Branding That Kids Actually Own
A plain wooden frame can feel like a parent project. A decorated stand feels like a child's business.
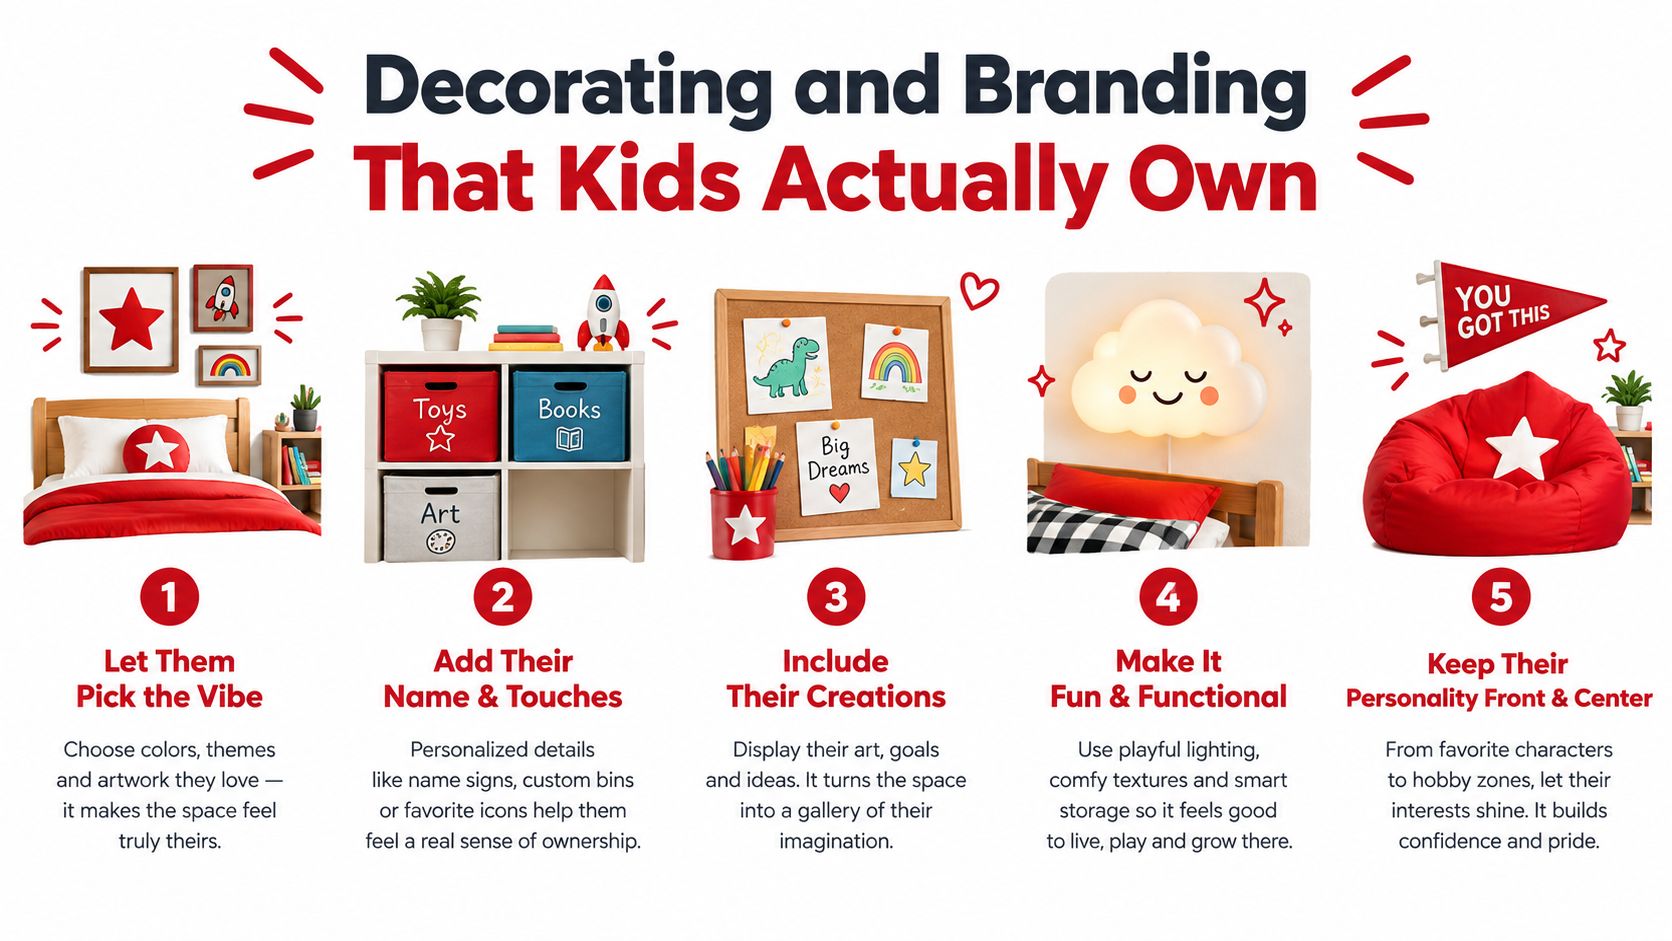
The easiest way to get that shift is to think in before-and-after terms. Before paint, it's a structure. After color, a name, and one or two personal touches, it becomes something your child recognizes as theirs.
Start with a simple color plan
The best kid-made stands usually stick to two main colors and one accent. That keeps the stand cheerful without turning it visually chaotic. For younger kids, let them pick from a short list you can live with. For tweens, hand over the sample cards and let them build the palette.
Sand rough edges first, then paint with weather-safe exterior paint. If your child wants a logo, keep it simple. A lemon, a smiling cup, initials, or the stand name on poster board works well. Covering a paper logo with clear tape can help it survive a little splashing.
Younger kids need structure. Tweens want authorship.
A preschooler usually does best with stencils, sponge brushes, and clear zones like “you can paint this panel yellow.” A tween often wants freehand lettering, a custom menu board, or a more polished brand name.
Some family-friendly decorating ideas work across ages:
- Add a chalkboard panel: easy for a daily menu or sold-out note
- Use zip ties for signs: they're easier and safer than driving in tiny nails
- Hang an outdoor fabric banner: lighter than wood and easier to store
- Label the cash box: children love this because it makes the whole setup feel official
If you want a more durable freestanding sign near the curb or walkway, it helps to browse examples of A Boards For Advertising, Sandwich Boards, A Frame Signs to see what makes pricing visible from a distance.
A child doesn't need a polished logo. They need one choice on the stand that is unmistakably theirs.
Quiet math hiding inside the fun
This part can turn into an easy learning moment without making the day feel like school.
Ask things like:
- How many letters fit across the header board?
- How many cups should the sign mention before we run out?
- How much paint do we think this panel needs compared with the smaller menu board?
For more make-it-your-own project ideas, these box decoration ideas can help if your child loves labels, themes, and turning basic materials into something story-driven.
Pricing, Budgeting, and the Math Behind the Cup
Families usually spend too much time debating the sign and not enough time doing the cup math. That's backwards. Kids learn the most when they can connect cost, price, and profit in a way they can see.
A very basic lemonade setup can be started for about $16 in supplies, including roughly 14 lemons, a 4 lb bag of sugar, 50 cups, ice, a sign, and borrowed household equipment, according to TeenMoney's lemonade stand guide. That works out to about 30 cents per cup, while common neighborhood pricing of $1.00 to $1.50 per cup can bring in about $15 to $40 in an afternoon, with higher-traffic locations reaching $60 or more in some cases, based on that same guide.
The easiest way to teach the math
Keep a simple ledger with these categories:
- Ingredients: lemons, sugar or mix, ice
- Serving supplies: cups, napkins, optional lids
- Stand costs: sign materials, wear-and-tear supplies, any small add-ons
- Location costs: only if you have them
Then divide the total by the number of cups you expect to sell. That gives you cost per cup. A pricing calculator from Back of Napkin uses this same cost-plus approach and shows example price bands such as $0.50 to $1.00 for basic mix lemonade and $2.00 to $3.00 for special-event stands, with profit margins often shown in the 65% to 75% range.
Round-number pricing helps younger kids make change faster and with less stress.
Lemonade Stand Budget Tiers and Per-Cup Costs
| Budget Tier | Estimated Total Spend | Cost Per Cup | Suggested Price | Margin Per Cup |
|---|---|---|---|---|
| Minimal household setup | About $16 | About $0.30 | $1.00 | About $0.70 |
| Mid-range decorated stand | Higher than a basic setup | Varies by materials and cup count | Use cost-plus pricing | Depends on your setup |
| Premium event-style build | Can move into the high hundreds when equipment is purchased new | Varies widely | Better for event pricing than curbside pricing | Depends on actual demand |
That “high hundreds” caution comes from a small-business guide that notes event-based lemonade stands are often modeled with startup costs in that range when equipment is bought new, which is why a minimal setup is the lowest-risk place to begin, according to this operational guide.
What kids can learn from the totals
The Lemonade Day impact paper reported an average profit of $168 per stand in 2016, and 91% of surveyed participants who ran a stand said they made a profit, while 83% saved at least part of it, according to the Lemonade Day impact report. I like that benchmark because it nudges families to treat the stand like a tiny business, not a guessing game.
A simple spending conversation helps too. Instead of treating sales money as instant spending money, have your child split it into spend, save, and reinvest buckets. Even if the exact split is informal, the habit matters.
If your child is still learning kitchen measurements, using a 1 cup measuring cup guide before mixing a batch can make the recipe and the math feel far less abstract.
Permits, Food Safety, and Smart Location Choices
This is the part many build tutorials skip, and it's the part that keeps a sweet project from turning into a stressful one.
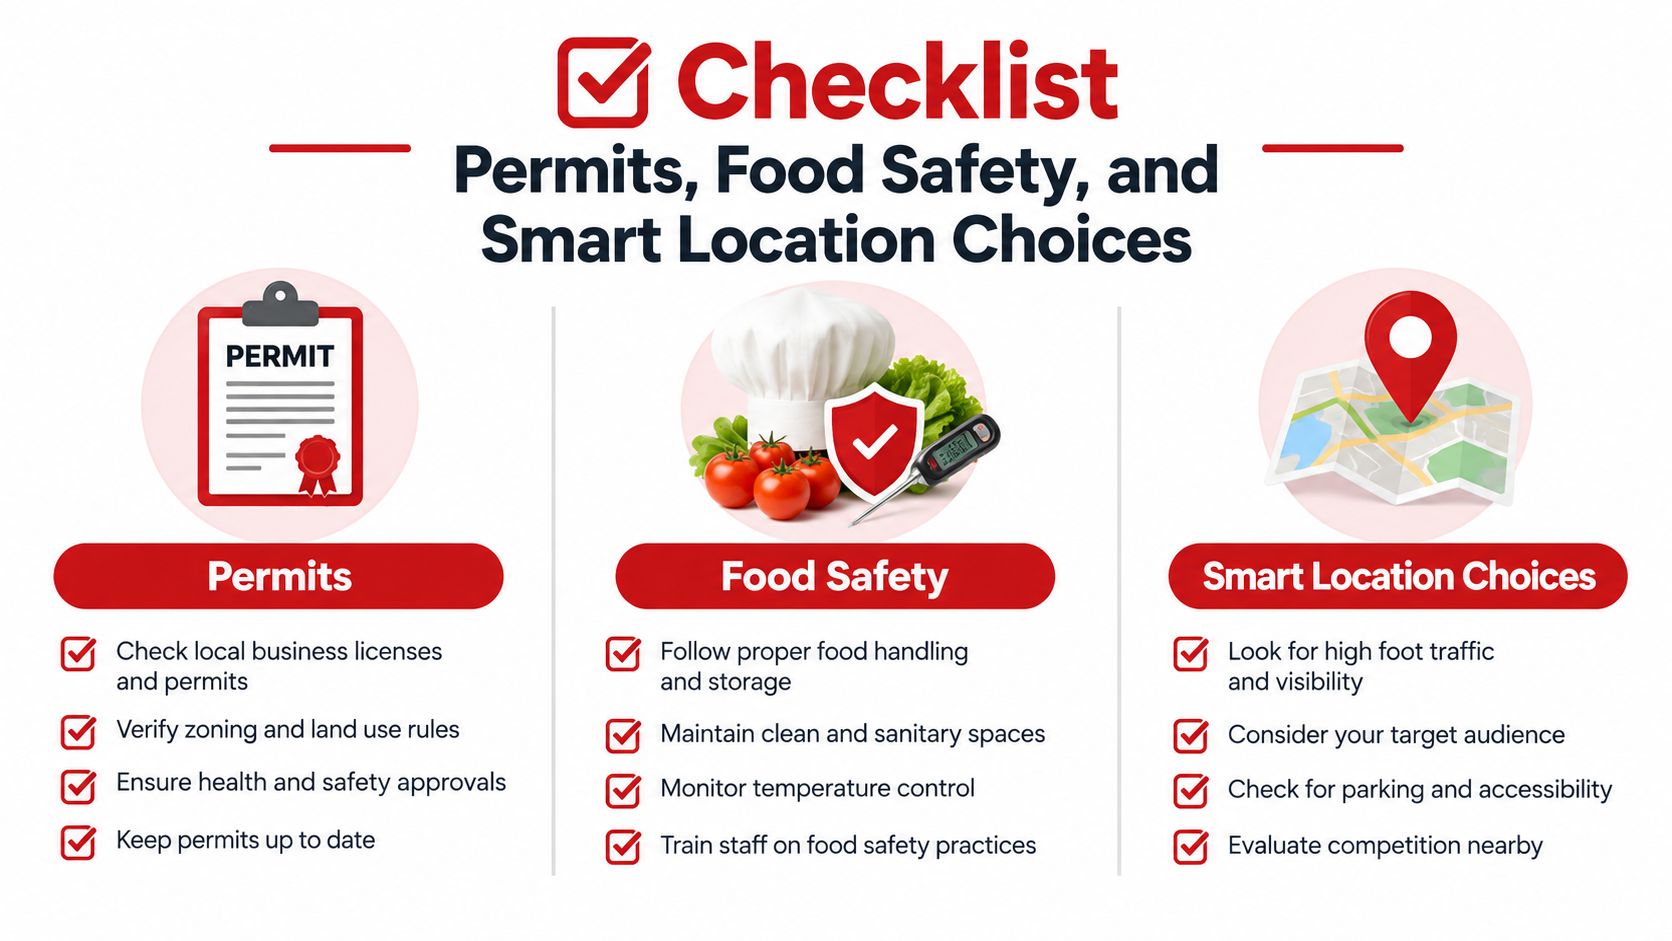
Local rules vary a lot. In Texas, state guidance says permits are not required for children's neighborhood beverage stands in DSHS-served areas and that those stands may not be regulated there, according to Texas DSHS guidance on child beverage stands. That doesn't mean every city, HOA, or event space works the same way. It means you need to check your own location before sale day.
Keep the recipe simple if you want fewer headaches
The easiest stand to run is usually the simplest one. Plain lemonade is easier to manage than recipes with lots of add-ins. A Spokane Valley health guidance document says ingredients such as fresh fruit or dairy require special refrigeration and a Health Department permit, and it lists a single-day permit cost of $100, according to Spokane Valley health requirements and safety guidance.
That same guidance also emphasizes handwashing with hot soapy water before food preparation and repeated handwashing during operation. For younger kids especially, adults should handle most of the mixing and pouring if sanitation is likely to slip once the excitement starts.
A location checklist that actually helps
A good stand location is visible, shaded, and comfortably set back from traffic.
- Check legal use first: neighborhood curbside, school event, and park event rules may differ
- Protect the seller: hat, sunscreen, shade, and short shifts matter more than squeezing in extra time
- Keep the table cold and clean: use a cooler, clean pitchers, and don't leave batches sitting in direct sun
- Avoid risky placement: skip busy intersections, tight driveways, and spots too close to the curb
If you're setting up for a larger gathering and need shade or seating nearby, some families look at event suppliers to find Delta tent and chair rentals, especially when the stand is part of a block party, fundraiser, or school event.
If a child can't serve safely in the location you picked, the location isn't good enough, no matter how much traffic it gets.
Selling Day, Learning Moments, and What Comes Next
Selling day goes best when the setup is calm. Put the stand in place first. Then set out cups, napkins, a cash box, and a clearly visible price sign. Give each child one role at the start so they aren't all reaching for the same pitcher at once.
One child can greet. Another can handle the cup handoff. An older child or adult can manage cash and make change. If you expect uneven bursts of customers, keep backup ice and extra mix nearby so restocking feels routine instead of chaotic.
Good questions to ask during and after the sale
The project turns into reflection instead of just a cute afternoon.
Ask simple questions like:
- Which hour felt busiest?
- Did our real sales match what we guessed this morning?
- Did people notice the sign, the location, or the flavor first?
- Was our price easy to explain and easy to make change for?
Take a few photos of the menu board, save the tally sheet, or let your child dictate a short recap into a notebook. Those little records become learning artifacts. They also help if your child wants to run the stand again with changes.
What the next version can look like
Some kids want to do one excellent weekend and move on. That's a success. Others immediately want version two. They might test a new flavor, add iced tea, donate part of what they earn, or redesign the sign after spotting what customers missed.
The best outcome isn't a perfect stand. It's a child who now understands that ideas can become objects, objects can become experiences, and experiences can teach real confidence. If you build one this weekend, I'd love for you to share what worked, what your child took ownership of, and what questions came up along the way.
If your family loves projects like this, Playz makes hands-on toys and activity kits that turn curiosity into real building, experimenting, and imaginative play. From creative setups to screen-free learning tools, Playz is a great next stop when you want to keep the momentum going after the lemonade stand comes down.