


The bin is already full of leaves, the table is dusted with flour, and one child is holding up a tiny shell print like it belongs in a museum. That's the moment salt dough fossils stop feeling like a craft and start feeling like science. Kids don't just make something cute, they make a shape that looks convincing enough to raise real questions about how fossils form and what scientists can learn from them.
Why Salt Dough Fossils Work as STEM Learning
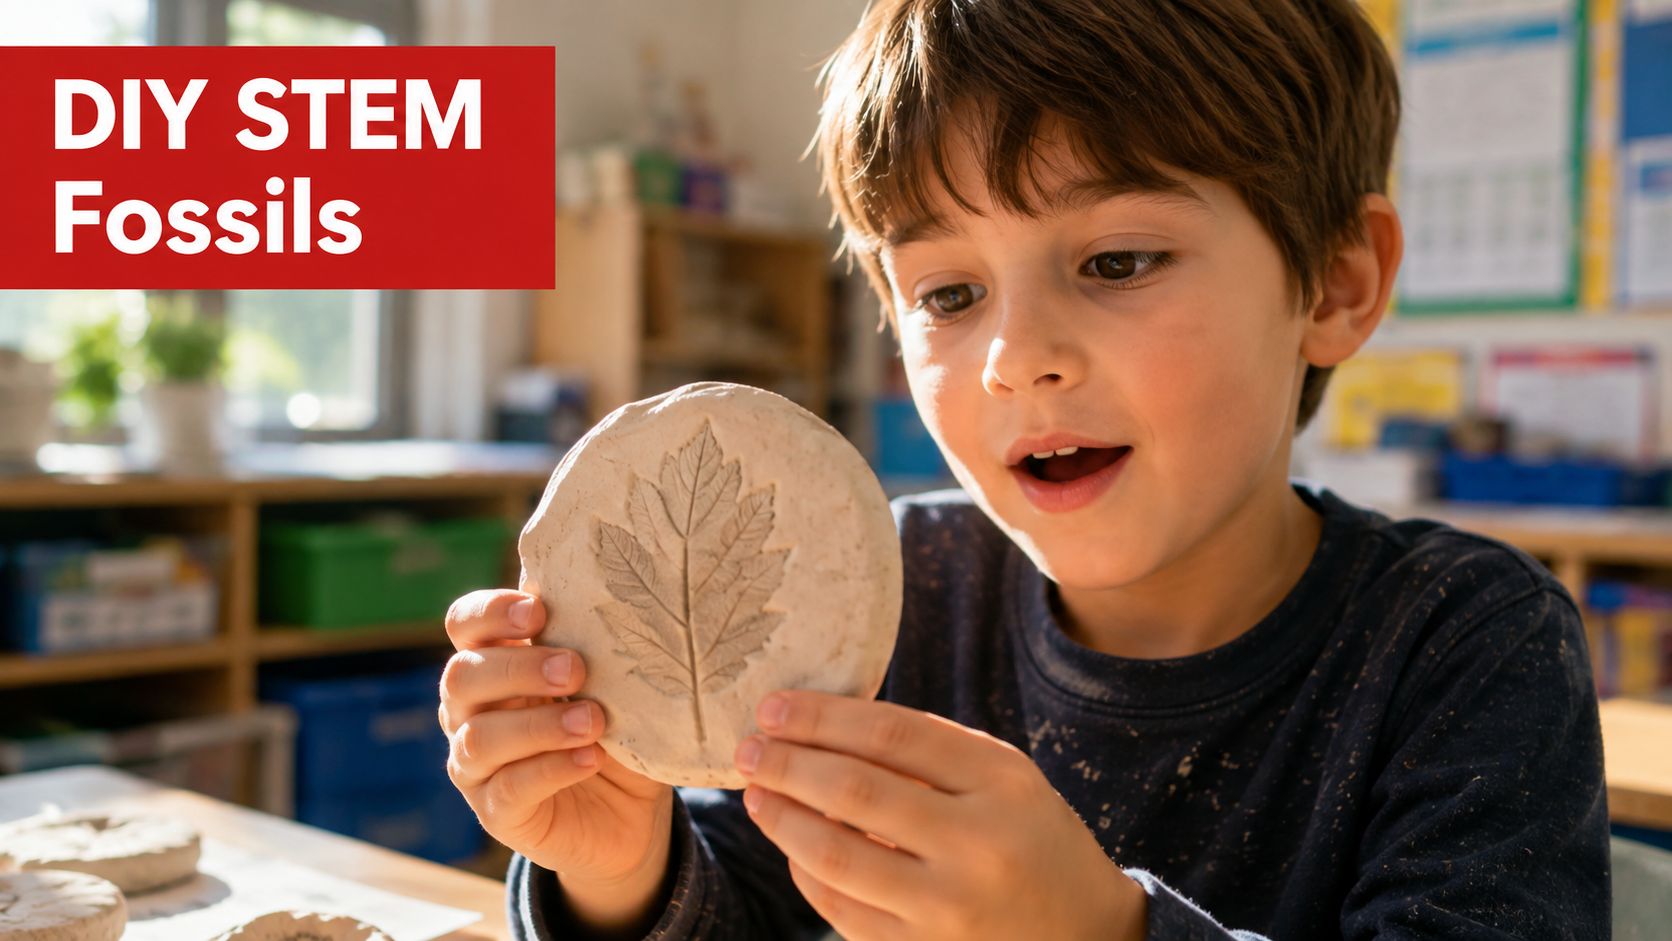
A child pressing a leaf into dough usually doesn't think they're studying paleontology. Then the leaf lifts away and leaves a clean imprint, and suddenly the room gets quiet for a second. That pause matters, because it's where curiosity turns into observation.
Salt dough fossils work because they mirror a real fossil process in a simple, hands-on way. A mold fossil forms when an organism leaves an imprint in sediment, and a cast fossil forms when that imprint later fills with minerals or sediment and hardens, which is why this activity maps neatly onto real fossil education and museum replica work. The ammonite example is especially powerful, since ammonites lived from roughly 450 million years ago until the end of the Cretaceous, about 66 million years ago. That gives educators a concrete way to talk about deep time without losing young children in abstraction. Hands-on learning sticks when kids can touch the idea, not just hear about it.
Practical rule: if a child can explain where the imprint came from, you've already moved beyond craft time.
The other reason this activity lasts in memory is that it gives children a visible cause-and-effect chain. Press, lift, dry, compare, ask. That sequence is simple enough for preschoolers and still useful for older children who are ready to talk about sediment, pressure, and preserved shapes. It's one of the few classroom activities that can feel playful and scientific at the same time.
Mixing the Perfect Salt Dough Recipe
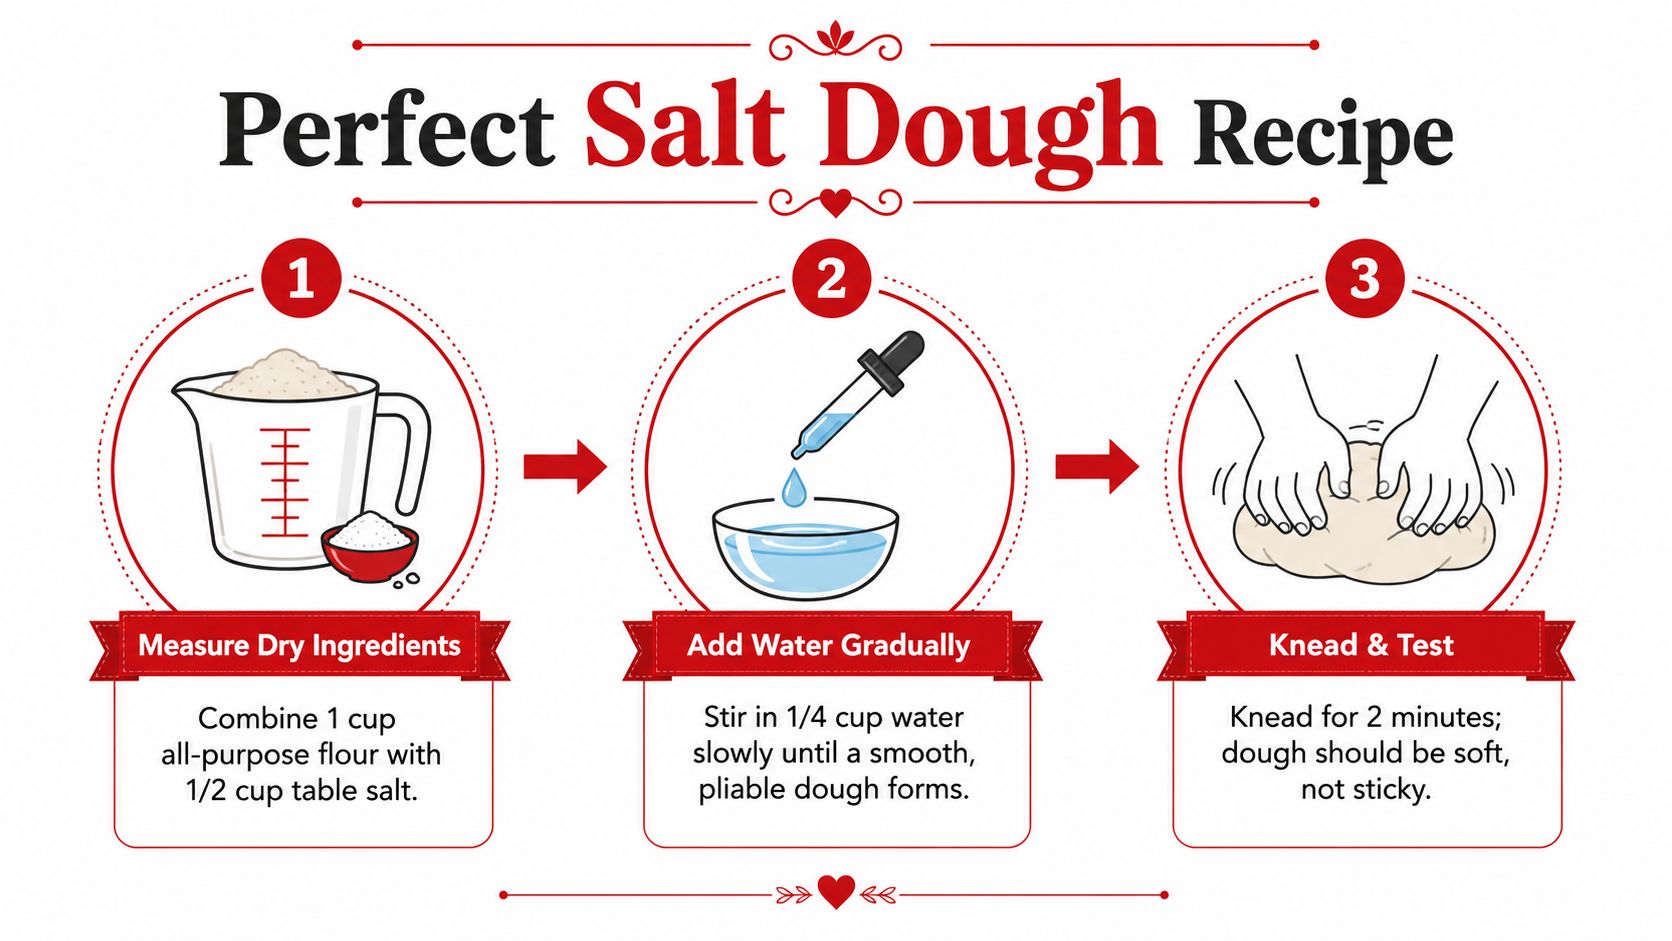
The dough decides whether the fossil looks crisp or collapsed. A reliable starting point is a 2:1 flour-to-salt ratio, then water added gradually until the mixture becomes a kneadable ball, with flour added if it feels sticky and water added if it turns crumbly. That small correction step matters more than many first-time crafters expect, because impression quality depends on a dough that holds detail without spreading.
Build the base before you press anything
For a classroom or kitchen table, measure the dry ingredients first so every child starts with the same consistency. If you're teaching ratios alongside the craft, a helpful companion resource is this useful cooking ratio guide, because it helps adults think about balance before they hand mixing jobs to children. Once the dry ingredients are combined, add water in small amounts and stop as soon as the dough forms into a soft ball.
Kneading is part of the learning, not just a cleanup step. Two minutes of working the dough usually gives enough time to feel the texture change from grainy to pliable, and that tactile shift helps children understand why measurement matters. If the dough tears when pressed, it's too dry. If it clings to fingers and blurs detail, it's too wet.
A good classroom setup keeps the recipe visible and the corrections simple.
- Too sticky: dust in a little more flour and knead again.
- Too crumbly: add a few drops of water and fold the dough over itself.
- Too soft after mixing: let it rest briefly before pressing impressions.
- Too stiff to shape: warm it with hands and knead again.
If you want another make-it-yourself idea that uses similar creative materials, the cool things to make out of clay collection offers a useful mental model for how children move from shaping to detailing. The same principle applies here, first get a smooth base, then add the fossil surface.
Creating Detailed Fossil Impressions
If the dough is the foundation, the impression is where kids feel like real makers. The trick is to roll the slab to about 1/4 to 1/2 inch thickness, because that range captures fine detail without making the fossil so fragile that it breaks before drying. Thicker dough hides texture. Thinner dough cracks or punctures when the object goes in.
Choose objects that leave a clear story
Shells, leaves, toy dinosaurs, forks, and spoons each leave different kinds of marks. A shell or leaf gives a crisp surface pattern, while a toy dinosaur or textured tool creates a more dramatic shape that children can name and compare. For a more structured lesson, keep one object for a body imprint and another for a track or mark so children can see that not every fossil looks the same.
A subtle difference in pressure changes the result more than most adults expect. Press firmly enough to create a clear print, but stop before the object breaks through the dough, because over-pressing distorts the edges and under-pressing leaves a weak impression. I usually tell children to press like they're making a clear stamp, not pushing a finger through frosting.
The cleanest fossil is often the one made with patience, not force.
For mixed groups, it helps to make one sample fossil first and hold it beside the class's work. Children learn quickly by comparing depth, edge shape, and texture transfer. If you want a simple themed extension, the what to do with seashells ideas can help you choose shell shapes that are visually strong and easy for small hands to handle.
A few practical habits make repeated fossils look more professional.
- Flatten first: a level base gives better detail than a lumpy one.
- Lift straight up: twisting the object smears the edge.
- Use spacing: leave room around each print so the design reads clearly.
- Label while soft: a toothpick mark or initial helps identify each child's fossil later.
Drying and Baking Options Compared
Drying is where many good fossils go wrong. The most important variable is thickness, because thin pieces harden much faster than thick ones. Thin fossil pieces may harden in about 45 minutes to 2 hours, while thicker pieces commonly need 2-3 hours in a low oven around 200-250°F or 24-48 hours of air-drying, with some guides noting air-dry windows of 4-6 days.
Choosing the method that fits your timeline
The best method depends on whether you need speed, even drying, or the safest setup for your group. Air-drying is gentler and reduces browning, but it asks for patience and space. Oven-baking is faster and useful when kids want to paint or take fossils home the same day, but it needs tighter supervision and smaller batches.
| Drying Methods Comparison | |||
|---|---|---|---|
| Method | Time Required | Best For | Watch Out For |
| Air-drying | 24-48 hours or longer | Classroom projects that can sit undisturbed | Pieces staying soft underneath |
| Low oven baking | 2-3 hours at 200-250°F | Faster turnaround | Overheating, browning, warping |
| Thin-piece drying | 45 minutes to 2 hours | Small, flat fossils | Burning if left with thicker pieces |
Flip pieces halfway through if you're air-drying or baking a thicker batch, because the underside often holds moisture longer than the top. Separate fossils by size if possible, since smaller pieces finish sooner and can over-dry while larger ones are still soft. That's the easiest way to avoid a classroom tray with half the fossils rock-hard and half still bendy.
If you're picking up the right measuring tools before baking, the 1 cup measuring cup is a small detail that makes batch prep smoother. Consistent scoops help you repeat the same dough texture from one group to the next, which makes drying results much more predictable.
Safety Considerations and Age-Appropriate Adaptations
The part most craft guides skip is the part parents ask about. The dough is made from flour, salt, and water, so it's simple, but it's still uncooked and not meant to be eaten. That matters in homes with toddlers, children who mouth materials, or mixed-age classrooms where one child follows the rules and another puts everything near their mouth.
Adjust the activity to the age in front of you
For preschoolers, keep the experience sensory and direct. Let them knead, press, and lift objects with close adult supervision, and use larger tools that won't become choking hazards. For early elementary students, add choice, comparison, and simple recording so the activity becomes a science task as well as a craft.
Children with gluten sensitivity need special attention because the standard recipe uses flour. In those settings, offer a non-food alternative or a separate workstation so families can decide what's appropriate. This is also the right time to separate the idea of “safe to handle” from “safe to taste,” because those are not the same thing.
Keep the surface covered, keep tools simple, and keep the dough away from mouths.
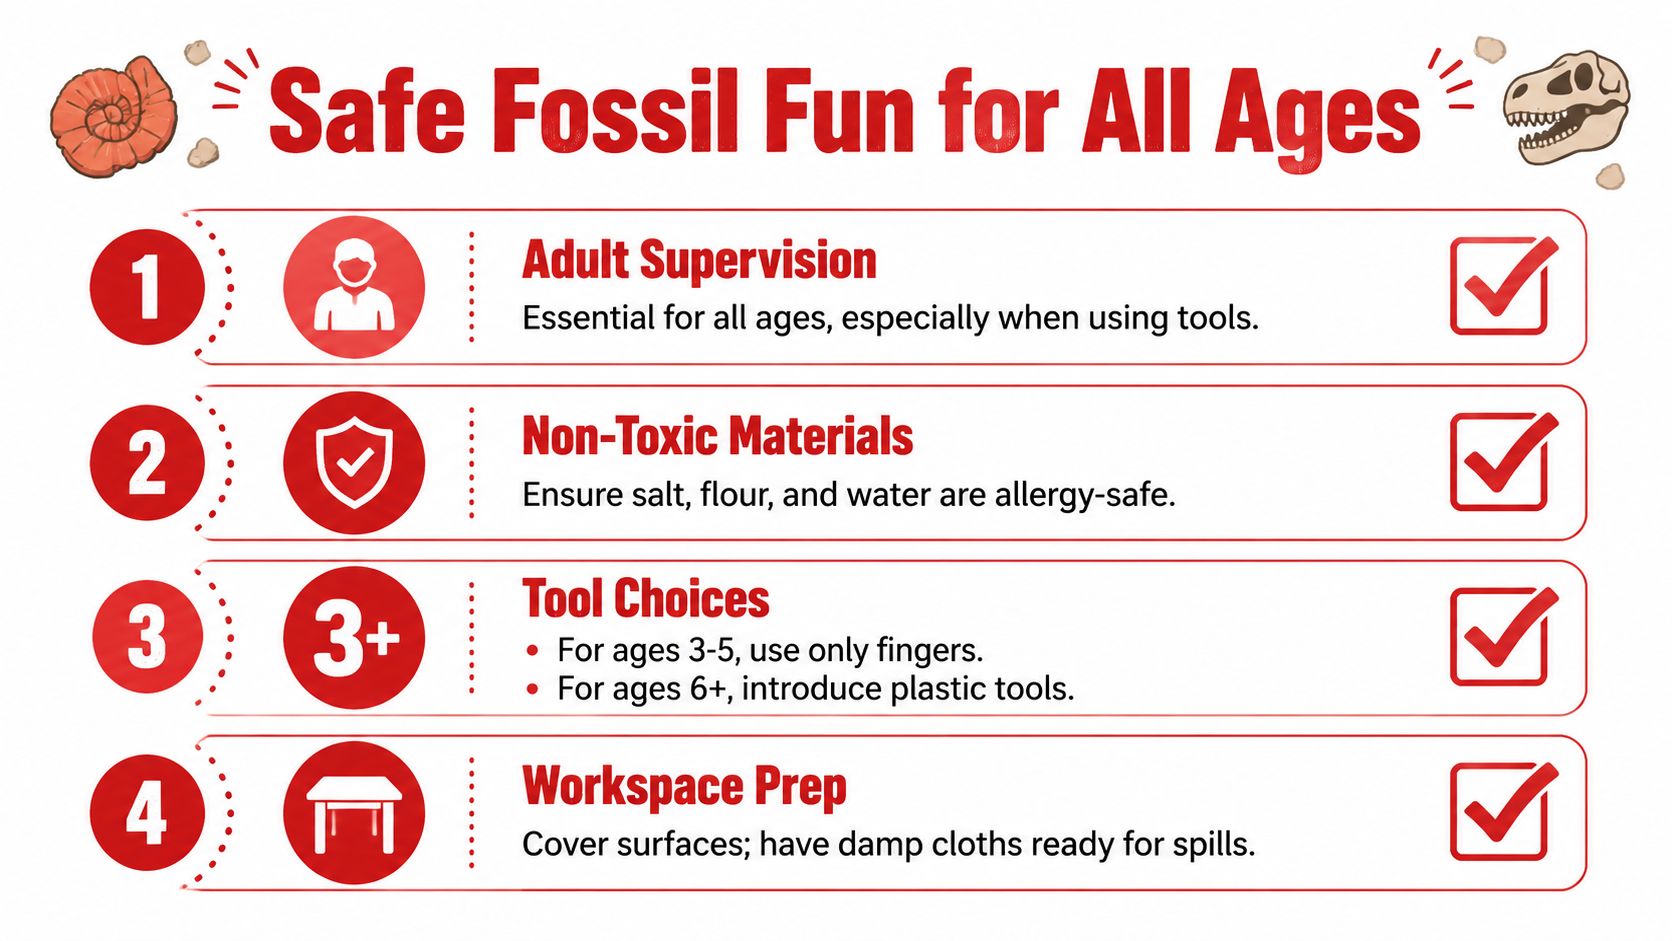
A classroom that runs smoothly usually has three things ready before children sit down.
- Adult supervision: especially when pressing hard objects into soft dough.
- Clear workspace prep: table covers, damp cloths, and a place for scraps.
- Age-appropriate tools: fingers for younger children, plastic tools for older ones.
The main goal is not caution for its own sake. It's making sure the science stays fun while the materials stay manageable for everyone in the room.
Extending the Activity Into Real Paleontology Learning
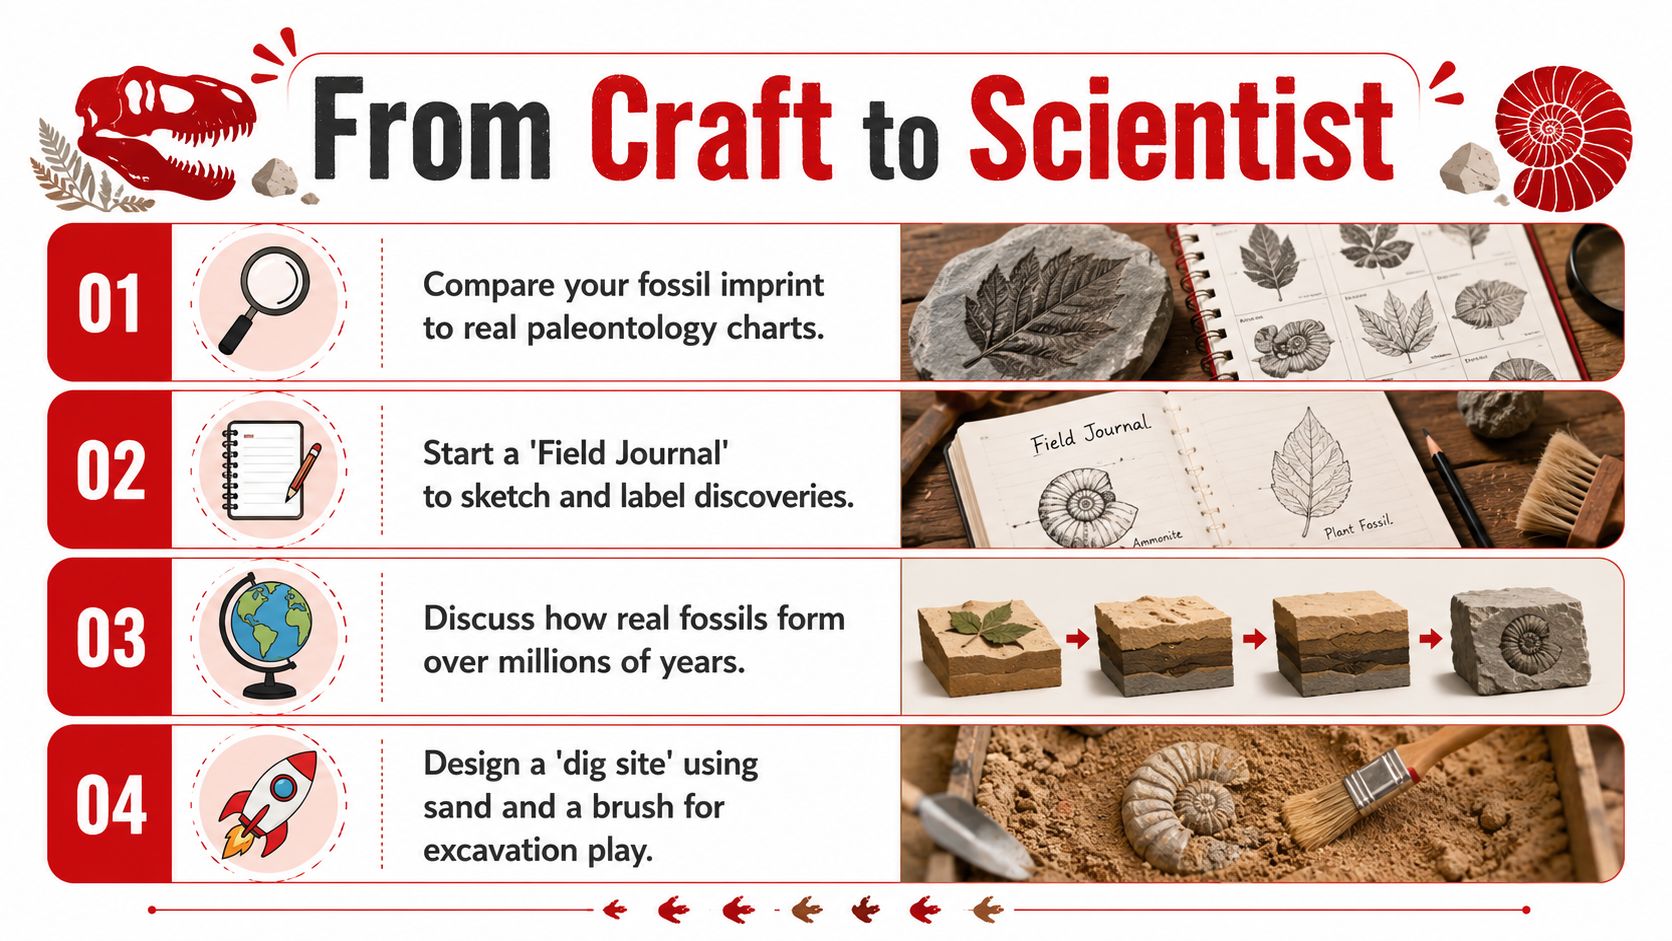
A fossil craft becomes a STEM lesson when children have to compare, classify, and explain what they made. One useful split is between body fossils and trace fossils. Some education guides use pasta or similar materials to model body fossils, while footprints, impressions, and tool-made marks can stand in for trace fossils, which gives children a real vocabulary for sorting evidence rather than just naming shapes.
Turn finished pieces into observation work
A simple classroom routine is to place finished fossils beside a few reference images and ask children what looks alike and what looks different. That pushes them from making to noticing. A field journal works well here too, because sketching a fossil forces a child to look longer than they would if they just carried it away.
For older children, add questions about what the fossil might tell us about the animal or plant that made it. Did it move? Did it have a shell? Was the surface smooth or textured? Those questions encourage hypothesis building without turning the activity into a lecture. If you want more structured extension ideas, the how to search for fossils guide pairs naturally with the observation stage because it connects classroom imitation to real-world fossil hunting.
A nice way to deepen the lesson is to give children a pretend dig site with sand and a brush. They can “excavate” their own fossil after it dries, then compare what the top surface looked like to what the buried side preserved. For a broader maker-oriented resource, the how-to class from Linda's Electric Quilters is a useful reminder that guided hands-on projects work best when the adult structures the process, not just the materials.
Compare by age and skill
- Ages 3 to 5: choose one object, one imprint, one naming prompt.
- Ages 6 to 8: compare two fossils and describe texture, shape, and depth.
- Older children: sort examples into body and trace categories, then explain the choice.
That progression keeps the same activity alive across grade levels. The materials stay familiar, but the thinking gets richer.
If you want more hands-on learning ideas, classroom-friendly science play, and creative tools that turn curiosity into real exploration, visit Playz and find projects that fit your child's age, attention span, and love of making things with their hands. You'll get more activities like this, built for learning through play and ready to use at home or in the classroom.