

Ever wondered how plants can 'see' light or 'feel' gravity? Plants are silent, secret scientists, constantly running experiments to survive and thrive. They bend towards sunlight, their roots navigate underground mazes, and they even communicate using chemical signals. This article unveils eight incredible science projects on plants that transform your home or classroom into a living laboratory, making complex biology tangible and exciting for young learners.
We'll move beyond just watching seeds sprout and dive into projects that reveal the hidden world of botany. You'll learn how to design and conduct experiments exploring phototropism, soil composition, seed germination, and even the chemical warfare between competing plants.
These hands-on activities are designed not just for fun, but to cultivate a deep understanding of the scientific method. They inspire critical thinking, encourage meticulous observation, and prove that some of the best learning happens away from screens. By exploring these fascinating projects, you'll provide a foundation for scientific literacy while nurturing a lifelong appreciation for the natural world. Get ready to dig in and discover the amazing power of plants, one experiment at a time.
1. How Do Different Light Conditions Affect Plant Growth?
This classic experiment is one of the most foundational science projects on plants, perfectly illustrating the crucial role of light in a plant's life cycle. The core concept involves exposing identical plants to varied light sources to observe and measure the differences in their growth, from germination to leaf development. This project provides a tangible demonstration of photosynthesis, the process by which plants use light to create their own food.
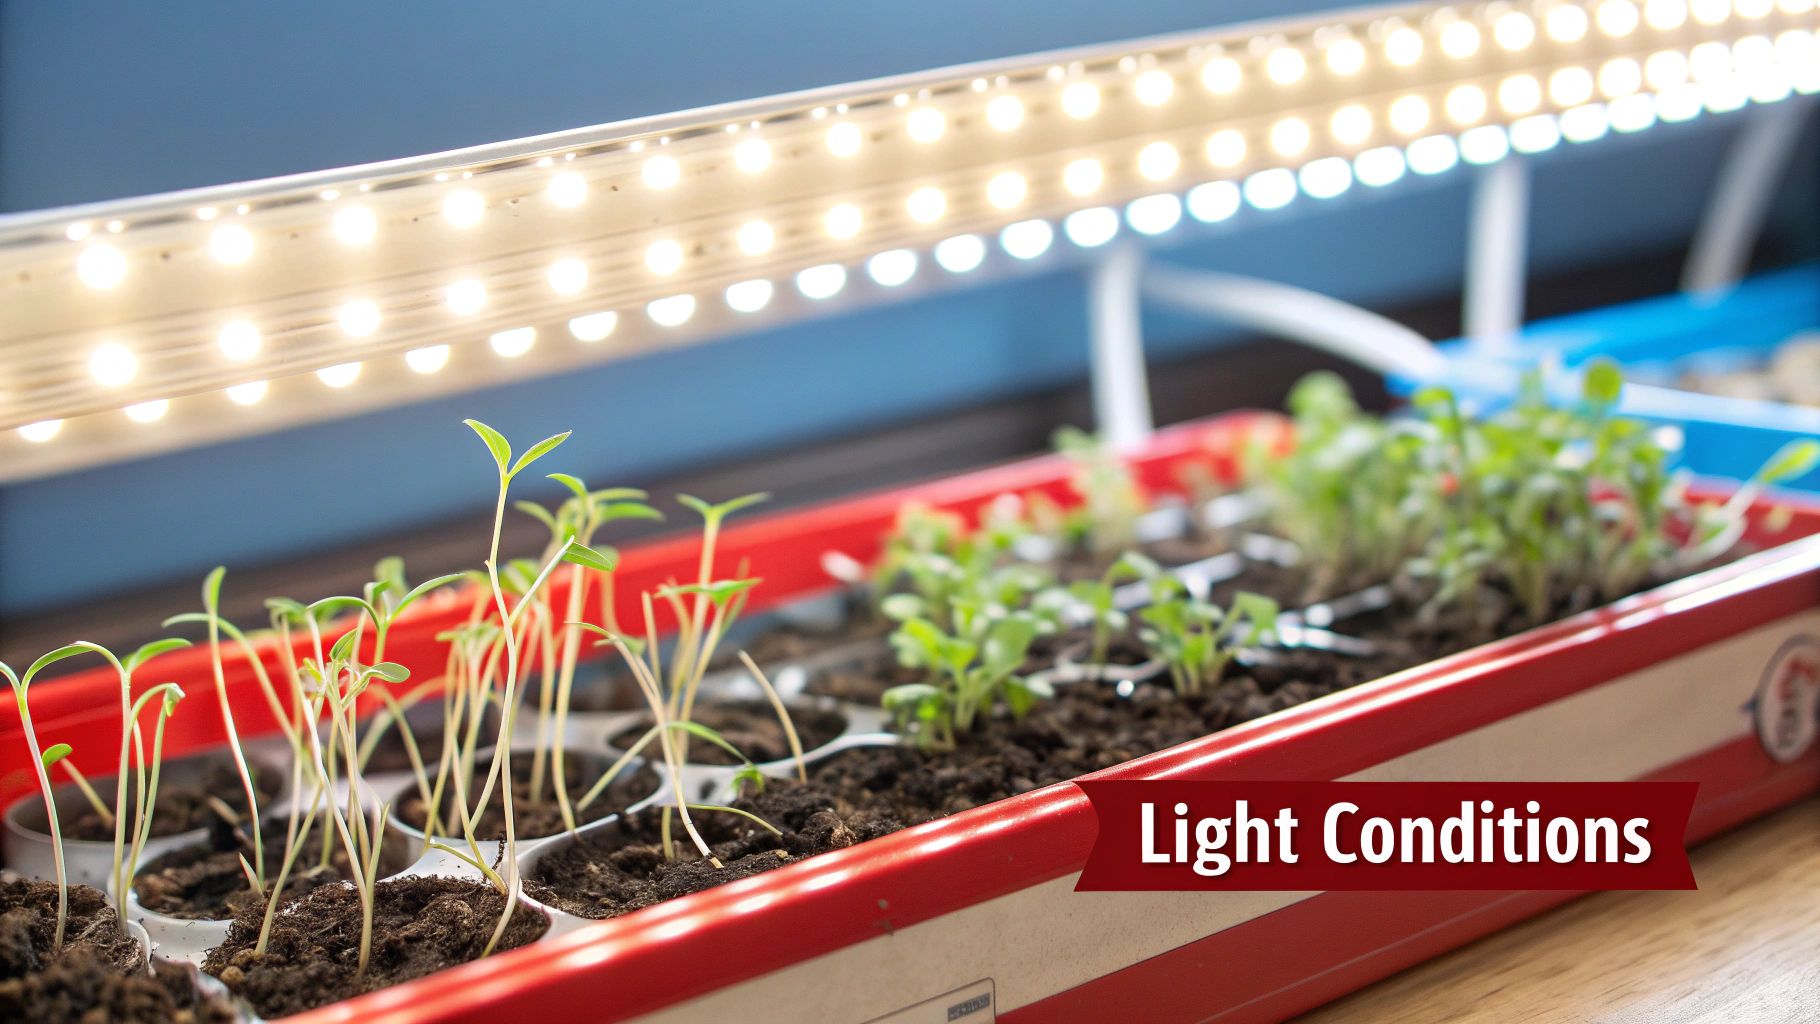
By setting up controlled groups, students can directly see how a plant in full sunlight thrives compared to one in complete darkness, which may grow tall and spindly (a process called etiolation) but will lack green color and eventually perish. This hands-on approach brings textbook concepts to life, showing why light is a non-negotiable resource for most plant life.
How to Set Up the Experiment
To get started, you will need several small pots, a consistent soil mix, and fast-growing seeds like beans or radishes. Set up at least three distinct groups: one placed in a sunny window (natural light), another under an artificial light source like an LED or fluorescent lamp, and a third in a completely dark closet or box.
Key Insight: The success of this experiment hinges on consistency. To ensure light is the only variable being tested, all other conditions must remain identical. This includes the amount of water, pot size, soil type, and ambient temperature for all plant groups.
Actionable Tips for Success
- Choose Wisely: Use plants known for rapid growth, such as radishes, beans, or lettuce, to see results within a few weeks.
- Maintain Controls: Keep all variables like water, soil, and temperature constant across all groups. This isolates light as the key factor influencing growth.
- Document Everything: Create a detailed log to record daily or bi-daily observations. Measure stem height, count the number of leaves, and take photos to visually track progress.
- Increase Sample Size: For more reliable results, use at least three to five plants per light condition. This helps average out any individual plant anomalies.
2. What is the Effect of Different Liquids on Plant Growth?
This fascinating experiment is one of the most insightful science projects on plants, as it directly investigates how substances other than plain water affect a plant's health and development. The core idea is to water identical plants with different liquids to observe and compare their growth, exploring concepts like plant nutrition, osmosis, and the impact of pH levels on soil and roots. This project highlights why water quality is so critical for agriculture and natural ecosystems.
By setting up a control group (water only) alongside experimental groups (e.g., salt water, sugar water, diluted vinegar), students can see firsthand how some liquids provide nutrients while others can be harmful or even lethal. Witnessing a plant watered with salt water wilt, for instance, provides a powerful, visual lesson on osmosis and dehydration. This hands-on investigation makes abstract biological principles tangible and memorable. You can find more engaging ideas for home projects by exploring other science experiments for kids on playzusa.com.
How to Set Up the Experiment
You'll need several identical pots, a uniform soil mix, and robust seeds like beans or marigolds. Establish a control group that receives only plain water. Then, create experimental groups for each liquid you want to test, such as sugar water, salt water, milk, or a mild acidic solution like diluted vinegar.
Key Insight: The experiment's validity depends on isolating the liquid as the sole variable. This means every other condition—pot size, soil volume, light exposure, and the amount of liquid given—must be kept strictly the same for every single plant in the project.
Actionable Tips for Success
- Start with a Control: Always include a plant watered only with plain water. This group serves as your baseline for what healthy growth should look like.
- Label Everything: Clearly label each pot with the type of liquid it will receive. This prevents mix-ups and ensures accurate data collection.
- Use Diluted Solutions: When testing potentially harmful substances like vinegar or salt water, start with very diluted solutions to observe gradual effects rather than immediate plant death.
- Maintain a Schedule: Water all plants at the same time each day with the same volume of their assigned liquid to ensure consistency.
- Document Observations: Keep a detailed journal to record changes in plant height, leaf color, wilting, and overall health. Taking daily photos is an excellent way to track visual changes over time.
3. Investigating Phototropism and Gravitropism in Plants
This fascinating experiment delves into how plants actively respond to their environment, making it one of the most dynamic science projects on plants. It explores phototropism (a plant's growth toward a light source) and gravitropism (growth in response to gravity), demonstrating that plants are far from passive organisms. By manipulating light and orientation, students can witness the powerful influence of plant hormones, called auxins, that direct stems to grow up and roots to grow down.
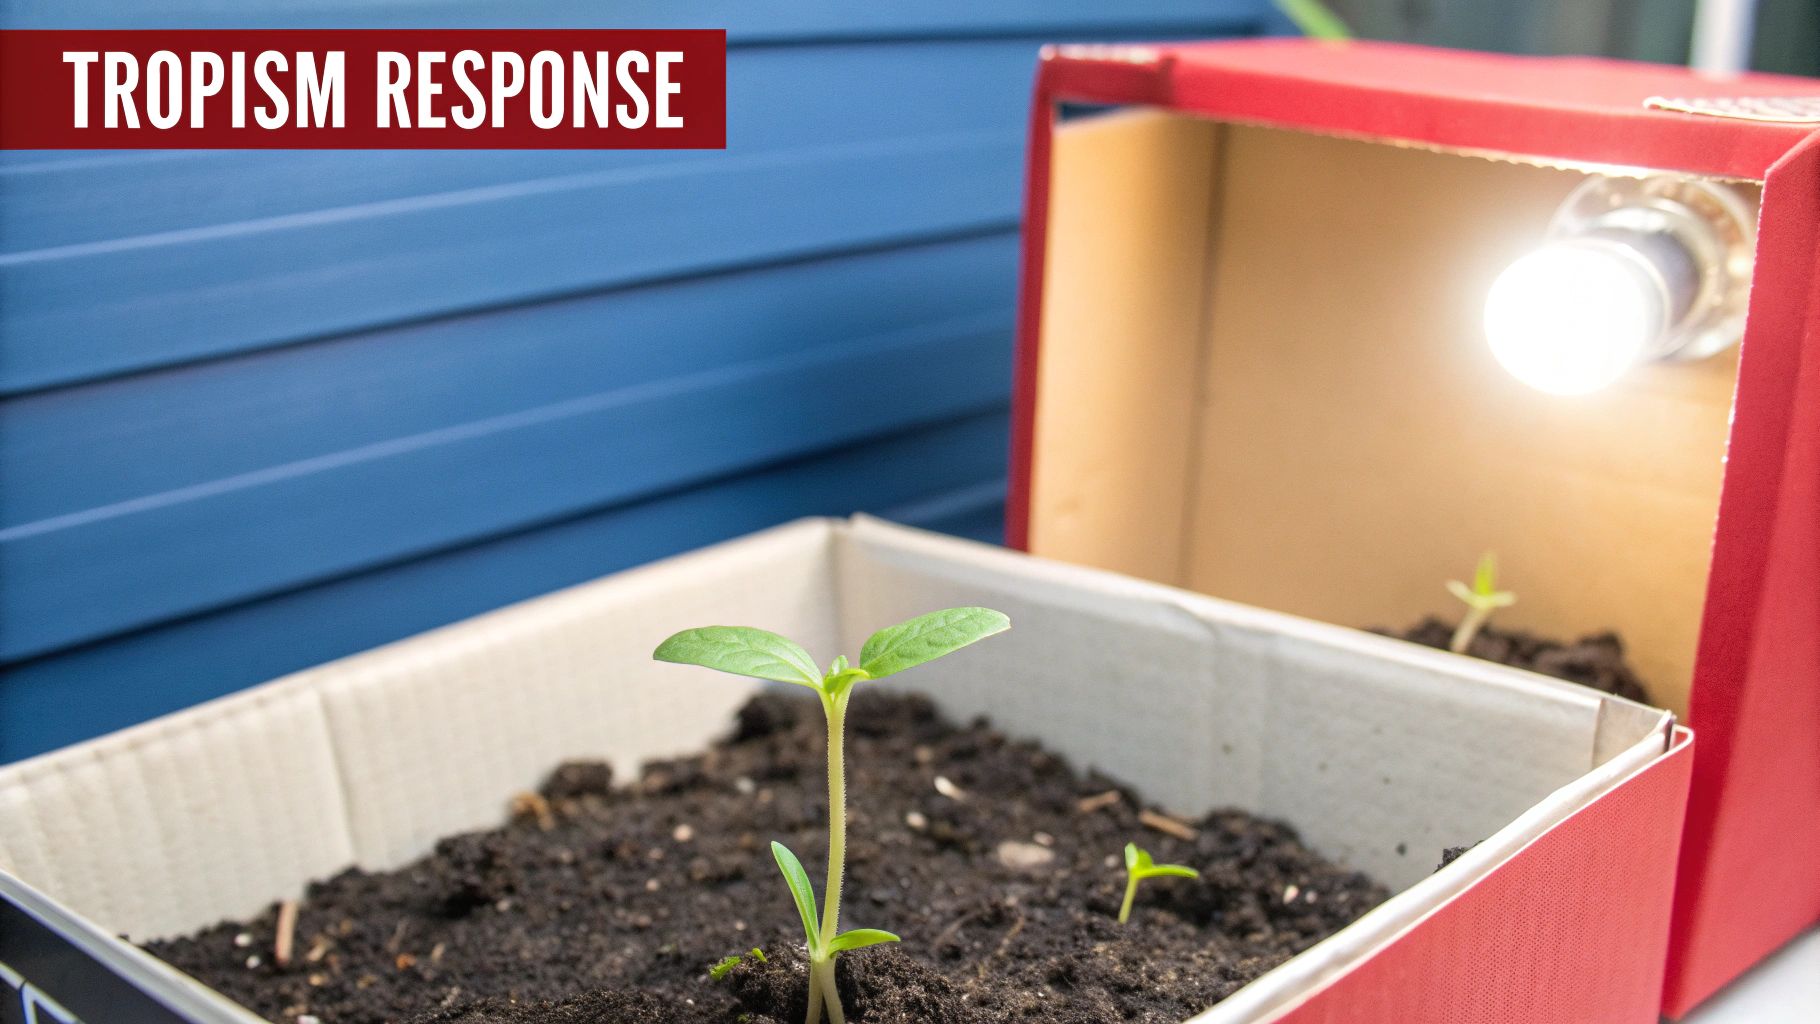
The project reveals a plant’s sophisticated sensory system, a concept pioneered by researchers like Charles Darwin and further explored by NASA scientists studying plant growth in microgravity. Watching a seedling bend toward a small opening in a box provides a powerful visual lesson on plant adaptation and survival instincts, all without a brain or nervous system. This investigation brings complex biological processes into clear view.
How to Set Up the Experiment
To begin, you will need fast-sprouting seeds (like beans or cress), small pots or clear containers, and a cardboard box. For the phototropism part, cut a single hole in one side of the box to create a directional light source. For gravitropism, after a seedling has sprouted, you can simply turn its pot on its side and observe how the stem reorients itself to grow upward over a few days.
Key Insight: The movement is slow but steady. Documenting the changes with photos at regular intervals (every 6-12 hours) is crucial to creating a time-lapse effect that makes the plant's response obvious and compelling.
Actionable Tips for Success
- Fast Growers: Use quick-sprouting seeds like beans, cress, or sunflowers to get visible results in a short timeframe.
- Isolate Light: Ensure the phototropism box is completely light-tight except for the single opening to guarantee the plant is only responding to that one light source.
- Track the Turn: When testing gravitropism, place a small marker on the pot to indicate its original "up" position, making it easier to measure the degree of the stem's bend.
- See the Roots: Grow seeds in a clear plastic cup or a glass jar against a damp paper towel to make root gravitropism (growing downward) visible.
This project serves as an excellent introduction to plant biology and environmental responses. For more inspiration, you can learn more about hands-on science activities on playzusa.com.
4. How Does Soil Composition Affect Plant Growth?
This project delves into the ground beneath our feet, making it one of the most essential science projects on plants by exploring how different soil types affect growth. The core idea is to plant identical seeds in various soils, such as sand, clay, loam, or custom compost mixes, to observe how each environment impacts plant health. This experiment provides a clear, hands-on understanding of how soil structure, drainage, and nutrient availability are fundamental to agriculture and ecology.
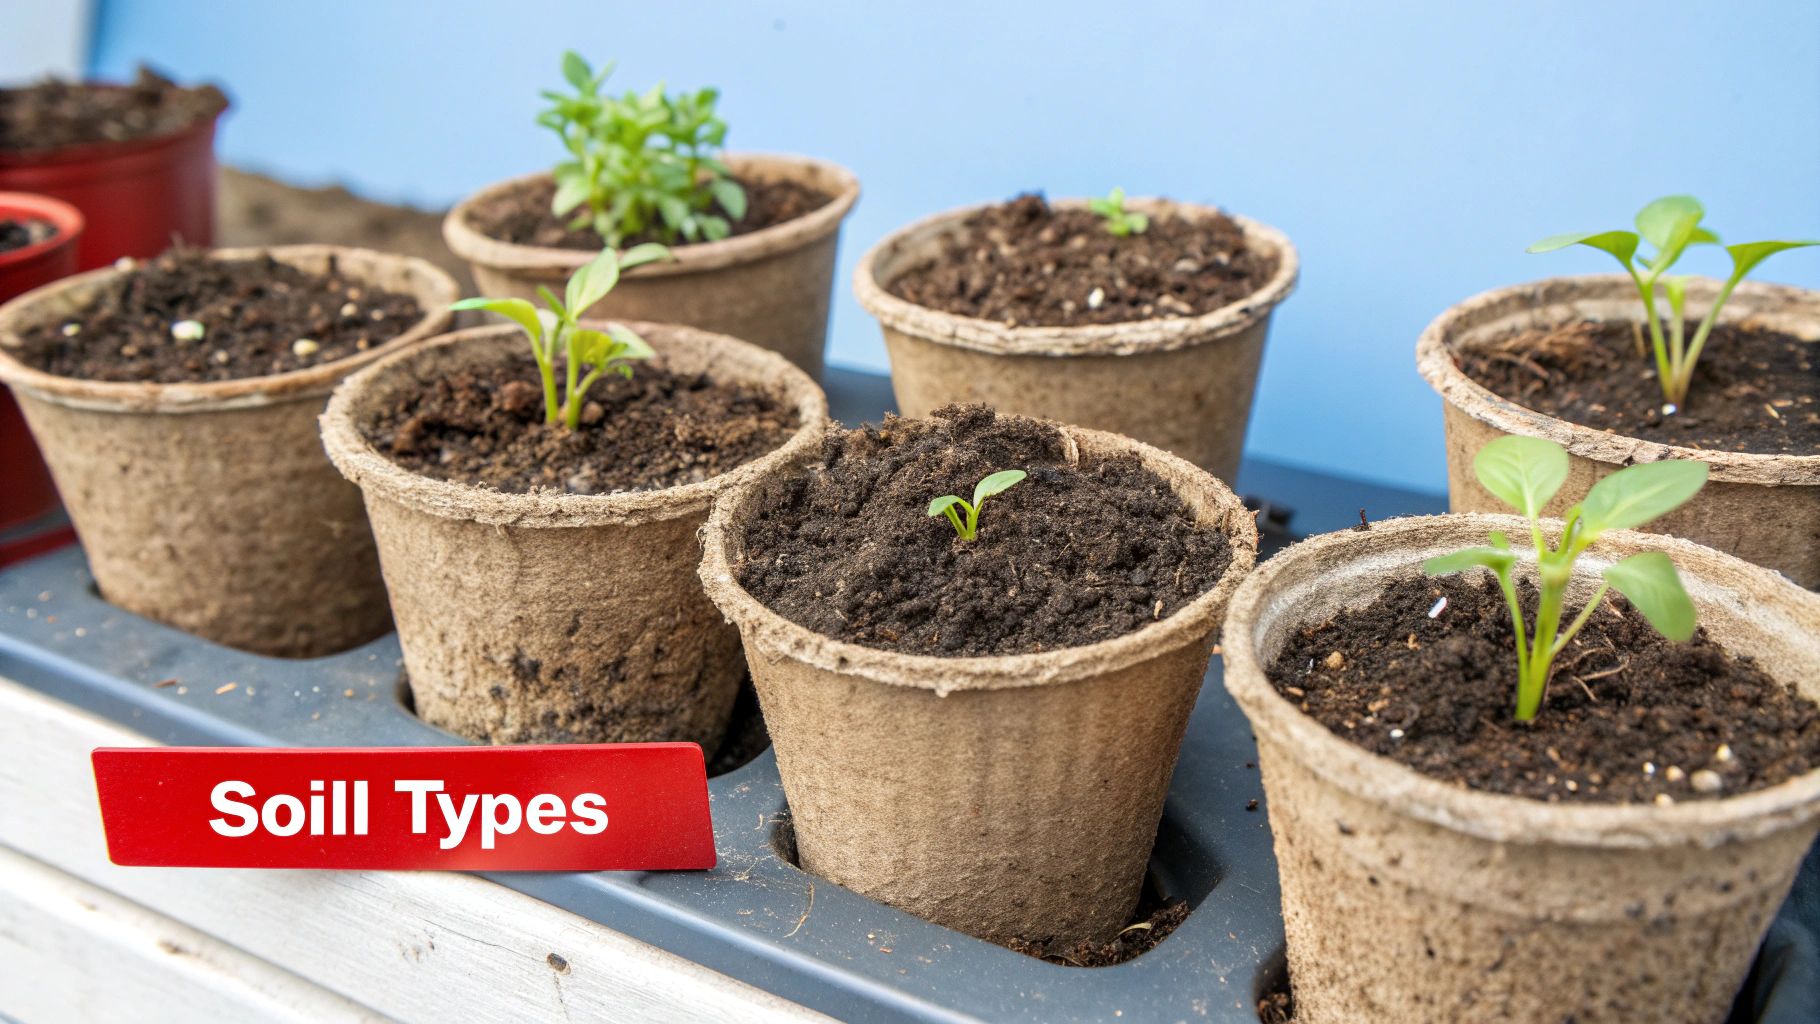
By comparing a plant in sandy, quick-draining soil to one in dense, water-retentive clay, students can directly see the results of proper aeration and nutrient access. This investigation brings soil science to life, demonstrating concepts pioneered by agricultural scientists like George Washington Carver and used today in everything from commercial farming to ecosystem restoration. It’s a perfect way to show that what happens below the surface is just as important as sunlight and water.
How to Set Up the Experiment
To begin, gather several identical pots, a single type of seed (beans or corn work well), and samples of different soils like sand, clay, and a high-quality loam or potting mix. Fill each pot with a different soil type, plant the seeds at the same depth, and place them in an area where they will receive equal sunlight. This setup isolates the soil as the primary variable influencing growth. For those looking for a more structured approach, various science fair project kits on playzusa.com can provide a great starting point.
Key Insight: The main challenge is standardizing variables beyond the soil itself. To ensure a fair test, all plants must receive the exact same amount of water and light. This focus on controlled variables is a cornerstone of the scientific method.
Actionable Tips for Success
- Create Controls: Always include a pot with a commercial potting mix as a control group to establish a baseline for healthy growth.
- Standardize Watering: Water each pot with the same volume of water. To be more precise, weigh the pots before and after watering to ensure each receives an identical amount.
- Analyze Your Soil: Before planting, have students document the texture and color of each soil. A simple "mason jar test" can also show the sand, silt, and clay composition.
- Ensure Proper Drainage: Make sure every container has drainage holes at the bottom to prevent roots from becoming waterlogged, which can skew the results, especially in dense clay soils.
5. Natural vs. Synthetic Fertilizers: A Growth Comparison
This vital experiment delves into the world of plant nutrition, making it one of the most relevant science projects on plants for understanding modern agriculture and sustainability. It directly compares how natural fertilizers, like compost or worm castings, affect plant growth versus manufactured synthetic fertilizers. The project highlights key differences in growth speed, plant health, and long-term soil vitality.
By observing plants fed with different nutrient sources, students can grasp complex topics like nutrient cycling and the environmental impact of farming practices. This experiment, famously explored in long-term studies by organizations like the Rodale Institute, provides a clear, hands-on lesson in the benefits and drawbacks of each approach, moving beyond simple growth to consider the health of the entire ecosystem.
How to Set Up the Experiment
You will need identical plants (tomatoes or leafy greens work well), pots, and a consistent soil base. Create at least three groups: one with natural fertilizer (like compost), one with a balanced synthetic fertilizer, and a crucial third group with no fertilizer at all to act as a control.
Key Insight: The primary goal is to compare the effects of the fertilizers, not just their volume. To do this, try to apply roughly equivalent amounts of key nutrients (like nitrogen) to the natural and synthetic groups, rather than just adding the same volume of fertilizer product.
The infographic below summarizes the core differences observed between these two fertilizer types, including their impact on growth rates, soil health, and cost.
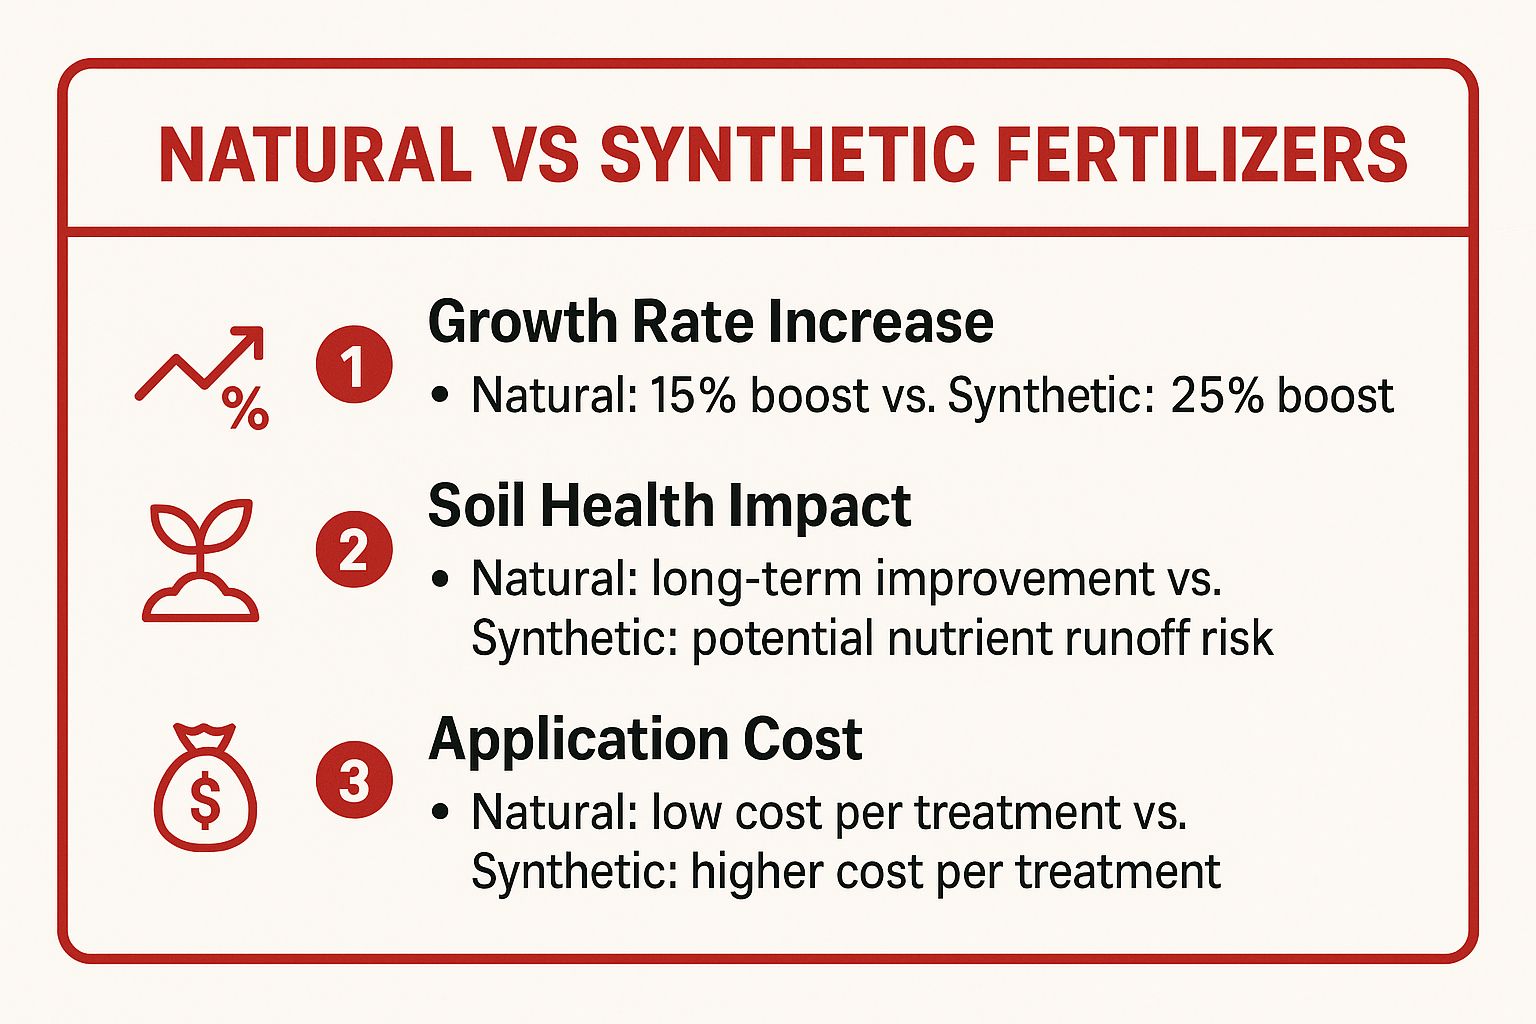
This comparison reveals that while synthetic options may offer a faster initial growth boost, natural fertilizers provide long-term benefits to soil health, creating a more sustainable growing environment. These concepts are foundational to many hands-on learning experiences and can be explored further in various STEM activities for elementary students.
Actionable Tips for Success
- Establish a Baseline: Test the soil's pH and nutrient levels before adding any fertilizers to understand your starting point.
- Include a Control: Always maintain an unfertilized group of plants to provide a clear baseline for measuring the impact of each fertilizer.
- Monitor for Stress: Watch for signs of over-fertilization, such as yellowing or "burned" leaf tips, especially in the synthetic fertilizer group.
- Document Growth: Measure plant height, count leaves, and photograph progress regularly. Note differences in color, size, and overall vitality.
6. Measuring a Plant's Transpiration Rate
This engaging experiment delves into the invisible process of transpiration, essentially how plants "breathe" and release water vapor. The core concept involves measuring the rate at which a plant loses water to the atmosphere under different environmental conditions, making it one of the most insightful science projects on plants for demonstrating key physiological processes. This project offers a direct look at how plants regulate their internal water balance in response to their surroundings.
By setting up controlled experiments, students can observe how factors like wind, light, and humidity affect the rate of water loss. For example, a plant exposed to a fan (simulating wind) will transpire more quickly than one in still air. This project vividly illustrates how plants are constantly interacting with and adapting to their environment, connecting directly to concepts like the water cycle and plant adaptations for survival.
How to Set Up the Experiment
You can measure transpiration using a simple plastic bag method or a more advanced potometer. For the bag method, securely seal a clear plastic bag over a leafy branch of a healthy plant. Over time, you will see water droplets collect inside the bag, which can be measured. For a potometer, you place a plant cutting into a water-filled tube and measure the water uptake over time, which directly correlates to transpiration loss.
Key Insight: The main challenge is isolating the variable you want to test. To accurately measure the effect of wind, for instance, the light intensity, temperature, and humidity must remain consistent between your control group and your test group.
Actionable Tips for Success
- Choose Wisely: Use plants with a large leaf surface area like geraniums, coleus, or sunflowers to get more dramatic and easily measurable results.
- Prevent Evaporation: To ensure you're only measuring water loss from the plant, seal the soil surface of potted plants with plastic wrap or a thin layer of petroleum jelly.
- Control Your Variables: Test one condition at a time. Use a fan for wind, a lamp for light intensity, or a humidifier/dehumidifier for humidity, always keeping a control plant in standard conditions.
- Document Everything: Record the amount of water lost or collected at regular intervals (e.g., every hour). Also, note the environmental conditions for each reading to draw clear conclusions.
7. Optimizing Seed Germination Conditions
This comprehensive experiment delves into the precise requirements for a seed to sprout, making it one of the more advanced science projects on plants. The core concept involves systematically testing how variables like temperature, moisture, and light impact the germination process. By manipulating these conditions, students can discover what makes a seed "wake up" and begin to grow.
This project moves beyond simply planting a seed and watching it grow; it teaches the science of dormancy, seed biology, and the environmental triggers that initiate life. It mirrors the work done by agricultural scientists and conservationists at institutions like the Svalbard Global Seed Vault, who must understand these mechanisms to preserve plant species. The experiment clearly demonstrates that a seed is a complex living organism with specific needs.
How to Set Up the Experiment
The easiest way to observe germination is with a "seed in a bag" setup. Place several seeds on a damp paper towel, slide it into a sealable plastic bag, and label it. Create multiple bags to test different variables: place one in a warm, sunny spot, another in a cool, dark refrigerator, and a third in a room-temperature location. You can also vary moisture levels, from slightly damp to very wet.
Key Insight: Statistical significance is crucial for this project. To get reliable data, you must test a larger number of seeds for each condition—at least 20 to 50 seeds per treatment group is recommended to draw meaningful conclusions about what works best.
Actionable Tips for Success
- Go Big: Use a large sample size for each variable you test. This will help ensure your results are not just due to chance.
- Use Controls: Always have a "control group" of seeds grown in what are considered ideal conditions. This gives you a baseline for comparison.
- Document Meticulously: Create a chart to log the number of seeds that have germinated in each group every day. Calculate the final germination percentage for each condition. For a deeper look into the growth process, you can explore how flowers grow from these beginnings.
- Try Advanced Techniques: For older students, introduce concepts like scarification (lightly scratching the seed coat) or stratification (cold treatment) for seeds that require these special conditions to break dormancy.
8. Allelopathy: Exploring Chemical Interactions Between Plants
This advanced experiment explores one of the more fascinating science projects on plants, introducing the concept of allelopathy. This is the process where one plant releases biochemicals that can inhibit or help the growth of another. This project uncovers the complex chemical warfare and cooperation happening unseen in the plant kingdom, demonstrating how plants compete for resources using more than just roots and leaves.
By creating extracts from allelopathic plants like black walnut or eucalyptus, students can test their effects on the germination of other seeds. This investigation vividly illustrates natural herbicide mechanisms and explains why certain plants, like the invasive garlic mustard, can dominate an ecosystem. It’s a brilliant way to explore plant ecology and biochemistry beyond basic growth needs.
How to Set Up the Experiment
You'll need a plant known for allelopathy (black walnut leaves, sunflower hulls, eucalyptus leaves) and fast-germinating test seeds (lettuce, radish). Create an aqueous extract by soaking the plant material in distilled water for 24-48 hours. Then, use this extract to water the test seeds in petri dishes or small pots, comparing their germination rate and growth against a control group watered only with distilled water.
Key Insight: The core of this experiment is isolating the chemical effects. To confirm that the results aren't due to other factors like pH, it's crucial to test the acidity of your extract and compare it to your distilled water control. True allelopathy is about the specific biochemicals, not just a change in soil conditions.
Actionable Tips for Success
- Choose a Potent Source: Black walnut leaves (containing juglone) and eucalyptus are famously allelopathic and yield strong, observable results.
- Test Concentrations: Create different dilutions of your extract (e.g., 100%, 50%, 25%) to see if the inhibitory effect is dose-dependent. Always include a 0% control group.
- Filter Your Extract: After soaking, filter the liquid through a coffee filter or cheesecloth to remove solid debris. This ensures you are testing the chemical compounds, not physical interference.
- Track Both Germination and Growth: Record how many seeds sprout (germination rate) and measure the root and shoot length of the seedlings (growth inhibition) for a complete picture.
Quick Comparison: Choosing Your Plant Science Project
| Experiment Title | Complexity & Time | Key Concept | Ideal Age Group | What You'll Discover |
|---|---|---|---|---|
| Light Conditions | Low / 2-4 weeks | Photosynthesis | Elementary | How light fuels plant life and affects appearance. |
| Different Liquids | Low / 1-3 weeks | Osmosis & pH | Elementary | Why clean water is crucial and how pollutants harm plants. |
| Phototropism | Medium / 1 week | Hormones (Auxins) | Middle School | How plants "see" and bend toward a light source. |
| Soil Composition | Medium / 3-5 weeks | Nutrients & Drainage | Middle School | Why the right soil is the foundation for a healthy plant. |
| Fertilizers | High / 4-6 weeks | Plant Nutrition | Middle/High School | The pros and cons of natural vs. chemical fertilizers. |
| Transpiration | Medium / 1-2 days | Water Cycle | Middle/High School | How plants "breathe" and release water into the air. |
| Seed Germination | Low / 1 week | Dormancy & Viability | All Ages | The exact conditions needed for a seed to sprout. |
| Allelopathy | High / 2-3 weeks | Chemical Ecology | High School | The hidden chemical warfare between different plants. |
Turn Today's Play into Tomorrow's Discoveries
You now have a full garden of ideas, from exploring how light guides a stem's growth to understanding the chemical conversations happening between neighboring plants. The eight detailed science projects on plants we've explored are more than just a way to spend an afternoon; they are foundational experiments that cultivate a deep, lasting appreciation for the natural world. Each project serves as a practical lesson in the scientific method, encouraging young minds to observe, hypothesize, test, and analyze.
Through these hands-on investigations, children aren't just learning facts about botany; they're developing critical thinking skills that will serve them for a lifetime. They see firsthand how variables like water quality, light exposure, and soil composition create tangible, measurable outcomes. This process transforms abstract concepts from textbooks into real, observable phenomena, making learning both memorable and impactful.
Key Takeaways from Your Botanical Journey
Recalling the experiments, several core principles stand out. We've seen how plants are not passive organisms but dynamic living things that actively respond to their environment.
- Adaptation is Key: Projects like the phototropism and gravitropism investigations demonstrate a plant's incredible ability to adapt its growth for survival, seeking out essential resources like light and anchoring itself securely.
- The Environment Matters: From the type of soil used to the liquid provided for hydration, the surrounding environment has a profound impact on a plant's health and vitality. The fertilizer and soil composition experiments make this connection crystal clear.
- Hidden Processes are Everywhere: Experiments measuring transpiration or observing allelopathy reveal the invisible, complex biological and chemical processes that are constantly at work, governing how plants function and interact.
The most important takeaway is that science is not confined to a sterile laboratory. It’s happening in your garden, on your windowsill, and in every park. These science projects on plants provide the perfect lens through which to view the world with a more curious and analytical eye.
Your Next Step: From Project to Passion
The journey of discovery doesn't have to end here. The true value of these projects lies in the curiosity they ignite. Encourage your young scientist to take the next step. What other variables could they test? Could they combine elements from different experiments, like testing different soil types under various light conditions?
Let these projects be a springboard for further questions. This is how a simple activity becomes a genuine passion for science. Don't let this newfound momentum wither. Choose the project that sparked the most interest, gather your materials, and begin the exciting process of growing knowledge, one seed at a time. The world is full of questions waiting to be answered, and it all starts with a little bit of soil, a seed, and an inquisitive mind.
Ready to take your hands-on learning to the next level? The award-winning kits from Playz are expertly designed to make complex science accessible and fun, turning your home into a thrilling laboratory. Explore our full range of STEM kits at Playz and discover how #KidsLearnBestThruPlayz.