

Welcome, future biologists and curious innovators! Are you ready to move beyond textbooks and dive into the vibrant, living world of biology? Science isn't just about memorizing facts; it's about asking questions, experimenting, and discovering the "why" behind the living world. This guide is your launchpad for a dozen exciting, hands-on biology science projects designed to spark curiosity and make learning unforgettable.
From extracting the very code of life from a strawberry to investigating the invisible world of microbes, each project is a complete blueprint for discovery. This listicle is packed with everything you need: clear objectives, simple materials lists, step-by-step instructions, and practical tips to take your experiments further. This hands-on method transforms abstract concepts into tangible, memorable experiences. For a deeper understanding of this educational approach, you might explore more about What Is Project Based Learning?.
Whether you're a student seeking a winning science fair idea, a teacher planning an engaging classroom unit, or a parent eager to foster a love for science at home, you'll find projects here that are both educational and incredibly fun. These activities cover a wide range of biological principles, including genetics, microbiology, botany, and ecology. Let's get our hands dirty and start exploring the wonders of life science together!
1. DNA Extraction from Strawberries
This classic experiment is one of the most popular biology science projects for a reason: it makes the abstract concept of DNA tangible. In under 30 minutes, you can extract visible, stringy strands of genetic material from a strawberry using simple household items. The process demonstrates fundamental principles of molecular biology in a straightforward and safe manner.
The experiment involves three core steps: breaking open the strawberry cells (cell lysis), separating DNA from proteins and other cellular components, and making the DNA visible (precipitation). By mashing the fruit and adding a solution of dish soap and salt, you break down the cell walls and membranes. The alcohol then causes the DNA to clump together, making it visible to the naked eye as a gooey, white substance.
Why It's a Great Project
- Visual Impact: Unlike many cellular biology concepts, this project produces a physical result you can see and touch, making it highly engaging for young learners.
- Accessibility: It requires low-cost materials typically found in any kitchen, such as salt, dish soap, and rubbing alcohol, making it perfect for classrooms and at-home learning.
- Scalability: The core concept is simple enough for elementary students, but it can be expanded into a more complex investigation for high schoolers, such as comparing DNA yields from different fruits.
Step-by-Step Guide
- Prepare the Strawberry: Place a ripe strawberry in a sealable plastic bag and mash it thoroughly for about two minutes.
- Create the Extraction Solution: In a separate cup, mix 2 teaspoons of dish soap, 1 teaspoon of salt, and 1/2 cup of water.
- Combine and Filter: Add 2 teaspoons of the extraction solution to the mashed strawberry, mix well, and then filter the mixture through a coffee filter into a clear glass.
- Precipitate the DNA: Tilt the glass and slowly pour an equal amount of cold isopropyl (rubbing) alcohol down the side. Do not mix.
- Observe: After a few minutes, you will see a white, stringy substance form in the alcohol layer. This is the strawberry’s DNA!
2. Bacterial Growth and Antibiotic Resistance Testing
This investigative project introduces students to the world of microbiology by having them culture bacteria and test the effectiveness of different antimicrobial substances. It provides a powerful, hands-on demonstration of how antibiotics work and illuminates the critical modern healthcare challenge of antibiotic resistance. This experiment moves beyond simple observation into quantitative analysis, making it an excellent bridge to more advanced scientific inquiry.

The core of the project involves preparing agar plates, swabbing them with a safe strain of bacteria (like non-pathogenic E. coli K-12), and placing small discs soaked in different substances (from household cleaners to natural oils) on the surface. After incubation, students measure the "zone of inhibition" around each disc—the clear area where bacteria could not grow. A larger zone indicates a more effective antimicrobial agent.
Why It's a Great Project
- Real-World Relevance: It directly connects to crucial public health topics like hygiene and the growing threat of antibiotic-resistant superbugs, making the science feel immediate and important.
- Quantitative Data: Unlike purely observational projects, this experiment requires precise measurement and data analysis, teaching students how to collect and interpret quantitative results.
- Investigative Freedom: Students can test a wide variety of substances, from commercial antibiotics to natural remedies like garlic or tea tree oil, fostering creativity and independent research.
Step-by-Step Guide
- Prepare Agar Plates: Following kit instructions or a standard protocol, prepare and pour sterile nutrient agar into petri dishes and let them solidify.
- Inoculate the Plates: Using a sterile cotton swab, evenly spread a liquid culture of a safe, non-pathogenic bacteria (e.g., Bacillus subtilis) across the entire surface of the agar.
- Apply Test Substances: Dip small, sterile paper discs into different test solutions (e.g., penicillin, dish soap, vinegar). Place the soaked discs, plus a control disc with just water, onto the inoculated agar.
- Incubate: Secure the lids with tape and place the petri dishes upside down in a warm, dark place (around 85-98°F or 30-37°C) for 24-48 hours.
- Analyze Results: Observe the plates without opening them. Measure the diameter of the clear zone of inhibition around each disc. A larger zone means the substance was more effective at killing bacteria. Properly dispose of all materials as biohazardous waste.
3. Plant Growth and Environmental Factor Investigation
This foundational project moves beyond simple observation into true experimental science, making it one of the most valuable biology science projects for teaching the scientific method. Students design an experiment to test how a specific environmental variable, such as light, water, or soil type, affects plant growth. It’s a long-term study that introduces concepts like variables, controls, and data analysis.
The core of the project is isolating a single variable to test. For example, a student might grow several groups of bean plants, giving each group the same amount of water, the same soil, and the same pot size, but exposing each group to a different color of light. By measuring growth over time, they can draw conclusions about which light wavelength is most effective for photosynthesis. This systematic approach is fundamental to scientific inquiry.
Why It's a Great Project
- Teaches Experimental Design: Students must learn to control all variables except the one being tested, a cornerstone of scientific research.
- Long-Term Data Collection: This project requires patience and diligence, teaching students to maintain detailed logs, measure consistently, and analyze data over weeks.
- Adaptable Complexity: It can be a simple project for elementary students (e.g., light vs. dark) or a complex investigation for high schoolers (e.g., testing the pH of water or nutrient concentrations).
Step-by-Step Guide
- Formulate a Question: Choose one variable to investigate. For example, "How does the amount of water affect the growth of a radish plant?"
- Set Up Control and Variable Groups: Prepare at least two groups of plants (using 3-5 plants per group is best for reliable data). The control group will receive normal conditions, while the experimental group(s) will have the variable changed.
- Establish Constants: Ensure all other conditions (soil type, pot size, light exposure, temperature) are identical for all plants.
- Observe and Measure: Create a data log. Every 1-2 days, record observations, measure plant height, count leaves, and take photographs.
- Analyze and Conclude: After a set period (e.g., 3-4 weeks), compile your data into charts or graphs. Analyze the results to determine if your hypothesis was supported. To discover more ways to design your experiment, you can learn more about science experiments with plants.
4. Enzyme Activity and Reaction Rate Investigation
This quintessential lab investigation brings biochemistry to life by exploring the power of enzymes—the biological catalysts that drive nearly every process in living organisms. Students can directly observe and measure how enzymes speed up chemical reactions, making this a cornerstone of many high school and introductory college biology curricula. It's a fantastic way to understand how biological systems function and respond to their environment.
The experiment typically focuses on a specific enzyme, like catalase from potatoes or amylase from saliva, and its corresponding substrate, like hydrogen peroxide or starch. By systematically changing one variable at a time—such as temperature, pH, or concentration—students can measure the reaction rate. This is often done by timing how long it takes for gas to be produced or for a color change to occur, providing a hands-on lesson in experimental design and data analysis.
Why It’s a Great Project
- Teaches Experimental Design: This project is a masterclass in the scientific method, requiring students to control variables, create replicates, and systematically collect quantitative data.
- Connects to Real-World Biology: It demonstrates fundamental principles that govern digestion, metabolism, and cellular function, making abstract biological concepts concrete and relevant.
- Adaptable Complexity: The core experiment can be simplified for younger students or expanded for advanced learners to include concepts like Michaelis-Menten kinetics and calculating reaction velocities.
Step-by-Step Guide
- Prepare the Enzyme Source: For a catalase experiment, finely dice a small piece of potato or liver. For amylase, collect a small saliva sample.
- Set Up the Substrate: Place hydrogen peroxide (for catalase) or a starch solution (for amylase) into a test tube or beaker.
- Introduce the Variable: Adjust the condition you are testing. For example, place the test tube in a water bath of a specific temperature (e.g., 10°C, 25°C, 40°C).
- Initiate the Reaction: Add the enzyme source to the substrate and immediately start a timer.
- Measure and Record: Measure the rate of reaction. For catalase, you can measure the height of the foam produced in one minute. For amylase, you can time how long it takes for a drop of the solution to no longer turn an iodine indicator blue-black. Graph your results to find the optimal conditions.
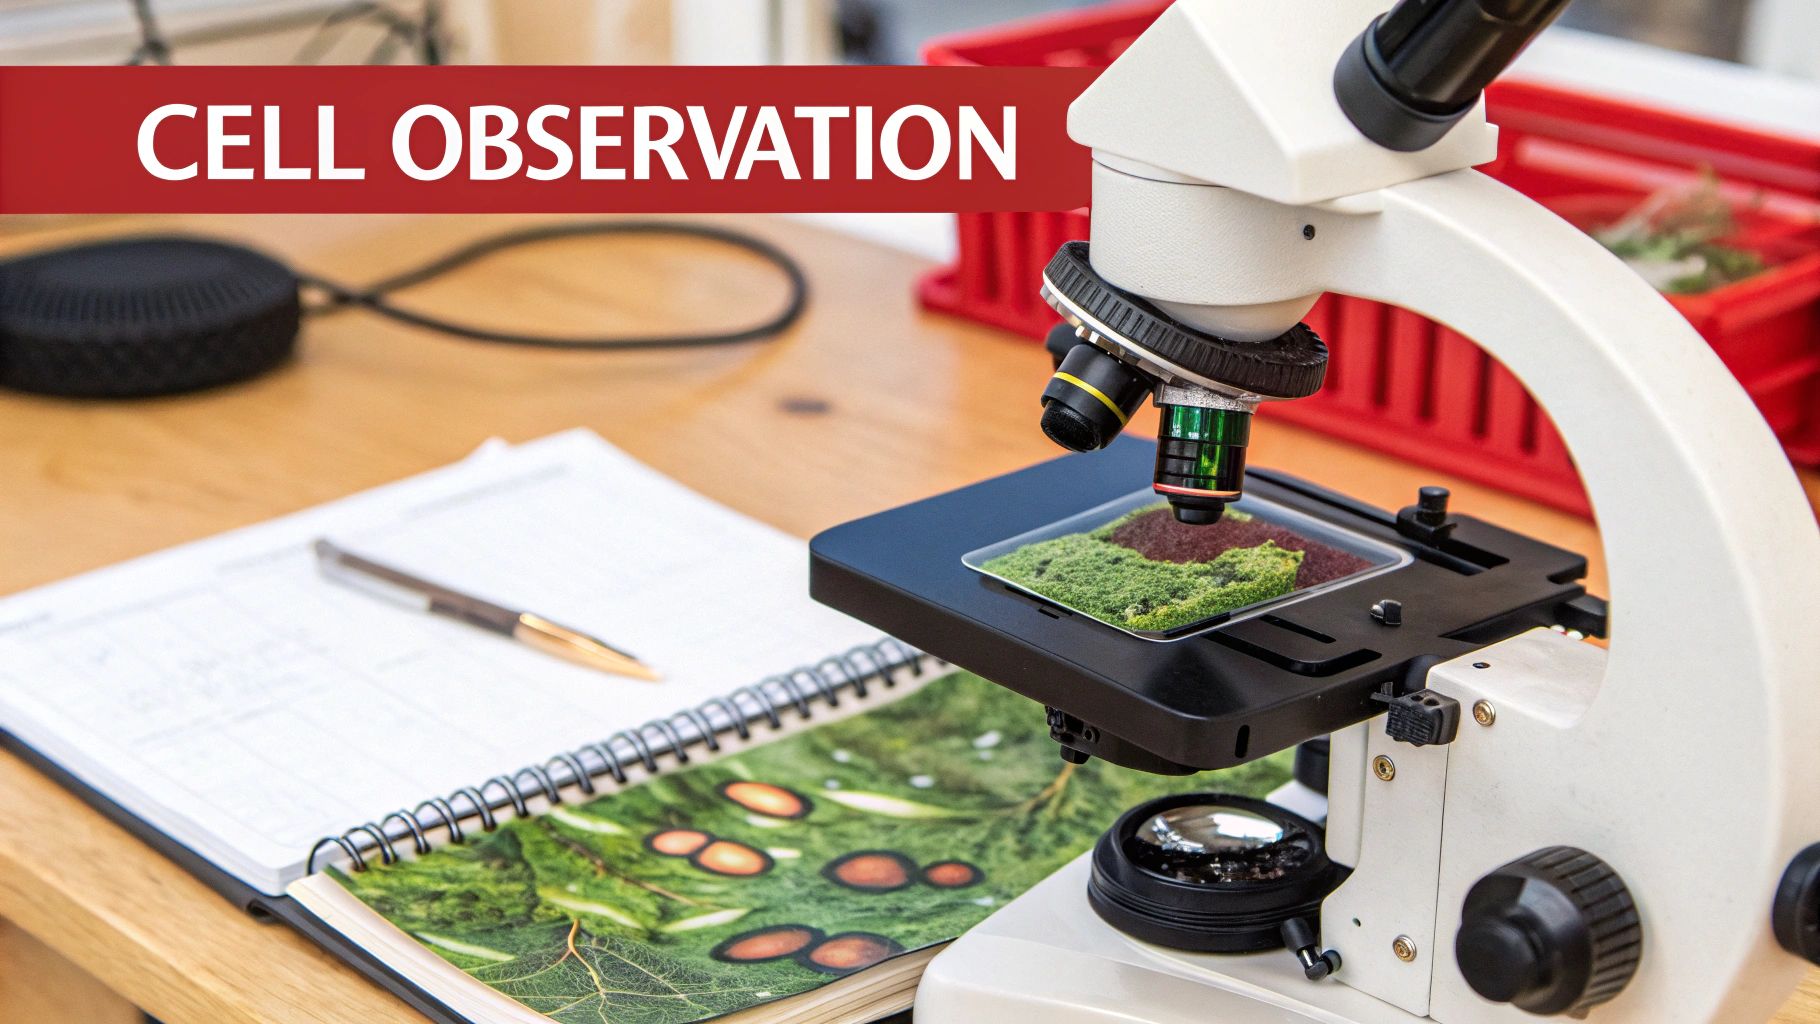
5. Microscopy and Cell Observation Project
This fundamental biology project invites students to explore the invisible world of cells, the basic building blocks of life. By using a microscope, students can prepare their own slides or examine pre-made ones to observe the intricate structures of plant and animal cells, as well as microorganisms. It’s a project that transforms the abstract diagrams in textbooks into a vibrant, observable reality.
The core of this project involves mastering the use of a compound microscope to view specimens. Students learn to prepare wet mounts, use stains like methylene blue to make cell components visible, and document their findings through detailed sketches or digital images. This hands-on process makes concepts like the cell wall, nucleus, and cytoplasm tangible and memorable.
Why It's a Great Project
- Develops Technical Skills: Students gain practical experience with essential laboratory equipment and techniques, such as slide preparation and proper focusing.
- Reinforces Core Concepts: Directly observing differences between plant cells (e.g., onion skin) and animal cells (e.g., cheek swabs) solidifies understanding of cellular biology.
- Encourages Discovery: Examining pond water can reveal a hidden ecosystem of fascinating microorganisms, sparking curiosity and a sense of scientific discovery. A great source for this can be found in our list of science fair project kits.
Step-by-Step Guide (for Onion Cells)
- Prepare the Slide: Place a single drop of water on a clean microscope slide.
- Get the Sample: Peel a very thin, transparent layer of membrane from the inside of an onion slice and place it flat in the drop of water.
- Stain the Cells: Add one drop of methylene blue or iodine solution to the onion membrane and carefully lower a coverslip over it at an angle to avoid air bubbles.
- Observe Under Low Power: Place the slide on the microscope stage and use the coarse focus knob to bring the cells into view under the lowest power objective.
- Observe Under High Power: Switch to the high power objective and use only the fine focus knob to see the cell walls, nuclei, and cytoplasm in greater detail.
6. Genetic Inheritance and Punnett Square Verification with Organisms
This advanced project brings Mendelian genetics to life by having students breed fast-reproducing organisms to observe real-world inheritance patterns. It moves beyond theoretical concepts, allowing students to make predictions using Punnett squares and then compare those predictions to actual offspring ratios. This hands-on process provides tangible proof of genetic principles and introduces fundamental techniques used in genetics research.
The core of the experiment involves selecting parent organisms with distinct traits, breeding them, and then carefully documenting the phenotypes of their offspring across one or more generations. By using organisms like Drosophila fruit flies, which have a short life cycle, students can witness inheritance patterns unfold in just a few weeks. The observed ratios of traits are then compared to the expected ratios calculated from Punnett squares, providing a powerful lesson in probability and genetics.
Why It’s a Great Project
- Concrete Results: It makes abstract genetic concepts like dominant and recessive alleles visible through the observable traits of living organisms.
- Introduces Scientific Modeling: Students practice creating a hypothesis (Punnett square prediction) and testing it against empirical data, a cornerstone of the scientific method.
- Scalability: While a classic high school and university-level project, the basic principles of observing inherited traits can be simplified for younger students using fast-growing plants like peas.
Step-by-Step Guide
- Obtain and Culture Organisms: Acquire a starting population of organisms with known genotypes, such as wild-type and vestigial-winged Drosophila fruit flies. Prepare a proper habitat and food medium.
- Set Up the Cross: Isolate virgin females and place them in a vial with males of the desired phenotype. Label this the P (parental) generation.
- Collect and Analyze F1 Generation: After about two weeks, remove the P generation flies and allow their offspring (the F1 generation) to emerge. Observe and record their phenotypes.
- Set Up the F1 Cross: Cross the F1 generation males and females to produce the F2 generation.
- Analyze F2 and Compare: Count the phenotypes of the F2 offspring. Compare the observed ratio to the ratio you predicted with a Punnett square. For a more advanced analysis, this is an excellent opportunity to perform a chi-square test.
7. Water Quality Testing and Bioindication
This immersive project turns students into environmental scientists, allowing them to assess the health of local ecosystems by analyzing water samples. It bridges chemistry and biology by examining both the physical properties of water and the living organisms within it. This type of hands-on fieldwork provides a powerful real-world context for learning about pollution, environmental stewardship, and the delicate balance of aquatic habitats.
The project involves two main components: chemical testing and bioindication. Students collect water from a local pond, stream, or river and use testing kits to measure parameters like pH, dissolved oxygen, and turbidity. Simultaneously, they can identify aquatic macroinvertebrates (insects, snails, worms) present in the water, as the diversity and type of these organisms serve as excellent biological indicators of water quality.
Why It's a Great Project
- Real-World Application: It directly connects classroom concepts to the local environment, showing students how science is used to monitor and protect community resources.
- Interdisciplinary Learning: The project blends biology, chemistry, and ecology, providing a comprehensive understanding of ecosystem health.
- Data-Driven Investigation: Students practice collecting, recording, and analyzing data, which are fundamental skills for any scientific inquiry. When conducting water quality testing, a crucial aspect of bioindication involves learning how to test water for bacteria to get a complete picture of potential pollutants.
Step-by-Step Guide
- Choose Locations: Select at least two different local water sources (e.g., a clear stream and a murky pond) for comparison.
- Collect Samples: Following safety protocols, carefully collect water samples from each location in clean, sealed containers. Note the date, time, and weather conditions.
- Perform Chemical Tests: Use a water quality test kit to measure and record the pH, temperature, turbidity, and dissolved oxygen levels for each sample.
- Identify Bioindicators: Use a small net to collect macroinvertebrates from the water. Use an identification key to classify them and record the species found.
- Analyze and Conclude: Compare the chemical test results and the types of organisms found at each site. Organisms sensitive to pollution will only be found in healthier water.
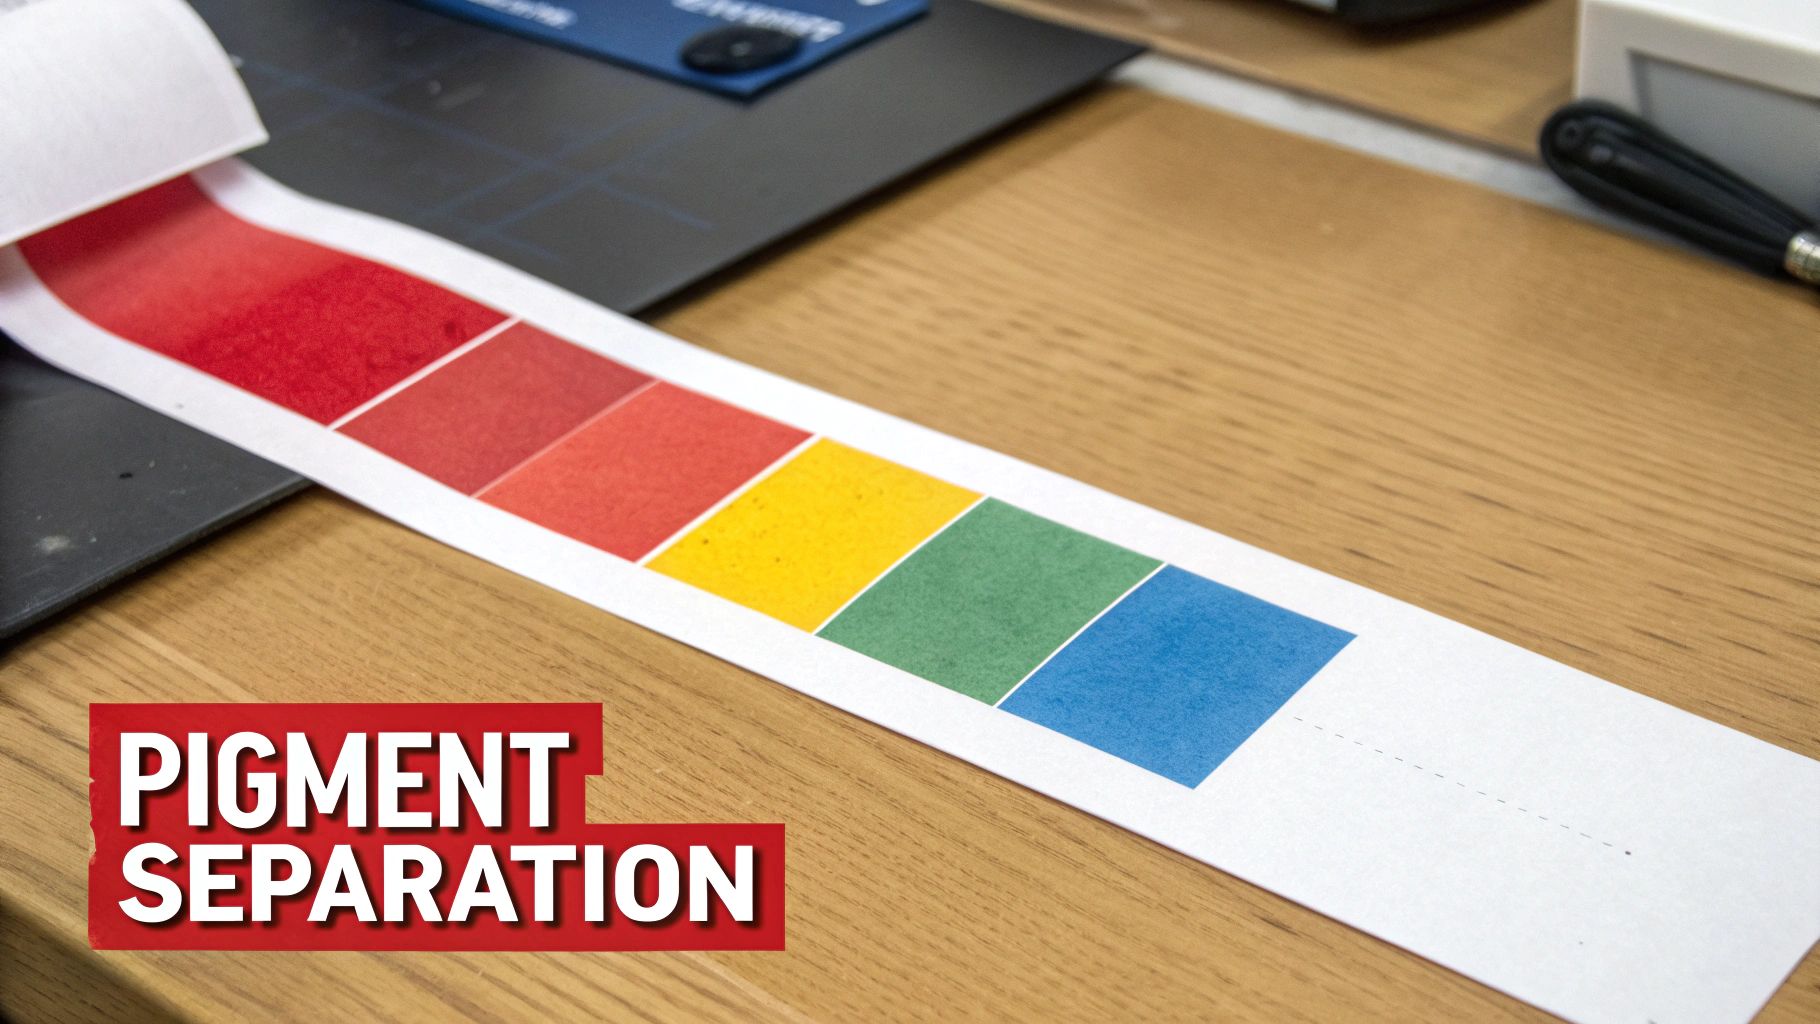
8. Chromatography for Photosynthetic Pigment Separation
This insightful experiment uncovers the hidden colors within green leaves, making it one of the most visually striking biology science projects. It uses paper chromatography to separate the various pigments plants use for photosynthesis, such as chlorophylls and carotenoids. This process elegantly demonstrates that a leaf's green color is actually a blend of multiple pigments, each playing a role in absorbing light energy.
The project involves crushing leaves to extract their pigments, applying the pigment extract to filter paper, and then dipping the paper into a solvent. As the solvent travels up the paper, it carries the pigments with it at different rates based on their size and solubility, separating them into distinct colorful bands.
Why It's a Great Project
- Reveals the Invisible: This project makes an abstract concept tangible by visually revealing the different pigments that are normally masked by dominant green chlorophyll.
- Connects to Real-World Biology: It provides a clear, hands-on demonstration of a core concept in photosynthesis and plant physiology, often used in AP Biology courses.
- Introduces Analytical Techniques: Students learn a fundamental separation technique used in scientific laboratories, providing a foundation for more advanced chemistry and biology topics.
Step-by-Step Guide
- Extract the Pigments: Finely chop or grind a dark green leaf (like spinach) and place it in a mortar or small bowl with a small amount of rubbing alcohol. Crush the leaf material until the alcohol turns dark green.
- Prepare the Chromatogram: Cut a strip of filter paper or coffee filter. Use a pencil to draw a faint line about 2 cm from the bottom.
- Apply the Pigment: Using a toothpick or capillary tube, apply a small, concentrated dot of the green pigment extract onto the center of the pencil line. Let it dry and repeat 10-15 times to build up a concentrated spot.
- Run the Separation: Pour a small amount (about 1 cm deep) of rubbing alcohol (or a specialized solvent) into a tall glass or beaker. Carefully suspend the paper strip so the bottom edge dips into the solvent but the pigment dot remains above the liquid level.
- Observe and Analyze: Cover the container to let the solvent ascend the paper. As it does, you will see the pigments separate into bands of different colors (e.g., green, yellow, orange).
9. Fermentation and Cellular Respiration Investigation
This engaging project delves into the fundamental processes of how organisms produce energy, either with oxygen (aerobic respiration) or without it (anaerobic respiration, or fermentation). It allows students to observe a biological process in action by measuring its byproducts, making an invisible cellular activity visible and quantifiable. This experiment is a cornerstone of many biology curricula, bridging the gap between textbook concepts and real-world applications like baking and brewing.
The core of the investigation involves using yeast, a single-celled fungus, to demonstrate fermentation. When yeast is provided with a sugar source (like glucose) and deprived of oxygen, it breaks down the sugar to produce energy, releasing carbon dioxide (CO2) and ethanol as byproducts. By manipulating variables such as sugar concentration, temperature, or the type of sugar, students can measure how these changes affect the rate of CO2 production, offering a direct look at metabolic activity.
Why It's a Great Project
- Dynamic and Measurable: Unlike static models, this project shows a biological process unfolding in real-time. Measuring CO2 production with a balloon or gas sensor provides clear, quantitative data for analysis.
- Connects to Real-World Science: The principles of fermentation are essential in food production (bread, yogurt, beer) and biotechnology, making this a highly relevant and practical lesson.
- Adaptable Complexity: The experiment can be simplified for middle school students to just observe CO2 production or expanded for AP Biology labs to calculate reaction rates and test different metabolic substrates.
Step-by-Step Guide
- Activate the Yeast: In a small bottle or flask, dissolve one packet of active dry yeast in 1/2 cup of warm water (around 105-115°F or 40-46°C).
- Add a Sugar Source: Stir in 2 teaspoons of sugar until it is fully dissolved. This will serve as the food for the yeast.
- Set Up for Gas Collection: Quickly stretch the opening of a small balloon over the mouth of the bottle to create an airtight seal.
- Observe Fermentation: Place the bottle in a warm spot. Over the next 30-60 minutes, you will see bubbles forming in the solution as the yeast ferments the sugar.
- Measure the Results: The balloon will inflate as it fills with the CO2 gas produced during fermentation. You can measure the balloon's circumference over time to quantify the reaction rate.
10. Population Dynamics and Predator-Prey Modeling
This advanced project brings ecological principles to life by allowing students to observe the complex interactions between populations. It shifts the focus from individual organisms to the larger forces that govern entire ecosystems, such as resource availability, competition, and predation. Students can model these dynamics using live organisms or computer simulations to understand how populations change over time.
The experiment involves setting up a controlled environment with a starting population, such as yeast or bean beetles. Students then track the population's growth, noting changes in numbers as resources are consumed or a predator is introduced. This hands-on approach helps illustrate abstract concepts like exponential growth, carrying capacity, and the cyclical nature of predator-prey relationships, forming the basis for many fascinating science fair topics.
Why It's a Great Project
- Conceptual Depth: It provides a tangible way to explore high-level ecological concepts that are foundational to environmental science and biology.
- Data Analysis: This project is heavily data-driven, teaching students critical skills in collection, graphing, and interpreting complex data sets to draw scientific conclusions.
- Real-World Relevance: It connects directly to real-world ecological issues, such as wildlife management, conservation efforts, and understanding environmental impacts.
Step-by-Step Guide
- Establish a Habitat: Create a controlled environment for your chosen organism (e.g., a yeast culture in a flask with nutrient broth or bean beetles in a container with beans).
- Introduce the Population: Add a starting number of organisms to the habitat and establish a baseline count.
- Monitor and Record: At regular intervals (daily for yeast, weekly for beetles), count the population and record the data in a logbook.
- Graph the Data: Plot the population size against time on a graph to visualize the growth curve. Observe patterns like exponential growth and stabilization at carrying capacity.
- Introduce a Variable (Optional): Once the initial population is stable, introduce a predator (like Daphnia preying on algae) or change a variable (like food supply) and continue monitoring to observe the effects.
11. Protein Structure and Function Using Molecular Models
This hands-on project demystifies the complex world of proteins by tasking students with building 3D models. It brilliantly connects the abstract concept of molecular structure to the tangible reality of biological function, showing how a protein's shape dictates its job in the body. This is a cornerstone of biochemistry and one of the most insightful biology science projects for advanced students.
The core of this project is translation: taking the linear sequence of amino acids and folding it into a complex, functional shape. Using materials like pipe cleaners, beads, or modeling clay, students can model primary, secondary, tertiary, and quaternary protein structures. This visual and tactile process helps explain how enzymes bind to substrates, how antibodies recognize antigens, and what happens when a protein misfolds.
Why It's a Great Project
- Conceptual Clarity: Building a physical model makes it easier to understand difficult concepts like alpha-helices, beta-sheets, and the importance of an enzyme's active site.
- Creative Engagement: Students can use a variety of materials and colors, allowing for creativity while reinforcing scientific principles like amino acid properties (hydrophobic vs. hydrophilic).
- Advanced Applications: The project scales perfectly for high school and AP Biology, where students can investigate the effects of mutations or environmental factors like heat and pH on protein structure.
Step-by-Step Guide
- Select a Protein: Choose a relatively simple protein to model, such as myoglobin or insulin. Research its amino acid sequence and known structure.
- Assign Materials: Use different colored beads or pipe cleaners to represent different types of amino acids (e.g., red for acidic, blue for basic).
- Build the Primary Structure: String the "amino acids" together in the correct sequence to form a polypeptide chain.
- Fold the Model: Carefully bend and fold the chain to represent secondary structures (coils for alpha-helices, zig-zags for beta-sheets) and then the overall tertiary structure.
- Analyze and Explain: Use the finished model to explain its function. For an enzyme, demonstrate how a substrate fits into its active site. For a challenge, model how a single amino acid mutation could change its final shape.
12. Disease Vector and Pathogen Transmission Investigation
This project delves into the fascinating and critical field of epidemiology by exploring how diseases spread through vectors like mosquitoes and ticks. It transforms abstract public health concepts into a hands-on investigation, allowing students to understand the lifecycle of disease carriers and model how pathogens move through a population. This project connects biology directly to community health and real-world science.
The core of this investigation involves either studying a biological vector or simulating disease transmission. Students might observe the mosquito lifecycle in a controlled environment to identify vulnerable stages for control, or they could use a simple simulation with colored liquids or software to see how quickly a "pathogen" can spread. This provides a powerful, tangible lesson on the importance of hygiene, vaccination, and vector control.
Why It's a Great Project
- Real-World Relevance: It connects classroom learning to current events and public health issues, such as Zika, Lyme disease, or even pandemic modeling.
- Interdisciplinary Learning: This project easily integrates concepts from biology, math (statistics and modeling), social studies (public health policy), and technology.
- Critical Thinking: Students must analyze data, identify patterns, and draw conclusions about disease prevention, promoting higher-level scientific reasoning.
Step-by-Step Guide
- Choose a Focus: Decide whether to study a biological vector (like local mosquitoes) or model transmission. For modeling, you can designate one student as "infected" and simulate interactions (e.g., handshakes) to track spread.
- Gather Data: For a vector study, safely collect samples (e.g., stagnant water with larvae) or research local tick species. For a simulation, create rules for "transmission" and run several trials.
- Analyze and Record: Photograph and document the lifecycle stages of the vector. For a simulation, chart the spread of the "disease" over time, creating an epidemic curve.
- Draw Conclusions: Analyze your findings. What factors increase disease spread? What are the most effective points for intervention (e.g., eliminating mosquito breeding grounds)?
- Present Findings: Create a public awareness poster, a presentation, or a report detailing your investigation and proposing prevention strategies for your community.
12 Biology Projects Comparison
| Project | Complexity 🔄 | Resources & Safety ⚡ | Expected Outcomes 📊 | Ideal Use Cases 💡 | Key Advantages ⭐ |
|---|---|---|---|---|---|
| DNA Extraction from Strawberries | Low — simple, stepwise protocol | Minimal household supplies (dish soap, salt, isopropyl); safe for K–college | Visible DNA precipitate in ~30 min; demonstration-level (no sequencing) | Intro genetics demos, science fairs, K–12 classrooms | Very low cost, immediate visual engagement |
| Bacterial Growth & Antibiotic Resistance Testing | Medium–High — requires sterile technique | Agar, incubator, sterile tools; biohazard disposal and approvals needed | Clear inhibition zones in 24–48 h; quantitative measurements possible | Microbiology units, public-health investigations, advanced HS/university | Real-world relevance; measurable, extendable experiments |
| Plant Growth & Environmental Factor Investigation | Medium — long-term control and replication | Pots, soil, lights, water; low biosafety but consistent care required | Quantitative growth data over weeks; strong statistical/experimental learning | Ecology/agriculture lessons, long-term student projects | Flexible, low cost, sustained student engagement |
| Enzyme Activity & Reaction Rate Investigation | Medium — precision in timing, temp, pH | Buffers, water baths, basic glassware; spectrophotometer optional; safe common enzymes | Rapid kinetic data (minutes); suitable for Michaelis–Menten analysis | Biochemistry/kinetics lessons, AP/IB labs, university practicals | Fast results, excellent for quantitative analysis |
| Microscopy & Cell Observation Project | Low–Medium — learn instrument and prep skills | Compound microscopes, slides, stains; moderate equipment cost | Visual evidence of cells and structures; photo documentation possible | Fundamental biology labs, cell-structure demonstrations | Foundational skillset; highly visual and versatile |
| Genetic Inheritance & Punnett Square Verification | Medium — breeding and multi-generation tracking | Live organisms (Drosophila, plants); containment and husbandry required | Empirical phenotype ratios across generations; statistical comparison to Mendel | Genetics units, multi-week projects, science fairs | Direct demonstration of inheritance; engaging hands-on genetics |
| Water Quality Testing & Bioindication | Low–Medium — field sampling + lab tests | Field kits (pH, DO), PPE, sample containers; field safety considerations | Comparative chemical and macroinvertebrate data; community-relevant results | Environmental science, citizen monitoring, community projects | Real-world impact, promotes stewardship and local data |
| Chromatography for Pigment Separation | Low — simple technique with solvent handling | Paper, solvents (ventilation required), plant material; solvent safety important | Colorful pigment separation in 30–60 min; Rf calculations for ID | Photosynthesis labs, AP/IB practicals, quick demonstrations | Visually striking, quick, teaches analytical technique |
| Fermentation & Cellular Respiration Investigation | Low–Medium — simple setups but monitoring needed | Yeast, sugar, temperature control, gas collection apparatus; odor considerations | CO2/ethanol production measurable in hours–days; metabolic comparisons | Cellular respiration labs, fermentation industry demos | Fast observable results, relevant to industry and physiology |
| Population Dynamics & Predator–Prey Modeling | Medium–High — long-term monitoring and modeling | Organisms/enclosures, counting tools, modeling software; time commitment | Time-series population data for modeling (exponential/logistic) | Ecology courses, modeling projects, citizen science | Rich datasets for analysis; teaches modeling and statistics |
| Protein Structure & Function Using Molecular Models | Low–Medium — conceptual and/or software-based | Craft materials or molecular software (PyMOL); low safety concerns | 3D understanding of structure–function relationships; qualitative insights | Biochemistry intros, spatial-reasoning activities, museum exhibits | Highly engaging, links structure to function, adaptable formats |
| Disease Vector & Pathogen Transmission Investigation | Medium–High — field/lab collection and modeling | Field gear, containment, permits, PPE; strict biosafety and legal considerations | Lifecycle observations or epidemiological simulation outputs; public-health insights | Public health education, epidemiology modeling, community outreach | Highly relevant to current health issues; interdisciplinary impact |
Your Scientific Journey Starts Now
You've just explored twelve captivating biology science projects, each offering a unique window into the intricate world of life. From extracting the code of life in a strawberry's DNA to modeling the complex dance of predator and prey, these experiments are gateways to profound understanding and hands-on discovery.
The true value of these projects lies not just in the final outcome, but in the scientific process itself. Every observation, every measurement, and every unexpected result builds a foundation of critical thinking, problem-solving, and analytical skills. This is the essence of scientific inquiry: asking questions, forming hypotheses, testing them rigorously, and learning from every step.
Key Takeaways: From Classroom to Real-World Impact
Let's distill the most crucial insights from our exploration of these biology science projects. Mastering these concepts isn't just about acing a test; it's about understanding the world on a much deeper level.
- Biology is Tangible: Concepts like DNA, enzymes, and cellular respiration can seem abstract. Projects like extracting DNA with household items or observing fermentation in a bottle make these invisible processes visible and tangible, cementing understanding in a way that textbooks alone cannot.
- The Scientific Method is a Life Skill: Each project is a mini-masterclass in the scientific method. Learning to control variables in a plant growth experiment or to accurately measure results in a water quality test teaches a systematic approach to problem-solving that is invaluable in any field.
- Small-Scale Experiments Reflect Big-Picture Concepts: Observing bacterial growth in a petri dish provides a direct, observable lesson in exponential growth and antibiotic resistance—issues of global health significance. Separating plant pigments illuminates the fundamental process of photosynthesis, which powers nearly all life on Earth.
Engaging with these hands-on activities develops a genuine appreciation for the complexity and elegance of biological systems. They teach that science isn't a static collection of facts, but a dynamic, ongoing process of discovery.
Actionable Next Steps: Turning Inspiration into Action
The journey doesn't end here. The most important step is the one you take next. Choose a project that genuinely sparked your curiosity and commit to trying it.
- Select Your Starting Point: Did the idea of investigating the unseen world with a microscope excite you? Or were you more intrigued by the ecological implications of water quality testing? Pick one project to begin.
- Gather Your Tools: Review the materials list. Many of these biology science projects can be started with common household items, making science approachable for everyone.
- Embrace the Process: Remember, the goal is learning, not perfection. If an experiment doesn't work the first time, don't get discouraged. This is an opportunity to troubleshoot and learn where the real science happens.
- Extend and Explore: Once you've completed a project, challenge yourself with the extension activities. How can you take it a step further? What new questions has the experiment raised? This is how a simple project evolves into a true scientific investigation.
Embarking on these biology science projects fosters not only a love for science but also a set of skills that will last a lifetime. The world is your laboratory, filled with endless questions waiting to be answered. Now, it's time to put on your safety goggles and start discovering.
Ready to take the guesswork out of gathering supplies? The experiments and principles explored here are the bedrock of what we do at Playz, where we believe that #KidsLearnBestThruPlayz. Explore our award-winning Playz science kits, which provide all the tools and clear, colorful instructions you need to turn these fascinating biology science projects into an unforgettable adventure.