

Ever wondered how plants breathe, eat, or decide which way to grow? The world of botany is full of incredible secrets waiting to be discovered—not in a dusty textbook, but right in your own home or classroom. This guide is your ticket to hands-on exploration, transforming abstract biological concepts into tangible, visible wonders. We've compiled a list of fascinating and accessible science experiments with plants designed for every skill level.
These projects will show you how to:
- Observe the hidden power of a germinating seed.
- Explore how roots defy gravity.
- Understand the critical role of light and nutrients.
Each experiment offers a clear, step-by-step path to discovery, making complex plant science understandable and exciting. Whether you're a parent seeking enriching family activities, an educator planning a memorable lesson, or simply a curious mind, these activities demystify the mechanics of the plant kingdom. Prepare to get your hands dirty and watch fundamental scientific principles come to life. This collection of science experiments with plants will provide you with the tools to cultivate not just plants, but a deeper appreciation for the intricate systems that sustain life on our planet.
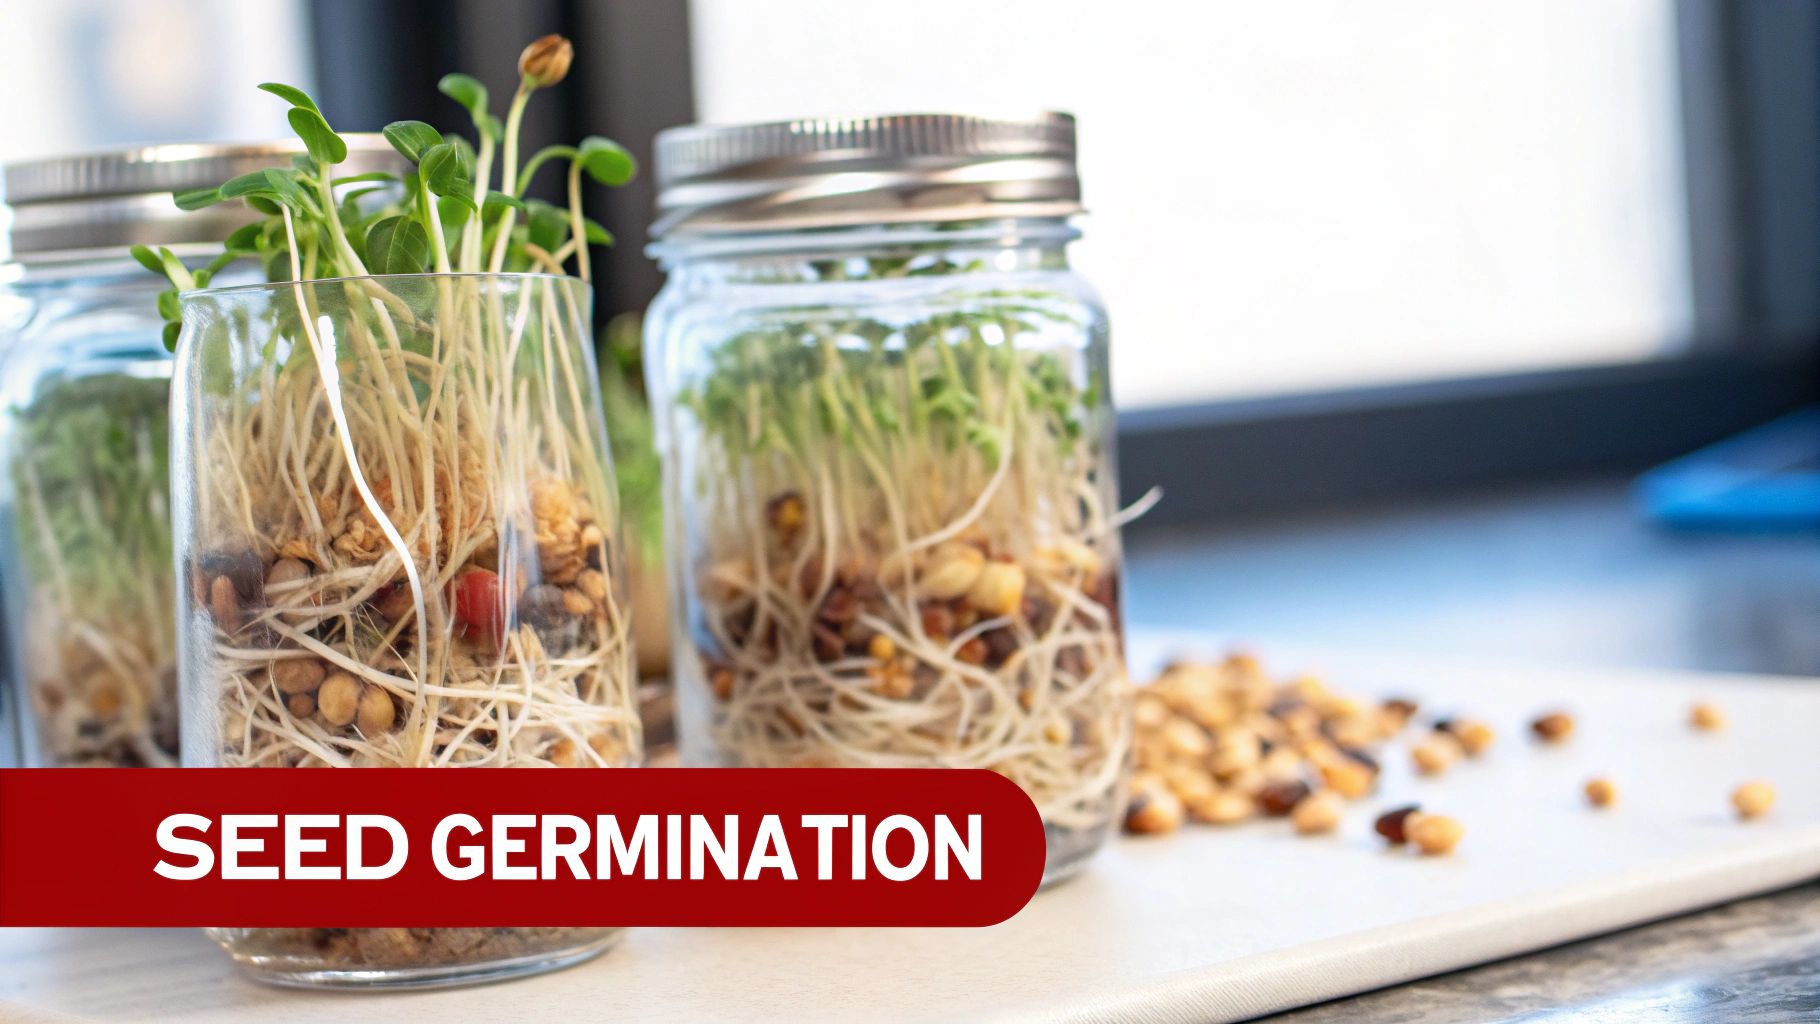
1. Seed Germination Experiments: Unlocking Life
Understanding how seeds sprout is a foundational concept in biology and one of the most rewarding science experiments with plants. This classic activity involves planting seeds under various conditions to observe how environmental factors like light, water, temperature, and soil type influence their ability to germinate and grow. It’s an excellent way to introduce the scientific method, encouraging you to form a hypothesis, test variables, and document your observations.
From elementary school classrooms demonstrating basic plant needs to advanced NASA research on growing food in space, germination experiments are universal. For a deeper dive into similar projects, you can find more inspiration for seed germination experiments on playzusa.com.
### Actionable Insights for Success
To ensure a successful and insightful experiment, it's crucial to isolate one variable at a time. This means if you're testing the effect of light, all other conditions (water, temperature, soil) must remain identical across all your test groups.
- Use Fast-Growing Seeds: Bean seeds are an excellent choice as they germinate quickly and produce visible changes daily.
- Maintain Consistent Moisture: Keep the soil damp but not waterlogged. A common mistake is overwatering, which can cause seeds to rot.
- Label Everything: Clearly label each container with the variable being tested (e.g., "No Light," "Cold Temperature").
- Document Diligently: Take daily photos and notes to track progress, creating a visual timeline of growth.
- Observe the Roots: Use clear plastic cups or glass jars to make root development visible without disturbing the plant.
2. Plant Tissue Culture: Cloning in a Jar
Plant tissue culture is an advanced technique involving the growth of plant cells or tissues in a sterile, controlled laboratory environment using a nutrient-rich medium. This method, also known as micropropagation, allows for the creation of numerous genetically identical plants from a single parent tissue. It’s a powerful experiment that demonstrates principles of cellular biology, genetics, and biotechnology, showing how a whole plant can be regenerated from just a small piece.
This biotechnology is crucial in modern agriculture and conservation. It's used for the mass production of orchids, to rescue endangered plant species, and to develop disease-resistant potato varieties. For advanced techniques like these, maintaining a sterile environment is critical, often requiring the use of biological safety cabinets to prevent contamination.
### Actionable Insights for Success
Success in tissue culture hinges on maintaining a completely sterile environment and providing the correct nutrient and hormone balance. Unlike other science experiments with plants, this requires precision and specialized materials.
- Sterilize Everything: Use an autoclave or pressure cooker to sterilize your nutrient media (like Murashige and Skoog medium) and tools.
- Work Cleanly: Perform all transfers in a laminar flow hood or a homemade still air box. Sanitize surfaces and hands with 70% ethanol.
- Balance Hormones: Adjust the auxin-to-cytokinin ratio in your media to steer development. Higher auxin promotes root growth, while higher cytokinin encourages shoot formation.
- Maintain Ideal Conditions: Keep cultures at a stable temperature (around 20-25°C) with a consistent light cycle, typically 16 hours of light per day.
- Start with Easy Plants: Carrots, African violets, and tobacco plants are often recommended for beginners due to their high success rates in culture.
3. Photosynthesis and Pigment Analysis: Painting with Leaves
Investigating photosynthesis offers a direct look into how plants convert light into energy—the process that powers most life on Earth. These science experiments with plants can range from measuring oxygen output to separating the vibrant pigments hidden within a leaf. Through an activity called paper chromatography, you can reveal the different molecules responsible for capturing light, such as chlorophylls (green), xanthophylls (yellow), and carotenes (orange), demonstrating why leaves change color in the fall.
This type of analysis is fundamental in university labs studying plant efficiency and even in advanced applications like NASA's research on growing plants in space. Early experiments by scientists like Jan Ingenhousz laid the groundwork for our understanding, and today, these principles are a staple of modern biology education. Observing photosynthesis in action provides tangible proof of a plant's vital role in producing the oxygen we breathe.
### Actionable Insights for Success
For accurate and visually striking results, it is important to control your variables and handle materials carefully. When measuring oxygen, ensuring the plant has time to acclimate to its new environment before you begin collecting data is key.
- Choose the Right Plant: Use an aquatic plant like Elodea for oxygen production experiments, as the bubbles it releases are easy to count.
- Use Fresh Leaves: For pigment analysis, select fresh, dark green leaves to ensure a high concentration of pigments for a clear separation.
- Control the Environment: Maintain a stable temperature (ideally 20-25°C) and vary only one factor at a time, such as light intensity.
- Be Patient: Allow your plant at least 15-20 minutes to acclimate to the light source before you start measuring its oxygen output.
- Proper Chromatography Setup: Mark your starting line about 1-2 cm from the bottom of the chromatography paper and ensure the solvent level stays below this line.
4. Plant Tissue Staining and Microscopy: A Look Inside
Venturing into the microscopic world of plants reveals the intricate structures that support life. This experiment involves preparing thin slices of plant tissue, staining them with dyes, and observing the detailed cellular organization under a microscope. It’s a fascinating way to visualize the building blocks of a plant, such as cell walls, chloroplasts, and vascular tissues, bringing textbook diagrams to life.
This technique is fundamental in many scientific fields. It's a standard procedure in university botany labs, used in plant pathology research to identify diseases, and even adapted for educational programs at botanical gardens. By learning this method, students gain a deeper appreciation for the complexity hidden within a simple leaf or stem, making it one of the more advanced science experiments with plants.
### Actionable Insights for Success
Proper sample preparation is key to seeing clear cellular structures. The goal is to create a tissue slice thin enough for light to pass through under the microscope. Precision and patience are essential for getting a good view.
- Select Young Tissues: Use tissues from young, actively growing parts of the plant, as their cells are easier to section and stain.
- Firm the Sample: Soaking the tissue in 70% ethanol for a few minutes can make it firmer and easier to slice thinly.
- Cut Thin Sections: Aim for transverse sections that are extremely thin (0.1-0.5mm). A very sharp blade is necessary for this.
- Practice Sectioning: Before using delicate samples, practice your free-hand sectioning technique on something common like a carrot or potato.
- Stain Properly: Allow the stain to sit on the tissue for the recommended time, typically 2-5 minutes, to ensure cells absorb the dye adequately.
- Mount Carefully: Use a cover slip to flatten the sample in a drop of mounting media or water on the slide, avoiding air bubbles.
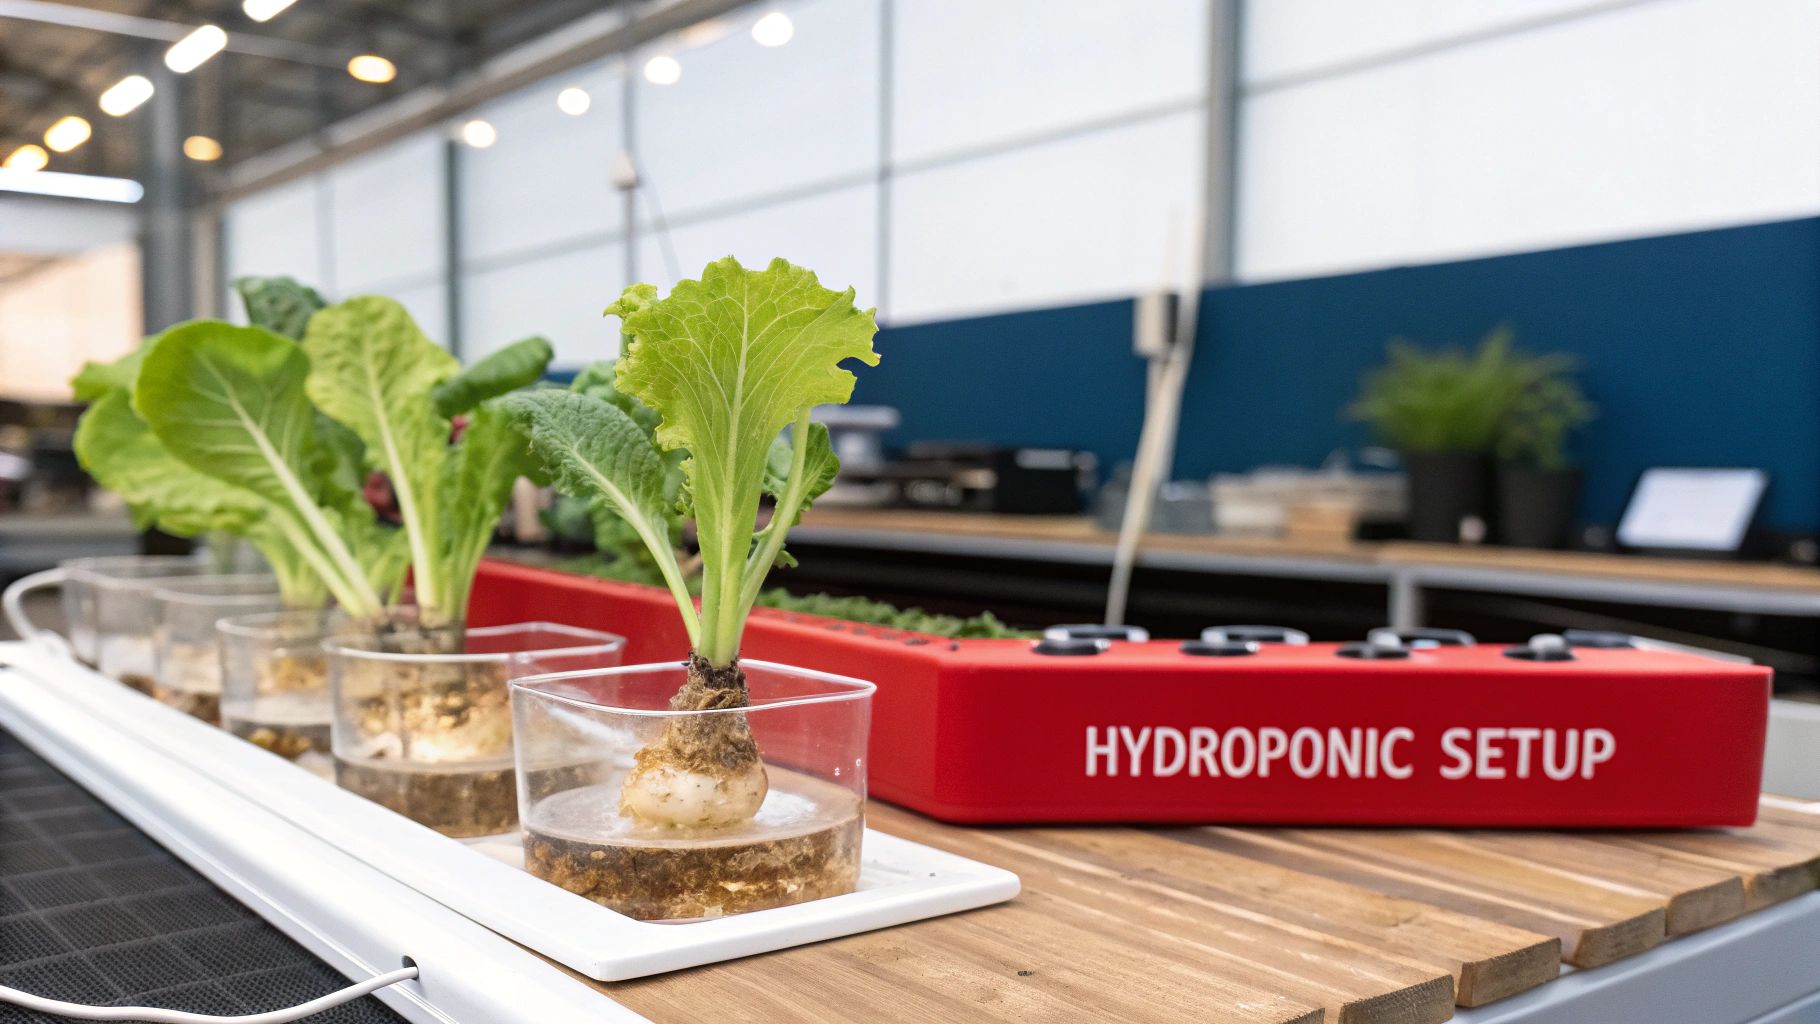
5. Hydroponics and Aquaponics: Farming Without Soil
Exploring hydroponics offers a futuristic glimpse into agriculture and is one of the most innovative science experiments with plants. This method involves growing plants in a nutrient-rich water solution without any soil. A related system, aquaponics, creates a symbiotic ecosystem by combining fish farming with hydroponics, where fish waste provides natural fertilizer for the plants. These experiments powerfully demonstrate concepts of plant nutrition, symbiotic relationships, and sustainable farming.
This soil-less technology is not just for classrooms; it's used by NASA to research growing food in space and by commercial vertical farms like AeroFarms to feed growing urban populations. The principles are scalable, making it a fascinating project for any aspiring scientist. For guided projects, you can explore various science fair project kits that simplify the setup.
### Actionable Insights for Success
Building a small-scale system is easier than it sounds, especially with simple designs like Deep Water Culture (DWC). Success hinges on maintaining a balanced environment for the plant roots.
- Monitor Water Quality: Regularly check the pH (ideal range is 5.5-6.5) and electrical conductivity (EC) to ensure nutrient levels are optimal.
- Use Complete Nutrients: Purchase a balanced hydroponic nutrient solution that contains all the essential macro and micronutrients plants need to thrive.
- Ensure Proper Aeration: Use an air stone and pump to oxygenate the water, which is crucial for preventing root rot and promoting healthy growth.
- Choose Fast-Growing Plants: Start with crops like lettuce, herbs, or even fast-maturing tomato varieties to see results quickly.
- Document Everything: Keep a detailed log of water quality measurements, plant growth rates, and any adjustments you make to the system.
6. Root Growth and Gravitropism: Defying Gravity
Investigating how roots respond to gravity, a phenomenon known as gravitropism, is a fascinating way to explore plant biology. This experiment demonstrates how plants orient themselves, ensuring roots grow downward to find water and nutrients, regardless of how a seed is planted. It’s a powerful visual for teaching about plant hormones like auxins, which regulate these directional growth responses, making it a cornerstone of many science experiments with plants.
This classic experiment has a rich history, dating back to Charles Darwin's work in "The Power of Movement in Plants." Today, its principles are studied everywhere from middle school classrooms to NASA space stations investigating plant growth in microgravity. To explore a wider range of similar engaging activities, you can find more science experiments for kids on playzusa.com.
### Actionable Insights for Success
To observe gravitropism clearly, it's essential to eliminate other environmental cues, especially light, which can cause roots to grow away from it (phototropism). Creating a controlled setup allows you to isolate gravity's effect on root direction.
- Create a Viewing Window: Place seeds at different angles on a wet paper towel inside a clear plastic bag or jar. Seal it to maintain moisture.
- Eliminate Light: Keep the setup in a dark environment, like a cabinet or box, to ensure gravity is the primary directional influence.
- Document Growth: Observe and sketch the root growth daily. Use a marker on the outside of the container to trace the root’s path.
- Establish a Control: Have one setup where the seeds are planted in a normal, upright position to serve as a baseline for comparison.
- Measure the Angles: For a more advanced study, use a protractor to measure the angle of the root’s curve as it reorients itself downward.
7. Plant Growth Response to Light: A Rainbow of Results
Exploring how plants respond to different colors of light is a fascinating experiment that delves into the complex science of photosynthesis. This investigation involves growing plants under various colored lights (such as red, blue, and green) to observe how different light wavelengths impact growth rate, overall plant shape, and biomass. It provides a vivid demonstration that not all light is created equal when it comes to plant development, highlighting the crucial role of specific spectra.
This principle is at the core of modern agricultural technology. NASA researches optimal light recipes to grow crops in space, while vertical farming companies engineer specific LED light combinations to maximize yield. This experiment brings high-tech agricultural science into a manageable format, making it one of the most visually striking science experiments with plants you can conduct. If this topic sparks your interest, you can see a great example of a science fair project on playzusa.com to get more ideas.
### Actionable Insights for Success
To get accurate results, control all variables other than the light color. This means ensuring each plant receives the same amount of water, the same soil, and is kept at a consistent temperature. The only difference should be the color of the light it grows under.
- Use Full-Spectrum and Colored Lights: Use a regular white or full-spectrum grow light as your control group and colored LED lights for your experimental groups.
- Maintain a Consistent Photoperiod: Keep the light cycle consistent for all plants, typically 16 hours of light followed by 8 hours of darkness.
- Document Morphological Changes: Beyond just height, take notes on leaf color, stem thickness, and the distance between leaf nodes.
- Measure Growth Systematically: Measure plant height weekly. At the end of the experiment, you can measure biomass (dry weight is most accurate) for a quantitative comparison.
- Graph Your Results: Create simple graphs to visually compare the growth rates and final biomass of plants under different light treatments.
8. Plant Hormone Application: Masters of Manipulation
Exploring how plant hormones regulate growth offers a more advanced but fascinating science experiment with plants. This investigation involves applying specific hormones, like auxins or gibberellins, to plants and observing the resulting changes in development. It’s a powerful way to demonstrate how these chemical messengers control everything from root formation and stem elongation to flowering and fruit development.
This type of experiment mirrors professional practices in agriculture and horticulture. Commercial growers use rooting hormones (auxins) for plant propagation, while farmers may apply gibberellins to produce larger, seedless grapes. This hands-on project gives students a direct look into the biochemical processes that drive plant life, connecting classroom concepts to real-world applications in biology and biotechnology.
### Actionable Insights for Success
For a successful hormone experiment, precision and control are key. You must carefully manage hormone concentrations and application methods while maintaining a non-treated control group for comparison.
- Use Commercial Rooting Hormone: The easiest way to start is with a rooting hormone powder, an auxin available at garden centers. Apply it to the cut end of a plant stem before planting.
- Establish a Control Group: Always have identical plants that do not receive any hormone treatment. This is crucial for proving that any observed changes are due to the hormone itself.
- Target Specific Areas: Apply hormones precisely to the intended tissue, such as the shoot tip, a lateral bud, or the cut base of a stem, to observe localized effects.
- Document with Photos: Take clear, daily or weekly photos of both the control and experimental plants side-by-side to create a compelling visual record of the growth response.
- Maintain Consistent Conditions: Ensure all plants, both treated and control, receive the same amount of light, water, and are kept at the same temperature to isolate the hormone as the only variable.
9. Plant Nutrient Deficiency: A Plant Detective Story
Understanding plant nutrition goes beyond just water and sunlight. This experiment delves into the essential micronutrients and macronutrients plants need to thrive by intentionally creating and correcting deficiencies. Students grow plants in controlled media, each lacking a specific nutrient like nitrogen, phosphorus, or potassium, to observe the resulting symptoms. This hands-on investigation makes it one of the more advanced and visually impactful science experiments with plants.
This method directly mirrors real-world agricultural science, where experts diagnose crop issues based on visual cues. Greenhouse managers and hydroponic farm operators all use these principles to optimize plant health and yield. By identifying symptoms like yellowing leaves (chlorosis) or stunted growth, you can learn to "read" what a plant needs.
### Actionable Insights for Success
Success in this experiment depends on isolating nutrient variables. Using a sterile, inert medium like sand or perlite is key, as it contains no pre-existing nutrients that could interfere with your results.
- Prepare Nutrient Solutions: Create a "complete" nutrient solution and several others, each omitting one target nutrient (e.g., one without nitrogen, one without phosphorus).
- Use Distilled Water: Tap water can contain minerals, so always use distilled or deionized water for mixing solutions and watering plants.
- Establish a Control Group: Always grow at least one plant with the complete nutrient solution to serve as a healthy baseline for comparison.
- Document Symptoms Systematically: Take weekly photos from the same angle and create a chart to record changes, such as leaf color, size, and stem strength. When exploring advanced methods for correcting plant nutrient deficiencies, understanding vermicomposting as a way to create 'garden gold' offers exciting possibilities for creating rich, natural fertilizers.
- Observe Recovery: Once clear deficiency symptoms appear, apply the complete nutrient solution to the deprived plants and document how they recover over time.
10. Plant Propagation: Making More Plants for Free
Exploring how to create new plants from existing ones is a fascinating and practical science experiment with plants. This process, known as vegetative propagation, demonstrates a plant's incredible ability to regenerate through asexual reproduction. By taking cuttings from stems, leaves, or roots, or by dividing or layering plants, students can observe the development of entirely new individuals that are genetically identical to the parent.
This fundamental horticultural skill is used globally, from commercial nurseries cloning ornamental plants to smallholder farmers multiplying vital crops like sweet potatoes. Conservation programs even use these techniques to save endangered species. Understanding this aspect of plant life offers a deeper appreciation for the complex processes behind how flowers and plants grow and reproduce.
### Actionable Insights for Success
Success in propagation hinges on providing the right conditions for the new cutting or division to develop roots. Maintaining a sterile environment and high humidity is key to preventing disease and dehydration.
- Use Sterile Tools: Always use sharp, clean scissors or a knife to make precise cuts and prevent infection.
- Apply Rooting Hormone: Increase your success rate significantly by dipping the cut end of a stem or leaf into rooting hormone powder before planting.
- Create a Humid Environment: Cover cuttings with a clear plastic bag or dome to trap moisture, which is crucial for root development.
- Choose the Right Medium: Use a well-draining, sterile mix like perlite, sand, or coco coir, which provides aeration and moisture without becoming waterlogged.
- Be Patient: Check for root growth after a few weeks by giving the cutting a gentle tug. If you feel resistance, roots have formed.
- Document Everything: Keep a log of which methods and plant types have the highest success rates, turning your gardening into a true scientific study.
Comparison of 10 Plant Science Experiments
| Item | Implementation Complexity 🔄 | Resource Requirements ⚡ | Expected Outcomes ⭐ | Results / Impact 📊 | Ideal Use Cases & Tips 💡 |
|---|---|---|---|---|---|
| Seed Germination Experiments | Low 🔄 | Minimal materials; low cost ⚡ | Clear germination rates & early growth; foundational biology ⭐⭐⭐ | Quick, repeatable visual data (3–14 days) 📊 | Intro classes/home labs; use beans, label and photograph daily |
| Plant Tissue Culture & Micropropagation | Very high 🔄🔄🔄 | Specialized lab (laminar hood, autoclave, media); high cost | Clonal plant production; disease-free stock; biotech concepts ⭐⭐⭐⭐ | High impact for mass propagation and research (2–4+ weeks) 📊 | Advanced courses/research; use MS medium and strict sterile technique |
| Photosynthesis & Pigment Analysis | Medium 🔄🔄 | Low–moderate (chromatography supplies, sensors) ⚡ | Quantified O2 production; pigment separation and ID ⭐⭐⭐ | Visual and quantitative results; adaptable complexity (minutes–hours) 📊 | Middle–university; use Elodea, fresh leaves, ventilate solvents |
| Plant Tissue Staining & Microscopy | Medium 🔄🔄 | Microscope, slides, stains; low–moderate cost ⚡ | Direct cellular anatomy observations; microscopy skills ⭐⭐⭐ | Produces teachable permanent slides; reveals internal structure 📊 | Anatomy labs; section young tissue, practice staining and mounting |
| Hydroponics & Aquaponics System Setup | Medium–High 🔄🔄🔄 | Moderate–high (pumps, nutrients, electricity); variable cost ⚡ | Soil-free growth, faster cycles; systems ecology and engineering skills ⭐⭐⭐⭐ | Scalable sustainability applications; long-term monitoring required 📊 | Long-term projects/urban farming; start DWC/NFT, monitor pH/EC regularly |
| Root Growth & Gravitropism Experiments | Low–Medium 🔄🔄 | Minimal (seeds, containers, paper towels) ⚡ | Observable directional root responses; auxin concept demonstration ⭐⭐ | Clear behavioral data in short time (3–7 days) 📊 | Intro physiology; keep setups dark to avoid phototropism, sketch daily |
| Plant Growth Response to Light Wavelength | Medium 🔄🔄 | Moderate (LEDs/filters, controlled light) ⚡ | Morphology, biomass and photoreceptor response data; agricultural relevance ⭐⭐⭐ | Measurable growth metrics over weeks (4–8 weeks); industry-applicable 📊 | Horticulture/LED research; use adjustable spectra, maintain photoperiod |
| Plant Hormone Application & Growth Response | Medium 🔄🔄 | Moderate (hormone solutions, controls); some reagents costly ⚡ | Specific developmental changes; dose–response learning ⭐⭐⭐ | Demonstrates hormonal regulation; applicable to propagation/agri 📊 | Advanced HS/uni labs; use proper concentrations and controls, document timing |
| Nutrient Deficiency Identification & Correction | Medium 🔄🔄 | Low–moderate (nutrient solutions, inert media) ⚡ | Distinct visual deficiency symptoms and recovery patterns ⭐⭐⭐ | Strong applied diagnostic skills; relevant to crop management (2–4+ weeks) 📊 | Agronomy/greenhouse labs; use sterile medium, photograph weekly, correct after symptoms |
| Plant Propagation Techniques (Cuttings, Division, Layering) | Low–Medium 🔄🔄 | Minimal (tools, rooting medium, hormones optional) ⚡ | New plants via vegetative methods; practical horticulture skills ⭐⭐⭐ | High practical value for nurseries and home propagation (2–8+ weeks) 📊 | Hands-on horticulture; use sterile tools, apply rooting hormone, maintain humidity |
From Seedling to Scientist: Your Key Takeaways
You've now explored a fascinating spectrum of botanical investigations, moving far beyond simply watering a houseplant. From coaxing life from a dormant seed and analyzing the vibrant pigments that capture sunlight, to setting up a soil-free hydroponics system, these ten science experiments with plants are more than just projects; they are gateways to understanding the intricate biological processes that underpin life on Earth.
The journey through these experiments has illuminated core scientific principles in a tangible way. You didn't just read about photosynthesis; you witnessed its evidence by separating chlorophyll and carotenoids. This hands-on approach transforms abstract concepts into unforgettable experiences, cementing knowledge far more effectively than passive learning.
Key Learnings from Your Botanical Journey
A central theme connecting all these activities is the power of observation and controlled testing. The most profound discoveries often begin with a simple question: "What will happen if...?"
- You've practiced systematic testing: By isolating variables in experiments like hormone application or light exposure, you've learned to conduct controlled tests to achieve clear results.
- You've developed critical thinking skills: Diagnosing a plant's needs based on visual cues or troubleshooting a hydroponics setup hones your ability to analyze problems and devise solutions.
- You've seen the unseen: Through microscopy and tissue staining, you've peered into the cellular world, revealing the hidden structures that give plants their form and function.
Taking Your Botanical Skills to the Next Level
Your botanical adventure doesn't have to end here. The skills you've developed are not just for isolated experiments; they are practical tools for gardening, environmental science, and even future scientific careers. The key is to keep asking questions and to never stop experimenting.
What happens if you combine hydroponics with a specific light wavelength? Can you use your propagation skills to save a rare local plant species? Use these projects as a foundation to design your own science experiments with plants. Let your curiosity guide you. Challenge the variables, combine the techniques, and document your findings. Every observation, whether it confirms your hypothesis or surprises you completely, is a valuable piece of the scientific puzzle. You have cultivated more than just plants; you have cultivated the mind of a scientist.
Ready to turn your curiosity into creation? The hands-on fun doesn't have to stop here. Check out the innovative STEM kits from Playz to find your next great scientific adventure, designed to make complex science accessible and incredibly fun. Discover your next experiment today at Playz