


A simple rubber band car converts elastic potential energy into motion and can be built in under 30 minutes with basic materials like wood and straws. A practical design uses a 6-inch balsa wood chassis, a 1×1-inch notch, straw axle guides, wheels, axles, and a rubber band.
You've probably seen the familiar scene: a child proudly presents a colorful car, gives the rear axle a twist, and watches the vehicle spin in a tight circle instead of crossing the floor. The problem usually isn't creativity. It's alignment, friction, weight, or a rubber band that can't grip the axle.
Learning how to make a rubber band car successfully means treating the build as an engineering test, not just a craft. Build a simple version first, observe what fails, change one feature at a time, and measure what happens.
Understanding the Physics of a Rubber Band Car
A rubber band car has a simple power system: twist the band around the rear axle and it stores elastic potential energy. Release the axle, and the band unwinds, turning the axle and wheels. Friction at the axle, wheel contact with the floor, and wheel grip determine how much of that stored energy becomes forward motion. TeachEngineering's rubber band car lesson uses the same energy-transfer principle in a structured engineering activity.
The working sequence is straightforward:
- Wind the band: Twisting the band stores energy.
- Release the axle: The band unwinds and rotates the axle.
- Move the car: The wheels transfer that rotation to the floor.
The test begins when the car fails to travel as expected. More winding can increase available energy, but it can also make the wheels slip, pull the car off line, or overload a weak axle. Rubbing guides, a bent axle, wheel wobble, excess mass, and poor band contact each waste energy at a different point. Change one factor at a time so you can identify the actual cause.
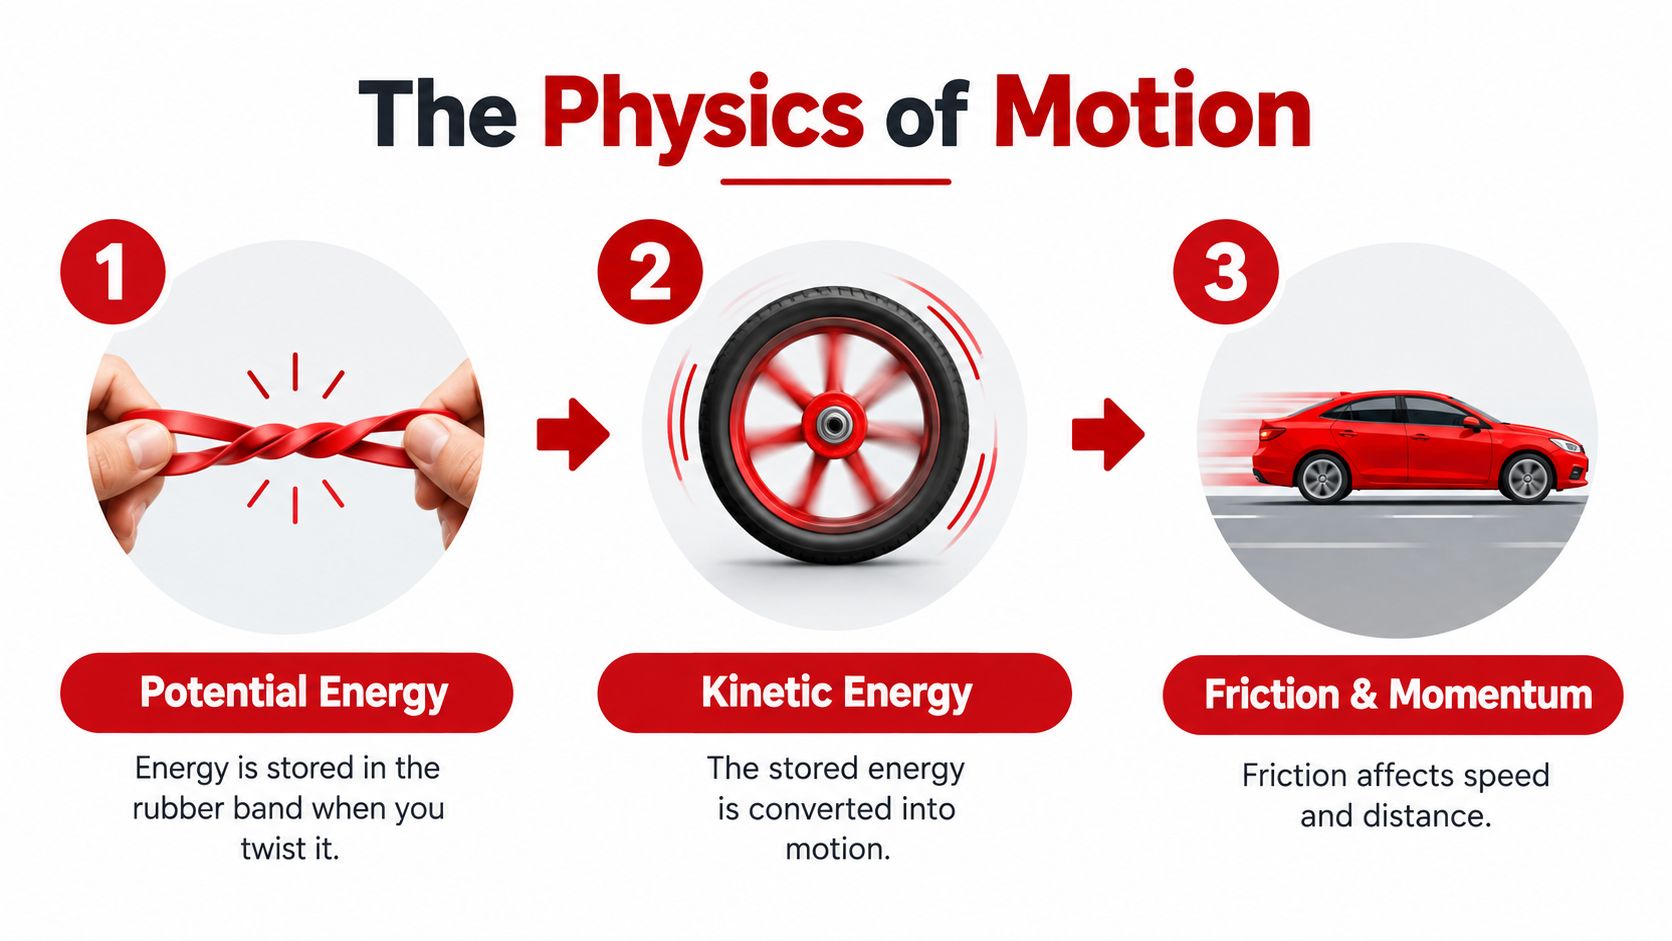
Turn motion into measurable evidence
A common engineering classroom version asks teams to make the car travel in a straight line for at least 10 feet, then measure distance and calculate speed, as described by TryEngineering's rubber band racers activity. That requirement makes alignment and repeatability matter more than decoration.
Compare winding force, travel distance, and speed across controlled trials. Test a different axle thickness, wheel size, or friction level, record the result, and inspect the car after each run. These physics projects for a science fair offer related ways to connect the build with broader STEM questions.
The car makes energy transfer visible. Children can watch the band unwind, observe the wheels turn, and locate the point where motion stops. Each failed run supplies evidence for the next design change, turning friction, alignment, and traction into problems they can test and improve.
Gathering Materials and Preparing the Chassis
Start with a flat chassis. A practical classroom design uses 6-inch balsa wood with a 1×1-inch notch cut from one end, as outlined by Home Science Tools' rubber band car project. The notch gives the rear axle and rubber band enough access to operate without being blocked by the body.
You'll also need two hollow straws for axle guides, wheels, two axles, a rubber band, scissors or a craft knife, and glue or tape. Choose materials that are light and straight. A heavier decorative body may look impressive, but it can make the drive system work harder without improving movement.
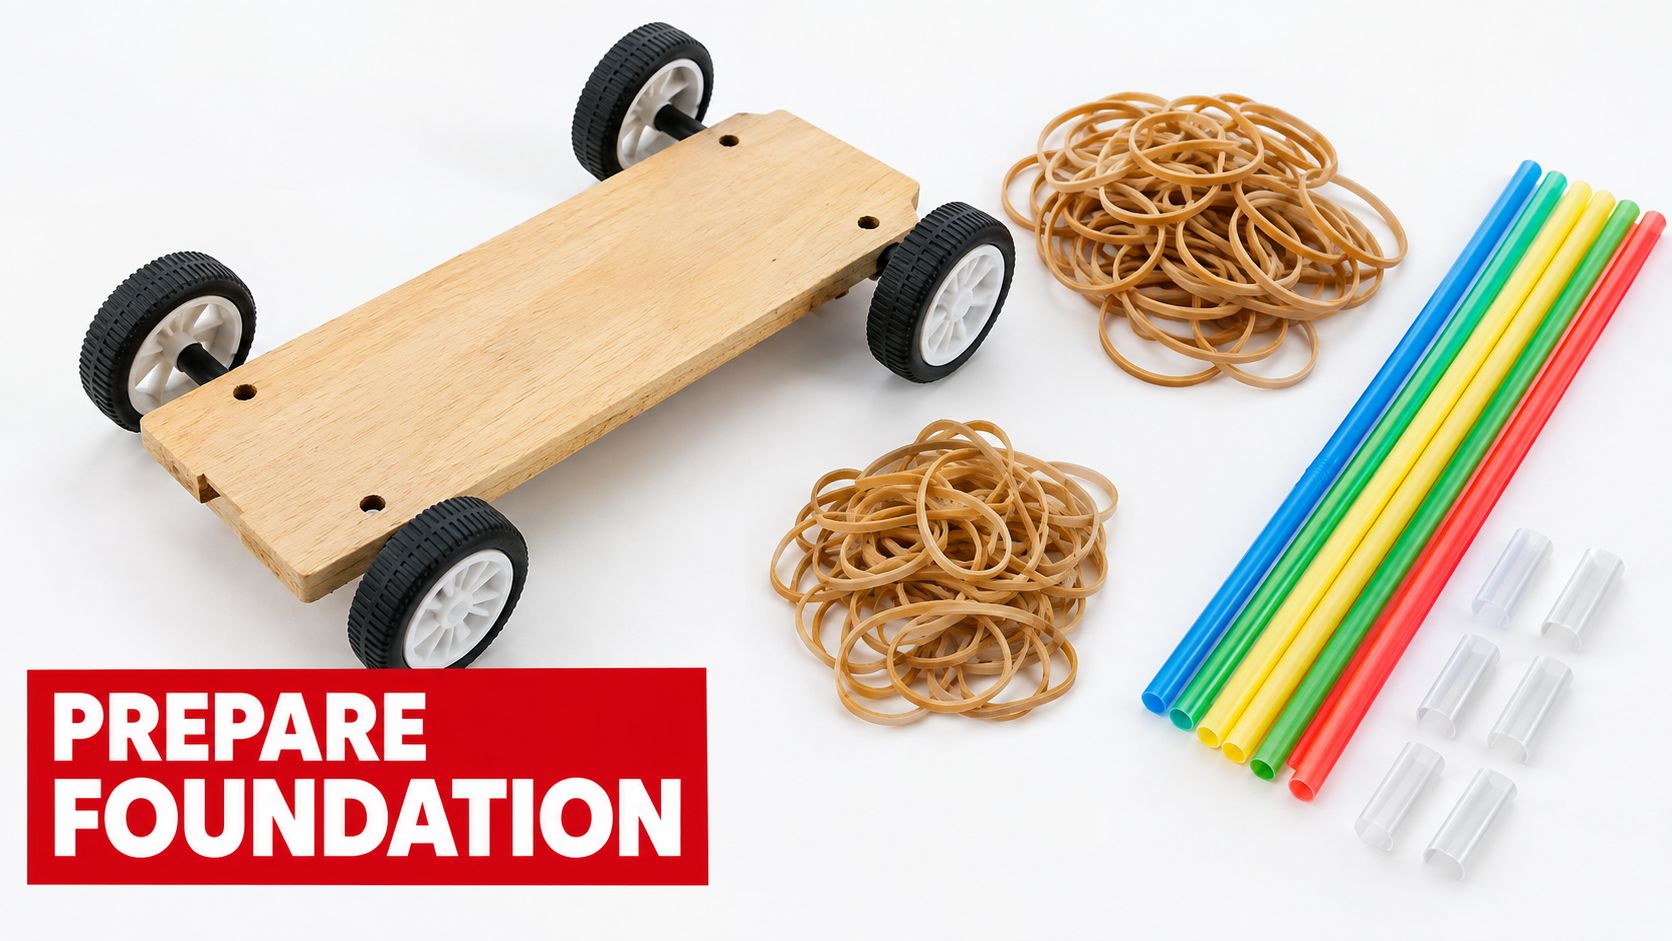
Prepare the frame before attaching parts
Mark the notch carefully and keep the remaining chassis edges straight. A crooked body often creates alignment problems later, even if the axles themselves look straight.
Cut or position the straws so they can sit near the ends of the chassis. Attach them parallel to one another, using a small amount of glue or tape first. Don't permanently reinforce the joints until the axles pass through easily and the guides remain in the correct position.
A simple preparation checklist helps:
- Keep the chassis flat: A twisted base can force the wheels into different angles.
- Make the guides parallel: The axle guides should point in the same direction.
- Leave clearance: Wheels need room to rotate without touching the frame.
- Avoid excess adhesive: Glue that bulges into the straw can obstruct the axle.
Cardboard can work for experimental versions, and these cardboard building ideas offer useful inspiration for adapting simple construction materials. Still, balsa wood provides a predictable lightweight base for this particular design.
Assembling the Axles and Wheels
Assembly determines whether the car rolls forward or fights itself. Slide the front axle through the straw guides, then check that it sits level and parallel with the rear axle. The wheels should be centered on the axle, with their holes as close to the middle as possible.
A wheel with an off-center hole acts like a wobbling cam. As it turns, it can pull the axle sideways, increase friction, and make the car veer. A tilted wheel can also rub against the chassis or straw, stealing energy from the drive system.
Build the rear drive system carefully
The rear axle does more than support wheels. It receives the rubber band's twisting force, so the band needs to connect directly and hold securely. Thread or attach the band so it winds around the rear axle rather than slipping across a smooth surface.
The practical sequence is:
- Insert the rear axle through the straw guides.
- Attach the rubber band so its twist acts directly on the axle.
- Add the wheels and center them on both ends.
- Spin the axle by hand before applying tension.
- Check for rubbing between the wheels, chassis, and straw guides.
Science Buddies' rubber band car guidance emphasizes parallel axles, centered wheel holes, and reduced wheel-to-frame contact. Those details may seem minor, but they determine how much of the band's stored energy reaches the floor.
Alignment rule: If the wheels don't spin freely by hand, winding the rubber band won't solve the problem.
Don't chase appearance yet. A plain car with straight axles will teach you more than a decorated car that can't roll. Once the mechanism works, add lightweight details without blocking the wheels or increasing rubbing.
Tuning for Distance and Speed
The first test should be diagnostic, not competitive. Place the car on a smooth surface, wind the rear axle modestly, and release it while watching three things: whether it rolls straight, whether the wheels slip, and how quickly the band unwinds.
Think of the system as a balance:
| Observation | Likely cause | First adjustment |
|---|---|---|
| The car barely moves | Friction, excess weight, or too little winding | Free the axle, reduce weight, or adjust winding |
| The car moves briefly, then stops | The stored energy isn't reaching the wheels efficiently | Check rubbing and band grip |
| The car veers | Uneven wheel placement or axle alignment | Reposition the guides or wheels |
| The band slips | The axle surface doesn't grip the band | Improve the attachment and contact |
Too few windings store too little energy. Too many can make the band slip, bind, or pull the car off course. The University of Hawaiʻi 4-H STEM Lab activity recommends changing the number of windings or the drive-wheel orientation when performance is poor.
Change one variable at a time
The most useful testing habit is controlled iteration. If you change the wheels, axle, decorations, and winding at once, you won't know which change mattered.
Try this order:
- Reduce friction first: Confirm that nothing rubs.
- Check mass next: Remove decorative pieces that add weight without helping propulsion.
- Adjust winding: Compare a smaller and larger amount of twist.
- Inspect drive contact: Make sure the band remains engaged with the rear axle.
- Measure motion: Record distance and calculate speed when the setup is consistent.
This approach turns a disappointing launch into evidence. A car that travels less after a modification has still answered a useful engineering question.
Troubleshooting Common Issues
Most failed rubber band cars fail in visible ways. A car that circles usually has unequal wheel placement, nonparallel axles, or a chassis that isn't square. Put the car on the floor and roll it gently without winding the band. If it immediately curves, fix the rolling geometry before investigating propulsion.
A slipping band points to a different problem. The band may not be winding tightly around the rear axle, or the axle surface may be too smooth. Improve the grip with a secure attachment or a small amount of tape around the contact area, while ensuring the added material doesn't obstruct the straw guide.
Use symptoms to choose the repair
- Veers sharply: Check whether both axles are parallel and whether the wheels are centered.
- One wheel rubs: Move the wheel outward slightly or correct the axle position.
- Band unwinds without driving: Rework the band connection so it twists the rear axle directly.
- The car breaks apart: Reinforce the straw-guide joints and inspect the chassis before the next test.
- The car moves but lacks distance: Reduce rubbing and unnecessary mass before adding more windings.
A common beginner mistake is to keep increasing tension when the actual problem is friction. More stored energy cannot compensate for a wheel scraping the frame or an axle trapped inside an incorrectly positioned guide.
Treat each repair as a small experiment. Building a kit can also help children practice following clear assembly steps, but the rubber band car remains valuable precisely because it leaves room for diagnosing mistakes and redesigning the mechanism.
Why This Project Endures in STEM Education
Rubber band cars remain useful in STEM classrooms because they turn simple materials into a working mechanical system. An archived TeachEngineering motion lesson dates the activity to 2000, placing rubber band cars in engineering education for more than two decades. The date supports the activity's longevity, not a claim that every classroom has used it.
The same design supports different levels of investigation. Younger students can concentrate on making the wheels turn. Older students can test friction, energy loss, axle thickness, wheel size, distance, and speed. The project gives each learner a visible cause-and-effect problem to examine.
The strongest lesson is often the failed launch
A failed launch gives the educator useful evidence. Ask, “What did the car do?” before suggesting a repair. A sharp curve, stalled wheel, slipping band, or flexing chassis points toward a different next test. Students learn to observe first, then change one part of the design.
That routine captures the value of hands-on learning. Students practice patience, communication, measurement, and revision while working with a machine that responds immediately. The materials are simple, but the decisions are not.
Iteration also exposes a practical engineering standard: a design should work repeatedly and have an explainable cause. A car that moves once by accident teaches less than one whose builder can connect axle alignment, wheel placement, and band attachment to its motion.
A rubber band car cannot replace a full engineering curriculum. It gives families and educators a durable starting point, makes energy transfer visible, and gives failure a productive role. Playz offers science kits, model-building kits, and creative toys for hands-on exploration, including a V8 combustion engine model. Visit Playz for materials that can extend the activity into a broader building and STEM-learning session.