


A child rolls a sheet of printer paper around a pencil, adds a few crooked fins, and slides the finished rocket over a straw. One breath later, the rocket shoots across the room. The excitement is immediate, but the first launch usually raises better questions than answers: Why did one rocket fly straight while another tumbled? Did the longer body help? Was the fin shape responsible, or did someone blow harder?
That curiosity is the value of paper rockets with straws. With a few household materials, children can build, test, measure, revise, and defend a conclusion. The activity becomes much more than a craft when every change has a purpose and every launch becomes part of a data record.
Why Paper Rockets Are Perfect for STEM Learning
The room changes as soon as children realize their paper creation can fly. They stop decorating long enough to compare tubes, inspect fins, and argue about which design will travel farthest. I've seen even hesitant students become eager participants when the question is no longer “Did you make it correctly?” but “What should we change before the next launch?”
Paper rockets work well because the result is visible, quick, and easy to discuss. A breath provides the launch force, the rocket moves through the air, and its path reveals problems with balance, friction, or design. Children can connect what they see to thrust, drag, gravity, lift, kinetic energy, and potential energy without needing advanced equipment. The American Physical Society lists straw rockets for grades 5–9 and connects the activity with friction, kinetic energy, and potential energy in its straw rocket classroom activity.
NASA's Jet Propulsion Laboratory recommends changing one variable at a time, such as rocket length, fin shape, fin size, or fin angle, and recording each launch distance in a data log. That approach turns a one-off craft into a controlled experiment, as explained in NASA JPL's straw rocket project. Children learn that a fair test isn't about getting the result they hoped for. It's about making a comparison they can trust.
What children learn through the activity
A well-run launch session gives children practice with several forms of scientific thinking:
- Observation: They notice whether a rocket veers, tumbles, stalls, or travels straight.
- Measurement: They record how far each launch travels instead of relying on memory.
- Prediction: They state which design they expect to perform better and why.
- Revision: They use evidence to choose the next change.
- Communication: They explain whether the results support their original idea.
This fits naturally with the broader value of hands-on learning, because children handle materials while developing language, reasoning, and problem-solving skills. The best moment often comes after a disappointing launch, when a child begins asking a sharper question instead of asking for a replacement rocket.
Classroom principle: The first rocket doesn't need to be the winner. It needs to give children something useful to observe.
Building Your First Paper Rocket Step by Step
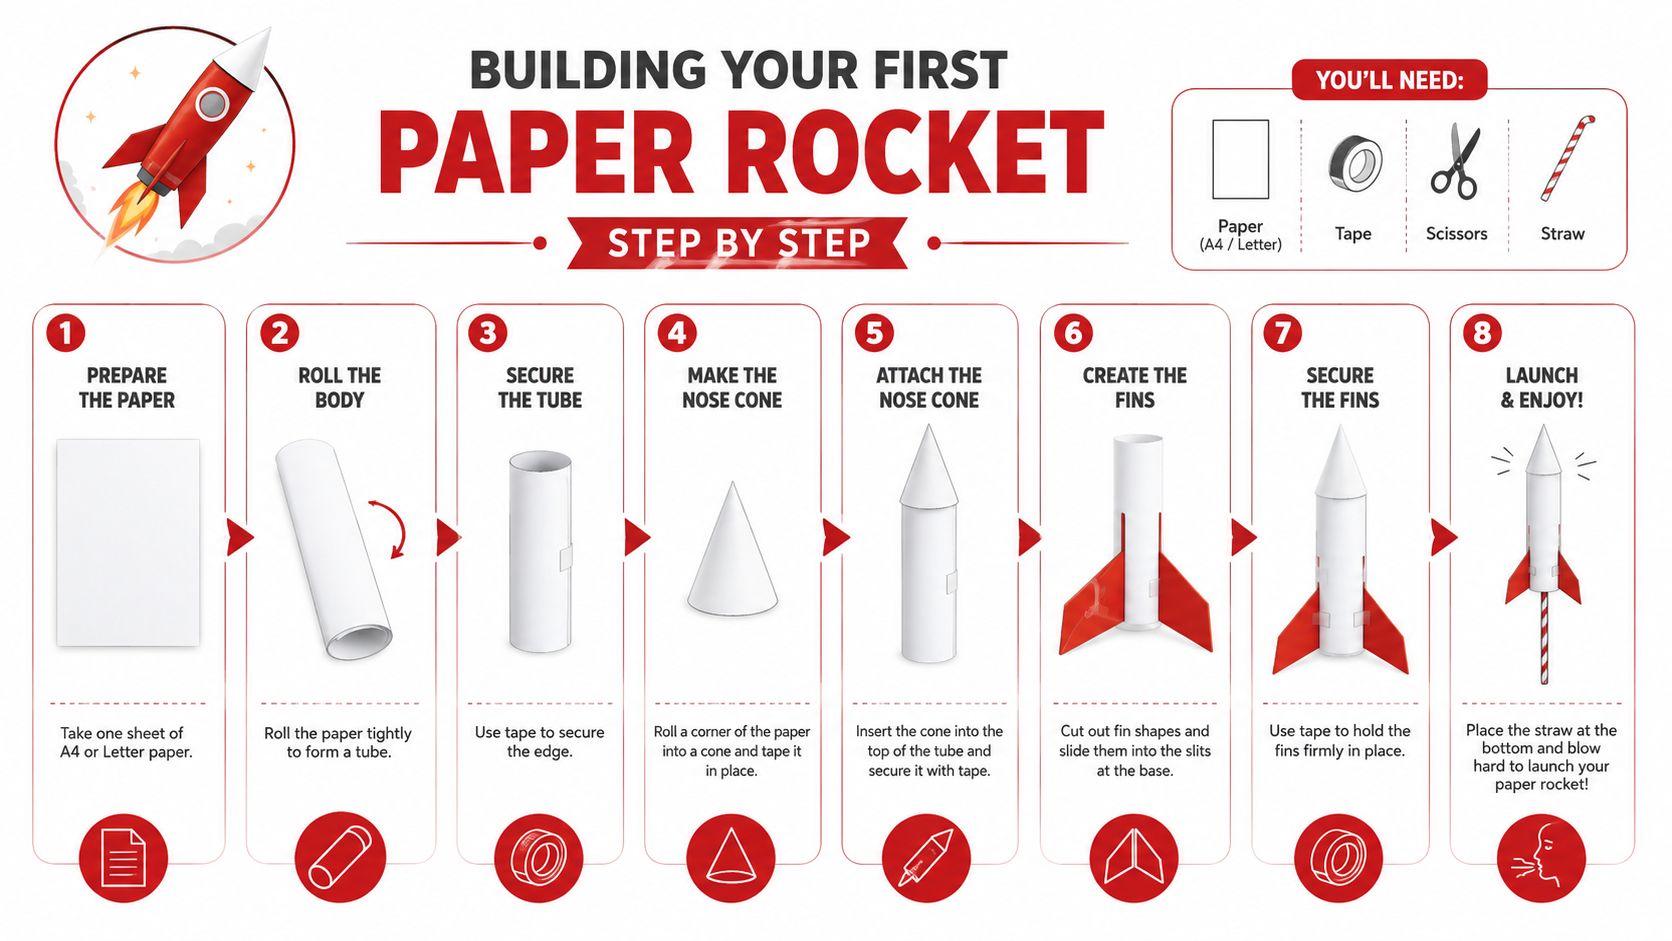
Start with a clear launch goal: build a simple rocket first, then modify it after you've tested the basic design. You'll need printer paper, tape, scissors, a pencil or forming straw, a launching straw, and a measuring tool. Keep the first version plain so children can identify which design features affect the flight.
Form the body tube
Cut printer paper into a strip about 2 inches (6 cm) wide and 8.5 inches (21.5 cm) long, following the build recipe in Scholastic's straw rocket activity. Wrap the strip tightly around a pencil. Keep the paper snug, but don't crush it around the pencil, because the finished tube must slide over the launcher.
Apply tape along the seam while the paper remains wrapped around the pencil. Then remove the pencil carefully. If the tube won't come off, it's too tight. If it opens widely at the seam, add tape and smooth the paper so the surface stays as even as possible.
Close the nose and add fins
Fold or pinch one end of the tube to create a nose. Seal it with tape so air from the straw pushes the rocket forward instead of escaping through the front. A loose nose can pop open during launch, while a bulky nose can add unnecessary drag, so use only enough tape to close the opening securely.
Cut small fins from leftover paper and attach them near the back of the rocket. Two fins can work for a basic build, while a three-fin arrangement offers another design to test. Keep the fins aligned with the body tube. Uneven placement can make the rocket turn or tumble, which gives children a useful troubleshooting clue.
Check the fit before launching
Slide the rocket onto the straw. It should move freely without wobbling excessively. The launcher straw needs to be narrower than the pencil or former used to shape the tube, because a tight fit increases friction and can make the launch inconsistent. Simple construction paper crafts can provide inspiration for decorating later, but test the plain rocket before adding decorations that might change its weight or balance.
Launch in an open area away from faces and fragile objects. Have children point the straw in a safe direction and use a controlled breath. The first launch is a fit check, not a competition.
The Science Behind How Straw Rockets Fly
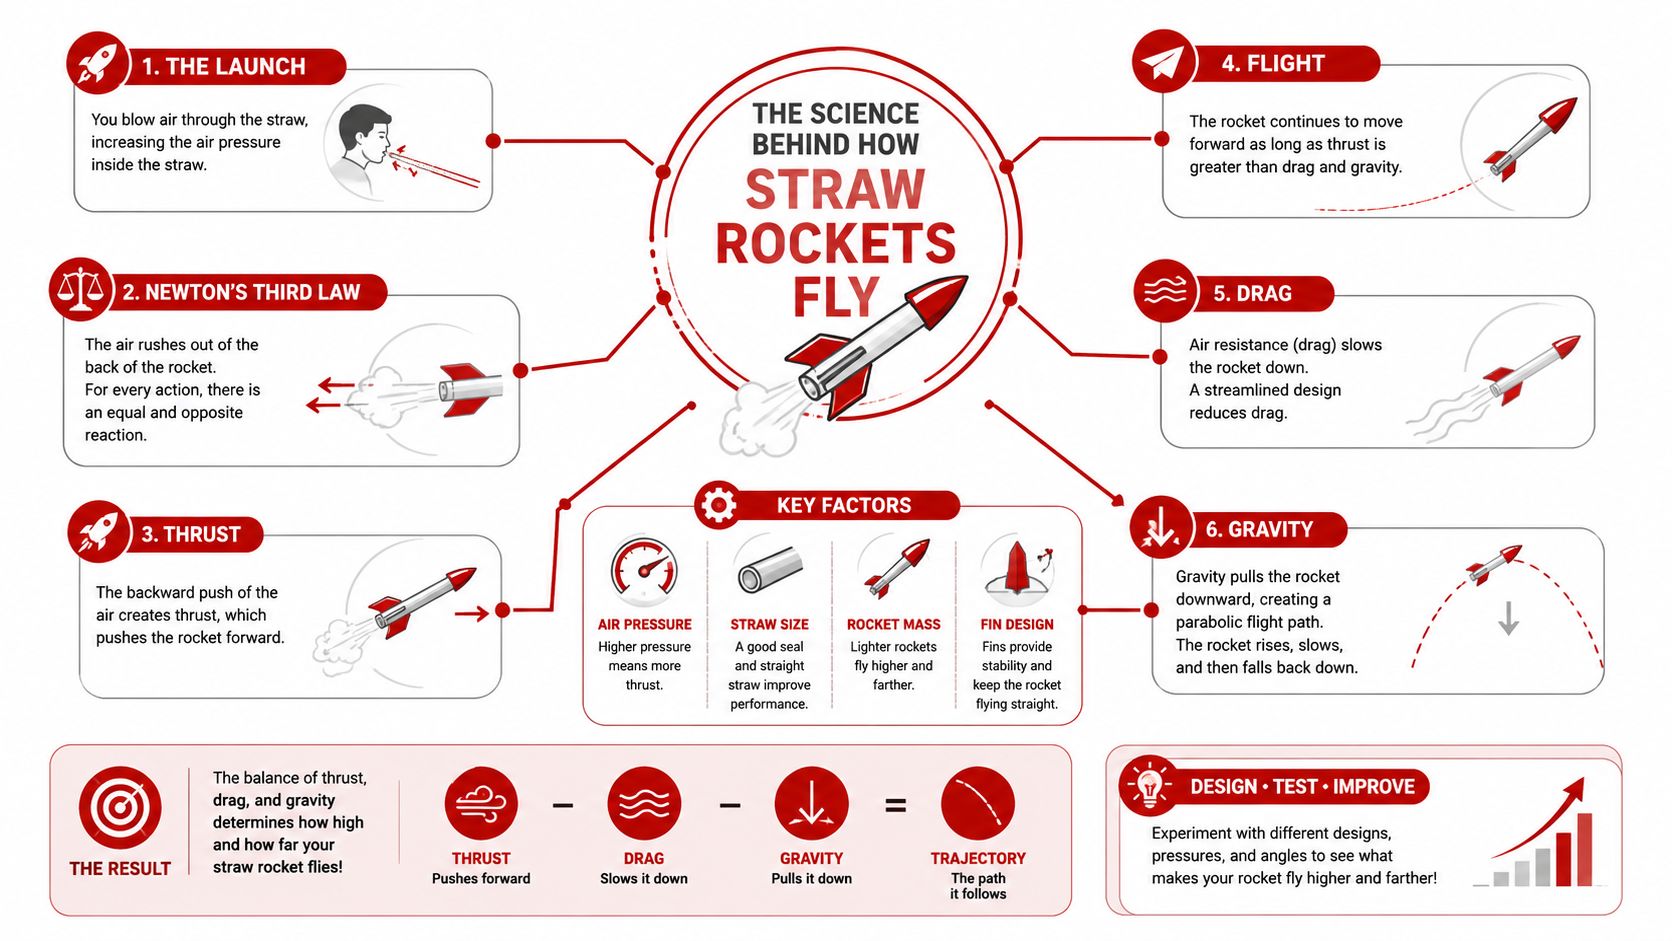
A straw rocket moves because air from your breath pushes against the inside of the rocket body. The air travels in one direction, and the rocket moves in the opposite direction. This is a simple demonstration of Newton's third law, which describes action and reaction.
Straw-rocket lessons frequently use this visible motion to teach Newton's third law and thrust. Curriculum materials from Wright State University's straw rocket guide frame the rocket as a model of action-reaction motion. Children don't need to memorize the law before launching. They can first observe that stronger air movement generally creates a stronger push, then use scientific language to describe what happened.
Four forces children can observe
Teachers often describe four forces acting on a flying object:
- Thrust pushes the rocket forward as air leaves the straw and acts on the rocket.
- Drag is air resistance that slows the rocket, especially when surfaces catch the air.
- Gravity pulls the rocket downward after launch.
- Lift can act when the rocket's motion and surfaces redirect air, although a small paper rocket won't behave like a carefully engineered airplane.
The fins mainly help with stability. They can keep the body from rotating freely, but they also create surfaces that interact with the air. A fin that's crooked, oversized, or attached unevenly may cause the rocket to veer. A child who sees a rocket curve can therefore ask whether the issue is thrust, drag, balance, or fin alignment.
Turning observations into explanations
Avoid giving children a single answer too early. Ask questions that connect design to motion: “Where did the rocket start turning?” “Did the nose stay closed?” “Was the tube easy to slide over the straw?” “Which force might explain the change?”
That discussion makes a useful bridge to physics projects for a science fair. The important habit is not using complicated vocabulary for its own sake. It's helping children use evidence from a launch to support an explanation.
Running Fair Tests and Measuring Real Results
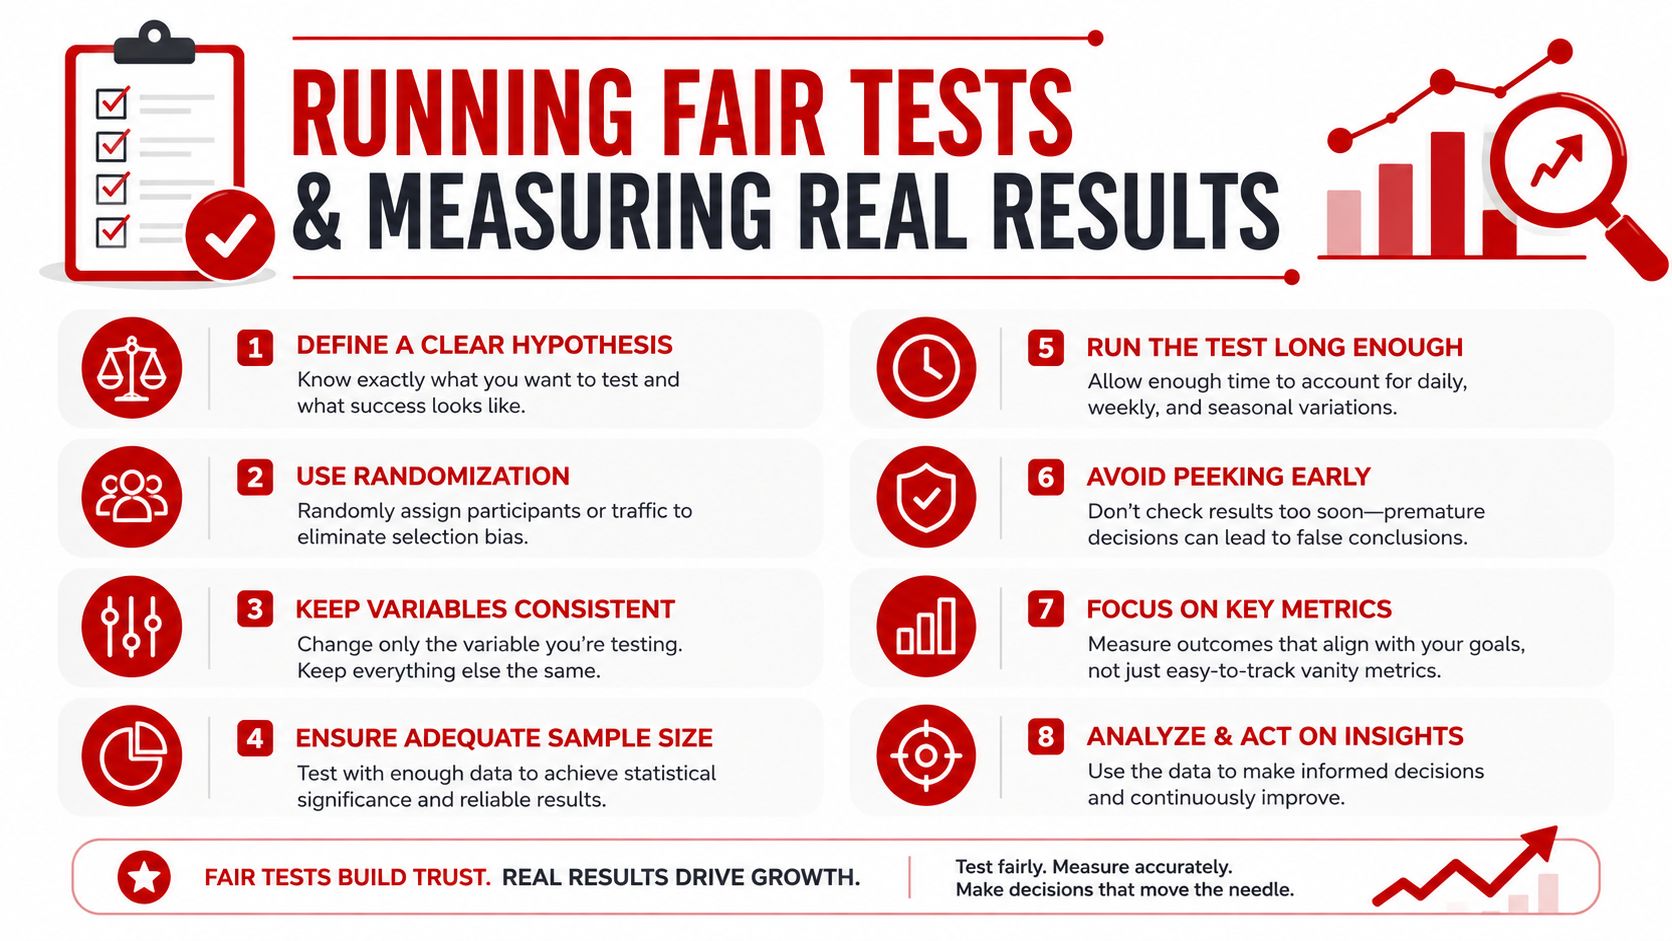
A fair test begins before anyone blows into a straw. Choose a fixed launch point, mark the direction of travel, and place a measuring tool along the expected flight path. Children should launch from the same location each time, because changing the starting position makes distance comparisons harder to interpret.
Science Buddies' scientific-method rocket lesson recommends using a fixed range marker and comparing repeated distance trials rather than treating one launch as the final result. Common variables include fin geometry, nose-cone sealing, and body length. The purpose is to identify which design travels farthest through measured comparisons, not through a child's impression of which rocket “looked fastest.”
Use a simple test plan
Have each child or group write a prediction before launching. Then keep the launcher, launch point, measuring method, and selected variable consistent.
A useful classroom record can include:
| Trial detail | What to record |
|---|---|
| Design name | A short label such as “wide fins” |
| Variable changed | The single feature being tested |
| Launch condition | A small breath or another agreed condition |
| Distance | The measured result |
| Flight behavior | Straight, curved, tumbling, or stalled |
| Next question | What the evidence suggests testing next |
The scientific method steps for kids can help younger learners organize this process. For early elementary students, drawing the flight path or placing a mark on a classroom number line may be more meaningful than writing a long conclusion.
Fair-test reminder: If children change the body length and fin shape together, they won't know which change affected the result.
Manage natural variation
Breath power varies from launch to launch, especially when children are excited. That's why repeated trials matter. Ask children to use the same launch routine each time, and record unusual events such as a rocket slipping, a nose opening, or a child blowing before the teacher gives the signal.
After testing, ask:
- Which design showed the most consistent flight?
- Which launch was unusual, and why?
- Did the evidence support the prediction?
- What should remain unchanged in the next test?
For a classroom group, assign roles such as launcher, measurer, recorder, and observer. Rotate those roles so every child participates in both the physical activity and the reasoning. The data collection becomes part of the excitement when children have a real question to answer.
Design Variations That Actually Improve Flight Distance
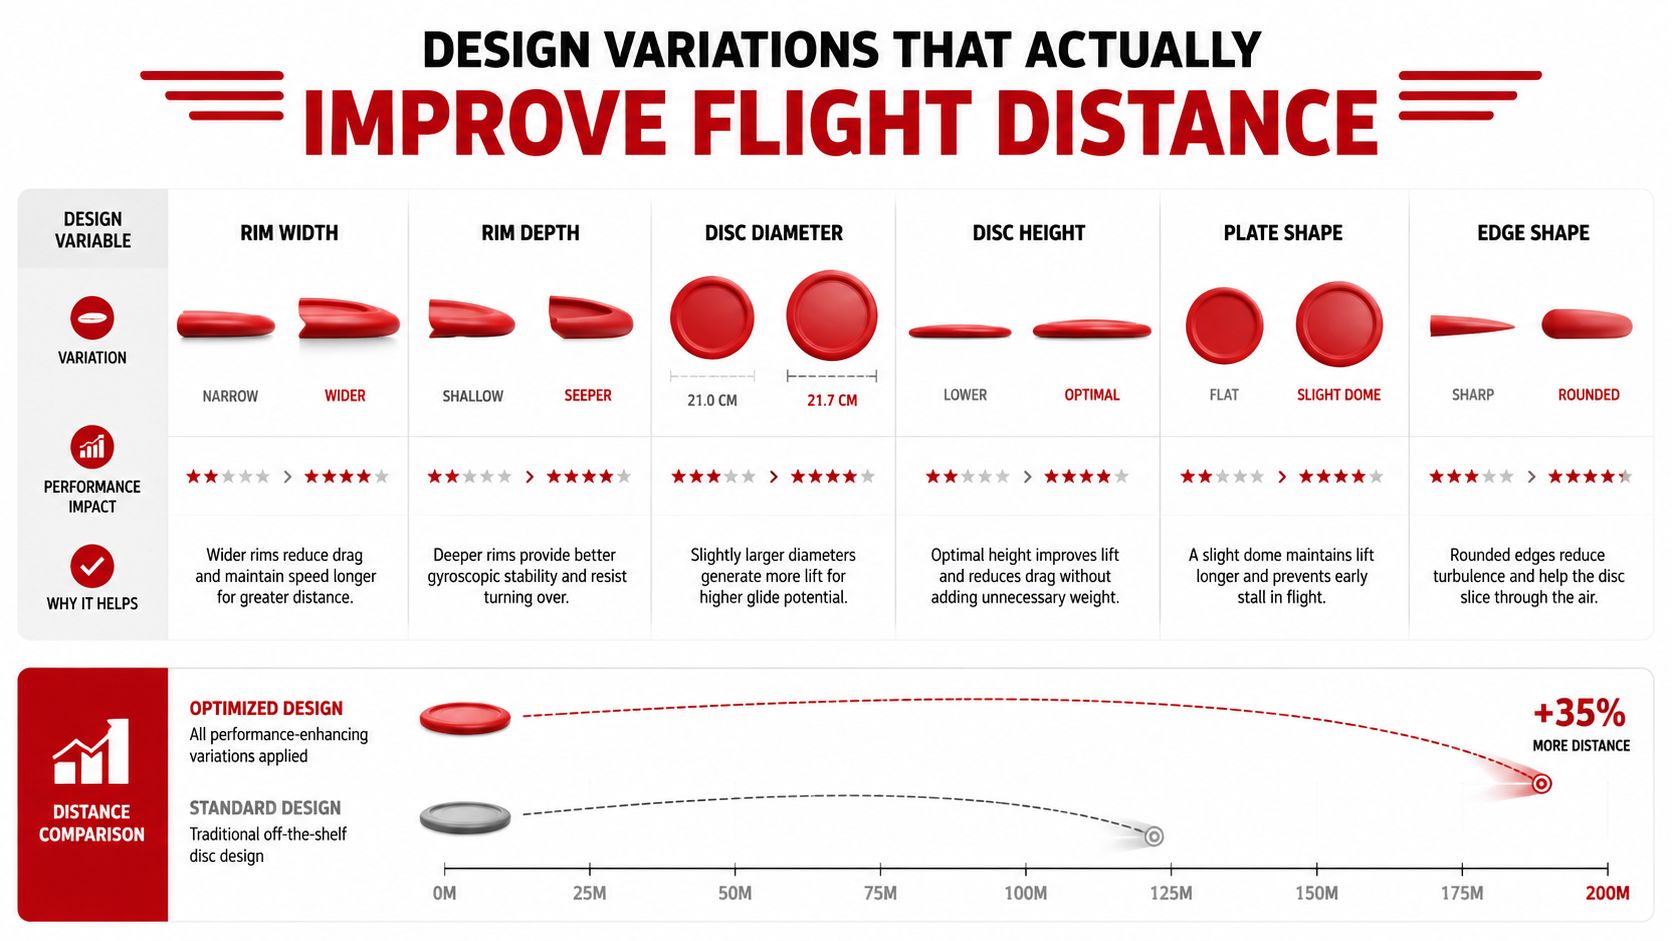
Once the basic rocket launches reliably, change one feature and make a prediction. The most useful comparison isn't “Which rocket looks coolest?” It's “Which design change produced a straighter or longer flight under the same conditions?”
The Aerospace Engineering Education Alliance emphasizes a small breath and measured distance as part of the launch-and-measure cycle. That focus matters because a dramatic launch isn't necessarily a fair test. A rocket that travels quickly but tumbles may be less successful for a distance investigation than one that flies steadily.
Compare the main design choices
| Design feature | Possible benefit | What to watch |
|---|---|---|
| Fin shape | A simpler shape may reduce unnecessary drag | Crooked edges can make the rocket veer |
| Fin size | Larger fins may improve stability | Excess surface can interact with more air |
| Fin angle | A consistent angle can change the flight path | Unequal angles can cause rotation |
| Body length | A different length changes the rocket's balance and surface area | A long tube may be harder to keep straight |
| Nose sealing | A closed nose helps the air push the body forward | Extra tape can affect balance |
| Launcher fit | A free-sliding tube supports consistent launches | A tight fit increases friction |
An EAA K-5 straw rocket guide gives a specific comparison design. It seals one end of a larger straw with a 7.5 cm piece of tape or a label sticker, attaches three fins about 2.5 cm from the back opening using tape pieces about 1.2 cm long, and compares a small breath with a big breath while measuring distance.
Solve the flight problem you actually see
A rocket that tumbles needs a balance check before a new fin experiment. Inspect whether the nose is sealed, whether the fins match, and whether the body slides evenly over the straw. If the rocket flies low or veers, move the investigation toward fin placement, body alignment, or trim rather than immediately adding more tape.
The engineering design process for kids gives children a productive cycle: identify the problem, propose a change, test it, and use the result to guide the next version. Don't promise that every modification will increase distance. A change can improve stability while reducing range, and that tradeoff is valuable engineering evidence.
Keeping Kids Engaged and Solving Common Problems
Paper rockets can lose their charm if children spend too long waiting for a turn or if every failed launch feels like a mistake. I keep the activity moving by giving each child a job and by treating the build-test-improve cycle as the main event. Children can be designers, launchers, measurers, recorders, or flight observers, then switch roles after a short set of trials.
The most effective adult response to failure is a question. If the rocket stays on the straw, ask whether the tube is too tight. If the nose pops open, ask where the air escaped. If it drops immediately, ask whether the launch was aimed safely and whether the body or fins are balanced.
Common problems and practical fixes
- The rocket won't slide onto the straw: Loosen the paper tube carefully or reshape it around a narrower former. Don't force it, because a crushed tube creates more friction.
- The rocket slips or wobbles: Check the fit and smooth the seam. A tube that is too loose may not receive the air push consistently.
- The nose opens: Add a small piece of tape to close the end. Keep the seal neat so the front doesn't become unnecessarily heavy.
- The rocket veers: Look for fins that aren't aligned or attached at different angles. Mark a centerline on the body before attaching the next design.
- The rocket barely moves: Check for air leaks, then confirm that the launching straw is open and properly inserted.
- Children argue about the winner: Return to the data log. Ask which launch conditions were the same and whether one unusual trial should be repeated.
Keep the challenge open-ended
Younger children can focus on fit, direction, and describing motion. Older children can compare fin geometry, body length, nose sealing, or launch conditions while defending a conclusion with recorded evidence. A group can also create a design brief, such as building a rocket that flies straight, travels far, or remains stable after a design change.
Use strategies to increase student engagement by giving children meaningful choices without letting every variable change at once. They might choose colors, names, or prediction methods freely, while the test itself remains controlled. That balance preserves creativity and protects the quality of the investigation.
Science rarely looks tidy during the first attempt. Paper bends, tape wrinkles, rockets tumble, and measurements need repeating. Those moments teach children that engineers don't hide failed designs. They study them, make a careful change, and launch again.
Playz offers hands-on options such as science kits with balloon rocket activities and a solar-system exploration kit that includes a DIY rocket-building activity. Visit Playz to find tools that can extend a paper-rocket investigation into broader space science and purposeful play.