


You've poured the liquids, stepped back to admire the colorful stripes, and then noticed the boundaries starting to soften. A density tower can look like magic at first, but it's really a careful demonstration of mass, volume, viscosity, diffusion, and fluid stability. With ordinary kitchen materials and a gentle pouring technique, children can predict where each liquid belongs, build the tower, test objects, and investigate why even a successful tower may slowly blur.
What a Density Tower Looks Like in Your Kitchen or Classroom
A finished density tower experiment looks like a stack of horizontal bands inside a tall, clear container. On a kitchen counter, afternoon light may shine through honey, dish soap, colored water, vegetable oil, and rubbing alcohol. In a classroom, several clear cups or cylinders can sit on a tray while students compare their layers.
The usual sequence runs from most dense at the bottom to least dense at the top. Honey forms the foundation, followed by dish soap, water, vegetable oil, and rubbing alcohol. The exact appearance depends on the products used, but successful towers have visible boundaries rather than one cloudy, blended mixture. Educational demonstrations commonly use five to nine liquids, including honey, corn syrup, dish soap, water, vegetable oil, and rubbing alcohol, because their relative densities can create distinct layers. University of Warwick's density tower instructions also emphasizes using equal volumes when comparing liquids.
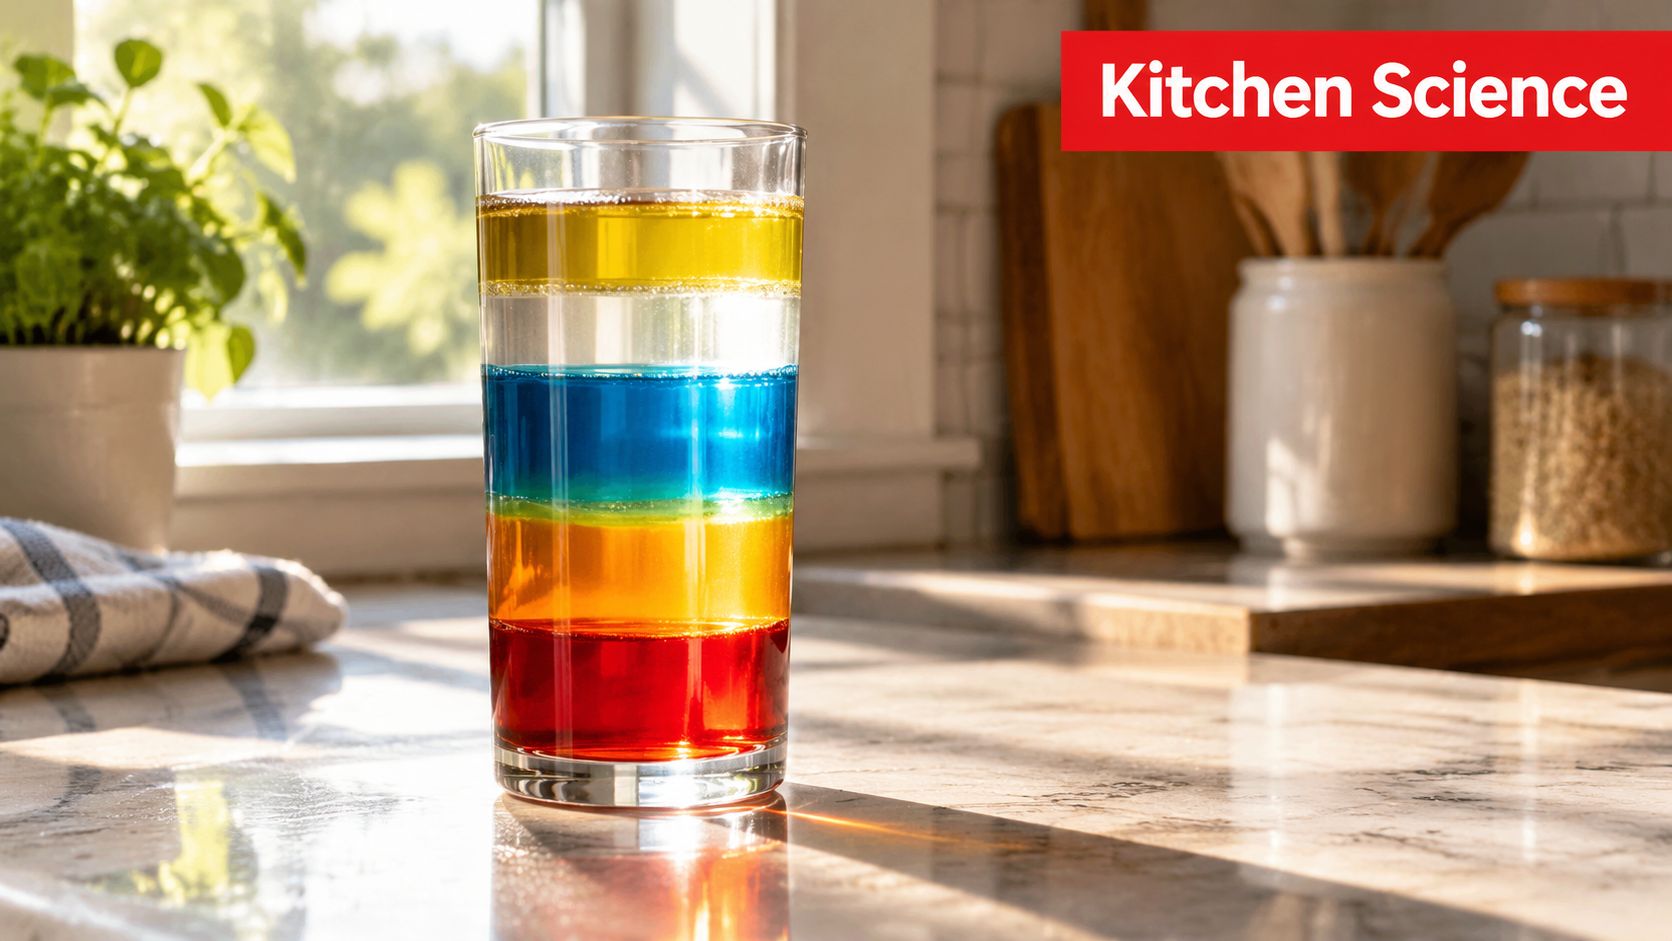
What success looks like: Clean, level bands that settle visibly. A little temporary waviness is normal, but a forceful pour can turn the whole glass into a muddy swirl.
Small objects add a second layer of discovery. A raisin, plastic bead, grape, or small building piece may stop at a particular height because its density falls between two liquids. That lets children make predictions before dropping anything into the container.
Choose a tall jar or cylinder with enough height for distinct layers. A one-quart Mason jar can work well when its clear sides and wide opening make pouring easier, although a narrower container often makes the bands look more pronounced.
By the end of the activity, children should be able to describe the tower as a density gradient, explain why the liquids were poured in a particular order, and identify why the layers may change after the experiment sits undisturbed.
The Science Behind Why Liquids Stack Instead of Mixing
Density describes how much mass occupies a given volume. The relationship is written as density = mass/volume. A material with more mass packed into the same space is denser than one with less mass in that space.
Water provides a familiar reference point at 1.0 g/cm³ or 1.0 g/mL, as explained in this density tower demonstration from Steve Spangler Science. Liquids above that value generally settle below water, while liquids below it tend to sit above water. This gives students a prediction rule before they touch the glass.
Honey and syrups usually belong low in the tower. Oil-based liquids generally sit above water. Dish soap often falls between thick syrups and water, though the exact position can vary by formulation.
Density is more than how heavy a liquid feels
A large container of oil may feel heavy in your hands, but that doesn't mean oil is denser than a smaller amount of honey. Density compares mass and volume together, not total weight alone. The type of material and the way its particles are arranged both affect the result.
Dissolving salt or sugar in water adds mass to the same liquid mixture and can increase its density. The crystals must dissolve fully, though. If they remain at the bottom, they create uneven pockets instead of one consistent layer. A university outreach resource describes density towers as a practical way to connect ordinary materials with the formula and notes that careful preparation helps students relate visible layers to quantitative relationships. Read the layered-liquid teaching resource.
Try asking children to rank the liquids before pouring. They might decide that honey belongs at the bottom and oil belongs near the top, then test those predictions with the actual tower.
The following video offers another visual explanation of density and floating behavior.
For a related activity that makes the same prediction process tangible, explore these floating egg science experiments.
Gathering Materials and Pouring the Layers the Right Way
Set everything out before opening the first bottle. You'll need a tall clear glass, plastic cylinder, or transparent drinking cup, along with honey, light corn syrup, dishwashing liquid, water, vegetable oil, and rubbing alcohol. Add food coloring to the water, and use separate colors only when they'll help children distinguish neighboring layers.
A turkey baster, small squeeze bottle, pipette, or the back of a spoon gives you control over the flow. Keep a tablespoon measure nearby, plus a stirring rod for guiding liquid down the side. A small pipette is especially useful for older children who need to practice controlled dispensing.
Prepare the vessel and the liquids
Use liquids at a similar room temperature when possible. Make sure any salt or sugar solution is fully dissolved before you begin. Equal volumes make comparisons fair, and educational lab guidance commonly recommends about 1/4 cup per liquid, with a few minutes allowed for settling between layers. Education.com's liquid-gradient activity gives the same general emphasis on measured portions, density order, and careful settling.
For a smaller home demonstration, a few tablespoons per liquid may be enough. The important point is to use similar amounts so that one unusually thick layer doesn't hide the others.
Build from the bottom upward
Start with honey, the densest liquid in this familiar sequence. Add it gently to the bottom, keeping the container steady. Follow with corn syrup, then dish soap, colored water, vegetable oil, and rubbing alcohol.
Tilt the glass slightly and let each new liquid slide along the inside wall or over the back of a spoon. Don't aim a fast stream at the center of the layer below. The liquid gains speed as it falls, and that force can disturb the interface.
Pause after every addition. Let the surface become calm and check whether the boundary looks clean before continuing. Some classroom guides recommend waiting several minutes for layers to settle, while smaller pours may look stable sooner. Education.com's layered-liquids activity explains that a gentle tool such as a spoon, straw, syringe, eyedropper, or baster reduces turbulent mixing.
Pouring slowly matters more than pouring perfectly. A patient hand can rescue an ordinary cup of liquids, while a fast stream can blur even a well-ordered tower.
Never taste the liquids, and keep rubbing alcohol away from flames, children's mouths, and unsupervised access. Use a tray to catch spills, especially when working with a group.
Troubleshooting When Layers Blur or Collapse
A blurred tower usually tells you something about the process, not that the density idea failed. The three most common problems are turbulent pouring, incomplete dissolving, and rushing the settling time.
Turbulent pouring
A fast stream pushes into the layer below and drags some of that liquid upward. This process, called turbulent entrainment, can create cloudy interfaces and streaks through the tower.
Use the back of a spoon, a baster, pipette, or slow stream along a stirring rod. Keep the outlet close to the surface rather than pouring from high above. A tilted container can also turn the glass wall into a gentle slide.
Undissolved crystals
Salt or sugar crystals that reach the bottom can create local density differences and small convection currents. The surrounding liquid may move around those concentrated spots, carrying color into nearby layers.
Dissolve the solid completely in a separate cup before adding the solution. Warm water can help dissolve it, but let the solution return toward room temperature before layering.
Rushing the next pour
A layer may look settled on top while movement continues below. Give the tower a 30-second pause and perform a quick visual check before adding the next liquid. For thick liquids, waiting longer is often sensible. Educational guidance consistently stresses allowing layers to stabilize, because density alone doesn't guarantee a sharp boundary. Science-U's density tower explanation points to settling, slow pouring, viscosity, and diffusion as important parts of the result.
Cloudy bands can also appear when liquids have different temperatures. Bubbles are more likely when the stream falls hard, so tilt the container slightly and guide the pour down the wall.
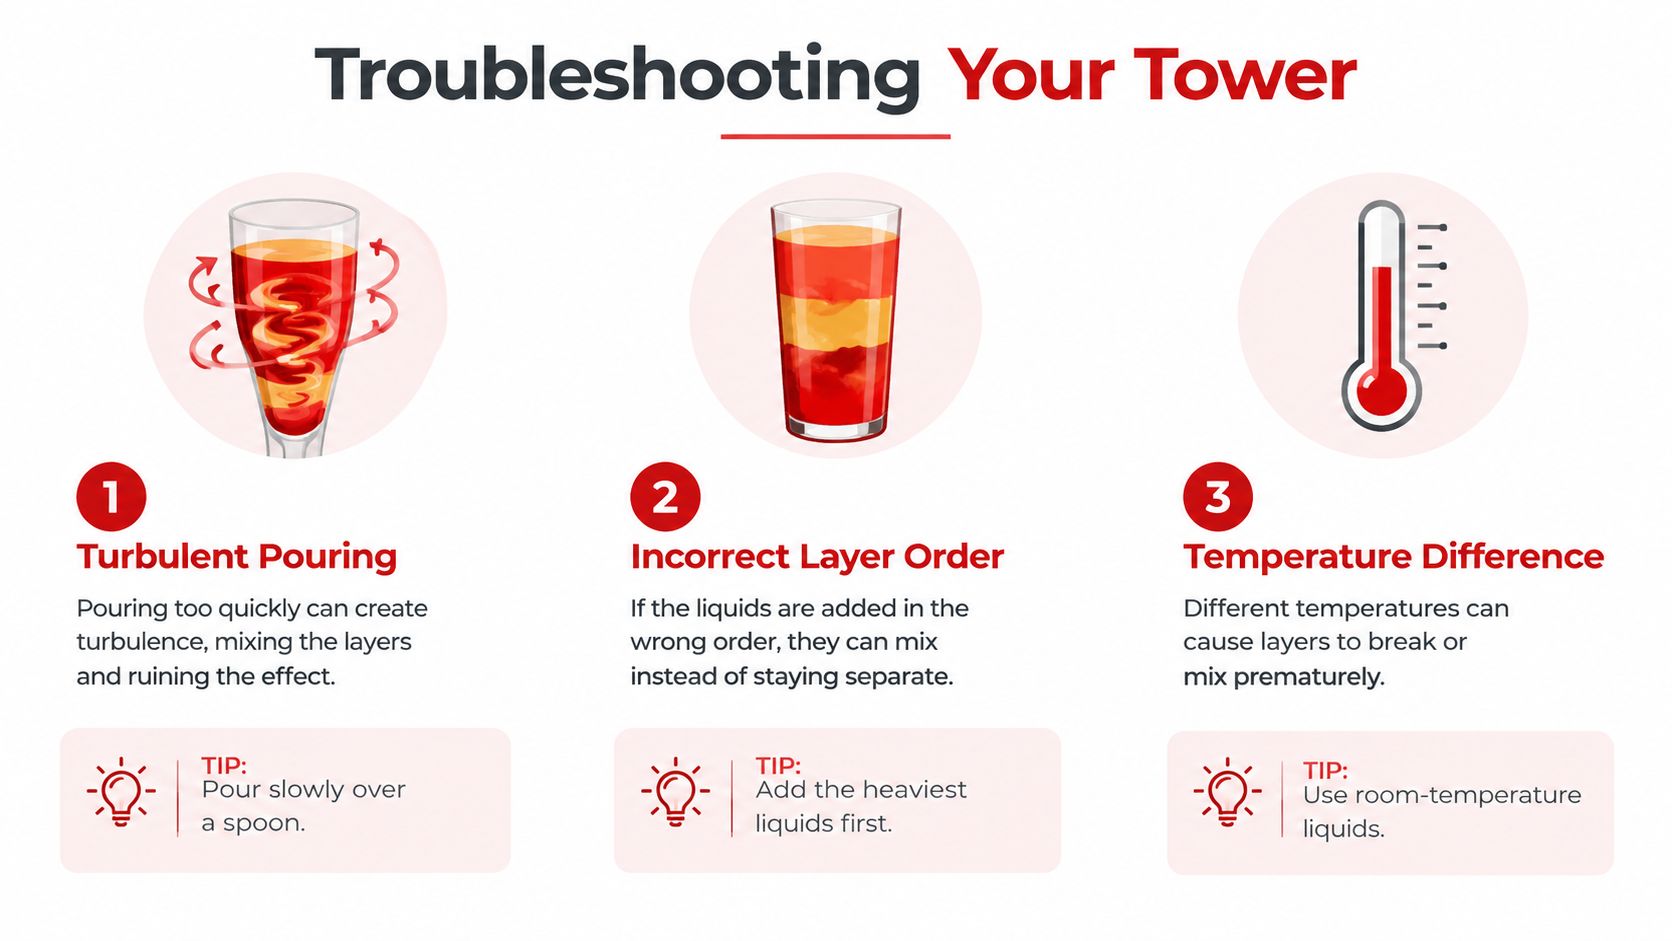
If the tower looks messy, don't discard it immediately. Set it somewhere stable and observe it later. Some layers may separate again as gravity pulls denser liquid downward, although diffusion can continue to soften boundaries over time.
Comparing Liquids by Density Before You Pour
A comparison table turns the activity into a prediction challenge. The approximate values below are commonly used teaching reference points for everyday density towers, while actual products can vary.
Common Liquids Ranked by Density
| Liquid | Density (g/cm³) | Sinks Below |
|---|---|---|
| Honey | ~1.42 | Corn syrup, dish soap, milk, water, oil, rubbing alcohol |
| Light corn syrup | ~1.33 | Dish soap, milk, water, oil, rubbing alcohol |
| Dish soap | ~1.06 | Milk, water, oil, rubbing alcohol |
| Whole milk | ~1.03 | Water, oil, rubbing alcohol |
| Water | 1.00 | Oil, rubbing alcohol |
| Vegetable oil | ~0.92 | Rubbing alcohol |
| Rubbing alcohol | ~0.79 | None in this comparison |
The reference rule is simple. A liquid denser than water tends to settle beneath it, while a liquid less dense than water tends to float above it. Color-coded samples make the boundaries easier to inspect, especially when two neighboring liquids look similar.
Place the seven samples in random order and ask children to rank them from densest to least dense. They should write their prediction before pouring, then compare the predicted order with the visible result. This creates a useful distinction between viscosity, which describes resistance to flow, and density, which determines the gravitational arrangement.
Maple syrup, glycerol, or lamp oil can serve as substitutes, but don't assume a substitute belongs in the same position as the original liquid. Warm liquids are slightly less dense than cold ones, so samples kept near the same room temperature usually give cleaner comparisons.
For more water-based activity ideas that build prediction and observation skills, browse these science experiments with water.
Age-Friendly Variations from Preschool to Middle School
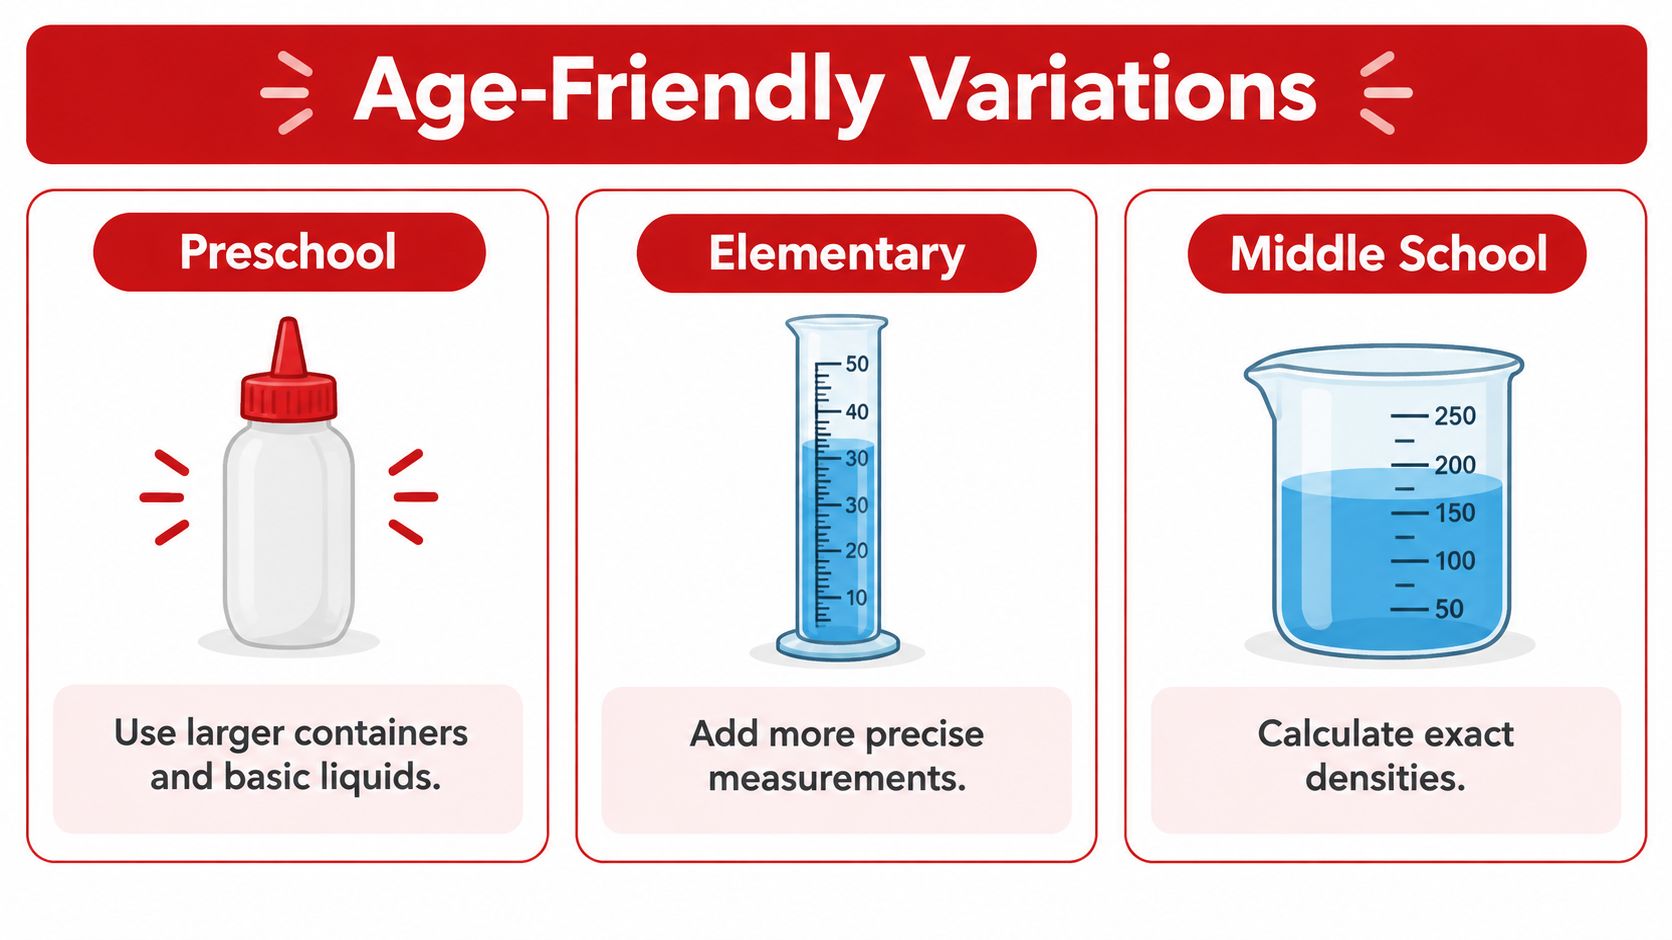
The same tower can support very different conversations depending on the learner's age. Younger children need a strong visual experience and simple choices. Older students can turn the same layers into measured data.
Preschool and early elementary
Use large clear containers, squeeze bottles, and broad color differences. Let children choose which colored liquid should go next using picture cards labeled “heavy” and “light.” Their job can be to observe, name colors, notice which liquid stays high or low, and describe the bands with words such as top, bottom, thick, and thin.
Adult hands should handle rubbing alcohol and any spills. Keep the activity focused on watching and predicting rather than precise measurements.
Elementary learners
Children in grades 3–5 can use measuring spoons, a kitchen scale, and a prediction worksheet. Have them record each liquid's mass and volume, then calculate density using density = mass/volume. They can compare their measured order with the tower and discuss why a commercial product may not match a classroom reference value exactly.
Middle school students
Middle school learners can work with graduated cylinders and a digital or triple-beam balance. They can calculate exact densities, compare predicted and measured values with percent error, and graph mass against volume for several liquids.
The recipe doesn't need to change. The vocabulary, data expectations, and level of adult support change instead. That's what makes this experiment useful across age groups. A preschooler sees a colorful stack, while a middle school student sees a fluid-stability system that can be measured and modeled.
Classroom Lesson Plans and Extension Activities
A short pour can become a compact STEM unit. Use one class period for predictions, another for the tower build, and a later investigation for testing whether temperature or dissolved sugar changes a liquid's measured density. Students can record observations in a lab notebook using a format such as this bench-to-ELN note example, adapting the structure for age-appropriate science writing.
A printable worksheet can ask students to:
- Predict the order: Rank the liquids from most dense to least dense.
- Record observations: Sketch each visible boundary and note any blur.
- Explain the outcome: Use mass, volume, density, viscosity, and diffusion in the explanation.
- Evaluate the method: Identify where pouring speed or temperature may have affected the result.
Connect the activity to NGSS MS-PS1-2 and 5-PS1-3 by asking students to measure properties, compare substances, and use evidence to explain why materials behave differently. Follow up with reading about Archimedes and buoyancy, then graph measured mass against volume to reinforce the density relationship.
A design challenge can ask groups to engineer the tallest stable tower using a fixed set of liquids. Assess both the scientific explanation and teamwork. A simple rubric row might award credit when every group member shares a task, listens to observations, and helps revise the method after a failed pour.
For project-based follow-up ideas, teachers can also explore project-based learning lesson plans. At home, children can repeat the demonstration with dish soap and corn syrup, then explain to a family member why the order matters.
Playz offers science kits and hands-on creative toys that can help children explore concepts through purposeful play, including activities connected to liquid layering and chemistry. Visit Playz to find tools that can turn a density tower experiment into a broader screen-free learning session.