

Are you looking for a way to turn a regular afternoon into an adventure of discovery? You've come to the right place. This guide offers a curated list of 10 easy science experiments for kids at home, specifically designed to spark curiosity and inspire learning without requiring expensive lab equipment or complicated setups. We focus on transforming simple household items like baking soda, lemon juice, and paper towels into powerful tools for exploring the magic of chemistry, physics, and biology.
These activities are more than just fun; they are foundational learning experiences. By engaging in hands-on projects, children develop critical thinking skills, learn to observe and question the world around them, and build a genuine passion for science. From the classic erupting volcano to the mesmerizing density tower, each experiment is a self-contained lesson that feels like pure play. If you're looking for even more ideas, check out these excellent resources showcasing simple science experiments for preschoolers that promote learning through play. Let's dive in and transform your home into a laboratory of fun and exploration.
1. Volcano Eruption (Baking Soda & Vinegar)
The classic baking soda and vinegar volcano is a staple of at-home science for a reason: it’s a thrilling and visually impressive introduction to chemical reactions. This experiment vividly demonstrates what happens when an acid (vinegar) and a base (baking soda) combine. The resulting fizzy "eruption" is actually the rapid production of carbon dioxide gas, a safe and exciting way to see science in action.
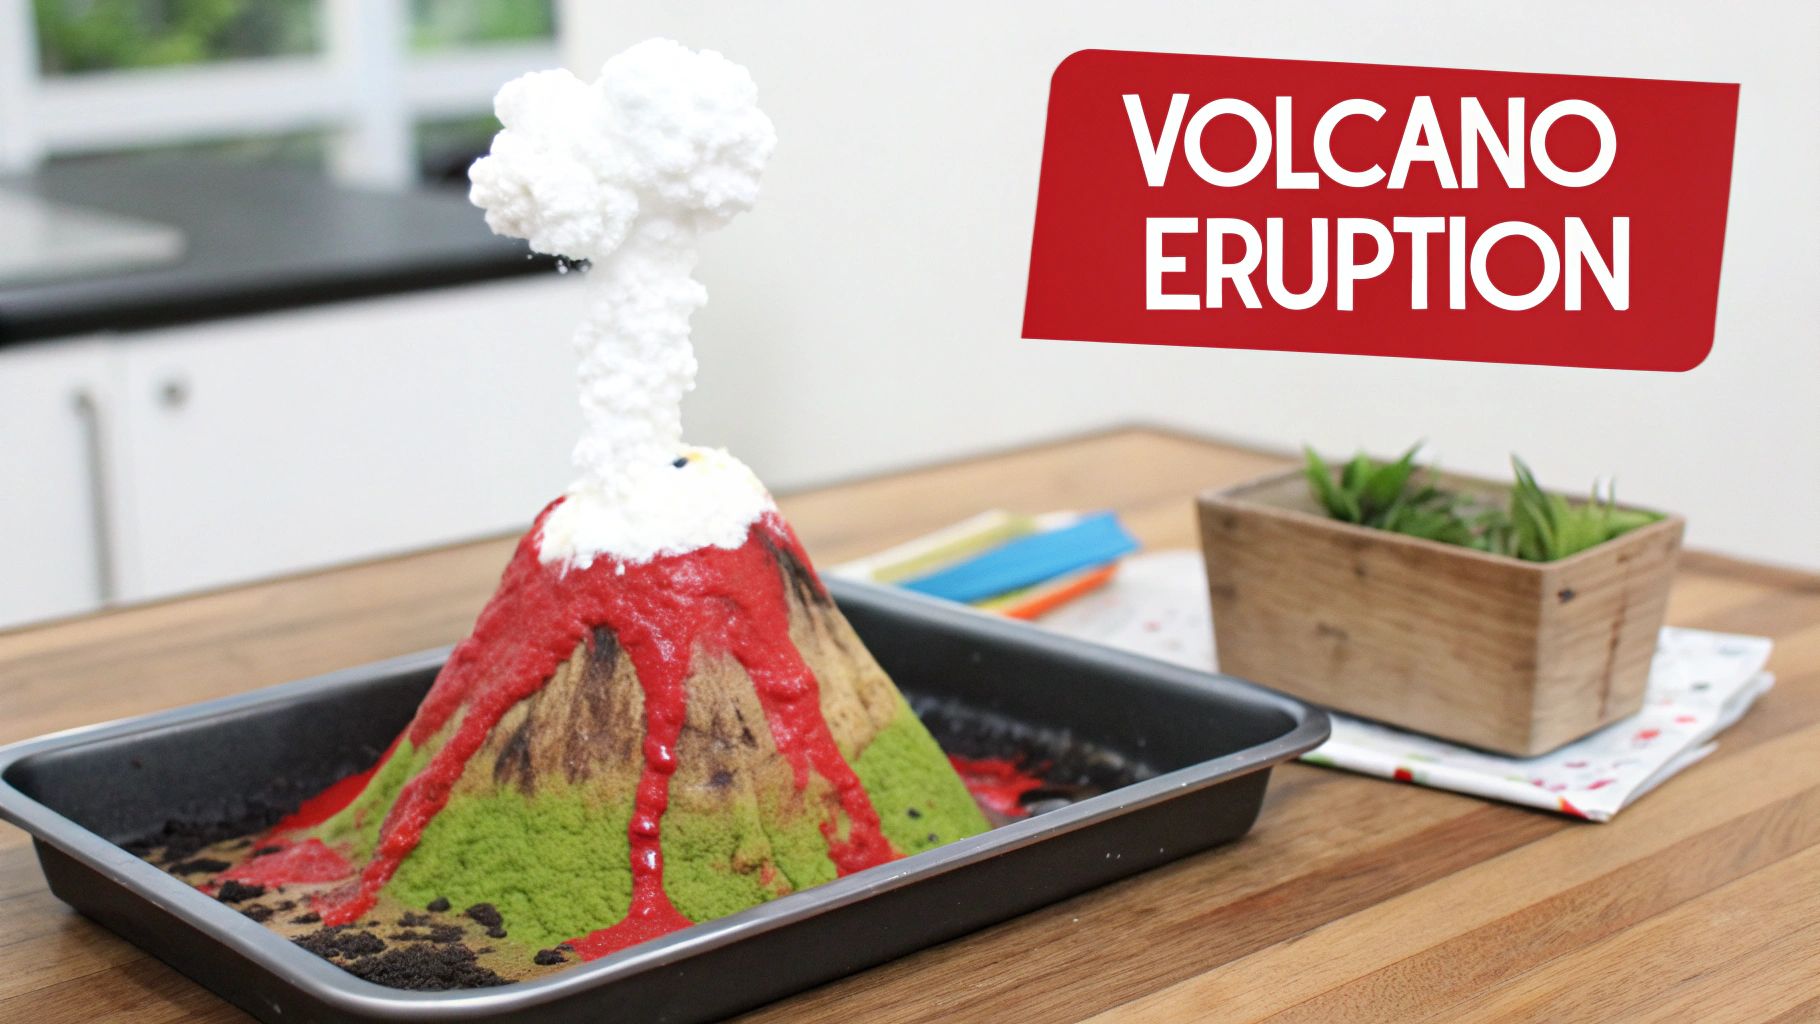
This hands-on activity is perfect for introducing young children to fundamental scientific concepts like acids, bases, and gas production. It’s one of the most popular easy science experiments for kids at home because the setup is simple, the materials are common household items, and the payoff is immediate and exciting.
Key Takeaways & Actionable Tips
To get the best eruption and learning experience, follow these simple but effective tips:
- Contain the Mess: Always place your volcano model inside a baking pan or a large plastic bin. This makes cleanup quick and keeps the bubbly "lava" from spreading everywhere.
- Boost the Lava Flow: Add a few drops of red or orange food coloring to the vinegar for a realistic lava effect. A squirt of dish soap will also help create more bubbles, making the eruption last longer and appear more dramatic.
- Build a Structure: While you can simply use a bottle, building a volcano shape around it with clay, play-dough, or papier-mâché elevates the project and adds an artistic element.
Pro-Tip: Use a small, narrow-mouthed bottle (like a small soda or water bottle) for the volcano's "chamber." The smaller opening helps build more pressure, resulting in a more forceful and impressive eruption.
This foundational activity, often seen in science fairs and STEM programs, provides a perfect opportunity to discuss chemistry concepts. For those looking to dive deeper into similar reactions, you can explore other home chemistry experiments to continue the scientific discovery. Learn more about chemistry experiments at home.
2. Crystal Growing (Salt, Sugar, or Borax)
Growing crystals is a magical experiment that teaches patience and reveals the beauty of chemistry over several days. This activity introduces kids to concepts like solubility, supersaturated solutions, and nucleation. By dissolving a solid like salt, sugar, or borax in hot water and letting it cool, children can watch as intricate crystal structures form, demonstrating how molecules arrange themselves into organized patterns.
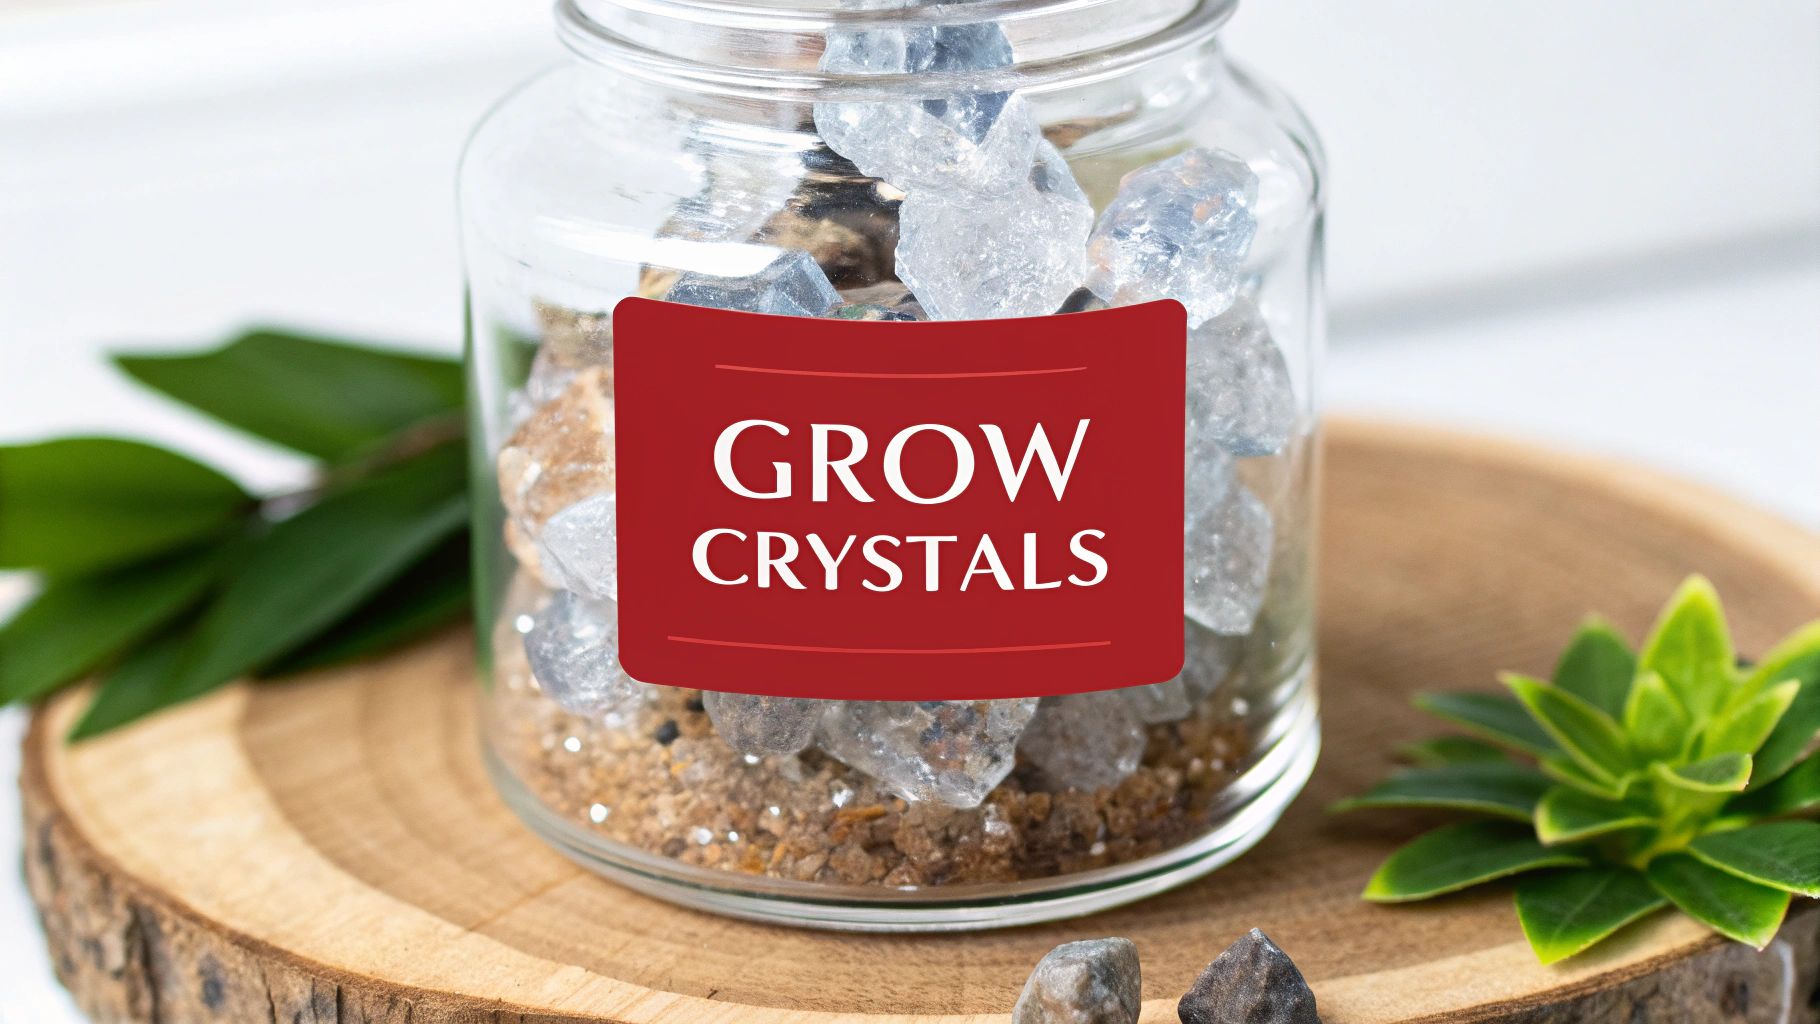
This slow-paced yet rewarding project is one of the best easy science experiments for kids at home because it illustrates scientific principles in a visually stunning way. It’s a common project in home schooling curricula and middle school geology lessons, teaching the value of careful observation and patience as the crystals grow day by day.
Key Takeaways & Actionable Tips
For the clearest and most beautiful crystals, follow these simple guidelines:
- Provide a Nucleation Site: Tie a string to a pencil and lay it across the top of the jar, allowing the string to dangle into the solution. This gives the crystals a surface to start growing on. A pipe cleaner or wooden stick also works well.
- Keep it Stable: Place the jar in a location where it won’t be disturbed and the temperature remains consistent. Shaking or sudden temperature changes can disrupt crystal formation.
- Add Some Color: A few drops of food coloring in your solution will create vibrant, colorful crystals, adding an artistic touch to the scientific process.
Pro-Tip: Use distilled water instead of tap water. Tap water contains minerals and impurities that can interfere with the crystallization process, while distilled water provides a cleaner environment for larger, more well-defined crystals to form.
This experiment is a fantastic way to explore chemistry and geology. Documenting the growth with daily photos can turn it into a long-term observation project. For more detailed instructions on creating your own crystal garden, you can explore guides on crystal growing kits. Find detailed crystal growing kit instructions here.
3. Walking Water (Paper Towel Capillary Action)
The Walking Water experiment is a mesmerizing and colorful way to demonstrate the scientific principle of capillary action. This experiment shows how water can seemingly defy gravity by "walking" along paper towels from one cup to another. The process illustrates how cohesive and adhesive forces work together to pull liquid through narrow spaces, the very same mechanism plants use to draw water up from their roots to their leaves.
This simple yet profound activity is perfect for introducing young learners to concepts in both physics and biology. As one of the most visually appealing easy science experiments for kids at home, it requires minimal materials and provides a fantastic opportunity to observe a slow, magical process unfold over time. Its popularity in preschool classrooms and on educational channels highlights its effectiveness in making complex ideas accessible and engaging.
Key Takeaways & Actionable Tips
To ensure your water walks successfully and creates a beautiful rainbow effect, follow these key tips:
- Choose Quality Towels: Use strong, absorbent paper towels. A more durable brand will hold together as it becomes saturated and will facilitate better water transfer.
- Create a Rainbow: Arrange several cups in a line or circle. Fill alternating cups with water and primary colors (red, yellow, blue), leaving the cups in between empty. As the colored water travels and mixes in the empty cups, it will create secondary colors like green and orange.
- Be Patient: Capillary action takes time. Set up the experiment in a stable location where it won’t be disturbed. You can check its progress every hour to see the changes.
Pro-Tip: Fold your paper towel strips into narrow, sturdy wicks about one inch wide. This concentrated path helps the water travel more efficiently and quickly between the cups, making the results more dramatic.
This quiet, observational experiment is an excellent way to teach patience and scientific documentation. Encourage children to predict what will happen and document the changes with photos, creating a time-lapse record of their colorful creation. For more lessons on water properties, you can explore other surface tension and density experiments. Find more physics experiments for kids here.
4. Slime Making (Glue, Borax, or Contact Solution)
Slime making is a wildly popular activity that doubles as a hands-on lesson in polymer chemistry. This experiment demonstrates how combining a polymer (polyvinyl acetate, found in white glue) with an activator (like borax or boric acid in contact lens solution) creates a new substance with unique properties. The activator links the long polymer chains in the glue together, transforming a liquid into a stretchy, gooey, non-Newtonian fluid.
This tactile experiment is one of the most beloved easy science experiments for kids at home because it allows for endless creativity while teaching fundamental concepts about molecules and chemical bonds. The process is engaging, and the result is a fun toy, making it a perfect introduction to chemistry that kids can feel and manipulate.
Key Takeaways & Actionable Tips
For the best and safest slime-making experience, follow these simple guidelines:
- Choose a Safe Activator: For younger children, using contact lens solution (which contains boric acid) and baking soda is a safer, borax-free alternative. If using a borax solution, ensure an adult handles it and everyone wears protective gloves.
- Customize Your Creation: Add glitter, food coloring, foam beads, or small charms to the mixture to create unique textures and visual effects. This adds an artistic layer to the scientific process.
- Contain the Mess: Work on a surface that is easy to clean, like a craft mat, plastic tray, or a table covered with newspaper. Keep ingredients in bowls to minimize spills.
Pro-Tip: For fluffy slime, add a small amount of shaving cream to your glue base before mixing in the activator. The air bubbles in the foam will create a lighter, softer, and more voluminous texture.
This activity, popularized by viral social media trends, provides a fantastic opportunity to discuss polymers, cross-linking, and states of matter. For those wanting to explore the science of polymers further, there are many resources available online. Learn more about the science of slime.
5. Density Tower (Layered Liquids)
The Density Tower is a visually stunning experiment that introduces the scientific concept of density in a clear and colorful way. By carefully layering different household liquids, children can see how liquids with higher density sink below those with lower density, creating a beautiful rainbow effect in a single container. This experiment illustrates that even though they are all liquids, they have different weights for the same volume, which keeps them from mixing.

This activity is one of the most mesmerizing easy science experiments for kids at home because it turns an abstract concept into a tangible, artistic creation. It's a fantastic way to teach about specific gravity and molecular weight without complex math, making it perfect for elementary-aged learners and a popular demonstration in school STEM curricula.
Key Takeaways & Actionable Tips
To create a perfect, non-mixing tower and enhance the learning, try these simple tips:
- Pour with Precision: Pour each liquid slowly and carefully down the inside of the container or over the back of a spoon. This prevents the liquids from mixing as they are added.
- Create a Rainbow: Use food coloring to tint clear or light-colored liquids like water and rubbing alcohol. Assigning a different color to each layer makes the density differences even more dramatic and easy to see.
- Test Buoyancy: Once your tower is complete, gently drop small objects like a plastic bead, a grape, or a small screw into the container. Watching where they settle is a great extension to demonstrate how solid objects also have different densities.
Pro-Tip: Use a tall, narrow container like a graduated cylinder or a clear glass vase. The narrow shape makes the layers appear thicker and more distinct, enhancing the visual impact of the experiment.
This hands-on project provides a great opportunity to explore the properties of matter. For those wanting to expand on this topic, exploring other physics-based activities can further a child's understanding of the world around them.
6. Invisible Ink (Lemon Juice or Baking Soda)
Unleash your child's inner spy with the classic invisible ink experiment, a thrilling way to explore the science of oxidation. Using common kitchen ingredients like lemon juice, children can write secret messages that only become visible when heat is applied. This experiment cleverly demonstrates how an organic substance (lemon juice) oxidizes and turns brown when heated, making the hidden message appear like magic.
This activity is a fantastic way to introduce kids to chemistry and the concept of chemical reactions triggered by an external agent like heat. As one of the most imaginative easy science experiments for kids at home, it perfectly blends creative play with fundamental scientific principles. It’s ideal for spy-themed birthday parties or a fun afternoon of creating secret treasure maps.
Key Takeaways & Actionable Tips
To ensure your secret messages are a success and the learning experience is clear, follow these simple tips:
- Choose the Right Ink: Freshly squeezed lemon juice works best. The juice weakens the paper's fibers, and when heated, these weakened areas burn or oxidize faster than the rest of the paper, revealing the message.
- Master the Technique: Use a cotton swab, a small paintbrush, or even a toothpick to write your message on plain white paper. Don't oversaturate the paper, as it could warp or tear.
- Reveal with Care: An adult should always handle the reveal process. Gently heat the paper with a lamp, a hairdryer on high heat, or by holding it near a lightbulb. The message will slowly turn a toasty brown.
Pro-Tip: For a different chemical reaction, use a solution of baking soda and water as your ink. To reveal this message, an adult can gently wipe over the paper with a cotton ball soaked in grape juice. The acidic juice reacts with the basic baking soda, causing a color change that reveals your writing.
7. Static Electricity (Balloon Experiments)
Exploring the invisible forces of static electricity with balloons is a magical and memorable science lesson. This experiment offers a tangible way for children to understand electrostatic forces by creating a charge on a balloon and observing its effects on other objects. When a balloon is rubbed against hair or a piece of wool, it collects extra electrons, giving it a negative charge that can attract or repel other items.
This classic demonstration is one of the most interactive easy science experiments for kids at home because it produces immediate and surprising results. From making hair stand on end to picking up tiny pieces of paper without touching them, it introduces core physics concepts like charge transfer and attraction in a safe and entertaining way.
Key Takeaways & Actionable Tips
To get the most dramatic and educational results from your static electricity experiments, try these simple tips:
- Work in Dry Conditions: Static electricity is much more powerful in low-humidity environments. This experiment works best during dry winter months or in an air-conditioned room.
- Choose the Right Materials: Rubbing the balloon with wool fabric, a cotton t-shirt, or even just clean, dry hair is highly effective for building a strong static charge.
- Prepare Small Objects: Tear up tiny pieces of tissue paper or aluminum foil for the balloon to attract. You can also try to bend a thin stream of water from a faucet or make an empty soda can roll across a table.
Pro-Tip: For a fun group activity, have multiple children charge their balloons at the same time. See if they can make their balloons stick to a wall or even repel each other without touching, demonstrating that like charges push away.
This experiment is a fantastic gateway into the world of physics, often seen in interactive museum exhibits and STEM programs. For those wanting to explore more forces and motion, you can find other engaging projects to continue the scientific journey. Learn more about physics projects for science fairs.
8. DIY Compass (Magnetism)
Creating a DIY compass is a fascinating experiment that demystifies Earth's magnetic field and introduces the fundamental principles of magnetism. By magnetizing a simple sewing needle and allowing it to float freely, children can build a functional tool that points to magnetic north. This experiment vividly demonstrates how invisible forces can have powerful and practical applications, like navigation.
This hands-on activity is perfect for exploring magnetism, Earth science, and the history of exploration. As one of the most intriguing easy science experiments for kids at home, it connects abstract concepts to a tangible, working device. The process is simple, the materials are readily available, and the result is a rewarding "aha!" moment.
Key Takeaways & Actionable Tips
To ensure your homemade compass works correctly and provides the best learning experience, follow these tips:
- Proper Magnetization: To magnetize the needle, firmly stroke it with a strong magnet from one end to the other, always in the same direction. Lifting the magnet away after each stroke is key. Repeat this 50-75 times to align the needle’s domains.
- Create a Stable Float: Use a small, thin slice of cork or a piece of foam as a float. Carefully push the magnetized needle through the center of the cork so it is balanced and can pivot easily in a shallow bowl of water.
- Avoid Interference: Keep your compass away from metal objects, electronics, or other magnets, as these can interfere with Earth's magnetic field and give a false reading.
Pro-Tip: Once your compass has settled, use a real compass or a smartphone app to verify that it's pointing to magnetic north. This adds an exciting layer of validation and is a great opportunity to combine the activity with basic map-reading skills.
This foundational experiment, often featured in outdoor education and geography lessons, provides a perfect opportunity to discuss Earth's magnetic poles. For those looking to explore more invisible forces, you can investigate static electricity or air pressure to continue the scientific journey.
9. pH Testing with Red Cabbage Indicator
This colorful kitchen chemistry experiment turns a simple vegetable into a scientific tool. By using red cabbage juice as a natural pH indicator, children can test various household substances and see them magically change color. The pigments in red cabbage, called anthocyanins, react differently to acids and bases, creating a vibrant rainbow that visually represents the pH scale.
This hands-on activity is a brilliant way to introduce chemistry concepts like acids, bases, and the pH scale in a safe and visually engaging manner. It's one of the most memorable easy science experiments for kids at home because it uses everyday items to reveal the hidden scientific properties of the world around them, making abstract concepts tangible and exciting.
Key Takeaways & Actionable Tips
To get the most colorful results and the best learning experience, follow these simple tips:
- Prepare the Indicator: To extract the juice, finely chop a few red cabbage leaves and boil them in water for about 10 minutes. Let the mixture cool completely, then strain the purple liquid into a jar.
- Use Clear Containers: Pour small amounts of your cabbage indicator into several clear glasses or test tubes. This ensures the color changes are highly visible when you add different test substances.
- Create a Rainbow: Test a variety of household liquids. Add a few drops of lemon juice or vinegar to see a red/pink (acid), a pinch of baking soda for a blue/green (base), and plain water to see the neutral purple.
Pro-Tip: Create a reference chart by labeling each color with the substance that produced it. This helps kids build their own visual pH scale, from acidic red to neutral purple to alkaline green-yellow, reinforcing the scientific lesson.
This experiment provides a perfect, low-cost opportunity to explore fundamental chemical properties in an unforgettable way. For more ideas on how to continue your child's journey into chemistry, you can explore other exciting projects. Learn more about chemistry experiments for kids.
10. Simple Circuit with LEDs (Basic Electricity)
Building a simple circuit is a fantastic entry point into the world of electronics and electricity. This hands-on project illuminates the fundamental principles of how power flows by tasking kids with creating a complete path for electricity to travel from a power source, through a component like an LED, and back again. It’s a foundational activity that makes abstract concepts like conductivity and circuits tangible and exciting.
This experiment is one of the most rewarding easy science experiments for kids at home because it connects directly to the technology they use every day. Successfully lighting up an LED provides a genuine "aha!" moment, empowering children with a basic understanding of engineering and physics. It is often a key introductory activity in elementary STEM programs and pre-engineering courses.
Key Takeaways & Actionable Tips
To ensure a safe and successful introduction to electronics, keep these tips in mind:
- Use Safe Power: Stick to low-voltage power sources like AA or AAA batteries. A simple battery holder will make connecting wires much easier and safer.
- Mind the Polarity: LEDs only work one way. Remember that the longer leg (the anode) connects to the positive (+) side of the battery, and the shorter leg (the cathode) connects to the negative (-) side.
- Easy Connections: Use alligator clip wires for a frustration-free experience. They allow kids to easily clip and unclip connections without needing any special tools.
Pro-Tip: Start with a simple series circuit: connect the positive battery terminal to the LED's long leg, then connect the short leg back to the negative terminal. Once that works, challenge your child to add a simple switch or more LEDs to see how the circuit changes.
This activity demystifies how everyday electronics work and provides a solid foundation for more complex projects. For those ready to explore further, you can find more detailed instructions to enhance the learning. Learn more about how to build simple circuits.
10 Easy Home Science Experiments — Quick Comparison
| Experiment | 🔄 Complexity | ⚡ Resources | 📊 Expected outcomes | 💡 Ideal use cases | ⭐ Key advantages |
|---|---|---|---|---|---|
| Volcano Eruption (Baking Soda & Vinegar) | Low setup, short demo (5–10 min); some containment needed | Very low — baking soda, vinegar, tray, optional soap/color | High visual impact; short-lived foam eruption | Science fairs, museum demos, elementary lessons | ⭐⭐⭐⭐ Highly engaging visual; teaches acid–base gas production |
| Crystal Growing (Salt, Sugar, or Borax) | Moderate — multi-day process, needs careful conditions | Low cost — salts/borax, hot water, jars; adult supervision for heat | Distinct crystalline structures over 3–7 days; variable success | Home projects, geology units, long-term observation | ⭐⭐⭐⭐ Teaches crystallization and patience; attractive results |
| Walking Water (Paper Towel Capillary Action) | Very low — quick 5-min setup, results in <2 hours | Minimal — cups, water, food coloring, paper towels | Color migration and mixing; clear capillary demonstration | Preschool, plant-biology intro, colorful demos | ⭐⭐⭐⭐ Immediate, colorful demo of capillary action |
| Slime Making (Glue, Borax, or Contact Solution) | Low–moderate — simple mixing; safety with activators | Moderate — glue, activator (borax/contact solution), add-ins | Immediate tactile material; reusable for days with storage | Sensory play, classrooms, viral demonstrations | ⭐⭐⭐⭐ Highly engaging, customizable; teaches polymer concepts |
| Density Tower (Layered Liquids) | Moderate — careful slow layering for best results | Moderate — multiple liquids (honey, soap, water, oil, alcohol) | Stable, rainbow-like layers showing density differences | Classroom demos, museum exhibits, hypothesis testing | ⭐⭐⭐⭐ Striking visual of density and buoyancy |
| Invisible Ink (Lemon Juice or Baking Soda) | Low — simple writing; reveal may require supervised heat | Very low — lemon juice or baking soda solution, paper | Secret messages revealed by heat/chemical developer; variable clarity | Spy-themed activities, camps, parties | ⭐⭐⭐ Creative, low-cost; teaches oxidation and reveal techniques |
| Static Electricity (Balloon Experiments) | Very low — immediate effects, repeatable but brief | Minimal — balloons, fabric/hair, small paper pieces | Short-lived attraction effects; dramatic but humidity-dependent | Preschool, interactive exhibits, hands-on demos | ⭐⭐⭐ Dramatic, safe intro to charge and electrostatic forces |
| DIY Compass (Magnetism) | Low — ~10-minute build; magnetization technique required | Very low — needle, magnet, cork/foam, shallow dish | Functional compass that indicates magnetic north; accuracy varies | Outdoor education, navigation lessons, earth-science labs | ⭐⭐⭐⭐ Practical hands-on tool; teaches magnetism and navigation |
| pH Testing with Red Cabbage Indicator | Moderate — prep (boil cabbage) and multiple test containers | Low–moderate — red cabbage, heating pot, clear cups | Vivid color changes across pH scale; reproducible comparisons | Middle-school chemistry, environmental science | ⭐⭐⭐⭐ Natural, visual pH indicator; teaches acids vs. bases |
| Simple Circuit with LEDs (Basic Electricity) | Moderate — wiring basics; safe with supervision | Moderate — batteries, LEDs, wires, holders, clips | Immediate visual feedback when circuit complete; troubleshooting practice | Intro to electronics, robotics clubs, STEM classes | ⭐⭐⭐⭐ Teaches circuits, conductivity, and problem-solving |
Frequently Asked Questions (FAQs)
What's the easiest science experiment for a 5-year-old?
The Volcano Eruption is a fantastic choice for young children. The setup is quick, the materials are safe (with supervision), and the fizzy reaction provides an immediate and exciting visual payoff that captivates their attention. The Walking Water experiment is another excellent option due to its simple setup and magical, colorful results.
How can I make these experiments more educational?
Focus on the "why" behind the "wow." Before you start, ask your child to predict what might happen. During the experiment, narrate the process and introduce simple scientific terms (e.g., "This is a chemical reaction," or "This is called capillary action"). Afterward, discuss the results and compare them to the initial prediction.
Are these experiments safe to do at home?
Yes, all the experiments listed use common household items and are generally safe. However, adult supervision is always essential, especially for activities involving hot water (Crystal Growing), heat sources (Invisible Ink), or small parts (DIY Compass). Always ensure children understand not to taste or ingest any of the materials.
Ready to Make Learning an Adventure?
The journey through these ten hands-on projects reveals a powerful truth: science isn't just a subject in a textbook; it's a dynamic, interactive adventure waiting to unfold in your kitchen or living room. From the explosive fizz of a baking soda volcano to the quiet magic of a homemade compass, you've seen how simple household items can unlock profound scientific principles. These easy science experiments for kids at home are more than just fun activities; they are foundational building blocks for a lifetime of curiosity and critical thinking.
From Simple Reactions to Big Discoveries
Each experiment serves as a gateway to understanding the world. The mesmerizing colors of the "walking water" experiment beautifully illustrate capillary action, the same force that helps trees drink water. Similarly, layering liquids in a density tower doesn't just create a pretty rainbow effect; it provides a tangible, visual lesson on mass and volume that children can grasp instantly. The goal isn't to achieve a perfect, lab-grade result every time. The true value lies in the process: the questions, the predictions, the occasional "failed" attempt that leads to an even bigger discovery.
The most important takeaway is to embrace the "why." When your child asks, "Why did the liquids stay separate?" or "How does the lemon juice make the ink invisible?" you've opened the door to genuine scientific inquiry.
Nurturing a Lifelong Love for STEM
Fostering this sense of wonder is one of the greatest gifts you can offer. By transforming your home into a mini-laboratory, you show children that learning is not a chore but an exciting, hands-on quest for answers. You are empowering them to observe, hypothesize, test, and conclude, which are skills that extend far beyond the realm of science into every aspect of their education and future careers.
As you plan for birthdays or holidays, remember the impact of these experiences. To truly encourage a passion for discovery beyond traditional play, consider cool Christmas gifts for kids that aren't toys, focusing instead on hands-on learning tools or experiences that build on this newfound curiosity. The joy of creating slime or growing crystals can spark an interest that lasts a lifetime, proving that the best gifts are often those that inspire action and thought.
The adventure doesn't have to end here. The principles you've explored in these easy science experiments for kids at home are just the beginning. The world is full of amazing phenomena to investigate, and with a foundation of curiosity and a willingness to explore, your child is well on their way to becoming a lifelong learner and innovator.
Ready to take the next step and dive even deeper into the world of STEM? Playz offers a wide range of science kits designed to turn curiosity into creation, minimizing screen time while maximizing imagination. Join over 5 million satisfied families and find the perfect kit to continue your scientific journey at Playz today