

Making the perfect batch of slime is way easier than you think. The classic, can't-miss recipe combines 4 ounces of white PVA glue with water and a bit of a diluted borax activator, creating that stretchy, gooey fluid that provides hours of fun.
It’s a simple process that turns a few common household items into an incredible sensory toy. This guide offers actionable insights and practical examples to make your slime-making adventure a roaring success, turning a fun craft into a memorable learning experience.
The Foundation of Perfect Borax Slime
Before you start mixing, it helps to know what each ingredient actually does. Think of it like baking a cake—every component has a specific job. Once you understand the "why" behind the ingredients, you can easily troubleshoot any issues and guarantee a successful slime session every single time.
This basic recipe is a well-structured blueprint for endless creative slime variations. With these fundamentals, you're not just making slime; you're conducting a cool chemistry experiment right in your kitchen.
Borax Slime Ingredients at a Glance
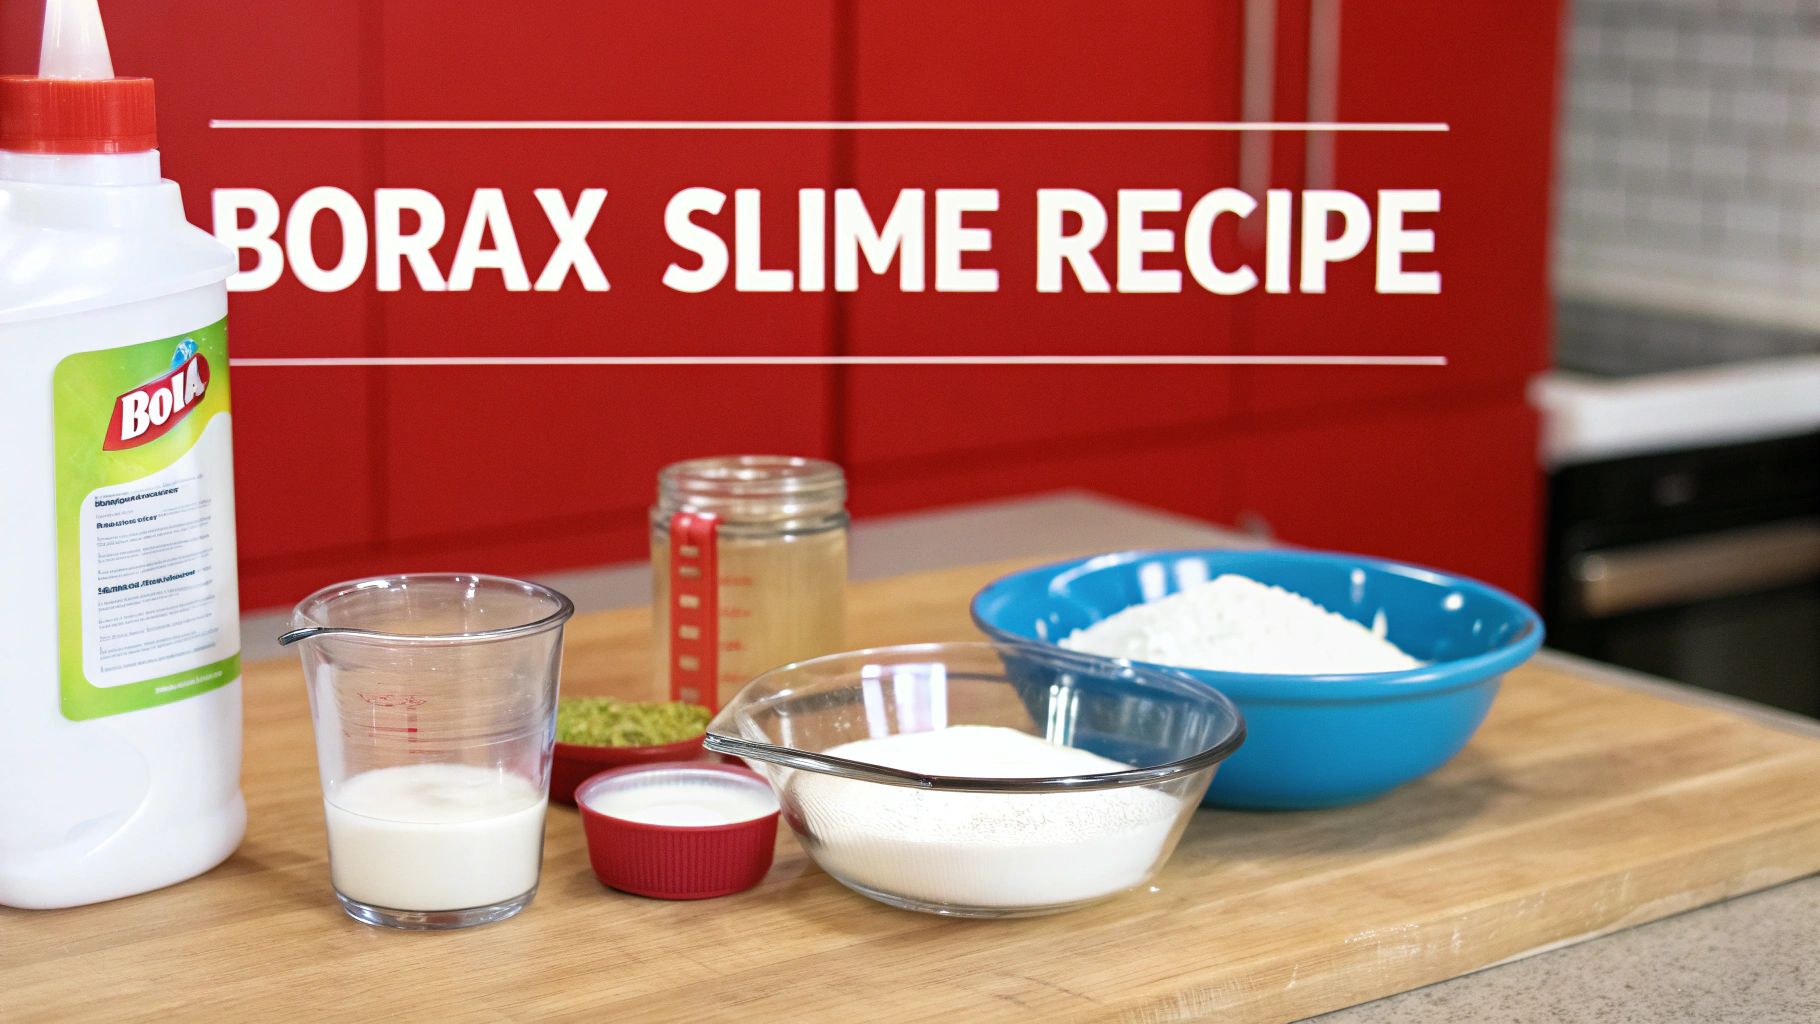
For a foolproof batch, getting your ingredients measured and ready to go is the best first step. This scannable table breaks down exactly what you'll need and explains the role each part plays in creating that perfect, gooey texture you're after.
| Ingredient | Quantity | Role in Slime Making |
|---|---|---|
| White PVA School Glue | 4 oz (½ cup) | This is the polymer base. The long molecular chains in the glue are what the borax will link together to create slime. |
| Warm Water | 1 ½ cups, divided | You'll use this in two steps: one part to dilute the glue for easier mixing, and the other to dissolve the borax for the activator. |
| Borax Powder | 1 teaspoon | This is the magic activator. When dissolved in water, it creates borate ions that cross-link the glue's polymer chains. |
| Food Coloring/Glitter | Optional | For fun! This is where you can personalize your slime and turn a basic batch into a unique creation. |
Once you have everything laid out, you're ready for the fun part. This simple setup is all it takes to kick off a seriously cool science experiment right in your kitchen.
Understanding the Key Components
Let's take a closer look at the star players in this little chemical reaction.
First up is white PVA (polyvinyl acetate) glue. This is the absolute backbone of your slime. It’s filled with long, flexible molecules called polymers. A real-world example is cooked spaghetti; on its own, the strands slide past each other. This is exactly how the polymers in liquid glue behave.
Next, you have the borax powder. When you dissolve one teaspoon of this in a cup of warm water, you're creating the "activator" solution. This is what links all those glue polymers together, turning a sticky liquid into a stretchy, pokable solid.
Finally, water plays two important roles. It thins out the glue, making it much easier to mix, and it’s also essential for dissolving the borax powder completely. Using warm water is a pro tip—it helps the borax dissolve faster, ensuring your activator is smooth and effective.
Key Takeaway: The magic of slime lies in the chemical reaction between the glue's polymers and the borax activator. Getting the ratios right is the secret to getting that ideal, non-sticky, and super-stretchy consistency every kid loves.
Once you’ve mastered this basic recipe, you've opened the door to endless possibilities. You can start exploring different colors, textures, and even scents. For anyone looking to expand their crafting adventures, check out our awesome collection of creative science kits and slimes that take hands-on learning to a whole new level.
Making Slime with Borax Safely
Making slime is a fantastic hands-on activity, but when you're using an ingredient like borax, safety must come first. The great news is that with a few simple ground rules, you can create a fun and totally worry-free environment for your little scientist.
The key to doing this safely is understanding you're not actually playing with pure borax powder. You’re creating a heavily diluted "activator" solution, which massively reduces the risks that come with handling the concentrated powder.
The Golden Rule of Slime Making
Here it is, the single most important rule: adult supervision is non-negotiable. An adult should always be the one to handle the borax powder and mix the activator solution. This is how you make sure the powder is measured right, dissolved completely, and kept away from curious hands.
Think of yourself as the lead scientist. Your job is to prep the key ingredient and oversee the project, letting your kid take the lead on all the fun parts—like mixing the glue, adding colors, and kneading the final gooey creation.
Important Insight: The main safety concerns with borax come from ingestion or prolonged skin contact with the undiluted powder. By having an adult prepare the activator, you eliminate the primary risks right from the start.
Essential Safety Practices and Precautions
Beyond supervision, a few practical steps will make every slime session a safe one. If you build these habits from the beginning, safety just becomes a natural part of the fun.
-
Protect Sensitive Skin: While the diluted activator is generally fine for brief contact, kids with sensitive skin or existing cuts should wear gloves. It’s a simple barrier that prevents potential irritation.
-
Work in a Well-Ventilated Area: It's always a good idea to work in a space with decent air circulation, like a kitchen or a room with an open window. This minimizes the chance of inhaling fine powder particles during mixing.
-
Designate a Slime-Making Zone: Set up shop on a dedicated surface like a craft mat or a large tray. This contains the mess and makes cleanup far easier.
The classic slime recipe works because of a chemical reaction where borax cross-links the polyvinyl alcohol chains in white school glue, creating a shear-thickening, non-Newtonian fluid. Large poison-control datasets show that over 85% of borax exposures from slime result in only mild skin irritation. A tiny fraction—under 5%—lead to burns, usually from improper handling of undiluted powder.
Slime Time Rules for Everyone
Before you open the glue, lay down some clear and simple rules. Framing them as the "Official Rules for Slime Scientists" makes it feel less like a lecture and more like part of the experiment.
- No Tasting Allowed: Slime is for playing, not for eating. This is a big one. Remind them that none of the ingredients should ever go in or near their mouths.
- Wash Hands Thoroughly: This is a crucial step. Everyone needs to wash their hands with soap and water both before and immediately after playing with the slime. This gets rid of any leftover activator and keeps the slime itself cleaner.
- Keep Away from Pets and Little Siblings: Make sure pets and younger kids, who might not understand the "no tasting" rule, are kept away from the slime-making area.
- Clean Up Together: Make cleanup part of the activity! Wipe down all your surfaces with soap and water, and make sure all ingredients are sealed and stored out of reach.
Following these guidelines helps create a structured and secure environment for countless hours of gooey fun. This kind of hands-on activity is a brilliant way to engage the senses, a core part of effective sensory play.
Creating the Perfect Batch of Borax Slime
This is where the real magic happens. A few simple ingredients are about to transform into that gooey, stretchy stuff kids can't get enough of. This isn't a rigid list of steps; think of it as a creative kitchen experiment where you get to be the scientist.
We'll walk you through each phase, sharing scannable, actionable insights so you know exactly what to do to nail that perfect, non-sticky consistency every single time.
Preparing the Borax Activator
First things first, let's mix up the borax activator. This simple solution is the key that unlocks the slime-making reaction, turning your glue from a sticky liquid into a playable, gooey masterpiece.
The secret to smooth, lump-free slime is a perfectly dissolved activator. Always use warm water for this part. The heat helps the borax powder dissolve completely, which is crucial for avoiding a gritty texture in your final product.
Just measure out one cup of warm water and stir in one teaspoon of borax powder until the water is totally clear. Once it's dissolved, set it aside.
Pro Tip: If you can still see tiny borax crystals swirling at the bottom, keep stirring! A fully dissolved activator is non-negotiable for a consistent chemical reaction and a much better slime texture.
Building the Glue Base
Now for the really fun part—making the glue base. This is where you inject personality with colors, glitter, and any other wild mix-ins you can dream up.
Grab a bowl and pour in 4 ounces (½ cup) of white PVA glue. Next, add ½ cup of warm water to the glue and give it a good stir until it's a smooth, milky liquid. Don't skip this—thinning the glue helps the activator work its magic more evenly.
This is your moment to get creative!
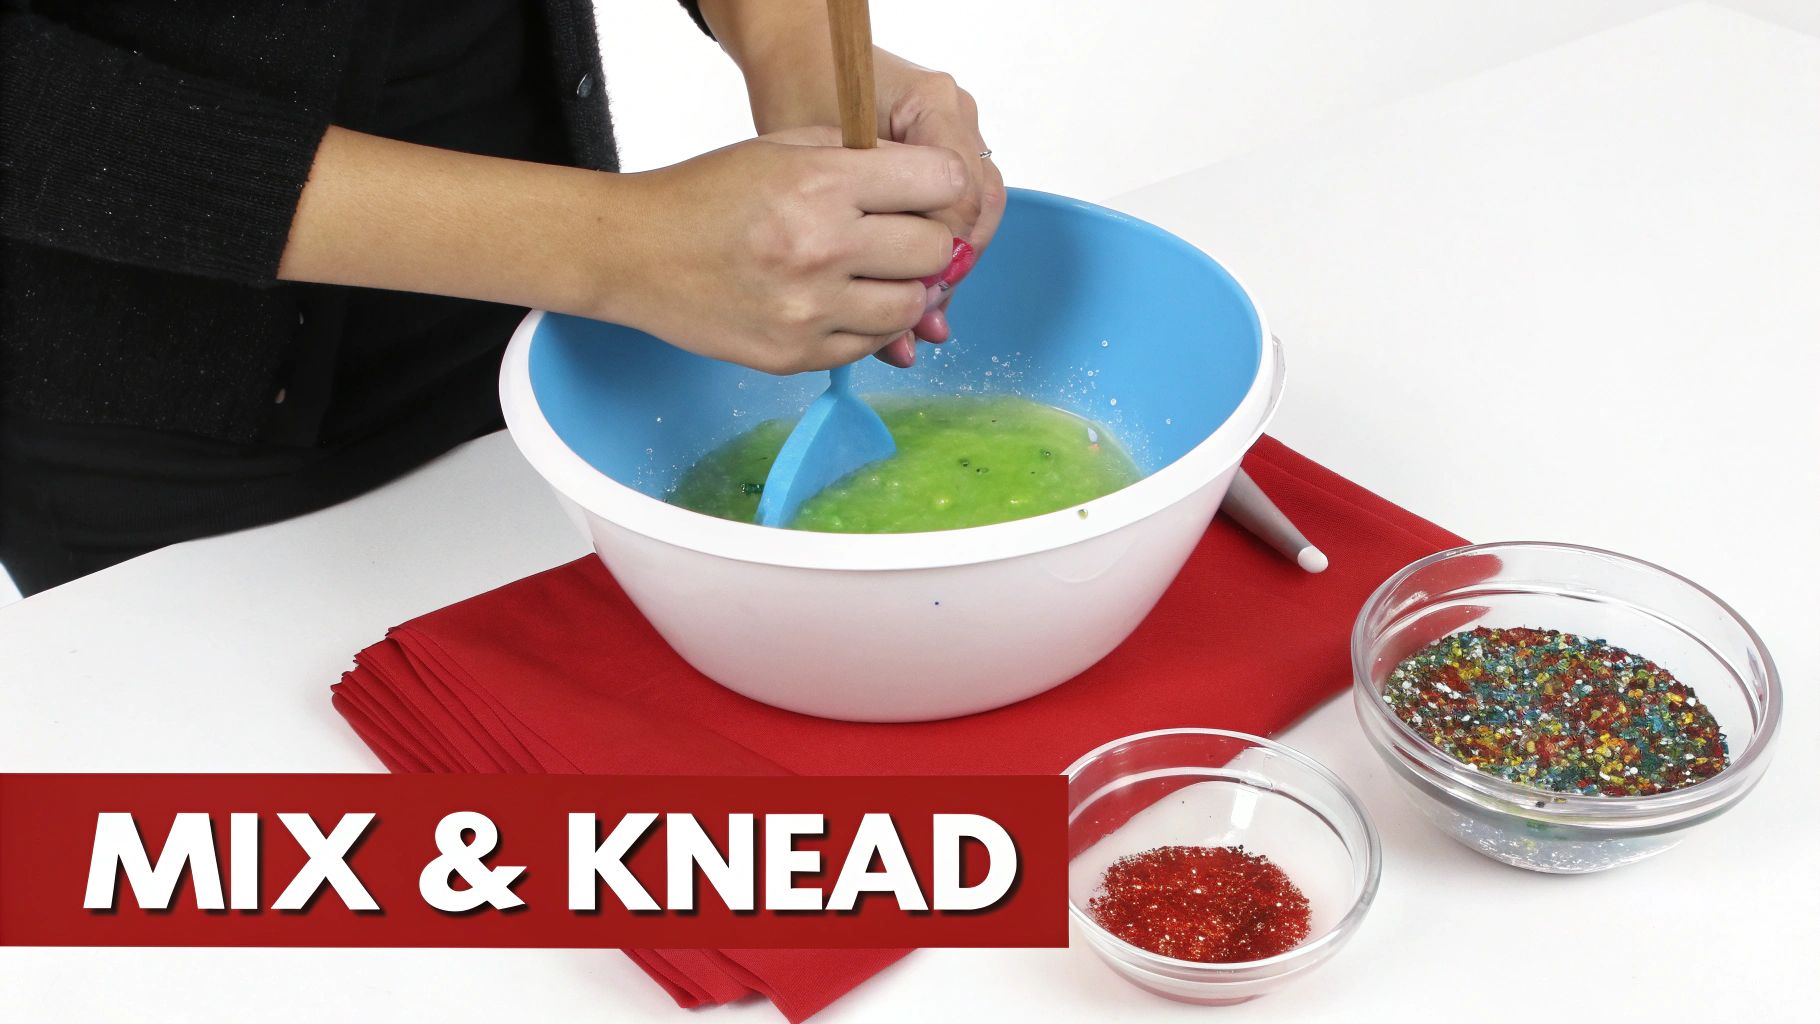
- Color it Up: A few drops of food coloring will do the trick. Start with just a drop or two; you can always add more to get the perfect shade.
- Add Some Sparkle: Toss in some fine or chunky glitter for a dazzling effect. For a real-world example, try mixing dark blue coloring with silver glitter to create a galaxy effect.
Stir until the color and glitter are spread evenly throughout the mixture. Your glue base is now prepped and ready for action.
Combining the Mixtures
Get ready for the most exciting moment in slime making! You're about to watch a liquid turn into a squishy semi-solid right before your eyes. The key here is to be patient and add the activator slowly.
Start by pouring just one teaspoon of your borax activator into the glue mixture. Begin stirring right away. You’ll see the mixture start to thicken and pull away from the sides of the bowl almost instantly.
Keep adding the activator, one teaspoon at a time, stirring well after each addition. The slime will get stringy, then start clumping into a single mass. You want to add just enough activator so the slime holds its shape but is still pretty sticky. Whatever you do, don't dump the activator in all at once—that's a fast track to hard, rubbery slime.
Kneading to Perfection
Once the slime has mostly pulled away from the bowl, it’s time to get your hands dirty. Kneading is the final, crucial step that develops the slime's texture, transforming it from a sticky blob into a smooth, stretchy toy.
To keep it from sticking, lightly coat your hands with a tiny bit of the activator solution. Scoop the slime out of the bowl and start folding, stretching, and squishing it. It will feel wet and sticky at first, but keep working it. You’ll feel the texture change dramatically.
Kneading does two things: it ensures the activator is fully incorporated and it aligns the polymer chains, which is what gives slime its signature stretch. If it’s still too sticky after a minute of kneading, add another ½ teaspoon of activator directly to the slime and keep working it in. You’ll know it’s perfect when it’s smooth, stretches without breaking, and doesn’t cling to your hands.
This whole process is a fantastic, hands-on way to introduce kids to basic chemical reactions. For more fun science projects, check out our guide to other exciting chemistry experiments for kids.
Troubleshooting Your Slime
Even experienced slime makers run into issues. A batch might turn out too sticky, too stiff, or just... weird. Don't throw it out! Most common slime fails are easy to fix with a little patience.
This quick-fix table will help you diagnose and solve any slime problems on the spot.
| Common Slime Problems and Quick Fixes | | :--- | :--- | :--- | | Slime Problem | What It Looks Like | How to Fix It | | Too Sticky | Clings to hands and surfaces, won't hold its shape. | Add activator, ½ teaspoon at a time, and knead thoroughly. A tiny bit of baby oil or lotion on your hands can also help. | | Too Stiff or Rubbery | Breaks when you try to stretch it; feels hard. | Add a small amount of warm water or a pump of lotion to the slime. Knead it in until it softens and becomes more pliable. | | Watery or Separated | Liquid is pooling around the slime; it won't combine. | It likely needs more activator. Add another teaspoon of the borax solution and knead vigorously to bring it back together. | | Gritty Texture | Feels sandy or has hard specks in it. | The borax wasn't fully dissolved. Unfortunately, this is hard to fix. Make sure your activator is crystal-clear next time! |
Remember, making slime is a science experiment, and sometimes experiments need a little tweaking to get them just right.
The Surprising Science Behind Slime
Ever wondered what’s actually happening when that bowl of sticky glue turns into a stretchy, bouncy blob? It’s not magic—it's a fun and surprisingly simple science experiment happening right in your hands. Turning a craft session into a stealth science lesson is the perfect way to spark a child's natural curiosity and engage them in educational storytelling.
This is where play meets education. A fun, gooey toy can introduce some seriously cool scientific ideas without ever feeling like a boring lecture. Let's peel back the curtain on the chemistry that gives slime its unique properties.
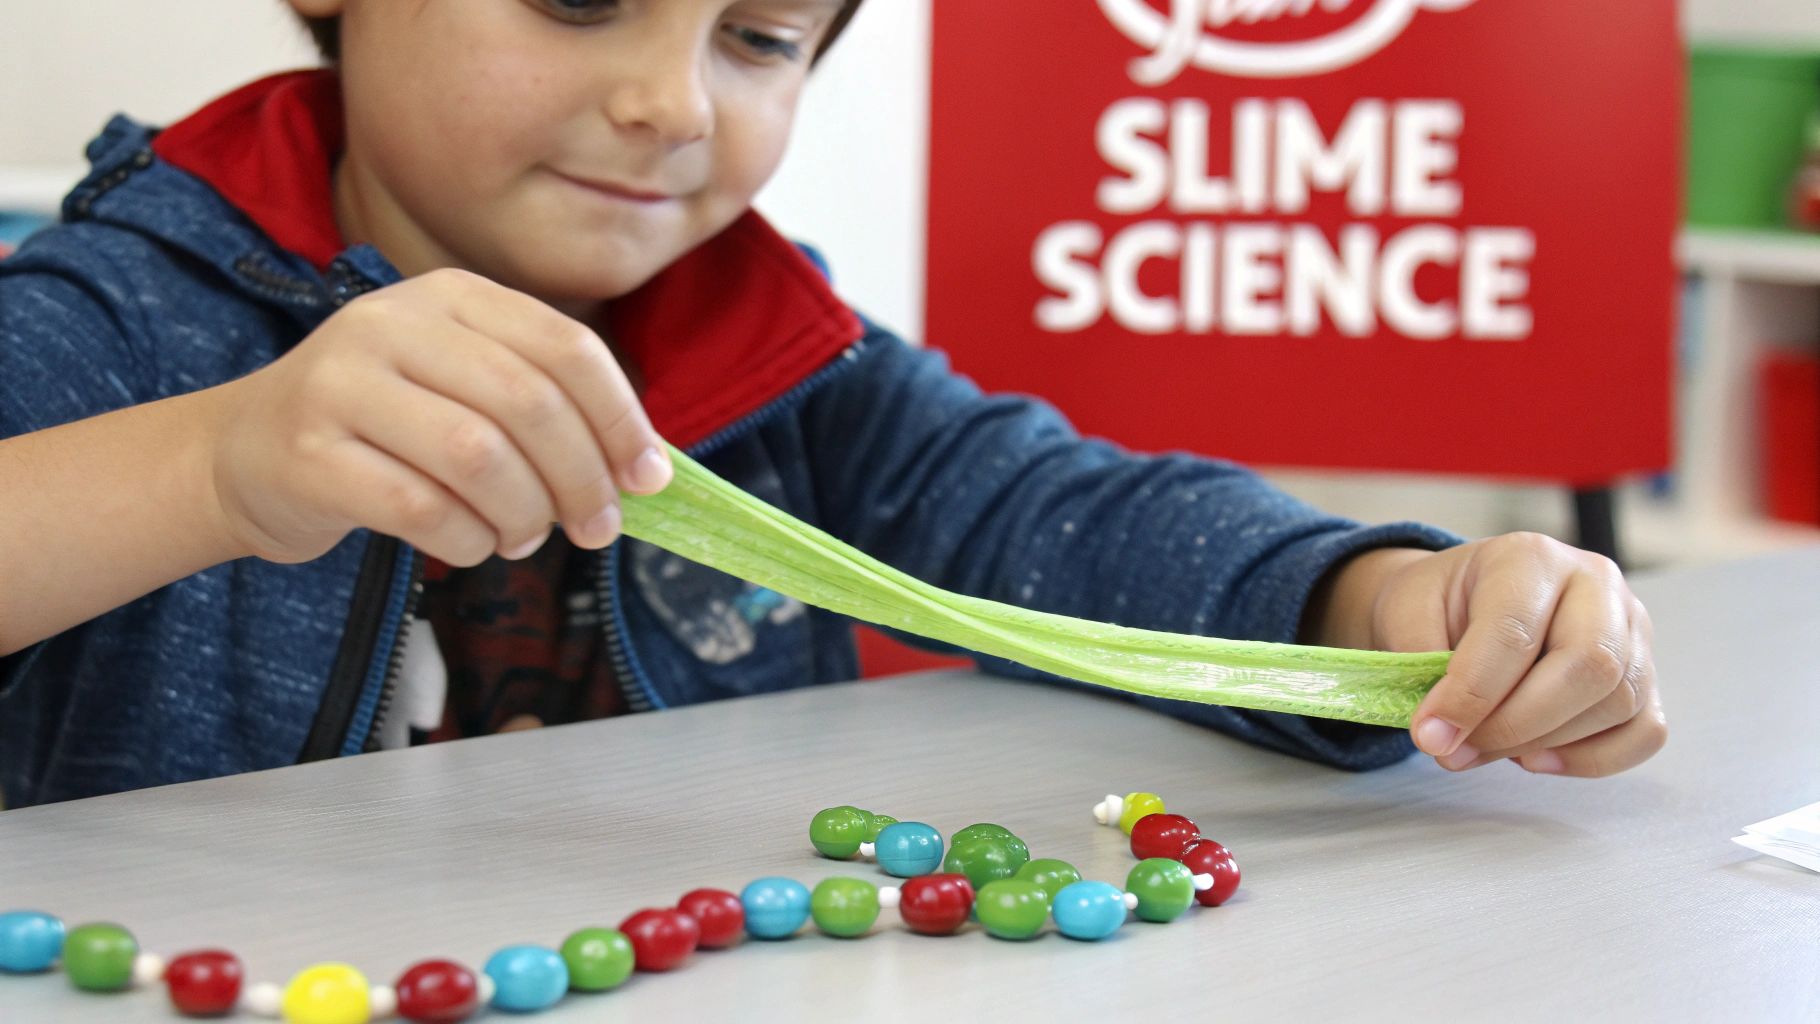
The Polymer Party in Your Bowl
The secret to slime starts with one key ingredient: white PVA school glue. Picture the glue as a bowl filled with trillions of super long, tangled-up molecular chains, kind of like cooked spaghetti. These long chains are called polymers.
On their own, these polymer chains slide past each other easily, which is why glue is a liquid. But when you add the borax activator, something incredible happens. The borate ions from the dissolved borax act like tiny hands that grab onto multiple polymer chains at once.
Key Insight: The borax activator creates cross-links between the glue's long polymer chains, tying them all together into a massive, interconnected web. This process, called polymerization, is what turns the liquid glue into the semi-solid gel we all know as slime.
This is a fantastic, hands-on way for kids to visualize abstract concepts like molecules and chemical reactions. For more ideas on weaving education into playtime, you can explore the many benefits of hands-on learning.
Understanding Non-Newtonian Fluids
Here’s where slime gets really weird and wonderful. It stretches slowly like taffy but snaps if you pull it too fast. It can be rolled into a bouncing ball, yet it melts into a puddle if left on a table. This strange behavior is because slime is a non-Newtonian fluid.
Unlike simple liquids like water (a Newtonian fluid), a non-Newtonian fluid's thickness—or viscosity—changes depending on the stress you put on it.
- Slow, Gentle Force: When you pull the slime slowly, the polymer chains have enough time to untangle and slide past one another. This allows it to stretch.
- Sudden, Strong Force: But if you pull it sharply, the chains don't have time to move. They lock together, causing the slime to break.
This unique property makes playing with slime so engaging. It’s a tangible lesson in physics that kids can literally feel in their hands. And if you're looking for more ways to blend physical activity with fun, you might be interested in the surprising benefits of roughhousing.
Creative Slime Recipes and Fun Variations
Once you've mastered the basic borax slime recipe, a whole universe of gooey fun opens up. Think of that classic recipe as your blank canvas. Now, with just a few simple tweaks and fun mix-ins, you can whip up slimes with completely different textures, looks, and sensory feels.

This is your launchpad for experimentation. The process is pretty much the same—you're still making a glue base and using a borax activator—but a single new ingredient can change everything. Let’s dive into some of the most popular and exciting slime variations you can try at home.
Create Dazzling Galaxy Slime
Galaxy slime is a visual masterpiece, swirling with the deep colors of outer space and sparkling with stars. It’s surprisingly easy to pull off and looks absolutely incredible when you stretch it out in the light.
The trick to an authentic galaxy look is layering multiple colors. Start by making your standard glue base, but stop right before you add the activator. Divide that glue mixture into three separate bowls.
- Bowl 1: Add black food coloring and some blue glitter.
- Bowl 2: Mix in dark purple food coloring and a dash of pink glitter.
- Bowl 3: Go with dark blue food coloring and silver glitter for this one.
Once you’ve got your colors mixed, activate each bowl of slime separately with your borax solution. You'll end up with three distinct batches. Now for the fun part: lay them side-by-side on a clean surface and gently twist and fold them together. Don't overmix! You want to create elegant swirls, not a single muddy color. The result is a mesmerizing, starry concoction.
Whip Up a Batch of Fluffy Slime
If you're after a slime that feels like a soft, squishy cloud, then fluffy slime is what you need. The not-so-secret ingredient here is foaming shaving cream. It pumps air and volume into the mixture, creating a light, airy, and incredibly satisfying texture that’s less sticky and more like a soft dough.
To make it, prepare your glue base as usual (½ cup of glue and ½ cup of water). Before adding activator, mix in 1 to 2 cups of shaving cream. The more you add, the fluffier it gets.
Key Takeaway: Make sure to use foaming shave cream, not the gel kind. The foam is what introduces air into the mixture, giving the slime its signature puffy texture and creating an awesome sensory experience.
After you’ve thoroughly mixed in the shaving cream, add your borax activator slowly. Knead it until it’s no longer sticky, and you’ll have a beautifully soft and pokeable cloud slime. This version is a sensory favorite and makes incredible bubble pops.
Make Super Satisfying Crunchy Slime
For kids who love amazing textures and sounds, crunchy slime is an absolute winner. This variation, often called "floam," is packed with tiny beads that create an irresistible crunching sound with every single squish and squeeze.
The key ingredient is foam beads (sometimes called "slushee" beads), which you can find at any craft store. The process is simple: make your basic borax slime recipe first. Clear glue often works best for this one since it really lets the colorful beads stand out.
Once your slime is ready, flatten it out on a clean surface. Pour a generous amount of foam beads on top and start folding and kneading them into the slime. It might feel a bit messy at first, but just keep working it until the beads are fully mixed in. The final product delivers an incredible auditory and tactile sensory experience.
These variations are just the beginning. Experiment with add-ins like water beads, small plastic gems, or even scents using essential oils. For more inspiration, check out our awesome Unicorn Slime & Crystals Science Kit, which comes packed with everything you need for magical, gooey creations.
FAQs: Your Slime Questions Answered
Even with a perfect recipe, making slime can feel like a wild science experiment. Things can get a little sticky, a little stiff, or a little... well, everywhere. Don't worry, it happens to everyone!
This FAQ section is your personal cheat sheet for all the common slime hiccups. We’re covering everything from fixing texture fails to cleaning up the inevitable mess, so you can keep your slime stretchy and fun for weeks.
How Do I Store My Slime So It Lasts?
The number one enemy of good slime is air. If you leave it out, it'll turn into a rubbery, sad puck before you know it.
The fix is simple: always store your slime in an airtight container or a resealable plastic bag. Squeeze out as much air as you can before sealing it up. When you do this, a good batch of borax slime can easily last for a few weeks of regular play.
If it starts to feel a little stiff over time, try kneading in a few drops of warm water or a tiny pump of hand lotion. That usually brings the softness right back. But since it's made with water, slime can eventually grow mold. If you see any fuzzy spots or notice a funky smell, it’s time to toss it and whip up a fresh batch.
Help! My Slime Is Too Sticky (or Too Rubbery)
This is the most common slime struggle, but thankfully, it’s usually an easy one to solve. It all comes down to the balance between your glue and the borax activator.
-
If your slime is a sticky mess: This just means you haven't added quite enough activator yet. The secret here is patience. Add your borax solution just a few drops at a time and knead, knead, knead. It's tempting to dump more in, but adding it slowly is the key to getting that perfect texture without overdoing it.
-
If your slime is hard and rubbery: This is a classic case of too much activator. But don't throw it out! You can often salvage it. Try kneading in an extra tablespoon of glue or a bit of lotion. This helps soften up those polymer bonds and makes the slime pliable again.
Slime-Making Pro Tip: Always add your activator slowly. It's way easier to fix sticky slime by adding a little more activator than it is to save over-activated, rubbery slime.
Are There Any Good Borax-Free Alternatives?
Yes, absolutely! If you'd rather not use borax powder, the most popular and effective alternative uses two things you might already have: contact lens solution and baking soda.
The key is that the contact lens solution must list boric acid and sodium borate in its ingredients—these compounds are what create the slime reaction. Another great option is using liquid starch. Both of these will react with PVA glue to make fantastic slime, though you might notice the final texture is slightly different from the classic borax recipe.
What's the Best Way to Clean Up Slime?
The moment every parent dreads: slime in the carpet. Or the hair. Or on the couch. Don't panic!
Your secret weapon for slime on clothes, carpet, or furniture is plain white vinegar. The acid in the vinegar is fantastic at dissolving the PVA glue that holds the slime together.
Just pour a little vinegar right on the stain and let it sit for a few minutes. You'll literally see the slime start to break down. After that, use a small brush and some warm, soapy water to scrub the rest of the residue away. For slime tangled in hair, coat the spot with conditioner or oil (like baby oil) and gently comb it out before shampooing.
At Playz, we believe learning should be hands-on and seriously fun. If you're ready to dive into more amazing projects that blend science and play, check out our incredible collection of STEM kits and toys at https://www.playzusa.com. Your next scientific adventure is just a click away