


Your child is already circling the box, asking when the new play tent will be ready. You're holding a bundle of poles, fabric, and small connectors, and the picture on the box makes setup look simpler than it feels. Before anyone crawls inside, treat the instruction sheet as a safety system, not just a diagram for putting parts together.
Good play tent instructions answer four practical questions: what belongs in the box, how the frame should be assembled, where the tent can safely stand, and what needs checking after play begins. The process below follows that order, with extra attention to inspection, cleaning, ventilation, and the small mistakes that can turn a sturdy hideout into a wobbly one.
Unboxing and Pre-Setup Checklist
The best time to find a missing connector is before your child is waiting beside you. Spread the tent flat on a clean surface, place the cardboard beneath the fabric if needed, and keep the instruction sheet within reach. Don't start joining poles until you know what the complete kit should contain.
Check every part before assembly
Use the manual as your inventory list. Confirm the fabric panels, poles, connector sleeves, stakes, carry bag, and tie cords. If the instructions show a particular pole arrangement, copy that layout on the floor so similar pieces don't become mixed.
Sort poles by length and shape. For segmented poles, align each section and look for a button-stop or spring-loaded pin that should meet its connector sleeve. A shallow bowl keeps plastic joints, caps, and other small hardware from rolling under a sofa.
Inspect the fabric in good light. Look for holes, loose stitching, detached loops, or Velcro that has separated from its backing. Run your fingers over pole ends and ferrules, the small sleeves that join sections, and remove any part that looks cracked or likely to slip.
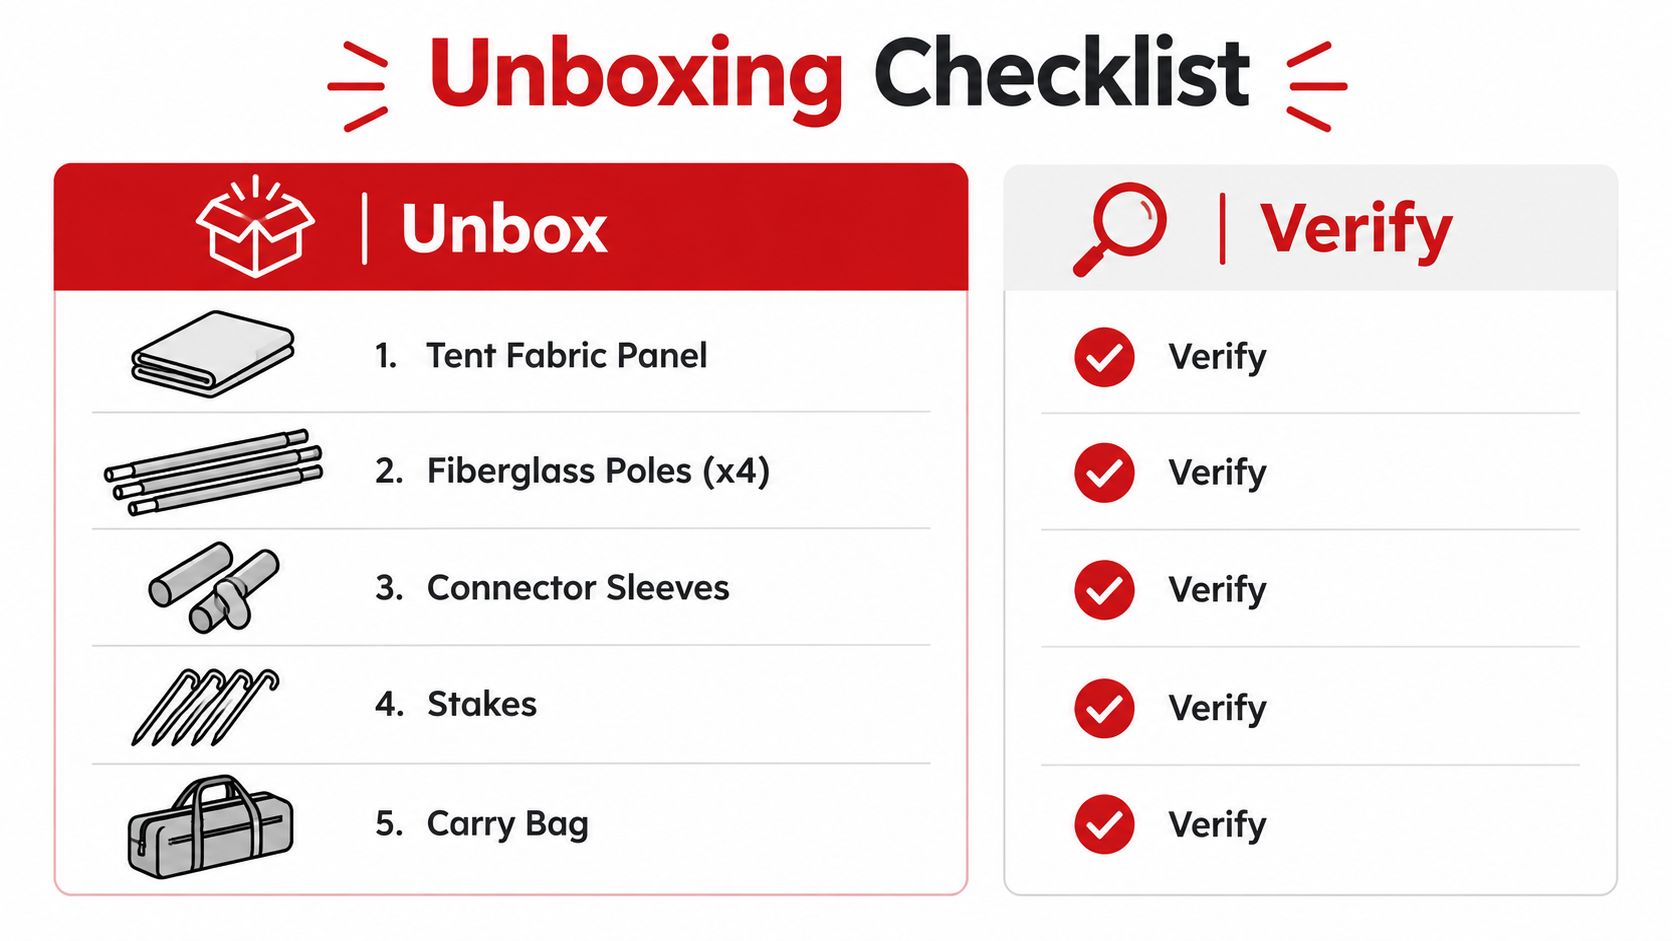
Practical rule: A ten-minute inventory prevents you from discovering a missing piece after the frame is already under tension.
Check whether the manual names a tool. Many indoor tents need none, while some outdoor models may call for a small rubber mallet for stakes. For indoor play, keep stakes and other unused hardware away from the child unless the product specifically requires them.
If you're comparing styles before buying, an indoor play tent guide can help you distinguish frame designs, room requirements, and intended uses. The same basic habit applies to every model: verify first, assemble second.
Standard Assembly Order for Pole-Frame Tents
A pole-frame tent is most reliable when you build the structure before pulling fabric over it. Lay every pole on the floor, connect the segments in the order shown, and align each button-stop with its connector sleeve. You should feel the joint seat properly, and a click often confirms that the spring-loaded button has emerged through the sleeve.
Start with the smallest complete pole, then work outward through the longer pieces. This keeps the lengths organized and makes it easier to identify a pole that belongs in the roof rather than the base. Use gentle, even pressure. If a connector enters at an angle, stop and realign it instead of forcing the joint.
Build the frame before fitting the cover
Complete the base first. Add the vertical supports next, followed by the roof or cross poles that give the tent its shape. Only after the frame has a stable outline should you drape the fabric over it.
The common mistake is threading poles through fabric sleeves before the structure is ready. That puts uneven tension on the cover, twists the frame, and can stretch the loops. Once the frame is positioned, insert the pole ends into reinforced sleeves or grommets, never into decorative seams that aren't designed to carry pressure.
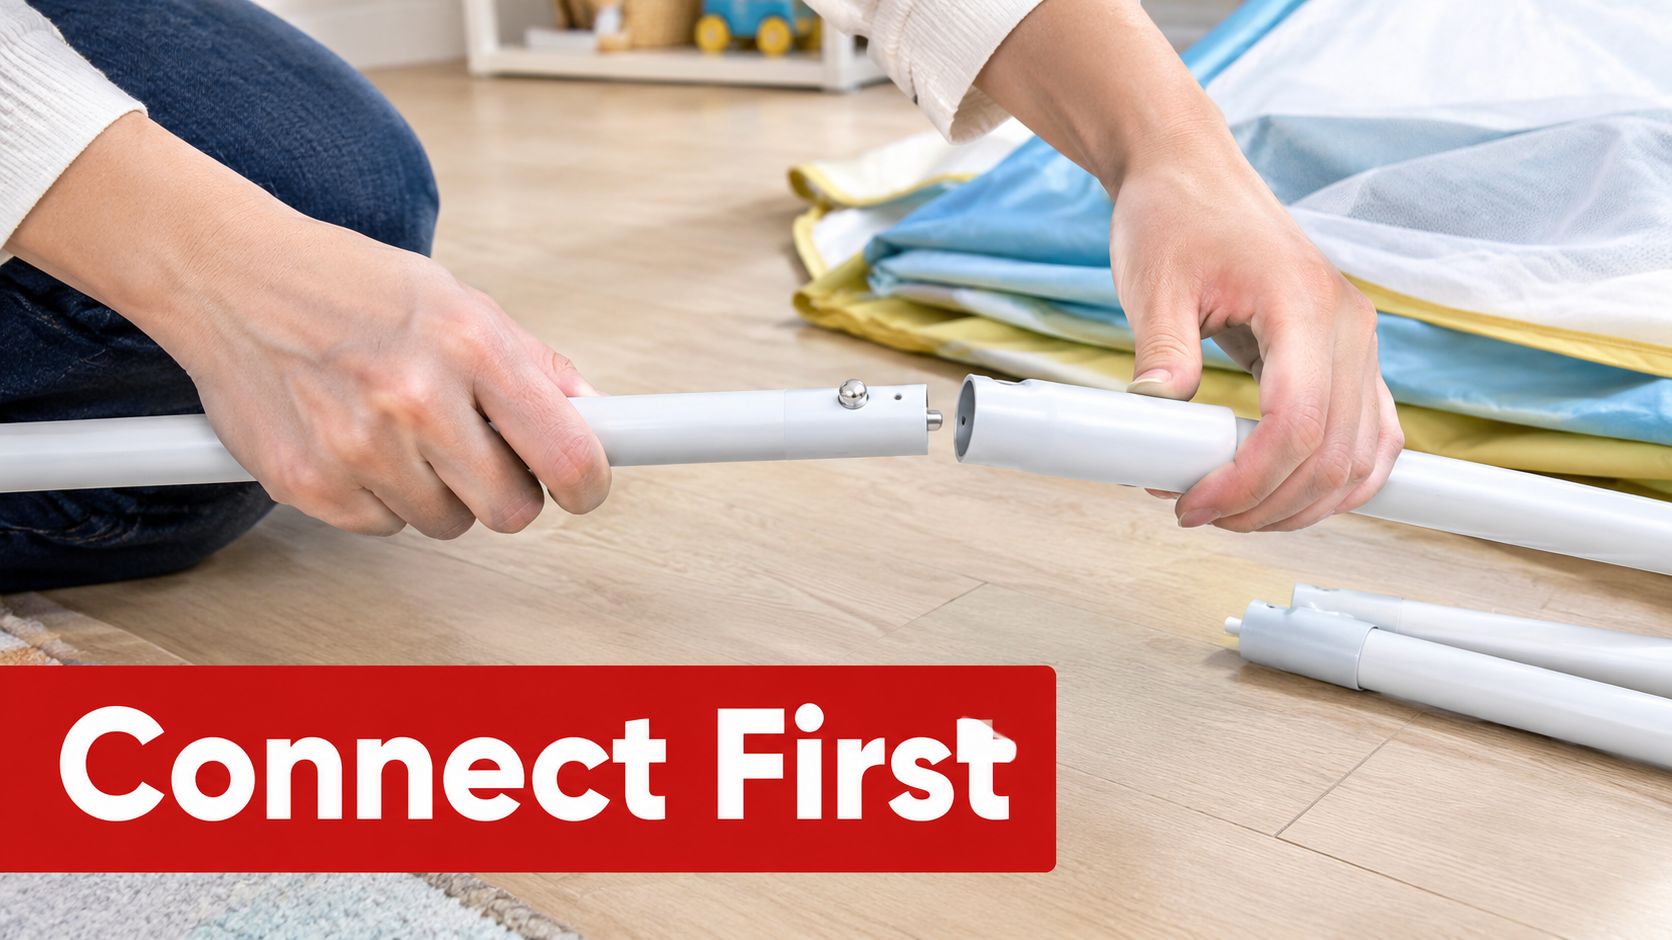
Align the fabric's door and window openings before fastening ties or Velcro. Misaligned openings can leave the cover wrinkled and prevent a snug fit. Attach tie cords to their intended anchor points, then walk around the tent and confirm that all pole joints are fully seated.
Before play begins: The tent should stand upright without wobbling, and no pole end should be loose, exposed, or angled against the fabric.
For families choosing among styles, this overview of teepee play tents offers useful context about simpler crossing-pole designs. Whichever model you have, follow the manufacturer's order rather than relying on the picture on the box.
Pop-Up and Collapsible Tent Setup
Pop-up tents look almost effortless, but their spring frames deserve a slower first deployment. Keep the tent folded, remove the elastic band carefully, and let the frame open in a controlled space away from children. Don't throw it upward or release it suddenly, because the poles can rebound or flip past their intended stops.
Hold the center hub with one hand and lift straight up. Guide the frame until each corner extends fully and locks. An audible snap may signal that a joint is seated, but still check every corner visually before you let go. Press the roof hub down gently if the design uses one, allowing the frame to settle into its final shape.
Accordion-style models need a staged approach. Extend the front, then the back, then the side rails, so the tension spreads across the structure rather than pulling one section sharply. If a joint refuses to lock, collapse the tent and refold it along its original creases. Retry without forcing the mechanism.
Pop-up versus pole-frame setup
| Step | Pop-Up Tent | Pole-Frame Tent |
|---|---|---|
| Initial action | Release the folded spring frame slowly | Lay out and join each pole segment |
| Main structure | Lift the hub and extend the corners | Build the base, supports, and roof |
| Fabric fitting | Usually unfolds with the frame | Drape and fasten after the frame is formed |
| Main check | Confirm every corner is fully locked | Confirm every joint is seated and the tent stands square |
| Best setup habit | Work away from children during deployment | Keep poles sorted before threading fabric |
The trade-off is straightforward. Pop-up tents save assembly steps, while pole-frame tents give you more control over each connection and are often easier to diagnose when something feels wrong. For age-specific play ideas and indoor placement considerations, this toddler play tent guide provides another useful perspective.
Families using tunnels or connected play areas should also check how each attachment changes the footprint and access route. A guide to play tents and play tunnels can help you think through those combinations before you open the frame.
Choosing the Right Surface and Location
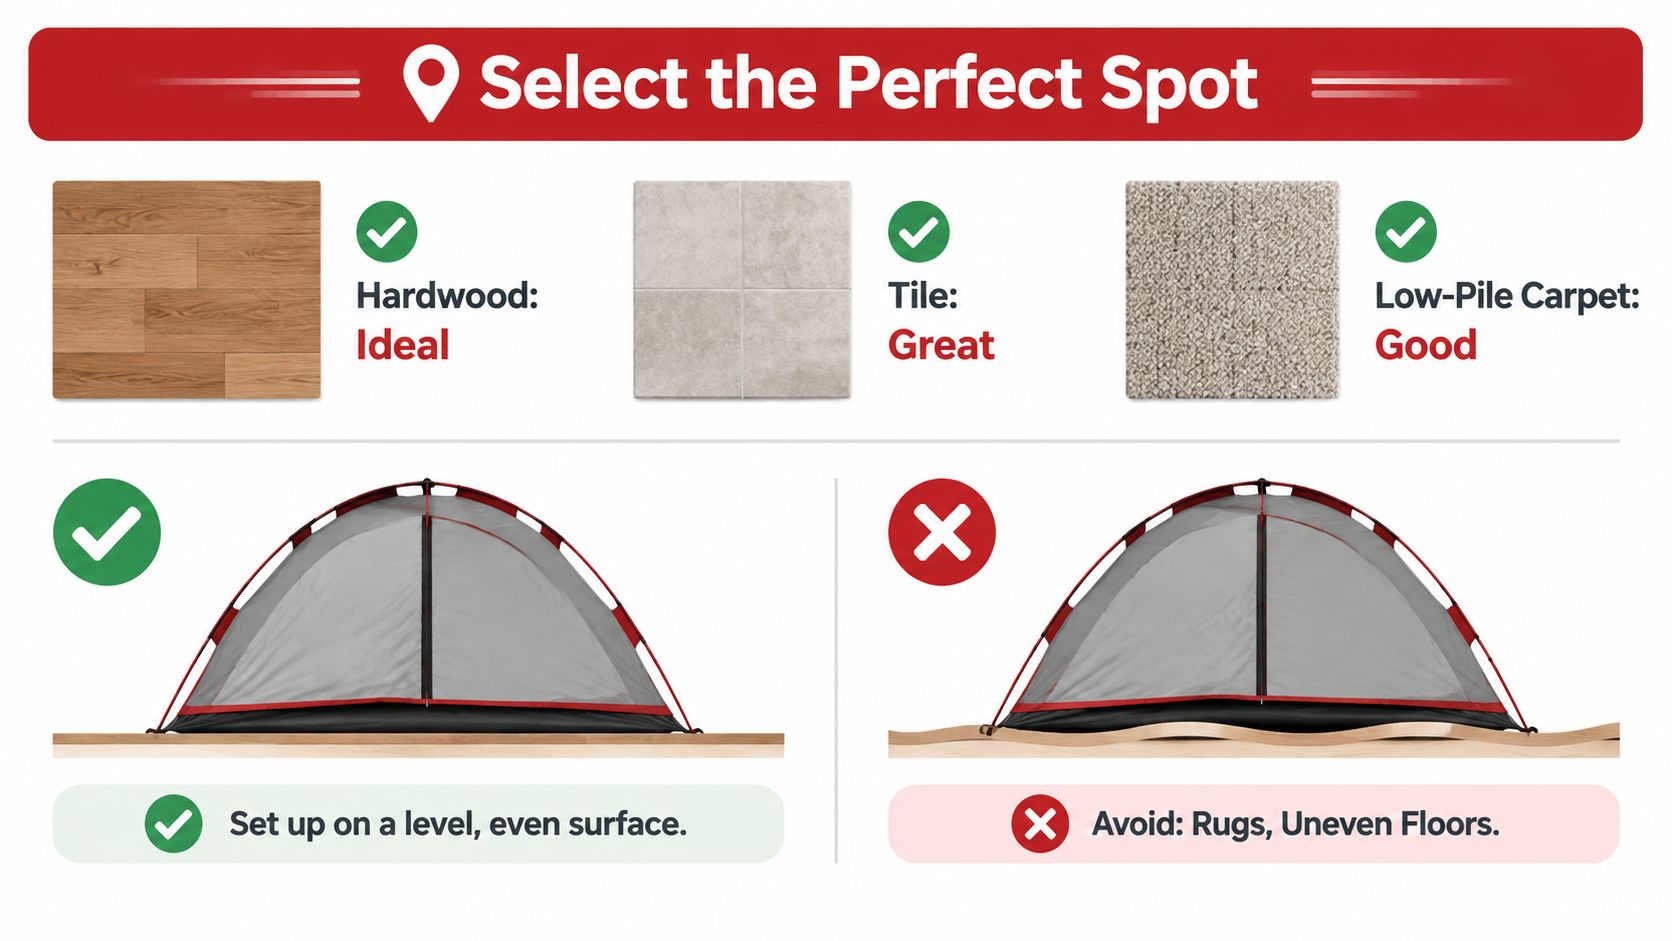
A tent can be assembled perfectly and still feel unstable if the floor underneath it is uneven. Choose a flat, level area where the base can sit flush. Hardwood and tile provide firm support, while low-pile carpet can work when the floor beneath it remains level and the tent doesn't rock.
A thin rug or foam play mat may soften knees, reduce noise, and protect the bottom hem from scuffs. Avoid thick, loose rugs that bunch beneath the base. Sharp objects near or under the tent can damage fabric and create an unsafe play surface, a concern also reflected in independent tent floor guidance.
A small placement change can make a difference
A family might first place the tent in a hallway because it's convenient. Drafts, passing feet, and an uneven rug can make the fabric sag and the frame shift. Moving it to a level bedroom corner, with a clear view from the doorway, often makes the structure feel calmer and easier to supervise.
Leave a clear zone around the tent. Keep it away from heating vents, fireplaces, open flames, ceiling fans, window-blind cords, and shelving that a child could pull down. Place the entrance where an adult can see inside without moving furniture, and check that nearby lighting doesn't heat the fabric or create a cord hazard.
For outdoor models, the same location decision needs extra attention to weather, surface condition, ventilation, and ongoing inspection. These kids' tents for outdoor use should never be treated as automatically suitable for every outdoor setting.
Safety Checks Beyond the Instruction Sheet
Assembly is only the beginning. A tent that looked secure on the first day can develop loose connections after repeated crawling, moving, folding, and imaginative play. Official Australian consumer guidance tells caregivers to follow assembly directions, check age, size, and developmental fit, keep ventilation openings clear, and inspect outdoor cubby houses and tents regularly. It also highlights an inside exit that opens easily, a 1.5 cm gap at the hinged side of doors, and the need to avoid splinters, sharp edges, and entrapment gaps in relevant designs (Australian product-safety guidance).
Use a repeatable inspection rhythm
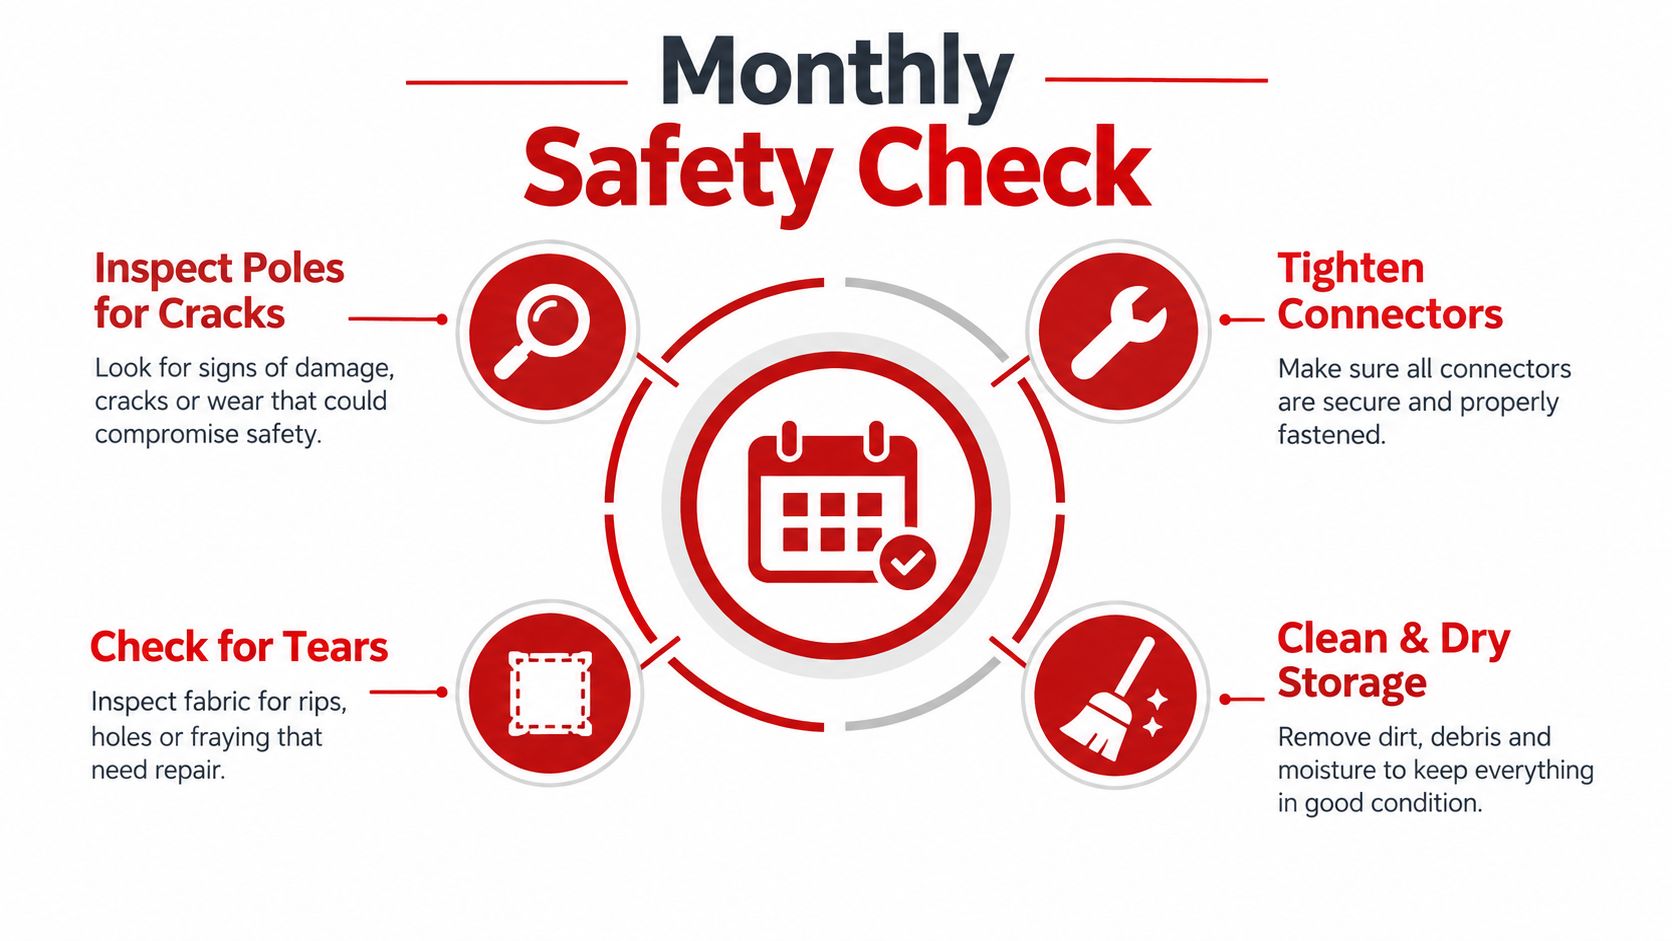
Check the tent immediately after setup, after moving or storing it, and regularly during heavy use. Look closely at:
- Pole joints: Check for cracks, bent tips, loose seats, and missing end caps.
- Fabric and seams: Look for tears, separating stitches, detached loops, and worn Velcro.
- Connectors: Remove plastic joints that show stress whitening or no longer hold firmly.
- Small parts: Keep beads, ties, pegs, and loose accessories away from children who may put them in their mouths, especially children under three.
- Collapse points: Keep fingers away from folding hubs, crossing poles, and spring-loaded joints during setup and takedown.
Don't let children climb onto the roof, jump inside, or pull the frame sideways. Adult supervision matters because a child's movement can test the tent in ways a stationary inspection won't reveal. If the product manual gives a specific age or use restriction, follow that limit rather than guessing from the tent's appearance.
The regulatory context reinforces why warnings matter. Canada defines a children's tent as intended for a child under 14 and not intended for use with a cooking or heating device. Canadian tent requirements also reference ASTM F3431-21 for tents intended for camping appliances, with attention to flammability performance and warning labels (Canada Gazette regulatory information).
For guidance focused on younger children, review this infant play tent resource. You can also watch the embedded demonstration below, then repeat the same inspection with the tent in front of you.
Fixing Common Setup Problems
Most frustrating tent problems have a recognizable symptom. Stop before applying more force, identify what the tent is doing, and compare the affected part with the assembly diagram. A quick diagnosis protects the frame and prevents a small alignment issue from becoming a torn sleeve or broken connector.
| Symptom | Likely Cause | Fix |
|---|---|---|
| Loose or wobbly frame | A joint isn't fully seated, or a pin is missing its opening | Disassemble the affected section, confirm the spring-loaded pin clicks into place, and rebuild with even tension |
| Sagging or pooling fabric | The frame isn't square, or opposite corners are sitting at different heights | Lift opposite corners alternately, square the base, and refit the cover |
| Pop-up collapses during play | A ring is cracked or overstretched | Use a manufacturer replacement kit if available, or retire the tent |
| Zipper splits open | The slider is bent or no longer aligns with the track | Close the zipper gently and, if appropriate for the hardware, use pliers carefully to realign the slider |
| Poles no longer match | Segments were mixed after partial disassembly | Lay every piece flat, match lengths, and compare the shape with the manual |
Read the symptom before touching the fix
A wobbly pole-frame tent usually needs attention at a connection, not extra fabric tension. Take apart only the affected section, check that the pin reaches its opening, and reassemble both sides evenly. Pulling harder on one corner can make the opposite corner loosen.
Sagging fabric often means the base has shifted out of square. Reset the structure first, then align doors, windows, sleeves, and fasteners. If a pop-up frame collapses because its ring is cracked, don't tape it and return it to play. A replacement part from the manufacturer is the safer route; if that isn't available, retire the unit.
Stop and diagnose before forcing anything. Resistance usually tells you that a pole, sleeve, joint, or fold is misaligned.
Care, Longevity, and Final Tips
A play tent lasts longer when care is part of the routine, not an emergency response to spills or broken parts. After indoor or outdoor use, wipe the fabric with a damp cloth and follow its care label. Polyester and canvas panels usually need gentle spot-cleaning. Scrubbing hard around seams can weaken them, so clean lightly and let the fabric dry fully before folding.
Moisture left in storage can cause odors and wear. After a spill, open the tent in a dry, ventilated place. If the design permits, store the cover separately from the poles. This keeps pressure off fiberglass rods and plastic joints while the tent rests in its carry bag.
A reusable care card
After daily play
- Clear the interior: Remove books, toys, ties, beads, and other loose accessories.
- Check the entrance: Doors and windows should open freely, with no fabric blocking airflow.
- Look at the floor: Remove crumbs, sharp objects, and damp materials.
During regular use
- Review the frame: Inspect joints, end caps, sleeves, and fasteners for movement, cracks, or damage.
- Refresh the fabric: Spot-clean marks with a damp cloth, then dry the area completely.
- Watch accessories: Keep string lights and electrical decorations supervised, away from heat, and arranged so air can circulate. Follow the product's play tent care and safety guidance, especially for ventilation, electrical accessories, and inspection.
Before storage
- Dry everything: Never fold a damp tent.
- Fold along original creases: This matters especially for pop-up frames, whose rings can become distorted by careless folding.
- Separate components: Store poles, connectors, and fabric so one part does not press against or bend another.
The child's age also changes the supervision plan. Children under two should use a tent only with an adult watching and without small detachable accessories. Children in the threes-and-fours stage may use it as a quiet reading nook. Older children may turn it into a fort or puppet theater. Match each activity to the product's stated age suitability, and keep climbing, roof play, and jumping off-limits.
Match these habits to whichever tent your family uses, whether it is a castle, rocket, or tunnel bundle. Before each play session, check the space, frame, fabric, and accessories. A short inspection helps turn the instruction sheet into an ongoing safety routine, not a document used only on assembly day.
Playz offers play tents and connected play products for imaginative indoor and outdoor activities. Visit Playz to explore tent options and choose a play area your family can assemble, supervise, and maintain with confidence.