


A child snaps a battery holder into place, clips on two wires, and waits for the bulb to glow. Instead, nothing happens, then an LED gets connected directly across the battery and begins to warm. The kitchen counter fills with loose leads, tiny bulbs, and half-built circuits while the adult nearby wonders whether the kit is teaching science or just producing frustration.
That moment captures the difference between a box of electrical parts and a genuine learning tool. The right science kits electricity experience doesn't stop when a lamp lights. It helps children discover why a circuit works, why it fails, and what their prediction reveals about their current understanding.
The Kitchen Counter Moment Every Parent Recognizes
A freshly opened electricity kit can look convincing. There may be a battery holder, wires, switches, bulbs, LEDs, motors, buzzers, and illustrated cards. Yet a large parts count doesn't tell you whether a child will understand what those parts do together.
I've watched children assemble a working circuit and still believe that the first bulb consumes all the current. I've also seen them rebuild the same circuit repeatedly without noticing that one loose connection, rather than a mysterious electrical problem, caused the failure. Successful assembly is an outcome, not proof of understanding.
The history of these kits supports a broader educational purpose. The Bakken Museum in Minnesota adopted the name “Bakken Library and Museum of Electricity in Life” in 1986, and in 1989 it developed “eighteenth-century Electricity Kits” for junior-high schools with funding from the U.S. National Science Foundation. The museum's work connected historical experiments, scientific ideas, and physical activity, showing that kit-based electricity education could function as formal public science education, not merely as a hobby. This historical account of the Bakken Museum's electricity education places hands-on kits within that longer tradition.
A worthwhile kit should help you answer four practical questions:
- What can this child understand now?
- Which misconception might the activity expose?
- Can the parts support more than one circuit arrangement?
- Does the guide explain why the result occurred?
By the end, you'll know how electricity kits teach, which components matter, how age affects the experience, what safety features to inspect, and how to recognize a box that builds reasoning instead of just making things blink.
My classroom test: If a child can make the light work but can't explain what changed when the switch opened, the kit needs better activities, not more components.
What an Electricity Kit Actually Teaches
Electricity becomes easier to understand when you begin with the loop, not with the bulb. A battery establishes a potential difference, which you can compare loosely to pressure in a water system. Pressure alone doesn't create useful flow through a lamp. The system also needs a complete route out from the source, through the load, and back to the source.
That route is the circuit. A battery sitting on the table does nothing because there isn't a conductive path connecting its terminals through a load. Close the switch and the path becomes continuous. Open it and the entire loop is interrupted, so the lamp stops rather than merely receiving “less electricity.”
The water comparison has limits, but it gives young learners a useful starting point:
- Potential difference is like a pressure difference that provides a push.
- Current describes charge moving through the complete path.
- Resistance affects how much current the circuit can deliver.
- The load converts electrical energy into another form, such as light, heat, motion, or sound.
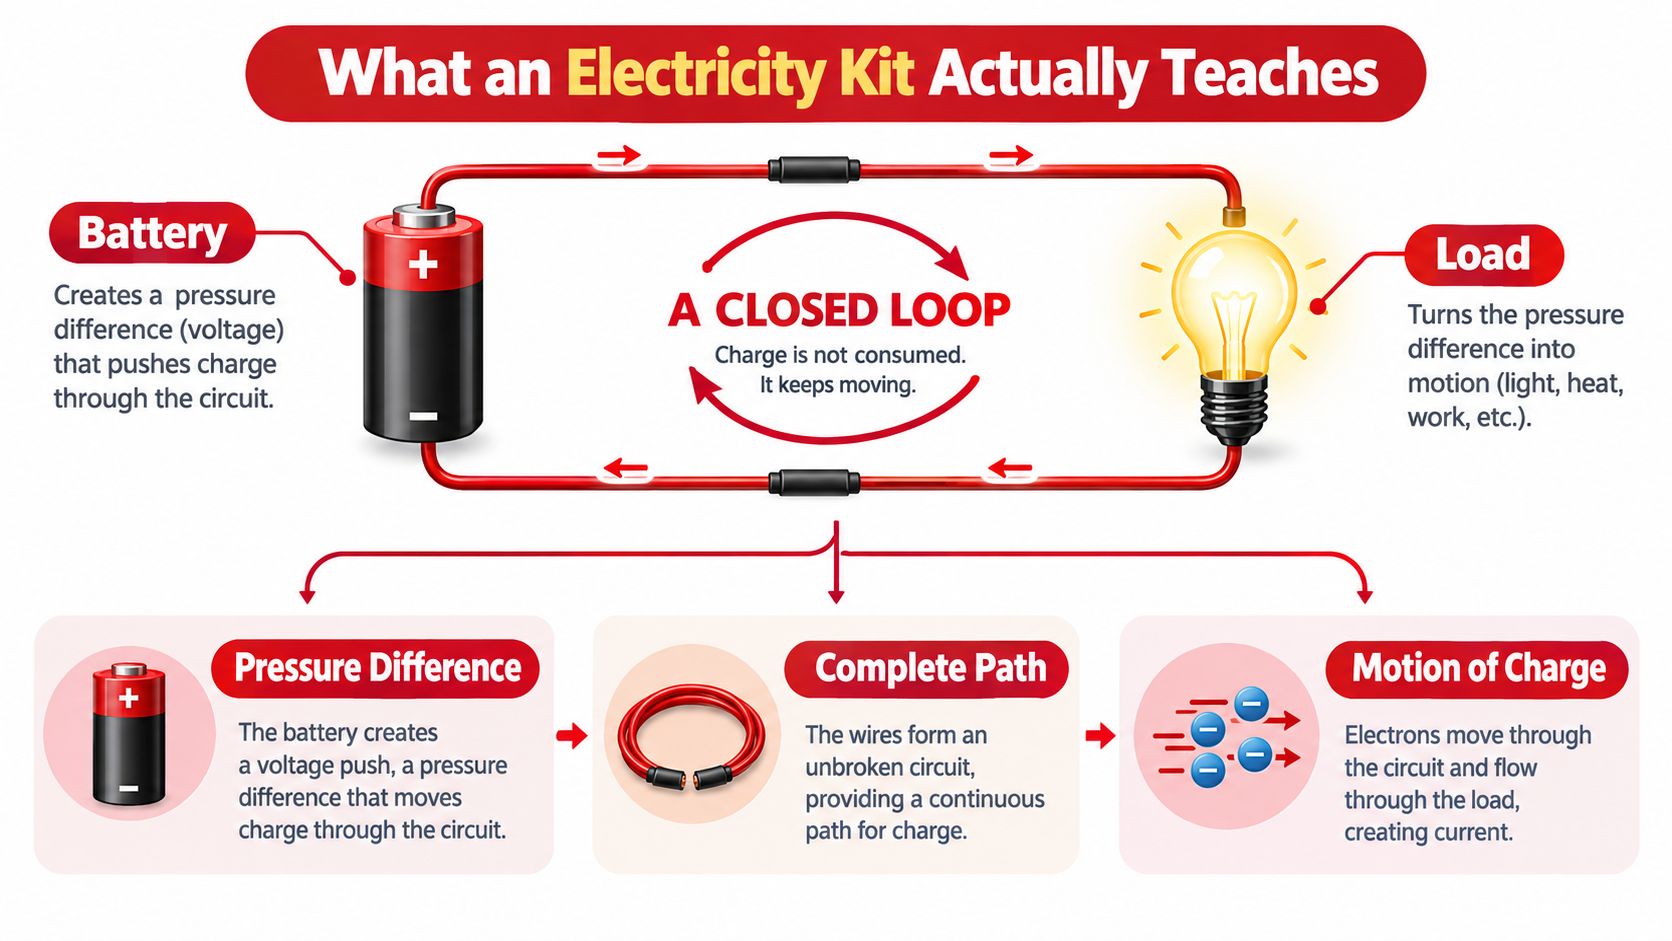
A good activity makes those ideas observable. A switch tests whether the path is complete. A bulb turns energy into light and heat. A motor turns it into motion. A buzzer produces sound. Two identical lamps reveal how changing the arrangement changes their behavior.
The most useful learning cycle is simple:
- Predict what will happen.
- Build the circuit carefully.
- Observe brightness, motion, sound, or silence.
- Explain the result using the circuit model.
- Revise the prediction when the evidence disagrees.
A 2018 peer-reviewed study of a zinc-copper potato-battery activity illustrates why this approach matters. Before instruction, 33% of participants identified valid everyday household electricity sources, while 18% knew ways to generate electricity at home. Afterward, 15% gave a detailed explanation of how to make a battery and another 18% gave a partial explanation. The peer-reviewed potato-battery study shows how a familiar material can move children beyond naming “potatoes” toward explaining an electrochemical process.
The enduring lessons are bigger than any single project: closed loops, energy conversion, conservation, and diagnostic reasoning. If a kit only produces a result without giving children a reason to predict, compare, and revise, it's providing entertainment with electrical parts rather than a complete science experience.
Age Ranges and What Each Stage Can Actually Learn
Age labels help, but they shouldn't make the buying decision alone. A child who enjoys building may handle a more complex kit with support, while an older beginner may need a highly visual introduction before working with diagrams or meters.
Ages 3 to 5
At this stage, focus on cause and effect. A large switch, a contained battery holder, and a low-voltage lamp can show that pressing one control changes what happens elsewhere. Children can practice connecting matching parts, noticing polarity markings, and describing “on,” “off,” “light,” and “no light.”
Choose a kit with oversized connectors, short activities, and strong adult supervision. Avoid exposed small batteries, fragile leads, and instructions that assume children can reason through a fault independently.
Ages 6 to 8
Children can begin to understand that a lamp needs a complete loop, not just contact with one battery terminal. Guided series and parallel activities work well here, especially when the kit uses identical lamps so brightness differences are easy to notice.
Expect confusion. A child may say that the battery “sends electricity to the bulb” without yet understanding the return path. Ask questions rather than correcting every sentence immediately: “Where does the path go after the bulb?”
Ages 9 to 11
This is a strong stage for prediction, simple schematics, and controlled comparisons. Children can predict what happens when a second lamp is added, record whether each lamp becomes brighter or dimmer, and compare a single loop with separate branches.
They can also begin identifying variables. If two circuits differ in both battery type and lamp arrangement, the comparison is weak. A better activity changes one feature at a time.
Ages 12 to 14
Older learners can work with resistors, protected multimeters, circuit diagrams, and design challenges. They can investigate why a motor behaves differently from a lamp, measure at different points under supervision, and explain how resistance influences delivered current.
A 2023 systematic review retained 93 studies and found that many learners, including advanced students, still treat a battery as a source of constant current rather than a source of potential difference whose delivered current depends on circuit resistance. The systematic review of electricity misconceptions is a useful reminder that older children still need conceptual prompts.
| Age | Concepts | Supervision | Kit complexity |
|---|---|---|---|
| 3 to 5 | Cause and effect, on and off, matching connections | Direct adult help | Large parts, contained battery, simple switch |
| 6 to 8 | Closed loops, basic series and parallel | Close guidance | Visual diagrams, rearrangeable connectors |
| 9 to 11 | Predictions, brightness comparisons, simple schematics | Regular check-ins | Multiple topologies, identical lamps, resistors |
| 12 to 14 | Resistance, measurement, design reasoning | Supervised instrument use | Components, protected meter, open-ended challenges |
The right kit asks a question the child can almost answer, then gives enough structure to help them succeed without removing the thinking.
Inside the Box, Components That Actually Matter
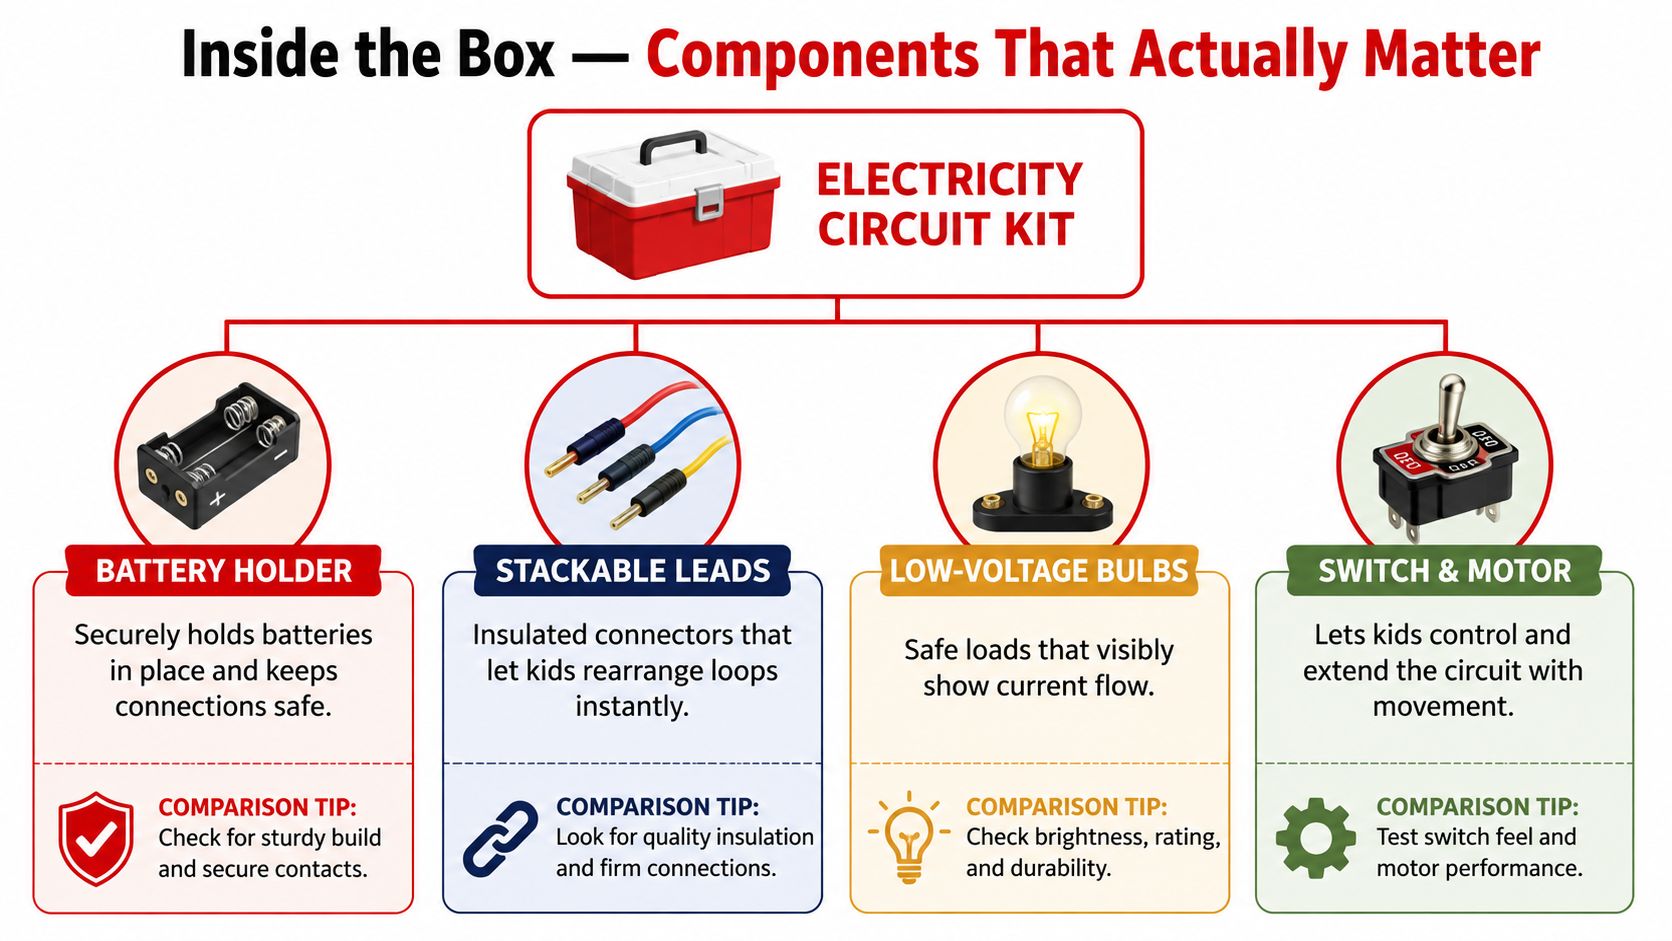
A useful parts list has a clear job for every item. Start with the battery holder. It should secure the cell, show polarity clearly, and connect without forcing a child to hold loose wires against terminals. A holder also makes it easier to disconnect the power source between activities.
Insulated leads are next. Stackable connectors or snap-together wires let children rearrange a circuit without stripping insulation or twisting bare conductors. The kit should include enough leads to build at least two different circuit topologies, rather than forcing every experiment into one fixed layout.
Low-voltage bulbs are often better teaching tools than LEDs alone. A bulb gives a visible result and can reveal changes in brightness when the arrangement changes. LEDs can be useful, but they typically need correct polarity and current limitation, so a beginner kit should explain those requirements rather than treating an LED as an interchangeable bulb.
Look for components that create useful comparisons
A real switch matters because it gives children a direct way to test continuity. Resistors help older learners explore current limitation. A buzzer, motor, or small speaker shows that electrical energy doesn't always become light.
Identical lamps are especially valuable. Connect one lamp in a simple loop, then compare two identical lamps in series and in parallel. The child can predict brightness, observe the result, and explain why changing the topology changed the behavior.
A breadboard or snap-tile system can make rearrangement easier, but it doesn't automatically improve learning. The key question is whether the child can change one variable and see a meaningful result.
The simple circuit-building guide can help families turn loose parts into a structured first investigation. The underlying classroom principle is supported by a circuit curriculum on wires, bulbs, batteries, switches, and energy transfer, which emphasizes observation through light, heat, motion, and sound, along with opportunities to compare series and parallel arrangements.
Price comparison rule: Count the number of meaningful investigations the components support, not the number of pieces printed on the package.
The Misconception Problem Most Kits Ignore
A child can build a working circuit and still hold an incorrect explanation. Phrases such as “the battery sends power to the bulb” may later become beliefs that current is used up by the first lamp, that a component nearer the positive terminal receives more current, or that an open switch affects only one bulb.
A 2025 study reported misconceptions involving voltage at 41%, electric circuits at 31.3%, resistance at 22.9%, and Ohm's law at 22.2%. It also reported that nearly three-quarters of pupils confused electric current with voltage, while about one-third treated electricity as a material that gets consumed. The study on persistent basic-electricity misconceptions supports using kits to test ideas, not only assemble parts.
Test the explanation behind the result
Use prompts that target these specific misunderstandings. Ask, “Does the current get used up in the first lamp?” Have the child compare two identical lamps in series with one lamp alone, then revise the “used-up current” explanation against the observed brightness. Ask whether a component receives less current because it sits farther from the battery's positive terminal. The child can examine whether changing its position, while keeping the circuit arrangement the same, changes the result.
Another useful question is, “If the switch opens between the battery and the first lamp, why would a lamp elsewhere in the same loop also go out?” For a parallel circuit, ask whether one branch can continue operating when another branch is disconnected. These questions expose the child's working model and give the next investigation a clear purpose.
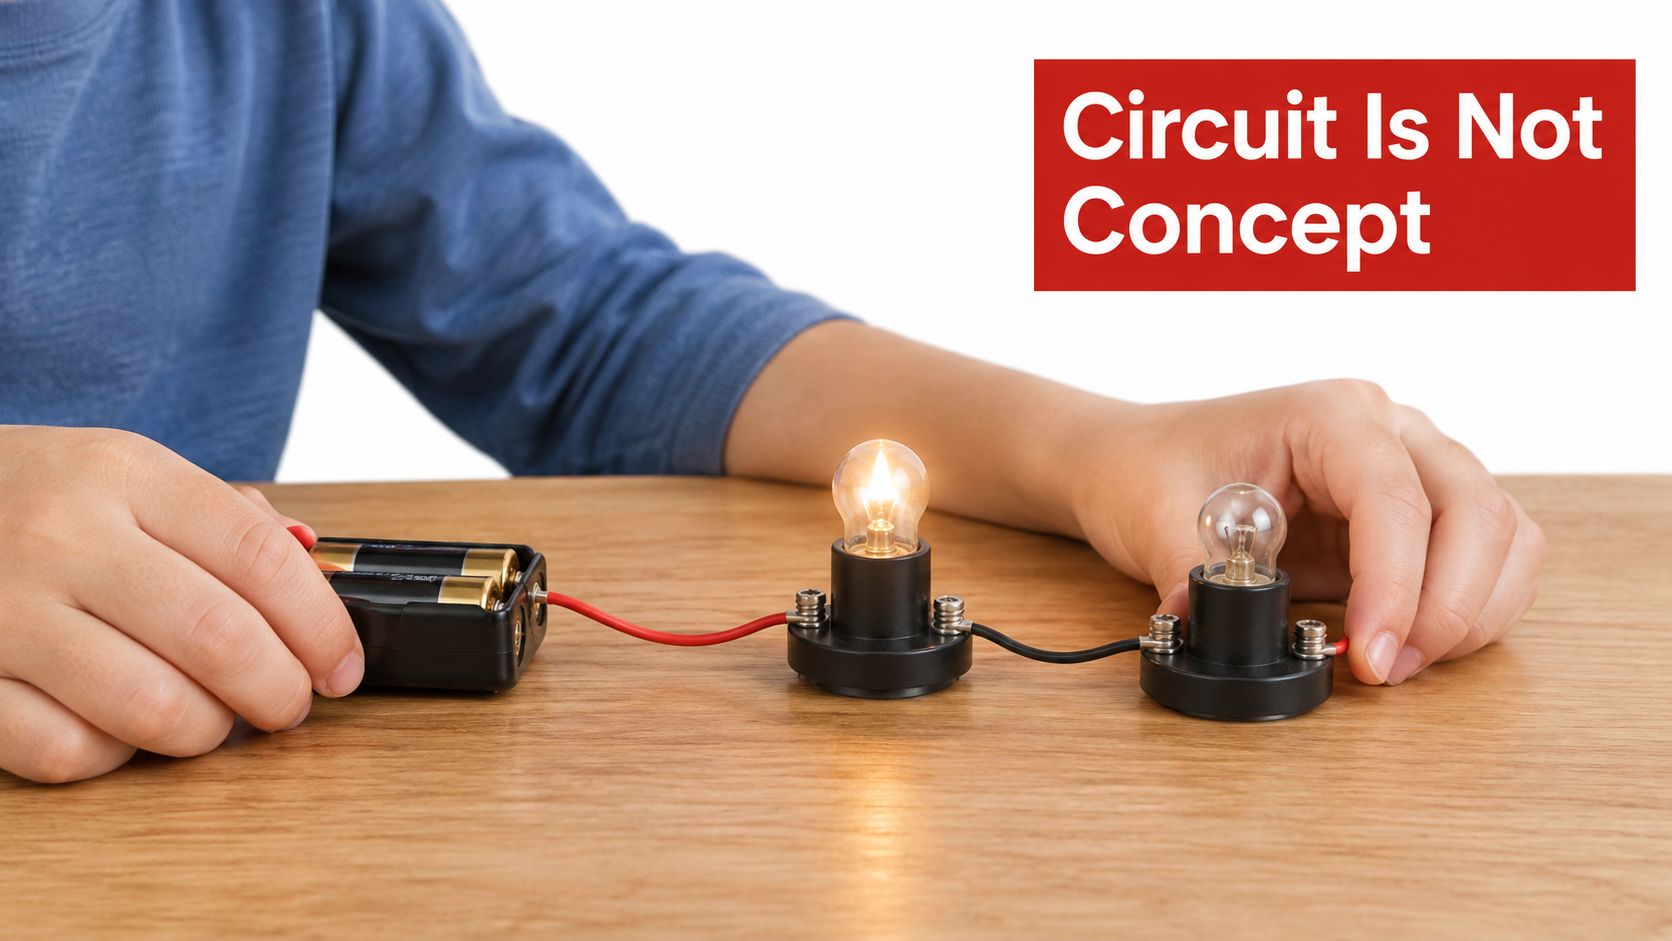
Controlled comparisons make the evidence easier to interpret. Keep the battery, lamps, and leads the same, then change one arrangement at a time. Ask the child to explain the result with potential difference, current, resistance, and path, rather than relying only on “this one is brighter.”
When a circuit fails, the adult's job is to ask which observation challenges the child's original idea, then step back while the child checks battery direction, switch position, connector contact, and lamp type. A bright bulb is useful evidence, but the explanation attached to it is the learning target.
A Practical Safety Framework for Parents and Educators
Low-voltage battery circuits are the sensible default for children. They let learners investigate polarity, insulation, continuity, and energy transfer without asking them to work with household mains electricity. A kit intended to connect to nominal 120-volt branch circuits falls under 16 CFR Part 1505, according to CPSC testing guidance for battery-operated toys.
Age changes the supervision plan. Young children need direct adult presence and contained components. Older children can take more responsibility for inspection and troubleshooting, but they still shouldn't improvise with outlets, damaged wires, unknown power supplies, conductive liquids, or unapproved chargers.
Inspect the kit before the first activity
Look for:
- A secured battery compartment: Children shouldn't be able to access batteries during ordinary play.
- Clear polarity markings: The compartment should show “+” and “−” symbols.
- Specified battery information: Instructions should identify the correct battery size and voltage.
- Protected connections: Leads should be insulated and free from cracks, fraying, or exposed conductors.
- A no-short-circuit rule: The guide should explain that a direct connection can heat the battery and wires.
- Charging protection: A kit using non-rechargeable cells must not allow those cells to be charged through its compartment or circuit.
CPSC guidance sets a concrete benchmark: battery surfaces in battery-operated toys must not exceed 160°F (71°C) during operation. Unusual warmth is a stop signal, not evidence that the experiment is working. Never mix battery chemistries, combine rechargeable and non-rechargeable cells, or use an unapproved charger.
Treat safety as part of the science
A child can learn why insulation prevents an unintended path and why polarity matters. Keep liquids away from electrical parts, remove damaged cells immediately, and disconnect the battery before changing the circuit. In a school laboratory, teachers should use the institution's established emergency procedures and equipment. For broader planning around lab incidents and response equipment, educators may want to find emergency fixtures for labs.
Safety standards support product selection, but they don't replace supervision. U.S. toy rules identify ASTM F963 as the broad toy-safety standard for products intended for children under 14, with additional electrical requirements for electrically operated toys. The secured battery compartment is a practical feature to check, not a substitute for an adult's judgment.
How to Choose a Kit That Builds Real Understanding
Three kit formats cover most family and classroom needs.
A guided project kit works well for a first introduction. It gives children a sequence, a defined result, and enough structure to reduce wiring frustration. Choose one whose instructions explain why each connection matters, not one that only says “attach red wire to red socket.”
An open-ended component kit suits children who already understand a basic loop or enjoy designing their own solutions. It should include enough leads, loads, and connectors to create different topologies. Without prediction prompts or adult guidance, though, open-ended play can become repeated trial and error.
A subscription series can maintain interest by introducing new projects gradually. Its value depends on whether later activities deepen the same concepts. A stream of unrelated gadgets may feel varied while leaving the child's circuit model unchanged.
Use a buying filter, not a parts race
Look for a kit that includes:
- At least two topologies: The child should be able to compare series and parallel arrangements.
- Identical lamps: Matching loads make brightness comparisons more meaningful.
- A functional switch: The switch should test the entire loop, not act as decoration.
- Resistors or current-limiting parts: These support safer LED work and more advanced reasoning.
- Readable schematics: Children should gradually move from pictures toward symbols.
- A thoughtful adult guide: The guide should include prediction questions, expected observations, and troubleshooting explanations.
Skip kits that pair a wall-plug adaptor with an under-six age label. Be cautious when packaging promises “learning while playing” without naming a concept the child will investigate. Also avoid any product that supplies non-rechargeable cells alongside a charger.
Product compliance matters, but compliance isn't the entire educational decision. U.S. rules require toys manufactured on or after February 28, 2018 to be tested and certified to ASTM F963-17, and electrically operated toys have additional requirements under 16 CFR Part 1505. CPSC's toy-safety guidance gives buyers a useful framework for checking age labeling, certification information, and battery security.
For families comparing formats, this guide to science kits for kids can sit alongside product manuals and safety details. A kit earns its place when a child can use it to revise a wrong answer, not when it merely offers the largest pile of parts.
Sample Activities, Learning Outcomes, and Common Questions
Begin with a single-loop flashlight. Ask, “What must be connected for the lamp to light?” Have the child connect the battery holder, switch, lamp, and leads into one complete loop. Open the switch and ask what changed. The observable result teaches continuity and gives the child a concrete reason for the return path.
Next, build a two-lamp comparison. Predict what will happen when identical lamps are connected in series, then rebuild them on separate parallel branches. Keep the battery and lamps the same. Compare brightness and ask whether the current was consumed by the first lamp. Record the explanation rather than accepting “parallel is brighter” as the final answer.
For a third activity, try a fruit or potato battery with adult guidance. Use suitable metal electrodes, connect them to a small load or meter designed for the activity, and ask where the electrical energy comes from. The goal isn't to make a dramatic light. It is to connect chemical reactions, potential difference, and energy conversion to a familiar material.
A simple observation sheet can strengthen the routine. Children can draw the circuit, write a prediction, record what happened, and explain the difference in their own words. Teachers who want a digital way to collect short responses can explore Form Timer classroom assessments, while families can keep the same process on paper.
For more ideas, use this collection of electricity experiments for kids as a source of activity inspiration, then add your own prediction and explanation questions.
Frequently asked questions
How long will a kit keep a child engaged?
That depends on the child's age, confidence, and the quality of the questions. A kit usually lasts longer when activities revisit one circuit and change one variable at a time.
Are wall-plug kits ever appropriate?
Mains-powered equipment belongs in settings with appropriate safeguards and adult control. It isn't a suitable default for unsupervised children's exploration.
What should I do if a battery gets warm?
Stop the activity, disconnect the battery, and inspect for a short circuit, reversed polarity, damaged wiring, mixed cells, or an incorrect charger. Don't resume until the cause is identified and the battery is safe.
Is this real STEM learning or just a toy?
It can be real STEM learning when the child predicts, observes, explains, and revises a model. A blinking result alone isn't enough, but a carefully designed circuit investigation builds scientific reasoning through direct evidence.
Playz offers children's science kits, including an Electrical Circuit Board Engineering Kit for ages 8 and up with hands-on circuit, light, sound, magnetism, radio, and electronics activities supported by an illustrated manual. Visit Playz to explore a kit that can turn the next kitchen-counter experiment into a more purposeful electricity investigation.