

Welcome, parents and educators! Searching for practical ways to make science exciting for your third grader? You've landed in the right place. Hands-on experiments are a fantastic tool for sparking genuine curiosity and a lifelong passion for learning. This guide is packed with incredible science project ideas for 3rd graders, each designed to be engaging, educational, and, most importantly, fun!
At this age, kids learn best through play, which is why each project here is more than just a task; it's an adventure. From an erupting volcano to growing sparkling crystals, these activities use simple, everyday materials to explain complex scientific principles in a way that's easy for an 8- or 9-year-old to grasp. This comprehensive roundup provides everything you need, including a materials list, step-by-step instructions, and key learning takeaways. Our goal is to make these projects as straightforward and rewarding as possible for both you and your young scientist.
For educators aiming to bring these dynamic activities into the classroom, securing supplies can be a hurdle. Seeking support through programs like Walmart Teacher Grants can provide valuable resources to fund these enriching learning experiences. Now, get ready to transform your kitchen or classroom into a laboratory of discovery and watch your child’s eyes light up with excitement as they explore the wonders of science.
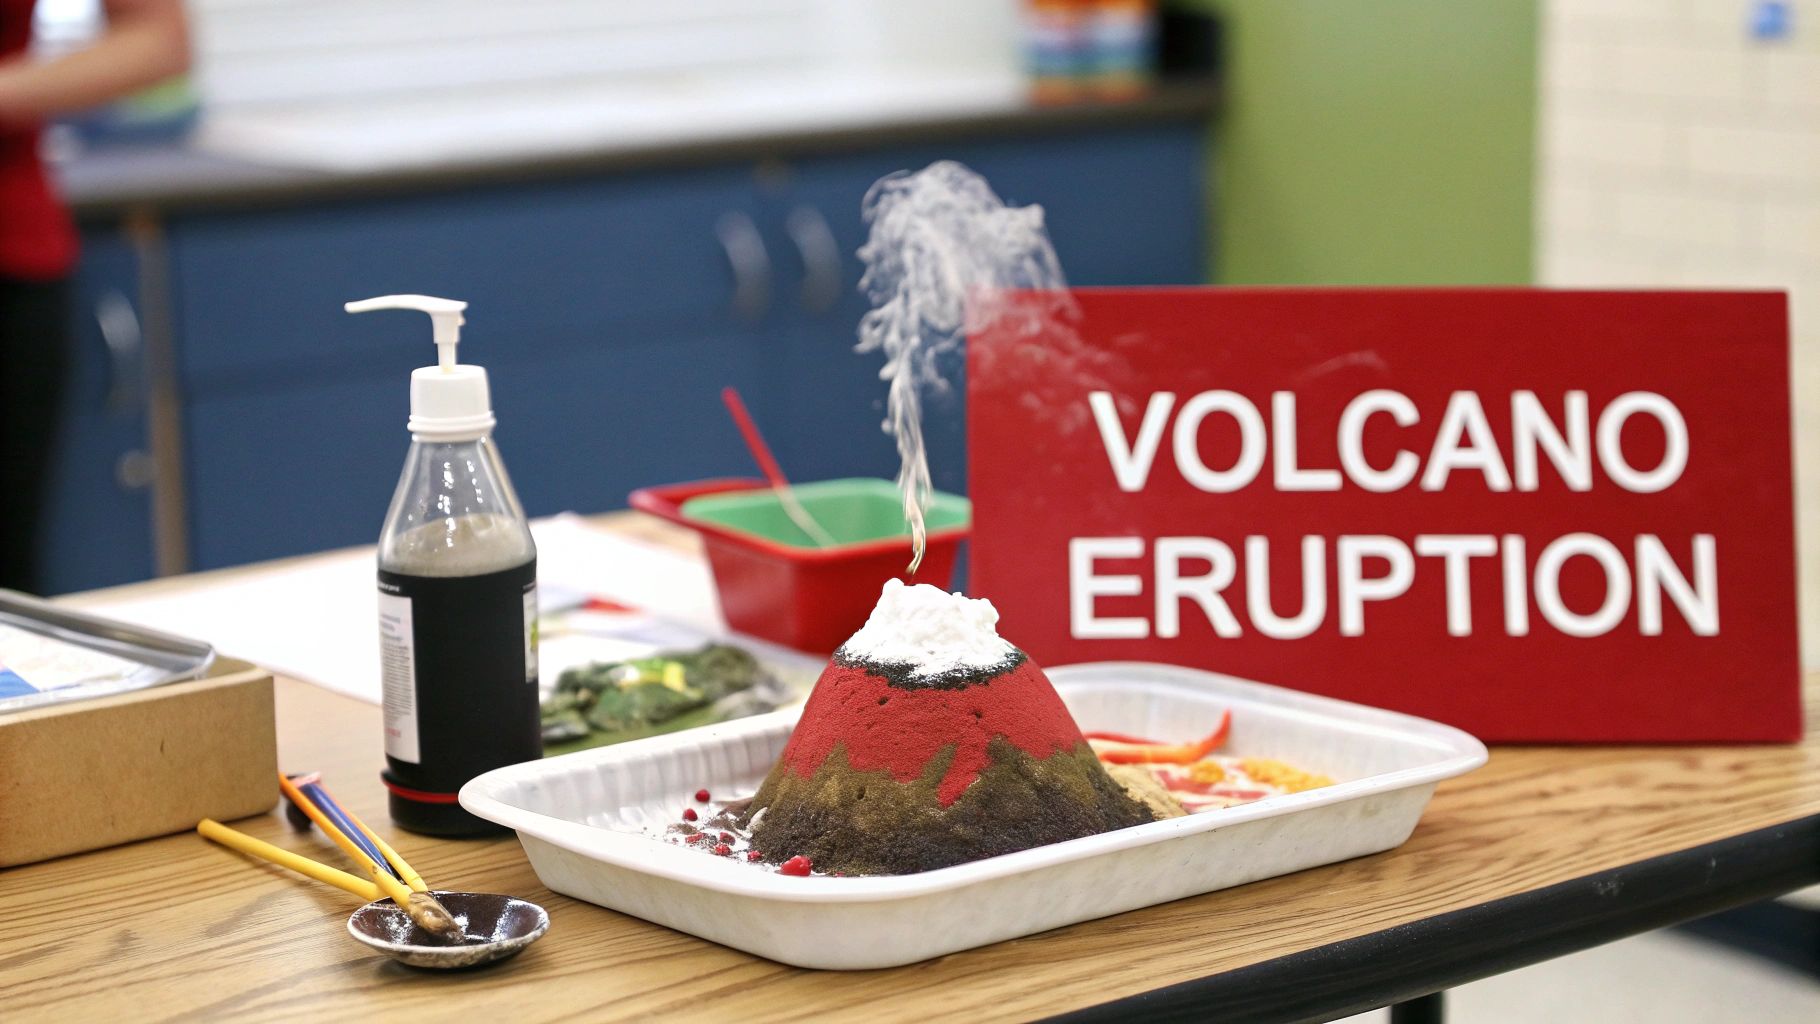
1. Erupting Volcano with Baking Soda and Vinegar
The erupting volcano is a cornerstone of science project ideas for 3rd graders, and for good reason. This classic experiment provides a visually spectacular introduction to chemical reactions using common household items. Students build a volcano model and then mix baking soda (a base) with vinegar (an acid) to simulate a volcanic eruption.
The chemical reaction between sodium bicarbonate (baking soda) and acetic acid (vinegar) releases carbon dioxide gas. This gas rapidly expands, creating pressure that forces the foamy liquid up and out of the "volcano," mimicking a real eruption. It's a fantastic, hands-on way to teach fundamental concepts in chemistry and earth science.
Why It's a Great Project
This project is perfect for third graders because it combines creative model-building with an exciting, immediate chemical reaction. It's a safe, non-toxic experiment that clearly demonstrates cause and effect. The "wow" factor keeps young scientists engaged while they learn about acids, bases, and gas formation.
Materials You'll Need
- For the Volcano: A small plastic bottle, clay or playdough, a tray or baking pan, brown/green paint (optional).
- For the Eruption: Baking soda, white vinegar, warm water, red food coloring, liquid dish soap.
Pro-Tip: The Playz Explosive Kitchen Lab kit includes materials and guides for this and many other exciting, food-based chemistry experiments that bring science to life in a safe and engaging way.
Step-by-Step Guide
- Build Your Volcano: Place the plastic bottle in the center of the tray. Use clay or playdough to sculpt a volcano shape around the bottle, leaving the opening at the top clear.
- Prepare the "Magma": Fill the bottle about halfway with warm water. Add a few drops of red food coloring and a squirt of dish soap. Add two tablespoons of baking soda and give it a gentle swirl.
- Cause the Eruption: When you're ready, pour about half a cup of vinegar into the bottle and stand back. Watch as the foamy "lava" erupts and flows down the sides of your volcano!
Extension Ideas
- Test Variables: Does the temperature of the water affect the reaction speed? What happens if you use more or less dish soap?
- Different Acids: Experiment with other safe household acids like lemon juice to see if they produce a similar reaction.
This experiment is an excellent starting point for exploring more complex reactions. To dive deeper into the world of bubbling, fizzing fun, check out these other exciting at-home chemistry experiments.
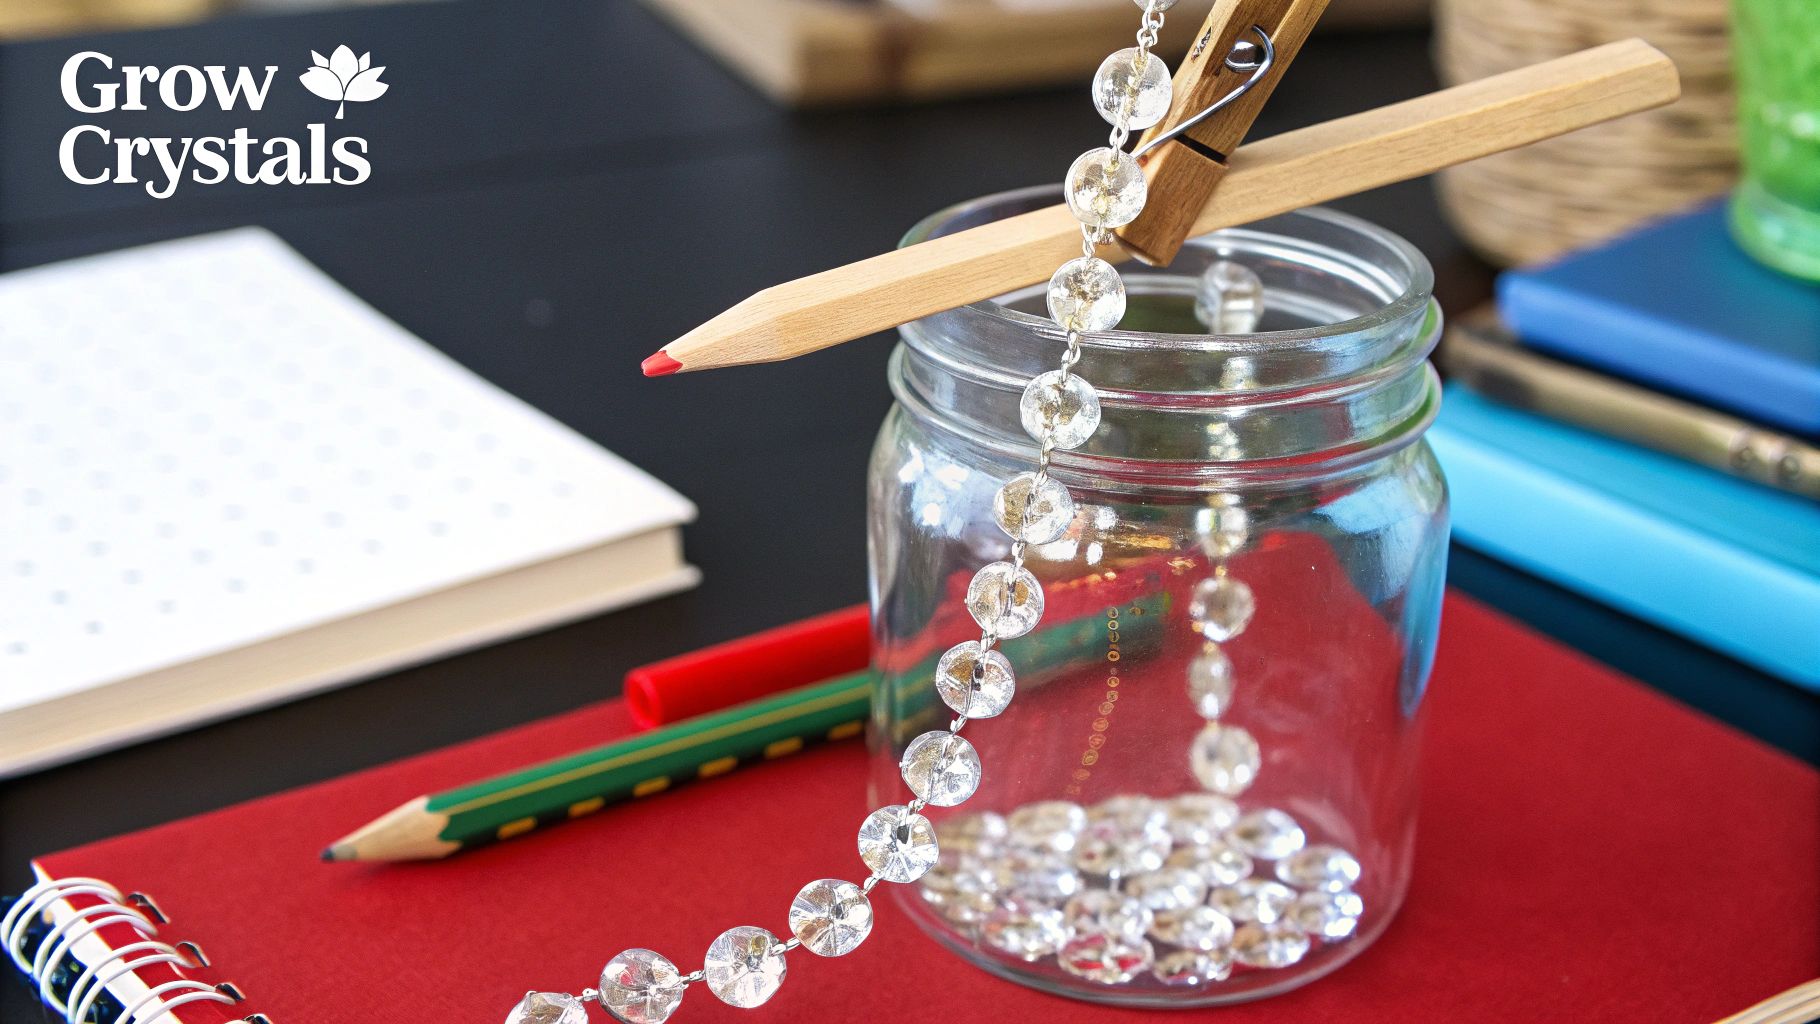
2. Crystal Growing with Salt or Sugar
Watching crystals seemingly appear out of nowhere is a magical experience that makes for one of the most rewarding science project ideas for 3rd graders. This experiment elegantly demonstrates complex scientific principles like solubility and saturation using just a few simple household ingredients. Students create a supersaturated solution of salt or sugar in hot water, and as the water slowly evaporates over a few days, beautiful crystalline structures form.
This project offers a fantastic lesson in patience and observation. It visually explains how dissolved solids can recrystallize into organized patterns, providing a tangible introduction to molecular structures. The final crystal creations are something students can proudly display.
Why It's a Great Project
This experiment is perfect for teaching concepts that unfold over several days, encouraging students to keep an observation journal. It bridges chemistry and geology, showing how similar processes occur in nature to form minerals and gemstones. The process is safe, visually appealing, and results in a beautiful keepsake.
Materials You'll Need
- For the Solution: A glass jar, salt or sugar, hot water (with adult supervision), a spoon for stirring.
- For the Crystal Seed: A wooden skewer or popsicle stick, rough string or a pipe cleaner, a paper clip (to weigh down the string).
Pro-Tip: For a more guided experience with a wider variety of crystal types and colors, the Playz My First Crystal Growing Science Lab Kit provides all the necessary components and detailed instructions to ensure dazzling results.
Step-by-Step Guide
- Create a Supersaturated Solution: With adult help, pour boiling water into the glass jar. Stir in salt or sugar, one spoonful at a time, until no more will dissolve. This is your supersaturated solution.
- Set Up Your Seed: Tie a piece of string to the middle of the popsicle stick so it can rest across the top of the jar. The string should hang down into the solution but not touch the bottom or sides. Attach a paper clip to the bottom to keep it straight.
- Wait and Watch: Place the jar in a safe spot where it won't be disturbed. Over the next few days to a week, you'll see crystals begin to form and grow on the string as the water evaporates.
Extension Ideas
- Add Color: Mix a few drops of food coloring into your solution to grow colorful crystals.
- Compare Crystal Types: Make one solution with salt and another with sugar to compare the different shapes and structures that form.
- Edible Science: Use sugar to make edible rock candy crystals.
For more detailed guidance and troubleshooting, you can follow these crystal growing kit instructions to perfect your technique.
3. Homemade Compass Using Magnetism
Creating a homemade compass is one of the most intriguing science project ideas for 3rd graders, offering a hands-on introduction to the invisible forces of magnetism. This experiment involves magnetizing a small metal object, like a sewing needle, and floating it in water. The needle will then align itself with the Earth's magnetic field, pointing north and south.
This project beautifully illustrates the principles of magnetism and the Earth's magnetic poles. Students learn that our planet acts like a giant magnet, which is why a compass works for navigation. It's a foundational experiment used in outdoor education programs to teach basic survival skills in a memorable way.
Why It's a Great Project
This project is fantastic for third graders because it demystifies a fundamental force of nature. It connects an abstract scientific concept (magnetic fields) to a practical, real-world tool (a compass). The process of magnetizing the needle themselves provides a powerful sense of discovery, showing them how scientific principles can be applied to create useful technology.
Materials You'll Need
- A sewing needle or a straight pin
- A strong magnet (a refrigerator magnet will work)
- A small piece of cork or a leaf
- A bowl or dish of water
- A commercial compass (for comparison)
Pro-Tip: For a deeper dive into magnetic forces, the Playz My First Magnetism Kit provides a safe and structured way to explore attraction, repulsion, and magnetic fields with a variety of fun, hands-on activities.
Step-by-Step Guide
- Magnetize the Needle: Take the strong magnet and stroke the needle in one direction only (not back and forth). Do this about 50 times. This aligns the magnetic domains inside the needle.
- Test the Magnetization: Try to pick up a small metal paperclip with the needle. If it sticks, your needle is magnetized.
- Assemble the Compass: Carefully push the magnetized needle through the small piece of cork, or simply rest it on top of a leaf.
- Float and Observe: Gently place the cork or leaf into the bowl of water. Watch as it slowly rotates until the needle points in the North-South direction. Use a real compass to verify your results!
Extension Ideas
- Mapping Your Space: Use your homemade compass to map the directions (North, South, East, West) in your classroom or backyard.
- Magnetic Interference: See what happens when you bring another magnet close to your compass. Does it disrupt the reading? This demonstrates magnetic interference.
4. Plant Growth Observation with Beans in a Jar
Observing a bean sprout in a jar is a classic and highly effective science project idea for 3rd graders that brings the magic of botany to life. This project allows students to witness the entire germination process, from a dormant seed to a sprouting plant, by placing a bean seed in a clear jar against a damp paper towel.
This setup provides a perfect window into the plant's life cycle. Students can clearly see the roots grow downward and the shoot push upward toward the light, offering a tangible lesson in biology. It’s an observational experiment that teaches the fundamentals of what plants need to survive.
Why It's a Great Project
This project is fantastic for teaching the scientific method through daily observation and data collection. It visually connects students to the life cycle of plants in a way that reading from a textbook cannot. Watching something grow because of their care is incredibly rewarding and instills a sense of wonder about the natural world.
Materials You'll Need
- For the Setup: A clear glass jar or plastic cup, paper towels, bean seeds (lima or kidney beans work well), water.
- For Documentation: A notebook or journal, a ruler, crayons or colored pencils.
Pro-Tip: Pre-soak the bean seeds in water overnight before starting the project. This helps to soften the seed coat and significantly speeds up the germination process, keeping young scientists engaged from the start.
Step-by-Step Guide
- Prepare the Jar: Fold a few paper towels and line the inside of the clear jar, pressing them flat against the glass.
- Position the Bean: Gently wedge one or two bean seeds between the paper towels and the side of the jar. This ensures you'll have a clear view of the roots and shoot as they develop.
- Add Water and Wait: Carefully pour water into the jar to moisten the paper towels, but avoid waterlogging them. Place the jar in a warm, sunny spot.
- Observe and Record: Check the bean daily. Have your child draw what they see in their journal and measure the growth of the roots and stem with a ruler once they appear.
Extension Ideas
- Test Variables: Set up multiple jars to see how different conditions affect growth. What happens if one jar is kept in the dark? What if another is placed in a cold spot?
- Graph the Growth: Use the daily measurements to create a simple bar graph, visually tracking the plant's growth over time.
This hands-on biology experiment provides a foundational understanding of botany. To explore more about the journey from a seed to a fully formed plant, you can learn more about how flowers grow.
5. Static Electricity with Balloons and Paper Scraps
This classic experiment is one of the most accessible science project ideas for 3rd graders, offering a hands-on introduction to physics. Students generate static electricity by rubbing a balloon against their hair or a wool sweater. This process creates an electrical charge on the balloon's surface.
When the charged balloon is brought near small pieces of paper, it attracts them, making them jump up and stick to its surface. This magical-seeming effect provides a tangible demonstration of electrical charges, attraction, and repulsion using simple, safe materials.
Why It's a Great Project
This project is fantastic because it allows students to directly see and feel the effects of an invisible force. The cause-and-effect relationship is immediate and clear, making a complex physics concept understandable. It requires no complicated setup and sparks curiosity about the electricity that surrounds us in everyday life.
Materials You'll Need
- For the Experiment: Latex balloons, small pieces of tissue paper or other lightweight paper, a wool cloth or a head of hair.
Pro-Tip: The Playz Electrical Circuit Board Engineering Kit for Kids is a great next step, allowing curious minds to move beyond static electricity and explore the principles of circuits and current in a fun, interactive way.
Step-by-Step Guide
- Prepare Your Materials: Cut or tear tissue paper into tiny, confetti-sized pieces and spread them on a flat, dry surface like a table.
- Charge the Balloon: Inflate a balloon and tie it off. Vigorously rub one side of the balloon on your hair or a wool cloth for about 10-15 seconds. This builds up a negative charge.
- Demonstrate Attraction: Slowly bring the charged side of the balloon close to the paper scraps without touching them. Watch as the pieces of paper leap up and cling to the balloon's surface!
Extension Ideas
- Test Different Materials: Does the balloon pick up other small items, like salt or sugar? Try rubbing the balloon on different fabrics to see which creates the strongest charge.
- Bend Water: Charge the balloon again and hold it near a thin, steady stream of water from a faucet. Observe how the water stream bends towards the balloon.
This simple demonstration is a powerful gateway to understanding more advanced concepts in electricity and magnetism. Explore even more amazing physics projects for science fair fun.
6. Sink or Float Prediction and Testing
The sink or float experiment is a fundamental science project idea for 3rd graders that introduces them to the concepts of density and buoyancy in a simple, hands-on way. Students are presented with various everyday objects and asked to predict whether each item will sink or float when placed in water. They then test their hypotheses and observe the results.
This experiment perfectly embodies the scientific method: question, predict, test, and conclude. It encourages young learners to think critically about the properties of different materials, such as what they are made of and how their shape might affect their ability to float. It’s a powerful lesson that challenges common misconceptions, like the idea that all heavy things sink.
Why It's a Great Project
This project is fantastic for third graders because it requires minimal setup but delivers significant learning outcomes. It promotes critical thinking, observation skills, and an understanding of physical properties. The process of predicting and then testing creates a memorable and engaging learning cycle that helps solidify complex scientific concepts like density.
Materials You'll Need
- For the Experiment: A large, clear container (like a tub), water, a variety of test objects (e.g., a crayon, a leaf, a small toy car, a rubber duck, a coin, an apple, a pencil, a paperclip).
- For Recording: A chart with columns for "Object," "Prediction (Sink/Float)," and "Result (Sink/Float)."
Pro-Tip: Include some "trick" items to spark discussion. For example, a can of diet soda (which often floats) and a can of regular soda (which often sinks) can lead to an amazing conversation about dissolved sugar and density.
Step-by-Step Guide
- Set Up Your Station: Fill the clear container with water. Lay out all the objects you plan to test and prepare your recording chart.
- Make Predictions: Go through each object one by one. Ask your third grader to predict whether it will sink or float and record their hypothesis. Encourage them to explain why they think that.
- Test the Objects: Carefully place each object into the water and observe what happens. Record the actual result next to the prediction on your chart.
- Discuss the Results: Once all items are tested, compare the predictions to the results. Discuss why some predictions were right and others were wrong, introducing the basic idea of density (how much "stuff" is packed into an object).
Extension Ideas
- Shape Shifter: Take a piece of clay. Does it sink or float as a ball? What if you shape it into a boat or a flat pancake? This explores how shape and water displacement affect buoyancy.
- Salty Science: Try the experiment again, but this time, dissolve a good amount of salt in the water. Do any of the objects that sank before now float? This is a great introduction to how water density can change.
7. Rainbow Density Column with Colored Liquids
The rainbow density column is one of the most visually captivating science project ideas for 3rd graders. This project creates a stunning layered "rainbow" in a glass by carefully pouring different liquids on top of each other. Each liquid, from dense honey to light rubbing alcohol, has a different mass per unit of volume, allowing them to stack without mixing.
This experiment provides a clear and colorful demonstration of the concept of density. Students learn that liquids with higher density will sink below liquids with lower density. It's a fantastic way to introduce principles of fluid dynamics and the physical properties of matter in a way that is both beautiful and easy to understand.
Why It's a Great Project
This project is a hit with third graders because it combines a mesmerizing visual result with a core scientific concept. The slow, careful process of layering the liquids is an excellent exercise in patience and precision. It clearly illustrates a complex idea (density) using simple, observable results, making it highly memorable.
Materials You'll Need
- For the Column: A tall, clear glass or cylinder, various small objects to test buoyancy (e.g., grape, plastic bead, screw).
- For the Layers: Honey, corn syrup (colored dark blue), dish soap (green), water (colored red), vegetable oil (yellow), rubbing alcohol (colored purple).
Pro-Tip: The Playz Kaboom! Explosive Combustion Science Lab Kit provides tools like beakers and measuring spoons that are perfect for precisely measuring and pouring the liquids needed for this experiment.
Step-by-Step Guide
- Predict the Order: Have your student guess which liquid is the densest and which is the least dense. Write down the predicted order of the layers from bottom to top.
- Pour the First Layer: Start by carefully pouring the densest liquid, honey, into the bottom of the glass.
- Layer Carefully: One by one, very slowly pour the subsequent liquids into the glass in order of decreasing density (corn syrup, dish soap, water, oil, alcohol). Tilt the glass and pour the liquid down the inside wall to prevent mixing.
- Observe and Test: Watch as the layers settle into a distinct rainbow column. Gently drop small objects into the column to see where they float, demonstrating how their density compares to the different liquids.
Extension Ideas
- Miscibility Test: After observing the layers, carefully stir the column with a rod. Which liquids mix together, and which ones separate again? This introduces the concept of miscibility.
- Create Your Own Liquids: Experiment with dissolving salt or sugar in water to change its density. See where this new liquid settles in the column.
This beautiful experiment is an excellent gateway to understanding the physical properties of the world around us. For more hands-on fun exploring liquids and reactions, discover other great home science experiments.
8. Tornado in a Bottle with Water and Glitter
This captivating project allows young meteorologists to create a mesmerizing vortex, safely modeling the powerful forces of a real tornado. By connecting two bottles and swirling the water inside, students can observe how a vortex, or funnel cloud, forms. It's a simple yet powerful demonstration of physics and atmospheric science.
The swirling motion creates centripetal force, which pushes the water toward the outer edge of the bottle. As the water drains, air is pulled up through the center, forming a stable, spinning column that looks just like a tornado. Adding glitter or small beads helps make the vortex's rotation clearly visible.
Why It's a Great Project
This project is a fantastic way to introduce concepts like vortexes, centripetal force, and weather patterns. It's highly visual, requires minimal materials, and provides an immediate, observable result. The hands-on nature of creating the vortex keeps third graders engaged while they learn about complex fluid dynamics in a simplified way.
Materials You'll Need
- Two clear 2-liter plastic soda bottles
- Water
- Fine glitter or small plastic beads
- Food coloring (optional)
- A tornado tube connector or heavy-duty waterproof tape (like duct tape)
- Liquid dish soap (a few drops)
Pro-Tip: For a more advanced exploration of weather and natural phenomena, the Playz My First Weather Science Kit offers experiments that cover everything from lightning and clouds to the water cycle, building a strong foundation for future meteorologists.
Step-by-Step Guide
- Prepare the Bottles: Take one of the 2-liter bottles and fill it about two-thirds full with water. Add a few drops of food coloring and a pinch of glitter to help visualize the vortex.
- Add Soap: Squeeze a few drops of liquid dish soap into the water. This helps the bubbles define the vortex and makes it last a bit longer.
- Connect the Bottles: Place the second, empty bottle upside down on top of the water-filled bottle. Securely fasten them together using a tornado tube connector or by wrapping the necks tightly with duct tape.
- Create the Vortex: Flip the bottles over so the full bottle is on top. Give the bottles a firm, circular swirl for a few seconds and place them on a flat surface. Watch as a spinning vortex forms in the top bottle as the water drains into the bottom one!
Extension Ideas
- Vortex Variables: Does the amount of water change the shape or duration of the tornado? What happens if you swirl it in the opposite direction?
- Bottle Shapes: Try using different sizes or shapes of bottles to see how it affects the vortex formation. Does a smaller bottle create a faster tornado?
9. Solar Oven S'mores with Box and Foil
Harnessing the power of the sun to make a tasty treat is one of the most memorable science project ideas for 3rd graders. This project involves building a simple oven from a cardboard box, aluminum foil, and plastic wrap. Students then use it to cook s'mores, providing a delicious lesson in solar energy, insulation, and heat transfer.
The solar oven works by using aluminum foil to reflect sunlight into the box. A clear plastic wrap cover creates a greenhouse effect, trapping heat. Black construction paper on the bottom of the box absorbs this heat, raising the internal temperature high enough to melt chocolate and marshmallows.

Why It's a Great Project
This project brilliantly connects an abstract concept like renewable energy to a tangible, delicious outcome. It's an excellent way for third graders to engage with physics and engineering principles in a practical way. The excitement of checking on their melting s'mores keeps them invested while they learn about reflection, absorption, and insulation.
Materials You'll Need
- For the Oven: A cardboard pizza box, aluminum foil, clear plastic wrap, black construction paper, a ruler, scissors or a box cutter, tape, and a wooden skewer or stick.
- For the S'mores: Graham crackers, marshmallows, and chocolate bars.
Pro-Tip: For the best results, use a thermometer to track the temperature inside the oven. This adds a data-collection element to the project, allowing students to graph the temperature change over time on a sunny day versus a cloudy one.
Step-by-Step Guide
- Construct the Oven: On the lid of the pizza box, cut a three-sided flap, leaving one side attached to act as a hinge. Line the inside of this flap with aluminum foil to create a reflector.
- Create the Window: Tape a layer of clear plastic wrap over the opening you cut, creating an airtight window. Tape another layer to the underside of the opening to create an insulating air pocket.
- Insulate and Absorb: Line the bottom of the inside of the box with aluminum foil and then place a sheet of black construction paper on top.
- Cook the S'mores: Assemble your s'mores on the black paper inside the box. Close the lid and prop the reflector flap open with the skewer to direct sunlight into the box. Place it in direct sun and wait for the magic to happen!
Extension Ideas
- Test Insulation: What happens if you add crumpled newspaper to the sides of the box? Does it cook faster?
- Color Comparison: Place a s'more on white paper next to the one on black paper. Which one melts first and why?
This solar oven project is a perfect gateway to exploring other amazing science experiments for kids at home that use everyday materials to reveal scientific wonders.
10. Invisible Ink Messages with Lemon Juice
Unleash your inner secret agent with this classic science project that turns a simple kitchen staple into a tool for espionage. Students write secret messages using lemon juice as an "invisible" ink. When the paper is gently heated, the message magically appears, revealing the hidden words.
This experiment is a brilliant introduction to the chemical process of oxidation. The acid in the lemon juice weakens the paper's fibers. When heat is applied, the lemon juice mixture oxidizes and turns brown much faster than the surrounding paper, making the secret message visible. It’s a captivating way to blend chemistry with a dash of mystery.
Why It's a Great Project
This project is fantastic for third graders because it feels like a magic trick backed by real science. It’s a safe and simple way to demonstrate how chemical properties can be altered by heat. The activity also opens the door to discussions about history and cryptography.
Materials You'll Need
- For the Ink: Half a lemon, a small bowl, water, a cotton swab or small paintbrush.
- For the Message: White paper.
- For Revealing: A heat source like a lamp (with an incandescent bulb), a hairdryer, or an adult to help with an iron.
Pro-Tip: For a more advanced and colorful exploration of secret messages, the Playz Spy Master Super Detective Gear & Activity Kit provides tools and experiments that take the fun of cryptography and chemistry to the next level.
Step-by-Step Guide
- Create the Ink: Squeeze the juice from half a lemon into a small bowl. Add a few drops of water and mix it together.
- Write Your Message: Dip the cotton swab into the lemon juice mixture and write a secret message on the white paper. Let the paper dry completely; the message will become invisible.
- Reveal the Secret: With adult supervision, carefully hold the paper near a heat source, like a warm light bulb. The heat will cause the lemon juice to oxidize and turn brown, revealing your hidden message.
Extension Ideas
- Test Other "Inks": See what other household liquids work as invisible ink. Try milk, white vinegar, or a solution of baking soda and water.
- Historical Context: Research how invisible ink was used during historical events like the American Revolution. What other methods did spies use?
10 3rd-Grade Science Projects Compared
| Experiment | Implementation Complexity 🔄 | Resources & Time ⚡ | Expected Outcomes & Impact 📊 | Ideal Use Cases 💡 | Key Advantages ⭐ |
|---|---|---|---|---|---|
| Erupting Volcano (Baking Soda & Vinegar) | Low — simple steps; adult supervision for vinegar | Low materials; immediate demo (minutes) ⚡ | Immediate foamy eruption; shows acid–base reaction and CO2 production 📊 | Intro chemistry demos, science fairs, engagement activities | Highly engaging, low cost, repeatable ⭐ |
| Crystal Growing (Salt or Sugar) | Medium — controlled dissolution and setup | Common materials; multi-day growth (3–5 days) ⚡ | Visible crystal formation over time; teaches solubility and saturation 📊 | Long-term observation, lab journals, lessons on solubility | Produces tangible keepsakes; reinforces patience and data logging ⭐ |
| Homemade Compass (Magnetism) | Low–Medium — magnetizing technique; safety with needle | Minimal materials; quick results after magnetization ⚡ | Needle aligns with magnetic field; demonstrates magnetism and navigation 📊 | Outdoor education, magnetism lessons, navigation exercises | Functional, portable, connects to real-world navigation ⭐ |
| Plant Growth Observation (Beans in a Jar) | Medium — requires ongoing care and measurement | Low-cost materials; multi-week timeline (2–3 weeks) ⚡ | Daily observable root/shoot development; growth data and life-cycle understanding 📊 | Biology units, data-collection projects, responsibility lessons | Living result, encourages routine observation and measurement ⭐ |
| Static Electricity (Balloons & Paper) | Low — very simple procedure | Minimal materials; immediate but short-lived effects ⚡ | Visible attraction/repulsion; demonstrates charge transfer and forces 📊 | Quick demos, introductory electricity units, tactile experiments | Highly engaging, repeatable, safe with supervision ⭐ |
| Sink or Float Prediction & Testing | Low — straightforward setup and testing | Household items; immediate results ⚡ | Predictive reasoning; clear demonstration of density and buoyancy 📊 | Hypothesis practice, group activities, critical-thinking exercises | Teaches hypothesis formation and misconception correction ⭐ |
| Rainbow Density Column (Colored Liquids) | Medium — careful pouring to avoid mixing | Common liquids; immediate stable layers, long-term display ⚡ | Clear density layering and miscibility concepts; strong visual impact 📊 | Visual chemistry demos, density/miscibility lessons, display pieces | Extremely visual, durable display, intuitive concept demonstration ⭐ |
| Tornado in a Bottle (Water & Glitter) | Low — simple assembly; seal must be watertight | Low-cost materials; immediate visualization ⚡ | Spinning vortex formation; teaches rotation, centripetal effects 📊 | Weather units, dynamics demonstrations, hands-on exploration | Dramatic visualization, reusable, links to real atmospheric phenomena ⭐ |
| Solar Oven S'mores (Box & Foil) | Medium — construction skills; weather-dependent | Recyclable materials; slow (30–60+ min), needs sun ⚡ | Demonstrates solar heating and insulation; produces edible outcome 📊 | Renewable energy lessons, outdoor STEM, applied physics | Practical renewable-energy demo, memorable and tasty result ⭐ |
| Invisible Ink (Lemon Juice) | Low — simple writing; heating requires supervision | Minimal materials; quick reveal with controlled heat ⚡ | Revealed messages via oxidation/heat; links chemistry and history 📊 | Chemistry/history cross-curricular activities, cryptography themes | Fun and mysterious, low-cost, encourages experimentation ⭐ |
Your Next Great Discovery Awaits!
Venturing through these engaging science project ideas for 3rd graders—from a fizzing volcano to a solar-powered s'more—marks the beginning of a remarkable journey. Your young scientist has now dipped their toes into the fascinating worlds of chemistry, physics, biology, and earth science. They've done more than just follow steps; they've practiced the core principles of the scientific method: questioning, hypothesizing, experimenting, and observing.
This hands-on exploration is where the magic of learning truly happens. The goal was never just to build a tornado in a bottle or grow a salt crystal. The real victory lies in the "aha!" moments, the bursts of curiosity, and the growing confidence to ask, "What if we tried this instead?" These projects are designed to demystify science, transforming it from an abstract school subject into a tangible, exciting part of everyday life.
Key Takeaways from Your Scientific Journey
Reflecting on these experiments, we can see a pattern of foundational scientific principles that are now more familiar to your third grader. These are not just one-off activities but stepping stones to a deeper understanding of the world.
- Chemical Reactions are Everywhere: The baking soda volcano and the invisible ink both showcased how combining substances can create entirely new ones, producing gas or changing color. This is chemistry in action.
- Physics Governs Motion and Energy: From understanding density with the rainbow column to harnessing solar power, your child has interacted with fundamental physics. They’ve seen how unseen forces like static electricity and magnetism can have visible, predictable effects.
- Biology is the Science of Life: Observing a bean sprout provides a powerful, firsthand look at the life cycle. It connects abstract concepts like germination to a living, growing thing they can see and touch.
- Observation is a Scientist's Superpower: Every project reinforced the importance of careful observation. Learning to watch, record, and analyze what happens is the most critical skill for any aspiring scientist.
Fostering a Lifelong Love for Discovery
The momentum from these science projects is a precious resource. The real value isn't just in completing a single assignment but in cultivating a lasting spirit of inquiry. The best way to keep that spark alive is to continue making science a part of your family's routine. Don't let the exploration end here.
Encourage questions about the world. Why is the sky blue? How do airplanes stay up? The most powerful response is often, "That's a great question. Let's find out together." This collaborative approach models curiosity and shows that learning is a shared adventure, not a test.
Remember that an experiment that doesn't go as planned is not a failure; it's a data point. It's an opportunity to troubleshoot, adjust a variable, and try again. This resilience is a critical life skill that extends far beyond the science fair. By celebrating the process over the perfect outcome, you empower your child to take intellectual risks and embrace challenges. These science project ideas for 3rd graders are just the start of building that confident, problem-solving mindset.
Ready to take the guesswork out of your next experiment? The Playz line of science kits provides all the high-quality materials and kid-friendly instructions you need to dive into even more exciting scientific concepts. Explore our award-winning kits and continue the journey of discovery at Playz today