


A child opens a solar robotics kit at the kitchen table, spreads the gears across the instructions, and proudly announces that the robot is ready. Then nothing happens. The panel is under a ceiling light, one wire is loose, and a gear is rubbing against the frame. Five minutes later, the same child is outside in direct sunlight, watching the robot creep forward and asking why it suddenly works.
That moment captures both the appeal and the frustration of solar robotics. These kits offer a screen-free way to explore renewable energy, motors, gears, and mechanical design, but they don't behave like ordinary battery-powered toys. Light quality, assembly accuracy, age, and adult guidance all affect the experience. This guide focuses on what children learn, where the robots work reliably, and how to choose a kit that won't become an avoidable source of disappointment.
What Makes Solar Robotics Kits Different from Other STEM Toys
The first build often looks more complicated than a child expects. There may be a photovoltaic panel, motor, wires, axles, gears, body pieces, and several small connectors. A child who has assembled a battery-powered car may assume the robot will move as soon as the pieces are connected. Instead, the robot teaches a less forgiving lesson: energy has to arrive in the right form, and the structure has to transfer it efficiently.
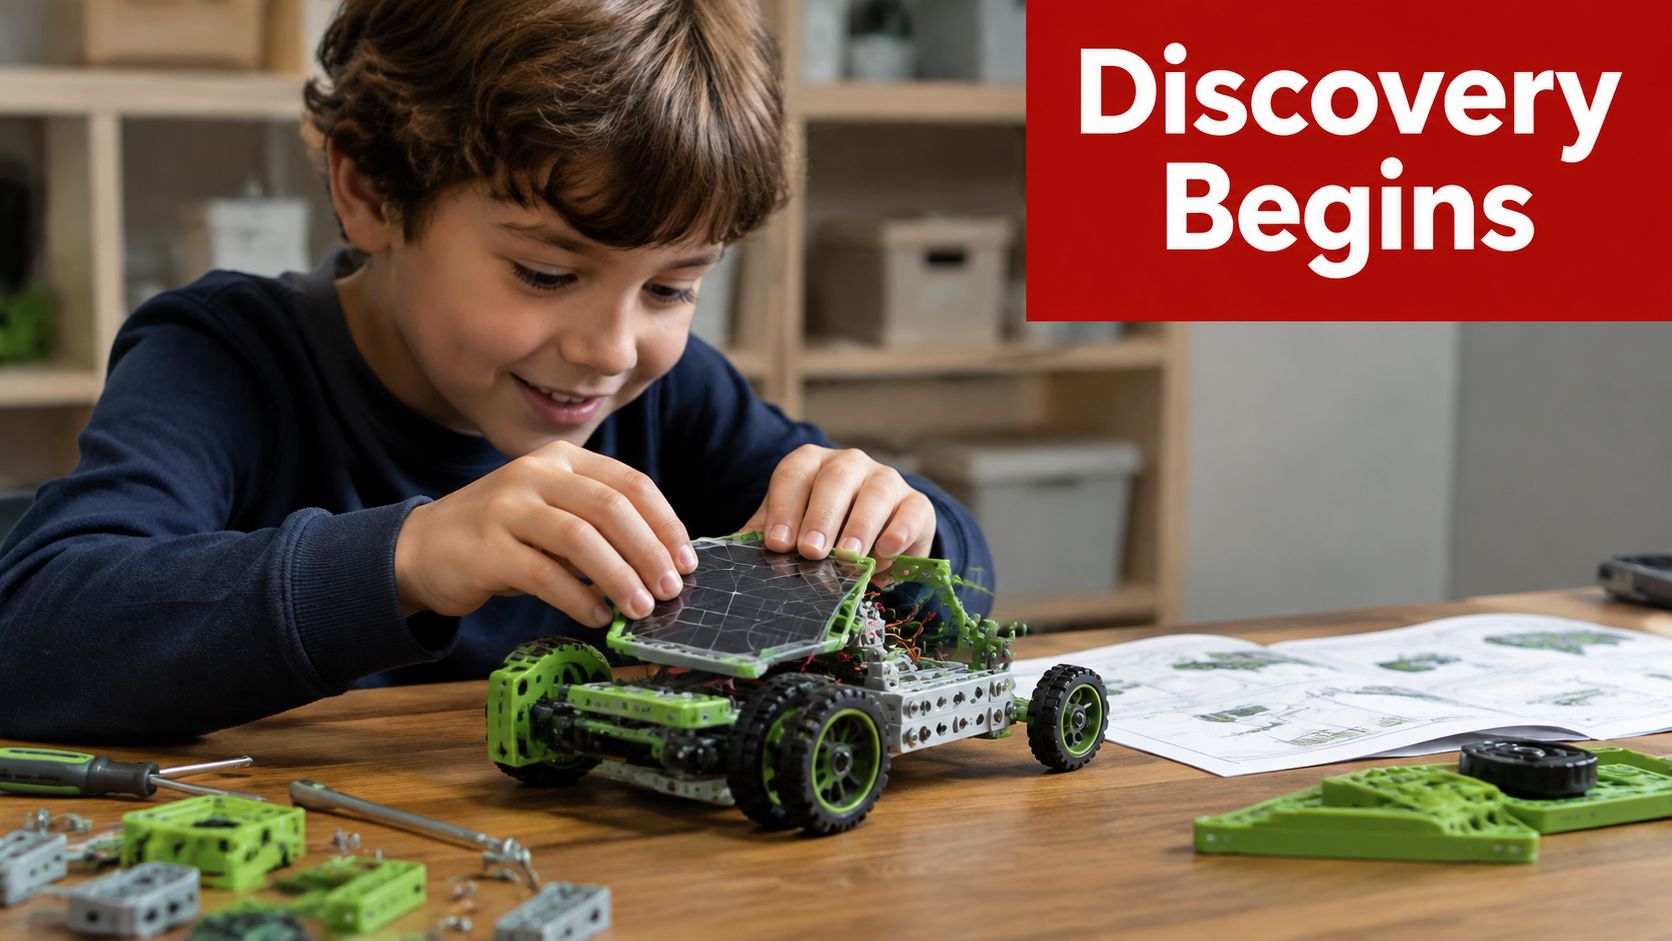
A battery-powered robot gives a fairly predictable supply of electricity. A screen-based coding toy may respond to a command even when the child hasn't built the hardware. A solar robotics kit sits between those experiences. The child must assemble a physical system, expose it to a suitable light source, observe the result, and diagnose what went wrong. That makes the kit closer to a small engineering investigation than a simple push-button toy.
A renewable-energy lesson children can see
The central idea is direct. A photovoltaic panel converts sunlight into electricity, and that electricity drives a small motor or mechanism. The child can see the cause and effect without needing software, a rechargeable battery, or an abstract diagram. Product documentation for the Elenco SolarBot line shows how the category has developed around multiple build options, including an 8-in-1 format, while another documented kit offers 14 configurations from 201 parts and operates without batteries (Elenco SolarBot product information, Electrokit 14-in-1 solar robot kit).
That variety matters educationally. A car, boat, walking robot, or plane may use the same basic energy source but place different demands on the gears and frame. Children begin to notice that changing the shape changes the load, balance, and friction. Parents looking for more screen-free STEM ideas can also compare these hands-on builds with other approaches in Playz's STEM learning toys guide.
Classroom observation: The stalled robot often creates more learning than the successful first run, provided an adult helps the child investigate instead of fixing everything immediately.
A solar kit isn't ideal for every child. Small parts can overwhelm a young builder, instructions may require careful reading, and the robot may refuse to move in ordinary indoor light. For families who want instant, repeatable play, a battery-powered toy may be less frustrating. For children who enjoy building, testing, and rebuilding, the constraints are precisely what make the experience valuable.
How Solar Power Actually Drives These Robots
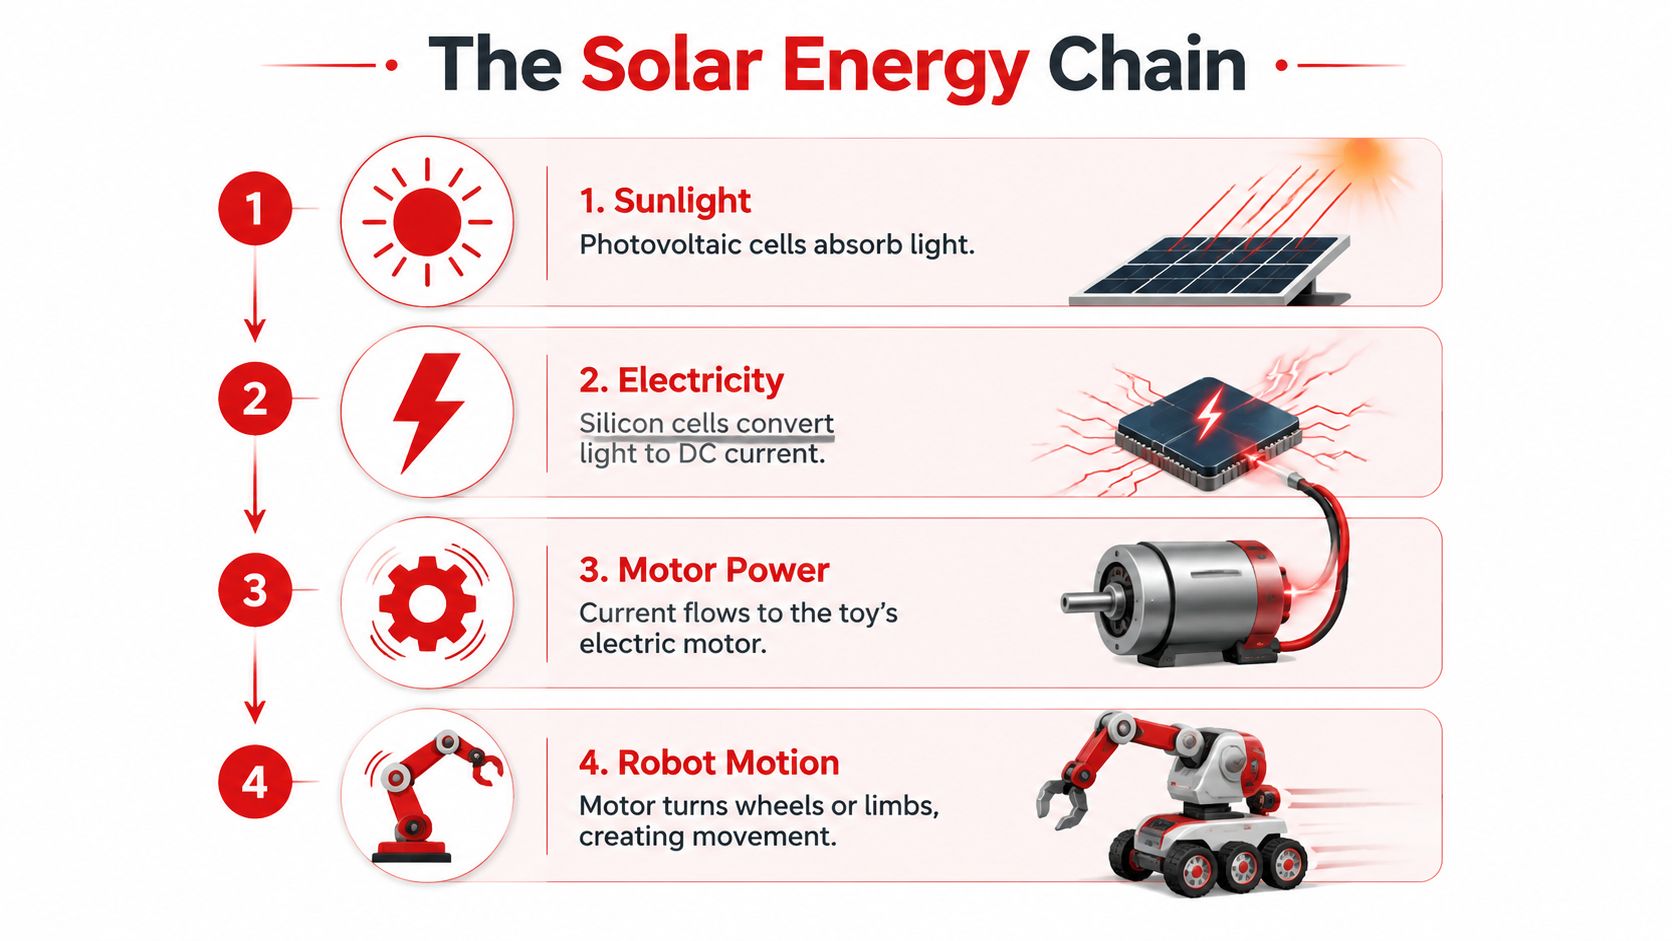
A solar robot follows a short physical chain. Light enters the photovoltaic panel, the panel produces direct-current electricity, the electricity reaches the motor, and the motor turns the robot's wheels or limbs. There isn't a hidden battery smoothing out weak conditions, so every stage affects the final movement.
From light to electrical power
Start with the panel. Photovoltaic cells respond to light and produce DC current. The panel's position matters because the robot receives only the energy available at that moment. If the panel faces away from the strongest light, the motor may receive too little current to begin turning.
A useful classroom analogy is a water system. Voltage is like the pressure pushing electricity, while current is like the amount of flow. A motor needs enough electrical supply to overcome its starting resistance. Weak light may produce some electricity, but not enough usable current to start the mechanism.
A documented Tomons kit lists a 3V, 140mA solar panel, along with one or two DC motors rated between 130 and 260 RPM and several gear combinations (Tomons solar robot construction details). Those specifications show why the panel, motor, and gears must work as a matched system. The panel supplies the energy budget, the motor converts electrical energy into rotation, and the gears adapt that rotation for movement.
Why the motor needs gears
Small motors can spin rapidly, but rapid spinning isn't automatically useful. A gear train transfers rotation and can trade speed for turning force. A child might see one gear rotate quickly while the wheel moves slowly, then learn that the arrangement determines whether the robot pushes forward or struggles under its load.
One representative kit architecture uses a low-voltage DC motor rated at 1.2 VDC and 14,000 rpm, paired with a photovoltaic panel and lightweight mechanisms (Electrokit solar robot specifications). The exact figures vary by product, but the lesson remains consistent. The motor may spin freely while the robot still fails if the gears bind, the axle is crooked, or the wheels meet too much resistance.
For a child-friendly test, lift the robot so the wheels can turn freely, then place it on a smooth surface in strong sunlight. If the motor spins in the air but stalls on the table, the child can investigate load and friction rather than assuming the panel is broken. Guidance on basic circuits can reinforce the electrical part of the activity through this simple circuits resource.
Real STEM Learning Benefits by Age Group
Age labels on solar robotics kits often start at 8+, but the right level of independence depends on more than the number on the box. A child may understand the idea of sunlight producing motion yet still need help sorting parts, reading diagrams, or aligning a gear train. The kit's educational value depends on whether the adult protects the child's role as the problem solver.
Younger builders need a shared build
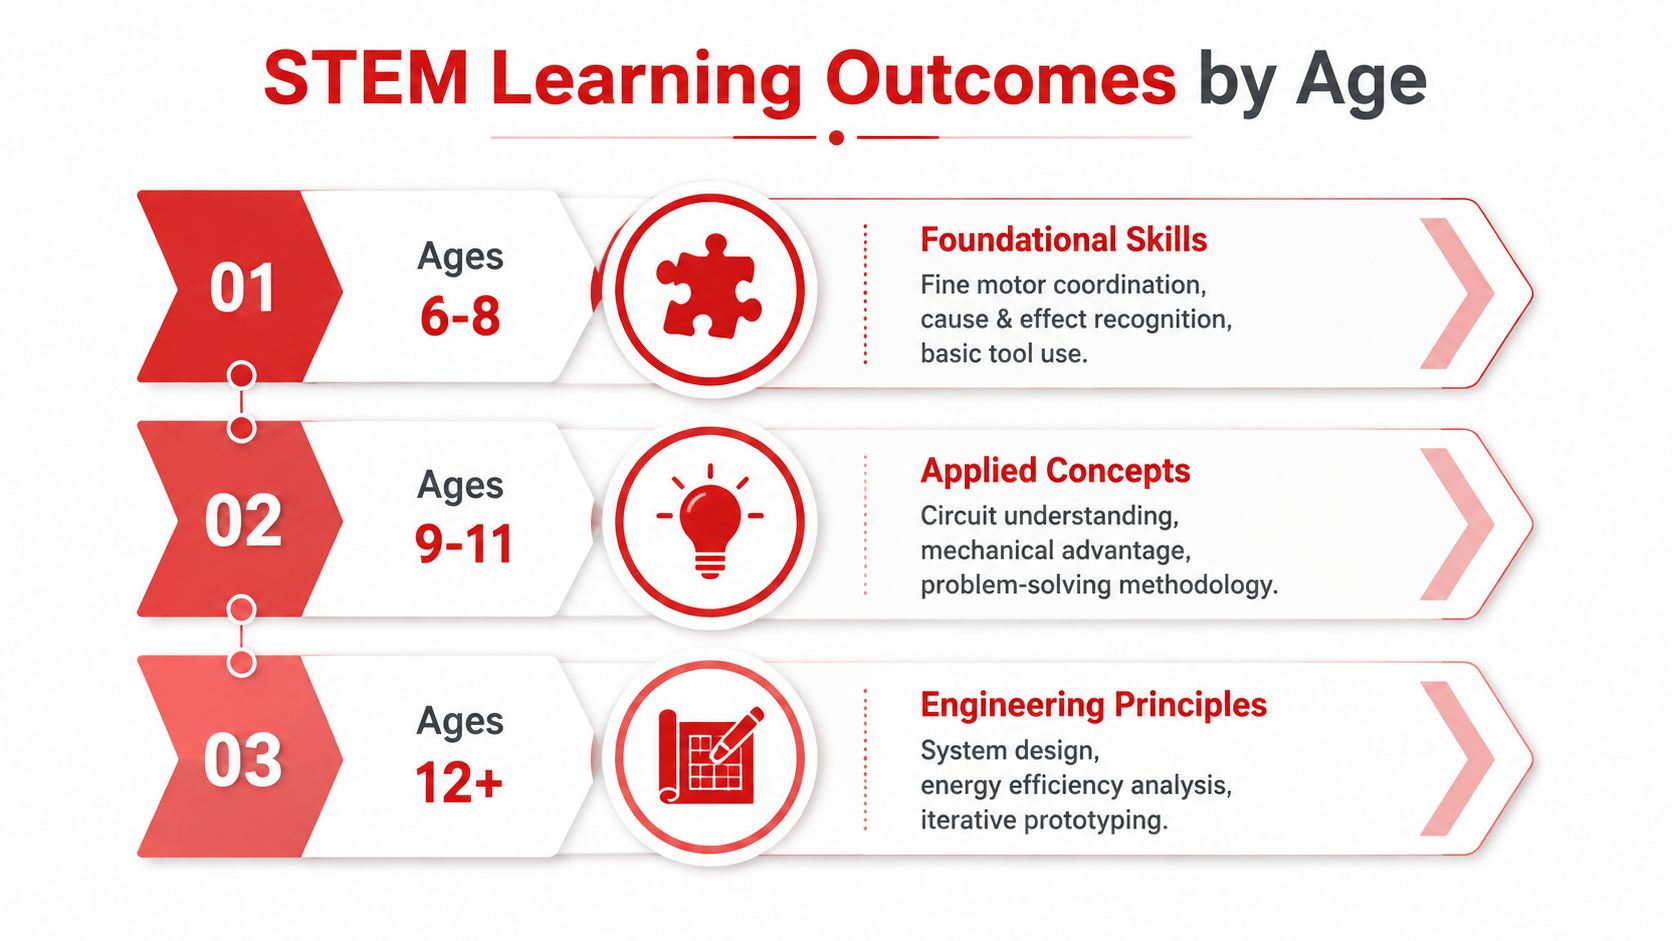
For children around 6 to 8, a solar robotics kit works best as a supervised exploration activity rather than a fully independent construction project. They can practice sorting, connecting, tightening, and observing cause and effect. An adult may handle the most delicate wiring while the child installs a wheel, predicts what will happen, or checks whether the axle turns.
The learning is still meaningful when the child has a clear job. Ask, “What changed when we moved the panel toward the window?” or “Which gear touches the wheel?” Those questions turn assistance into guided discovery instead of an adult takeover.
Middle-grade builders can troubleshoot systems
Around 8 to 10, many children can take ownership of a simpler build, especially when the instructions use clear diagrams. They can begin connecting electrical flow with mechanical output, identify a loose wire, and compare a free-spinning gear with one that rubs against the frame. A kit can move beyond assembly gratification and introduce an engineering routine: observe, form a possible explanation, change one thing, and test again.
A child who rebuilds a stalled vehicle may develop more useful intuition than a child who completes a model perfectly but never asks how it works. Adults should resist correcting every error immediately. Instead, point to the symptom and let the builder propose the next check.
Older learners can redesign the system
For children 10 and older, the kit can support deeper projects involving load, balance, gear ratios, and iterative prototyping. They might compare two body designs, alter the wheel arrangement, or document how panel alignment affects motion. The goal isn't to make the robot look more elaborate. The goal is to help the child explain why a design performs differently.
The supervision test: If the adult's hands do most of the assembly, the child may remember the finished robot but miss the engineering reasoning.
In a classroom, small groups can divide roles among builder, parts manager, tester, and recorder. That setup gives children different ways to contribute and makes troubleshooting visible. Teachers can also distinguish a quick-gratification kit from an instructional engineering tool by examining whether the manual explains failures, offers multiple models, and encourages modifications instead of treating assembly as the endpoint.
The Indoor and Cloudy Day Problem Most Guides Ignore
Many product descriptions emphasize that a solar robot needs no batteries. That statement is accurate but incomplete. The robot still needs enough suitable light, and ordinary household lighting usually doesn't provide the same usable energy as direct, strong sunlight.
Manuals and troubleshooting guidance commonly identify direct sunlight as the preferred operating condition and note that indoor lighting is often insufficient. Under cloud cover, the panel may produce reduced power, causing slow movement, intermittent operation, or a complete stall. Loose wires, gear friction, and motor misalignment can create similar symptoms, which makes diagnosis confusing for young builders (solar robot troubleshooting manual).
What each environment really means
| Lighting environment | Likely experience | Buying implication |
|---|---|---|
| Direct outdoor sunlight | The most reliable movement and the clearest demonstration of solar power | Strong choice for outdoor play and sunny-season projects |
| Bright window light | May work, depending on panel angle, distance, and available light | Useful for testing, but don't promise consistent performance |
| Cloudy outdoor conditions | Reduced or intermittent motion is possible | Expect slower experiments and more troubleshooting |
| Typical ceiling lighting | Usually insufficient for a battery-free solar motor | Poor choice if indoor operation is the main requirement |
| Bright supplemental lamp | Can help with testing, but results depend on the lamp and setup | Treat it as an aid, not a guarantee |
The infographic's suggestion to use a bright desk lamp as a supplement can help families test the mechanism indoors, but the child should understand that artificial light isn't automatically equivalent to sunlight. A lamp may produce a useful demonstration, or it may leave the motor underpowered.
A short video can help families visualize the kind of build and movement involved:
Test the environment before buying
Before choosing a solar robotics kit for a winter classroom or apartment, identify where the child will use it. If outdoor access is limited, look for a manual that discusses light requirements and troubleshooting, then plan a controlled test near the brightest available window or with a suitable desk lamp.
Don't treat seasonal limitations as a product defect. They are part of the technology. Families who want reliable indoor play may prefer a kit with another power option, while families who want an authentic renewable-energy demonstration should accept that weather and room lighting are part of the lesson. For additional indoor activity ideas, see Playz's indoor play activities.
Choosing the Right Kit for Your Child or Classroom
A child can assemble a solar robot successfully and still be unable to run it in the intended room. Choose the kit by considering the building environment, the child's patience, and the amount of adult help available. A box showing many models is useful only when the parts are manageable, the instructions are readable, and the finished designs receive enough light.
Solar Robotics Kit Selection Matrix
| Kit Type | Best Age Range | Complexity Level | Indoor Usable | Best For |
|---|---|---|---|---|
| Introductory single-model build | Younger supervised builders | Low | Usually limited | First demonstrations and guided parent-child play |
| Multi-model construction kit | Ages 8+ with support | Moderate | Limited without strong supplemental light | Gift buyers and children who enjoy repeated rebuilding |
| Detailed multi-part kit | Older independent builders | Moderate to high | Limited by light conditions | Troubleshooting, mechanical reasoning, and design changes |
| Classroom-ready activity kit | Ages 8+ in small groups | Varies | Depends on room lighting | Teacher-led lessons and collaborative testing |
| Solar and science activity combination | Mixed ages with adult guidance | Varies | Activities may work indoors, robot operation still depends on light | Families wanting broader renewable-energy exploration |
“Indoor usable” means that the robot can operate under ordinary room conditions. It does not mean that a child can assemble it at a kitchen table. A classroom kit may work well for a teacher-led demonstration, while a multi-model kit may require an adult to sort parts, check alignment, and help younger builders recover from mistakes.
Check the build before the feature list
Part count matters, because more pieces create more sorting and alignment work. One documented 14-in-1 design includes 201 parts, which may suit a child who enjoys extended construction but frustrate someone seeking a quick first success. See a breakdown of the Electrokit 14-in-1 solar robot design before choosing a highly varied kit.
Motor specifications reveal the mechanism's scale. A representative Tomons design lists a 3V, 140mA panel and motors rated between 130 and 260 RPM (Tomons kit component details). These figures do not predict enjoyment, but they show that the robot depends on a real power-to-motion system. Under weak indoor lighting, that system may not receive enough energy to move reliably.
Instruction quality affects independence. Look for labeled parts, clear diagrams, model variations, and troubleshooting guidance. A child who can follow one short build sequence may still need help interpreting a crowded diagram or identifying a reversed gear. For a broader comparison of age, complexity, and project type, use this guide to robotics kits for beginners.
Safety information belongs on the checklist too. IEC 62115 covers electric toys intended for children under 14 and explicitly includes toys powered by solar cells, along with battery and transformer-powered products (IEC 62115 electric toy safety standard). Follow the manufacturer's age guidance, supervise small-part assembly, and inspect wires, connectors, and moving gears before use.
Creative Projects and Troubleshooting Common Build Issues
A child named Maya once finished the basic car and immediately wanted to race it. The first race ended quickly because one vehicle had a straighter axle, while the other had a gear rubbing against its frame. Instead of rebuilding both cars for her, I asked Maya to find the point where each wheel stopped turning freely. She lifted the chassis, adjusted the gear, and discovered that a small alignment change mattered more than adding decoration.
That kind of extension keeps a solar robotics kit useful after the first model works. Try challenges that change one design variable at a time:
- Reduce friction: Check whether each axle turns freely before adding the body panels.
- Compare gear layouts: Build two configurations and record which one starts more easily.
- Change the surface: Test smooth flooring, cardboard, and a textured surface, then discuss resistance.
- Improve balance: Move the panel or body pieces carefully and observe whether the robot tracks straight.
- Create a design brief: Ask the child to build a vehicle that carries a very light object without blocking the panel.
Troubleshoot in a fixed order
Start with the light. Place the panel in direct, strong sunlight and angle it toward the source. If the motor still doesn't turn, check the wire connections and confirm that the motor leads are seated correctly.
Next, inspect the mechanical path. A loose gear may slip, while a tightly pressed gear may create too much friction. A crooked axle can also stop the wheels even when the motor is spinning. Turn the wheels by hand, look for rubbing, and make one adjustment at a time.
If the robot moves briefly and then stops, check whether the panel has shifted or whether the mechanism meets resistance at a particular point. Manuals and troubleshooting pages identify slow movement, loose wires, gear friction, and motor misalignment as recurring issues (documented troubleshooting guidance).
Useful adult language: “What can we observe?” works better than “Give it to me, I'll fix it.”
Keep a simple build journal with a sketch, the change made, and the result. Children learn that failed tests produce information. Families looking for another physical construction activity can also explore Playz's simple robot building ideas, then compare how a different power system changes the troubleshooting process.
Making the Most of Your Solar Robotics Investment
A solar robotics kit earns its place when the child uses it as a starting point, not a one-time assembly task. Before buying, check the age guidance, part organization, motor and panel details, model variety, troubleshooting support, and expected lighting conditions. If the child will work mostly indoors, decide whether limited operation is acceptable or whether another type of STEM kit would provide a better daily experience.
During the build, ask questions that keep ownership with the child. “What does this gear change?” and “Why might the motor spin but the wheel stay still?” invite reasoning without turning the activity into a worksheet. After the first successful run, set a small design challenge, record observations, and revisit the build when the child is ready.
For classroom use, prepare a bright testing area, assign group roles, and keep spare time for misalignment and loose connections. For home use, store the parts in labeled containers and treat rebuilding as part of the product's value. The broader solar robot kits market is projected to expand from about USD 240 million in 2023 to roughly USD 520 million by 2033, with a 9% CAGR projection for 2024 to 2033, while another estimate projects growth from USD 142.7 million in 2025 to USD 478.2 million by 2034, at a 14.9% CAGR. The differing estimates point to a growing category, but your purchase should still be based on fit, supervision, and usable light, not market size (solar robot kits market estimates).
Playz offers hands-on science kits and creative toys that can complement solar robotics by extending building, experimentation, and screen-free learning. Visit Playz to explore activities that help children keep asking questions after the robot's first successful run.