


A child holds a tiny plastic planet over a half-built Sun and asks the question that stops many projects in their tracks: “Why is it so far away?” The model on the table can't answer by itself. A painted sphere shows a planet, but it doesn't automatically explain orbital distance, relative size, or the enormous spaces between worlds.
That gap separates a decorative solar system model kit from an instructional one. The better kits give children something to assemble, compare, question, and use again. They turn astronomy into a physical activity, but only when an adult helps connect the parts to the science.
This guide will help you choose solar system model kits for the learning goal you have, whether that's a first craft project, a classroom demonstration, an introduction to gears, or a serious conversation about scale. The approach also reflects the value of play-based learning, where children learn through active participation rather than passive observation.
What a Solar System Model Kit Actually Does for a Child
A solar system model kit gives a child a physical way to represent an abstract system. Instead of only reading that planets orbit the Sun, the child paints spheres, places them in an order, attaches rods or strings, and watches the finished arrangement occupy real space. That sequence creates opportunities to ask useful questions.
Why are some planets larger? Why do some sit closer to the Sun? Why can't all the planets fit at their real distances on a desk? These questions matter more than whether every planet is painted perfectly.
A model is a representation, not a miniature universe
A tabletop model can't reproduce the solar system's true size relationships. One independently sourced kit description explains that the planets are tiny compared with the Sun, while the orbital distances are so large that students can only build a model that suggests scale rather than reproduces it exactly (Kemtec Science's solar system model explanation).
That limitation should be stated openly. If a child sees planets close together on a hanging display, they may assume the solar system is similarly compact. A responsible adult can correct that idea by saying, “This model helps us see the order and movement, but it can't show the actual distances at the same time.”
Practical rule: Choose a kit for the questions it helps a child investigate, not only for how attractive it looks on a shelf.
Decorative versus instructional value
A glow-in-the-dark set may encourage children to notice planet names and positions. A paint-and-hang kit can support fine motor practice and sequencing. A geared model can introduce motion, transmission, and cause and effect. A classroom scale kit can make relative size and location easier to compare.
The outcome depends on what happens around the kit. Ask the child to name each world, explain its position, compare two spheres, or predict what will happen when a gear turns. Those small prompts transform assembly into a learning conversation.
A 300 Year Journey From Orrery to Living Room
The modern solar system model kit has an older ancestor than many buyers realize. In 1704, clockmakers George Graham and Thomas Tompion built the first modern orrery, a mechanical device designed to represent planetary motion. Orreries soon became useful for teaching and for home recreation, because they made celestial movement visible rather than leaving it as an idea in a book.
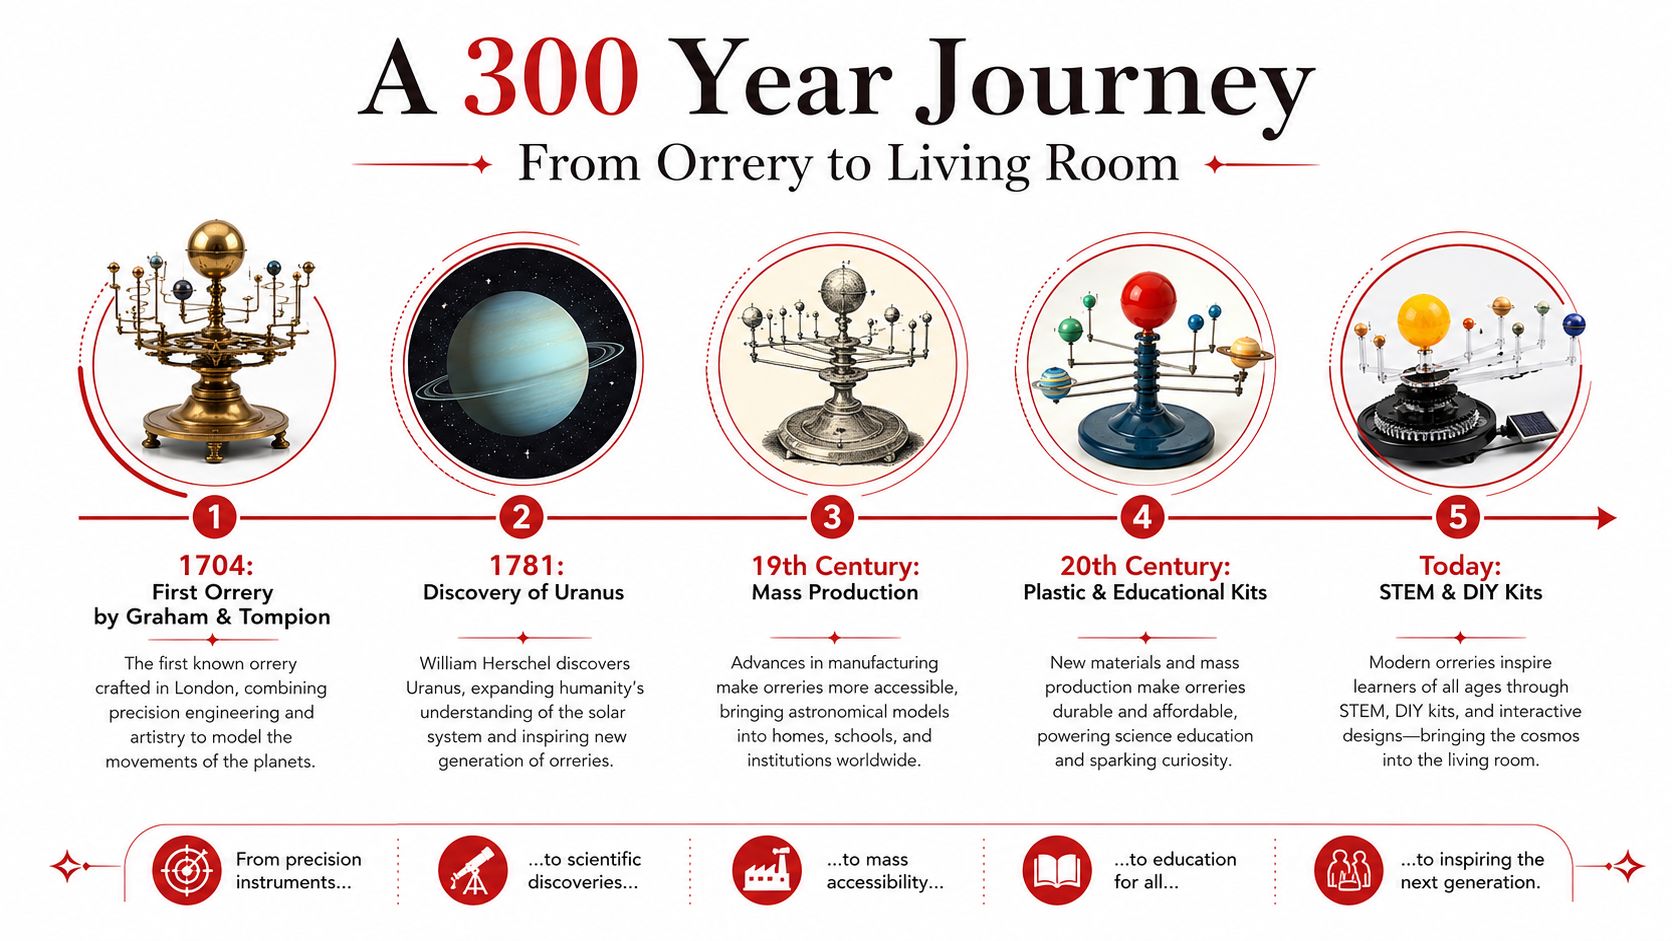
The appeal grew as astronomy offered new explanations and discoveries. Isaac Newton's theory of gravity helped people understand why planets move as they do, while the discovery of Uranus in 1781 expanded public interest in demonstrations of the solar system. The History of Science Museum's account of mounted orreries notes that by around 1800, some models extended to Uranus, showing how the format adapted as astronomical knowledge changed.
From precision instrument to learning object
Early orreries were complex, expensive instruments. Their purpose wasn't to give every child a craft project. They helped teachers, lecturers, and curious households turn orbital relationships into moving parts that people could see and discuss.
Over time, the same educational idea became easier to reproduce. Schools, museums, and eventually homes could use simpler models made from accessible materials. The modern kit keeps the central principle intact, even when it replaces brass gears with foam spheres, paint, rods, or plastic components.
Why the history matters to today's buyer
This lineage gives solar system model kits a stronger educational foundation than a short-lived novelty. The category belongs to a teaching tradition that has lasted more than 300 years, with each generation adjusting the format to fit available materials and new learning settings.
A parent doesn't need to buy an antique instrument to use that tradition. A child can still hold a planet, move a piece, and ask how the system works. The important feature isn't historical appearance. It's the conversion of invisible relationships into an object that learners can manipulate.
The Four Main Types of Kits and When to Use Each
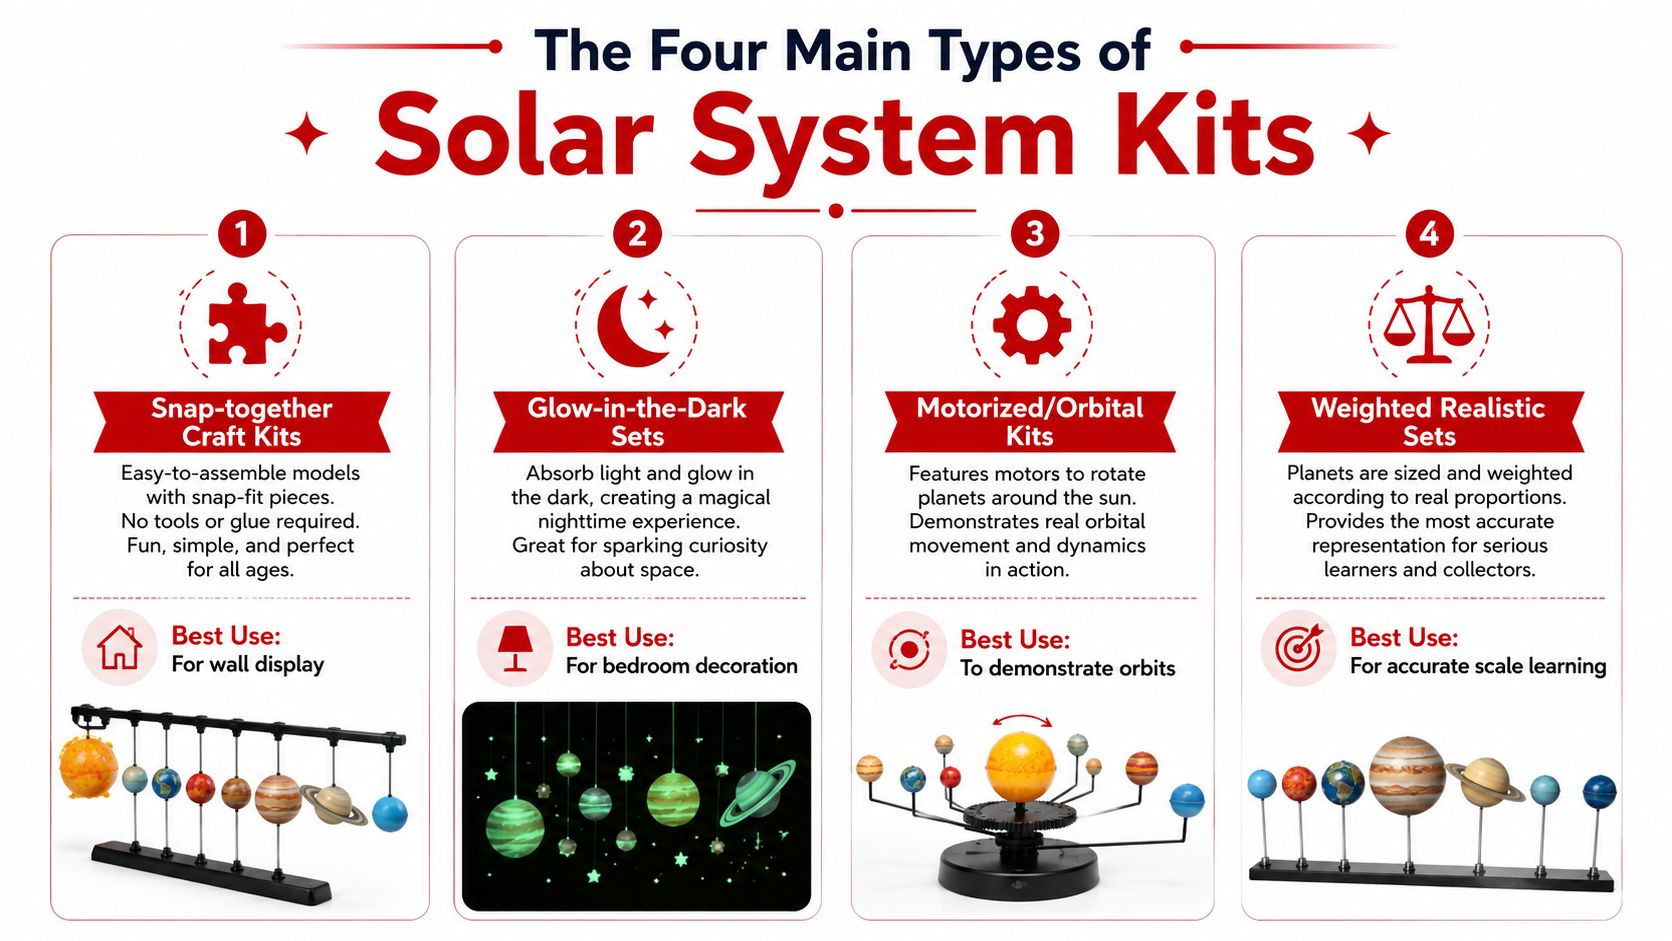
A child choosing between a painted planet set and a motorized model is choosing more than a look. Each format teaches a different slice of the solar system, so start with the learning goal. Retail listings show how varied the category is: Amazon's solar system model assortment includes craft sets, decorative displays, moving systems, and classroom materials.
Snap-together craft kits
These sets commonly provide spheres, paint, rods, hooks, instructions, and sometimes a poster. One museum-store kit includes snap-together planets, hanging rods and hooks, paint, glow paint, fishing line, instructions, and an informational wall poster.
Choose this type for children who learn through making. Painting and assembling give them practice identifying planets, following sequence, and handling parts carefully. The finished model also gives families a concrete object to discuss. Its limitation is scale. The planets may show order and general arrangement more clearly than their actual relative sizes or distances.
Glow-in-the-dark sets
Glow sets make sense when the model will live in a bedroom or other dim space. The visual reminder can prompt conversations about planet names, order, and the idea that planets occupy space around the Sun.
Use the glow feature as an entry point, not the whole lesson. Ask the child to name each planet in darkness, compare its position with the lit display, or explain why glowing paint does not show orbital speed. Without added questions, the display may remain decoration rather than support for spatial reasoning.
Motorized and windup orbital kits
These models put motion and mechanisms at the center. One orbital kit contains 59 pieces and has children assemble gears and a wind-up motor while exploring planetary orbits, transmissions, and gear ratios (the EurekaKids orbital model).
Select this format for a child who enjoys construction, mechanisms, and troubleshooting. It can support useful questions: Which gear turns first? What changes when alignment is off? Explain that the moving display demonstrates relationships, much like a clock model demonstrates coordinated motion. It does not reproduce the sizes, distances, or orbital speeds of the planets.
Classroom-oriented science kits
These kits support comparison and discussion more than decoration. A classroom model may use interchangeable spheres, marbles, balloons, beads, Styrofoam balls, and an activity book with planet and Moon data. One listed kit is designed for one to four students simultaneously and demonstrates the relative locations and sizes of the Sun, planets, and Moon (Fisher Scientific's solar system scale model kit).
Its strength is adaptability. Teachers can change materials, ask students to compare size and location, and have groups explain what the model leaves out. The trade-off is preparation. It may require more adult setup and offer less independent decorating than a craft set.
For broader ideas about selecting hands-on materials, Playz's guide to science kits for kids connects kit choice with age, supervision, and learning goals.
Matching a Kit to Your Child's Age and Skill Level
The age printed on a box is a starting point, not a complete teaching plan. A child may be comfortable with painting but not with small connectors. Another may understand planet order but need help following a multi-step mechanical diagram.
Use the child's motor skills, attention span, reading ability, and appetite for challenge alongside the manufacturer's age guidance.
Ages four to six
Look for large pieces, simple assembly, clear colors, and an adult co-builder. At this stage, the useful goals are naming, sorting, matching, and practicing careful handling. Keep the activity short enough that the child can finish a meaningful part without losing interest.
Avoid treating a young child's model as a test of scientific accuracy. Let them paint, identify the Sun, and notice that planets differ. Adults should handle small parts and inspect every component, because kits can include choking hazards.
Ages seven to nine
Children in this range can usually gain more from painting, hanging, reading planet names, and learning the order of the planets. Ask them to create a simple planet profile card or explain why their model has a particular sequence.
A craft kit with an instruction booklet can work well here. The child should do as much of the construction as safely possible, while an adult manages hanging points, difficult fasteners, and any paint or adhesive that needs extra care.
Ages ten to twelve
This is a productive stage for introducing relative size, orbital spacing, and model limitations. Ask the child to compare two planets, estimate which gaps should be larger, and explain why a tabletop arrangement can't show both accurate diameters and accurate distances.
A more detailed model, including the Playz Premium Solar System Model Kit, can support this kind of guided construction when the adult treats the finished object as a starting point for questions rather than the final lesson.
Teens and advanced learners
Older students may prefer motorized systems, gear trains, and independent research. They can investigate how a windup mechanism transfers motion, why a gear ratio changes speed, or how an orbital display differs from a scale-distance demonstration.
Safety still matters. Read the box guidance, supervise motorized builds, and provide ventilation for paints. Never assume that a teenager's reading ability removes the need to check small parts, sharp tools, or unstable hanging hardware.
The STEM Benefits Hidden Inside a Simple Kit
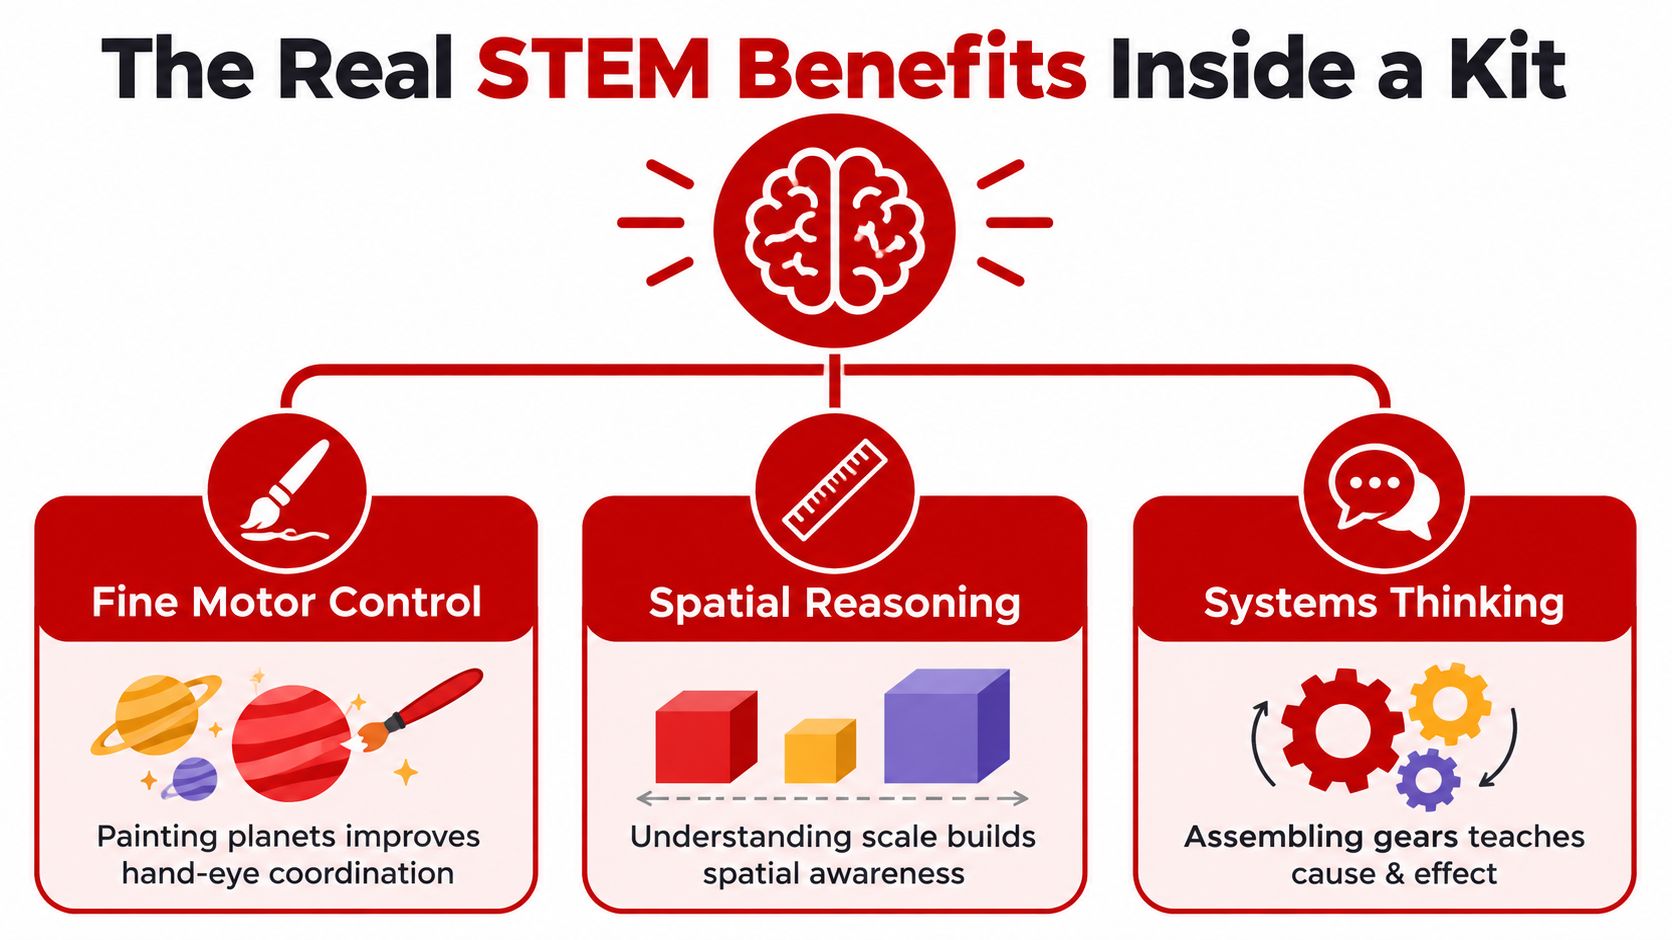
A child paints a sphere, connects a rod, and explains where a planet belongs. Each action can become a focused learning task when an adult follows with a useful question. The educational value comes from what the learner observes, builds, and explains, rather than from the word “STEM” on the box.
Fine motor control and observation
Painting asks a child to manage pressure, direction, and coverage. It also opens a discussion about why planets have different colors and surface appearances. Point out that the kit's paint scheme is a simplified representation, not a complete account of each world.
Sorting parts develops visual discrimination and organization. Separating spheres, rods, hooks, and gears gives children practice identifying materials and grouping them by visible features before the model takes shape.
Sequencing and systems thinking
Planet order provides a memorable sequence, but asking for an explanation makes the activity more meaningful. Have the learner point from the Sun outward, name each planet, and describe what would change if one piece were removed. The question shifts the task from recall to reasoning about a connected system.
Mechanical kits provide direct evidence of cause and effect. A child turns one gear and watches another move, then can explain how one action produces a visible result. That feedback makes systems thinking easier to discuss than a diagram alone.
A formal education study linked in the research on discovery learning with LearnStream reported a normalized gain of 0.74, 100% class mastery, and 83.87% activity engagement after students used a solar-system kit in structured instruction (the education study). These findings support a measured conclusion: a kit can contribute to learning when a teacher connects construction with instruction, discussion, and assessment. Opening the box alone does not guarantee understanding.
Spatial reasoning and proportional thinking
A hanging model gives children a three-dimensional reference they can inspect from different positions. Looking above, below, and across the arrangement helps them compare relationships that stay flat on a worksheet.
Use scale discussions to expose the model's limits. A kit may preserve planet order while distorting distance, size, or both. Ask which feature the model represents well, then assign a separate activity for the feature it cannot show accurately. That distinction teaches children to treat a model as a tool with a purpose, not as a perfect copy of space.
How to Assemble, Display, and Troubleshoot Any Kit
Most builds go more smoothly when adults prepare before children begin. Spread the parts on a tray, identify the pieces, and read the instructions from beginning to end. A five-minute inspection can reveal whether the project needs fishing line, rods, batteries, paint, or a stable display location.
Prepare the build
- Sort before painting. Group spheres by size and label them if the instructions use similar pieces. Keep small hardware in a shallow container rather than loose on the table.
- Paint in batches. Finish one color across several planets before changing colors. Let each surface dry fully before adding a second layer or attaching parts.
- Protect the work area. Use ventilation when the kit includes paint, and keep younger children away from materials they shouldn't handle independently.
- Test the display plan. A desk stand, ceiling hanger, or classroom corner each needs a different balance of stability and visibility. Don't hang a model until its attachment points have been checked.
Fix predictable problems
Paint can crack on Styrofoam when it goes on too thickly or before the surface is ready. Use light coats and allow proper drying time. Warped rods may straighten when gently supported, but don't force them into place if the material shows stress.
Fishing line often tangles because pieces are connected before the lines are separated. Lay every strand out, identify its destination, and attach one line at a time. If stickers are missing, write planet names on small cards rather than abandoning the labeling activity.
A motor that doesn't turn may have a battery issue, a misaligned gear, or too much friction. Remove the power source before checking the gear train, then confirm that each wheel moves freely and that no planet or rod is pressing against another component.
For a broader example of the value of careful, sequence-based kit work, compare the preparation style in crystal growing kit instructions. The materials differ, but the habit is the same: prepare first, follow the process, and treat mistakes as information.
Classroom and Home Activities That Make the Kit Stick
A finished model shouldn't signal the end of the lesson. It should become a reference object that children return to for short investigations, explanations, and creative work.
Five activities for different learners
- Scale-distance walk: Choose a safe hallway, yard, or playground and pace out the planetary gaps using a teacher-provided simplified scale. The purpose isn't to create a perfect model, but to make the expanding distances physically noticeable.
- Planet profile cards: Assign each learner a world to research and present. Younger children can focus on names and visible features, while older students can explain why the model cannot show every scientific property.
- Orbit timing experiment: Use a stopwatch to observe a motorized model's repeated movement. Discuss what the model demonstrates and what it leaves out, especially because real orbital periods aren't reproduced at tabletop speed.
- Celestial storytelling: Let children create a story or myth for each world, then connect the imaginative description to factual planet information. This works well as a family activity or a group presentation.
- Light and shadow demonstration: Place a lamp near the model to explore day and night. Move a smaller sphere carefully and discuss why the lamp's position matters, while keeping the activity supervised.
An inflatable classroom set can make large-group demonstrations easier. One marketed set lists a 36-inch Sun, with other bodies ranging from 8 inches to 22 inches, showing how classroom models exaggerate size relationships for visibility (the inflatable solar system demonstration set). The trade-off is storage. A school needs enough space to inflate, use, and store the pieces.
Use the scale problem as the lesson
A true single-scale model is impractical. One instructional guide explains that if Earth is represented as 0.5 cm, the distance to Neptune would make the full model about 1.8 km long, so separate scales are needed for planet sizes and orbital distances (the scale model guide).
That isn't a defect to hide. Ask students to identify which scale the kit preserves and which it sacrifices. NASA's 2026 grades 6 to 8 hands-on activity focuses on calculating scale distances with household materials, suggesting a useful companion approach for older learners (NASA's scale-distance activity).
For additional construction and display ideas, use solar system model ideas to vary the project after the original build.
Questions Parents and Educators Ask After the Box Is Open
How long does assembly take?
It depends on the number of parts, painting, drying time, and whether the child works independently. Plan for several short sessions rather than expecting one uninterrupted build.
Do kits teach scale accurately?
Usually, they show order, relative relationships, or movement more effectively than true distance. Add a scale-distance walk or a separate measurement activity.
Are inflatable classroom kits worth the storage?
They can be useful when many students need to see the model at once. They require dedicated storage and a suitable space for setup, so they make more sense for active demonstrations than permanent display.
How do I keep the model useful?
Return to it with new questions. Use it for planet presentations, light and shadow work, gear observations, and comparisons between the tabletop arrangement and a walk-off distance model.
Playz offers hands-on science products, including a Premium Solar System Model Kit designed for building and exploring a planetary model with children. Visit Playz to find a kit that fits your learner's age, your available space, and the astronomy questions you want to investigate together.