

Ever watched a kid learn to ride a bike? You probably didn't just give them a push and hope for the best. Instead, you likely held the back of the seat, giving just enough support to keep them balanced while their little feet figured out the pedals.
That steadying hand is the perfect, real-world example of scaffolding in child development.
What Is Scaffolding in Child Development?
At its heart, scaffolding is a teaching method where an adult provides temporary, just-right help to a child who's tackling a task just beyond what they can do alone. It’s not about giving away the answers. It’s about building a learning framework that you can slowly take away as the child’s skills and confidence grow on their own.
This collaborative approach transforms a potentially overwhelming challenge into a manageable learning opportunity. It’s a powerful strategy for fostering independence, problem-solving skills, and a genuine love for learning.
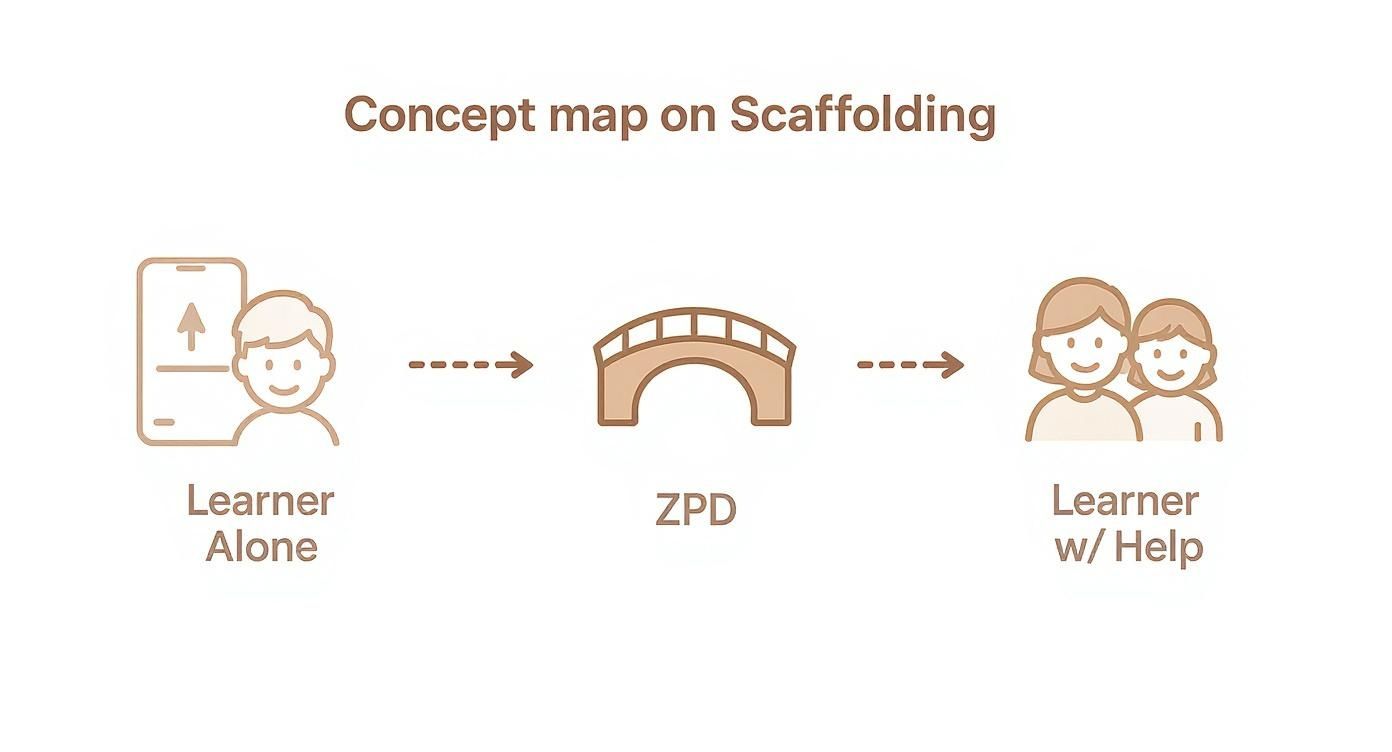
The concept was introduced by psychologist Lev Vygotsky in the 1930s. He described how adults can guide children by providing this kind of tailored assistance, a concept he called the Zone of Proximal Development (ZPD). Vygotsky's ideas are a cornerstone of modern education, and you can see how they connect to bigger frameworks in our guide on what is constructivist learning theory.
The Zone of Proximal Development (ZPD): This is the sweet spot for learning. It's the gap between what a child can do independently and what they can achieve with guidance from a more experienced person, like a parent, teacher, or even an older sibling.
Visualizing The Learning Journey
To truly understand the ZPD, picture three circles. The first is what a child already knows and can do alone. The third is what's still too difficult, even with help. The ZPD is that magical space in the middle—the "what they can do with help" zone.
Scaffolding acts as the bridge that helps a child cross the ZPD, moving them from needing support to mastering the skill independently.
This is where real growth happens. The goal is to meet a child inside this zone, offering just enough help at just the right time to keep them challenged but not frustrated. This philosophy of guided discovery is also a huge part of play-based learning, which is all about learning through exploration.
To help you get a firm grasp on these ideas, here’s a quick breakdown of the core principles.
Key Principles of Scaffolding at a Glance
| Principle | What It Means for Parents and Educators |
|---|---|
| Zone of Proximal Development (ZPD) | Find the sweet spot where a task is challenging but achievable with your help. Don't do it for them, but don't let them struggle to the point of giving up. |
| Collaboration | Learning is a partnership. Work with your child, not just at them. Ask questions, offer hints, and solve problems together. |
| Gradual Release of Responsibility | Start with more support and slowly fade into the background as they get the hang of it. Your goal is to make yourself unnecessary. |
| Responsive Support | Pay close attention to your child's cues. Provide more help when they're stuck and pull back when they're confident. |
Ultimately, scaffolding is all about being a responsive learning partner. You observe, you determine what kind of support is needed, and you offer it. Whether that’s showing them the first step, asking guiding questions, or just giving a word of encouragement, you're not just teaching them what to learn, but how to learn.
The Building Blocks of Effective Scaffolding
So, what does scaffolding look like in the real world, beyond the theory? Effective scaffolding isn't just about "helping"—it's a responsive, adaptive kind of support that empowers a child to tackle something they couldn't do alone. It's a dynamic dance with a few key ingredients that can turn a frustrating task into a major win.
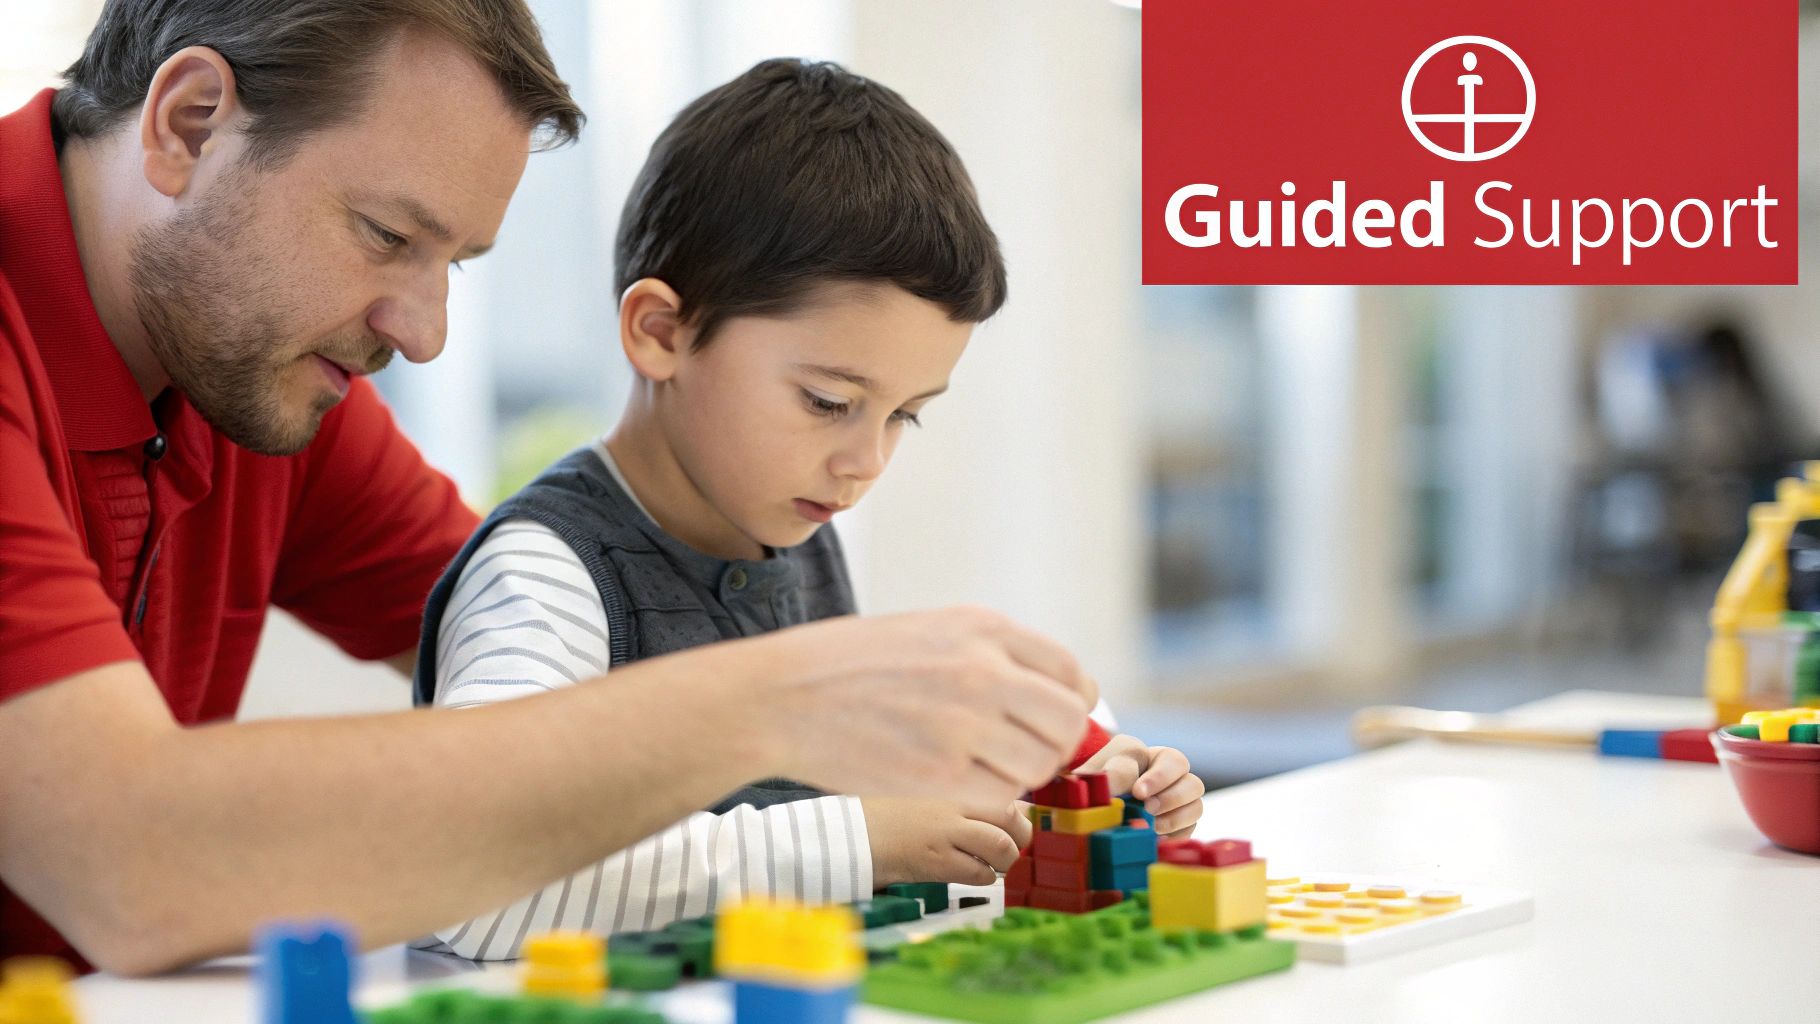
Imagine a father and his young daughter sitting down to build her first big Lego set. This is a perfect, everyday scenario where all the building blocks of scaffolding come into play.
Capturing Interest and Breaking Down the Task
First things first, the father has to engage his daughter's interest. He might point to the box and say, "Whoa, look at this cool spaceship! Think we can build it together?" That simple question creates a shared goal and instantly makes the activity feel exciting.
Next, he breaks that huge, daunting project into manageable steps. Instead of dumping all the bricks on the floor, he might say, "Okay, the instructions say we need to find all the long red pieces first. Can you help me find them?" Suddenly, an overwhelming task becomes a simple, achievable treasure hunt.
Key Takeaway: The first move in scaffolding is always to get the child hooked and then simplify the job. A big goal feels way less intimidating when it’s just a series of small, clear actions.
By doing this, he isn't building the spaceship for her. He’s creating a clear starting point and heading off that initial wave of overwhelm that so often leads to a kid saying, "I can't do it."
Modeling and Maintaining Motivation
As they start building, the father uses another crucial technique: modeling the process. He might take two pieces, show her how they click together firmly, and say, "See how they make that snapping sound? That's how we know they're connected just right." He's providing a clear visual and sound cue she can copy.
When she gets stuck, he doesn’t just hand her the answer. Instead, he offers gentle hints and prompts. If she's struggling to find the right piece, he might ask, "Does the picture show a piece with four dots or six dots?" This guides her thinking without taking away her moment of discovery. Keeping up this kind of dialogue is a huge part of the process. If you want to dig deeper into this collaborative element, it's worth exploring the concept of sustained shared thinking, where adults and kids work through a problem together.
To keep her going, he offers specific, encouraging feedback. Rather than a generic "good job," he might say, "I love how you matched the yellow blocks exactly like they are in the picture!" This reinforces what she did right and builds her confidence to try the next step.
Core Actions in Effective Scaffolding
These actions form the foundation of successful scaffolding. They create a supportive space where a child feels safe to try, mess up, and try again without fear.
- Engage Interest: Create a shared goal that feels exciting and motivating.
- Break It Down: Chop a complex task into a sequence of small, manageable steps.
- Model the Skill: Demonstrate the "how" and "why" of an action, not just the finished product.
- Offer Hints, Not Answers: Ask guiding questions that nudge them toward problem-solving on their own.
- Provide Specific Feedback: Pinpoint exactly what the child is doing well to reinforce the learning and build their confidence.
This approach is incredibly flexible and works for just about anything. Once you get the hang of these building blocks, you can apply them to tying shoes, tackling a science experiment, or figuring out a new game. Many hands-on learning kits, like the ones from Playz, are designed specifically to encourage this kind of parent-child teamwork. You can find more ideas for applying these principles in our guide to inquiry-based learning activities.
Ultimately, the goal is to be an adaptive guide—giving more support when they’re struggling and pulling back as they start to get the hang of it. This is how you turn a powerful theory into a practical, repeatable way to raise independent, capable learners.
How Scaffolding Shapes Confident and Resilient Kids
The true power of scaffolding isn't just about finishing a puzzle or learning to ride a bike. Those wins are great, but the real magic is happening under the surface. It's in the way this supportive process shapes a child's mind, emotions, and social skills for years to come.
When you offer that steadying hand, you’re building more than just competence—you're nurturing a confident, resilient little person.
Think of it as a powerful engine for cognitive growth. By breaking down a tricky problem into smaller pieces, you’re actively modeling critical thinking and problem-solving skills. A child doesn't just learn what to do; they learn how to think through a challenge.
Instead of staring at a big, overwhelming task, they start to see it as a series of manageable steps. This creates a mental blueprint they can use for any obstacle they face down the road, which is a core skill for lifelong learning.
Building More Than Just Skills
Scaffolding is a hands-on way to teach self-regulation, a critical executive function. When you model how to stay calm, talk through the options, and try again after a mistake, you're giving your child a script for handling frustration. This emotional guidance is incredibly powerful.
In fact, the support parents provide in the early years has a measurable impact on a child's ability to manage their behavior. One long-term study found that when mothers used fewer scaffolding techniques, their preschoolers were much more likely to show behavior problems later on. Scaffolding acted as a protective factor, predicting better self-control even when kids faced other challenges.
Working together on a challenge also strengthens the parent-child bond. It’s a shared experience that builds mutual trust and opens the door for better communication.
Scaffolding sends a powerful message to a child: "I believe in you. I am here to support you, but I know you can do this." This belief becomes a cornerstone of their self-worth.
This supportive partnership creates a safe space for kids to take risks without being terrified of failure. They learn that messing up is just part of the process, not a signal to quit. And that, right there, is the heart of resilience.
Fostering a Growth Mindset
Ultimately, the biggest win from scaffolding is the mindset it helps create. It shifts a child away from a fixed mindset ("I'm just not good at this") toward a growth mindset ("I can get better at this if I practice"). That shift is everything when it comes to their future success and happiness.
This whole approach is the foundation for so many effective educational philosophies. The benefits of scaffolding are closely tied to what you'll find when you look into different types of play-based learning benefits. Both methods empower children by making them the star of their own discovery process.
Here’s a quick rundown of the core benefits you'll see from consistent scaffolding:
- Boosts Confidence: Kids develop a strong "I can do it" attitude by successfully navigating challenges with just the right amount of help.
- Encourages Resilience: They learn to see setbacks as learning opportunities, not dead ends.
- Develops Problem-Solving Skills: Scaffolding teaches children how to break down problems, think strategically, and eventually find solutions on their own.
- Strengthens Relationships: Working together like this fosters trust, communication, and a secure bond between a child and their caregiver.
In the end, scaffolding is less about the task at hand and more about the long-term empowerment it provides. You’re not just helping your child build a block tower; you’re giving them the tools, confidence, and resilient spirit to build their own future.
Practical Scaffolding Techniques for Every Age and Stage
Knowing the theory is one thing, but what does scaffolding actually look like on a Tuesday afternoon when the kids are getting restless? The great news is you don’t need a fancy lesson plan. The best scaffolding moments often happen organically while tying shoes, building with blocks, or cleaning up toys.
The real trick is matching your support to where your child is developmentally. What works for a toddler will likely get you an eye-roll from a ten-year-old. Let's dig into some practical, age-appropriate strategies you can use right away.
Scaffolding for Toddlers (Ages 1-3)
At this age, the world is a very physical, hands-on place. Toddlers are working hard to master their motor skills and are just starting to link words with actions. Your support here will be direct, gentle, and full of simple language.
Scenario: Your 2-year-old is determined to eat yogurt with a spoon but keeps missing their mouth, and a meltdown is brewing.
- Modeling: First, show them. Take a spoonful yourself, making the motion from the bowl to your mouth slow and obvious. For a toddler, seeing is believing.
- Hand-Over-Hand Guidance: Gently place your hand over theirs and guide the spoon through the motion a few times. This isn't about doing it for them; it's about letting their muscles feel the right path.
- Verbal Cues: Keep it simple and positive. "Scoop... up, up, up... yum!" This helps connect the physical action to a short, memorable phrase.
As they get the hang of it, you can loosen your grip and then remove your hand entirely. The goal is to offer just enough support to bypass the frustration so they can feel the pride of doing it themselves.
Scaffolding for Preschoolers (Ages 3-5)
Preschoolers are becoming little chatterboxes who can follow more complex directions. Their fine motor skills are taking off, and they love to feel competent. Scaffolding for this crew is less physical and more about breaking things down, asking questions, and providing visual clues.
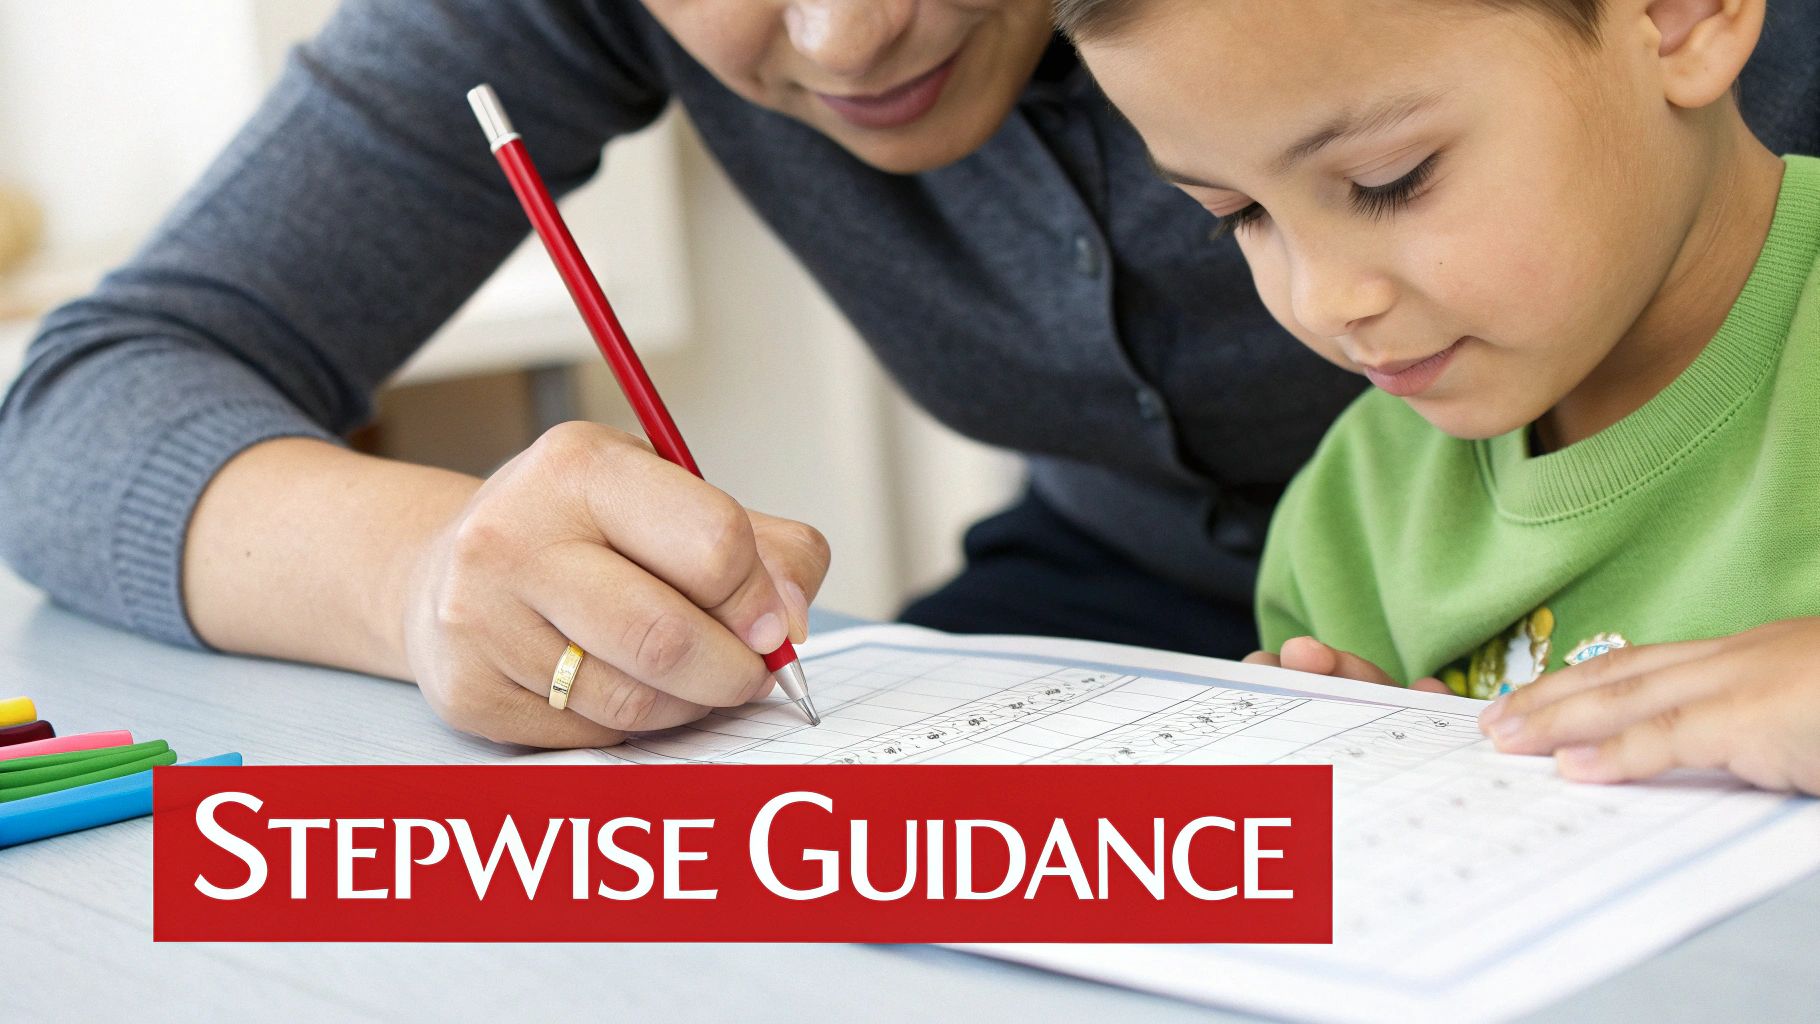
Scenario: A 4-year-old wants to write her name, "ANNA," but gets tangled up forming the letters.
- Provide Visual Aids: Start by writing her name in big, clear letters. A dotted-line version they can trace is a classic for a reason—it provides a clear roadmap.
- Break It Down: Tackle one letter at a time. "Okay, let's make the 'A.' A big line slides up, a big line slides down, and a little line goes across." Suddenly, a whole name becomes four simple tasks.
- Use Probing Questions: When she gets stuck on the "N," resist the urge to just fix it. Ask a gentle question like, "I wonder what line comes next? Does it go up or down?" This prompts her to think instead of just copy.
- Offer Positive Reinforcement: Be specific with your praise! "Wow, your lines on that 'N' are so straight!" This builds the confidence she needs to keep going.
Key Takeaway: For preschoolers, the scaffold is more of a mental blueprint than a physical boost. You're giving them the map, but they're still the ones driving the car.
These strategies are the secret sauce behind great educational fun. For more ideas on how to weave skill-building into playtime, check out these awesome learning through play examples.
Scaffolding for School-Aged Children (Ages 6-10)
Older kids are starting to think more abstractly. They can tackle bigger problems, but they often need help organizing their thoughts and making a plan. Your role as a scaffolder shifts from a hands-on helper to more of a project consultant.
Scenario: Your 7-year-old is jazzed about his science fair project—finding out which paper airplane flies the farthest—but has no idea where to start.
- Activate Prior Knowledge: Kick things off by asking what he already knows. "What do you think makes an airplane fly really well? Have you ever folded one that was a superstar?"
- Ask Guiding Questions: Don't lay out the plan for him. Guide his thinking with open-ended questions. "What's the big question we're trying to answer here? What steps will we need to take? How are we going to measure which one goes the farthest?"
-
Help Organize the Task: A big project can feel overwhelming. Help him break it into a simple checklist:
- Step 1: Find three cool airplane designs online.
- Step 2: Fold one of each.
- Step 3: Test each plane five times and measure the distance.
- Step 4: Make a chart to show what we found.
- Encourage Self-Correction: When one design keeps nose-diving, bite your tongue! Instead of showing him how to fix it, prompt his own problem-solving. "Hmm, that one keeps crashing. What part of the plane do you think is the problem? What's one thing we could change to see if it helps?"
With this approach, you're not just helping with a science project; you're scaffolding crucial executive functioning skills like planning, organizing, and critical thinking.
To make these ideas even easier to use, here's a quick cheat sheet for scaffolding at different stages.
Scaffolding Strategies by Age
| Age Group | Common Task | Scaffolding Example |
|---|---|---|
| Toddler (1-3) | Putting on socks | Modeling the motion, then using hand-over-hand to help pull the sock over their toes. |
| Preschooler (3-5) | Building a block tower | Asking probing questions: "What shape would make a strong base at the bottom?" |
| School-Aged (6-10) | Doing a math worksheet | Encouraging self-correction: "That answer looks a bit off. Can you walk me through how you got it?" |
Think of this table as a starting point. The real magic happens when you observe your child and tailor your support to that specific moment, providing just enough help to turn "I can't" into "I did it!"
Scaffolding in Action Inside the Classroom
While scaffolding is a game-changer for parents at home, it’s an absolute cornerstone of modern education. In a classroom buzzing with kids at different learning stages, a skilled teacher uses scaffolding to meet every child where they are—challenged but not overwhelmed. It’s the art of giving just the right support at just the right time.
If you peek inside a classroom that uses this approach, you won't see a teacher just handing out answers. Instead, you'll see them building a supportive structure that lets kids discover those answers for themselves.
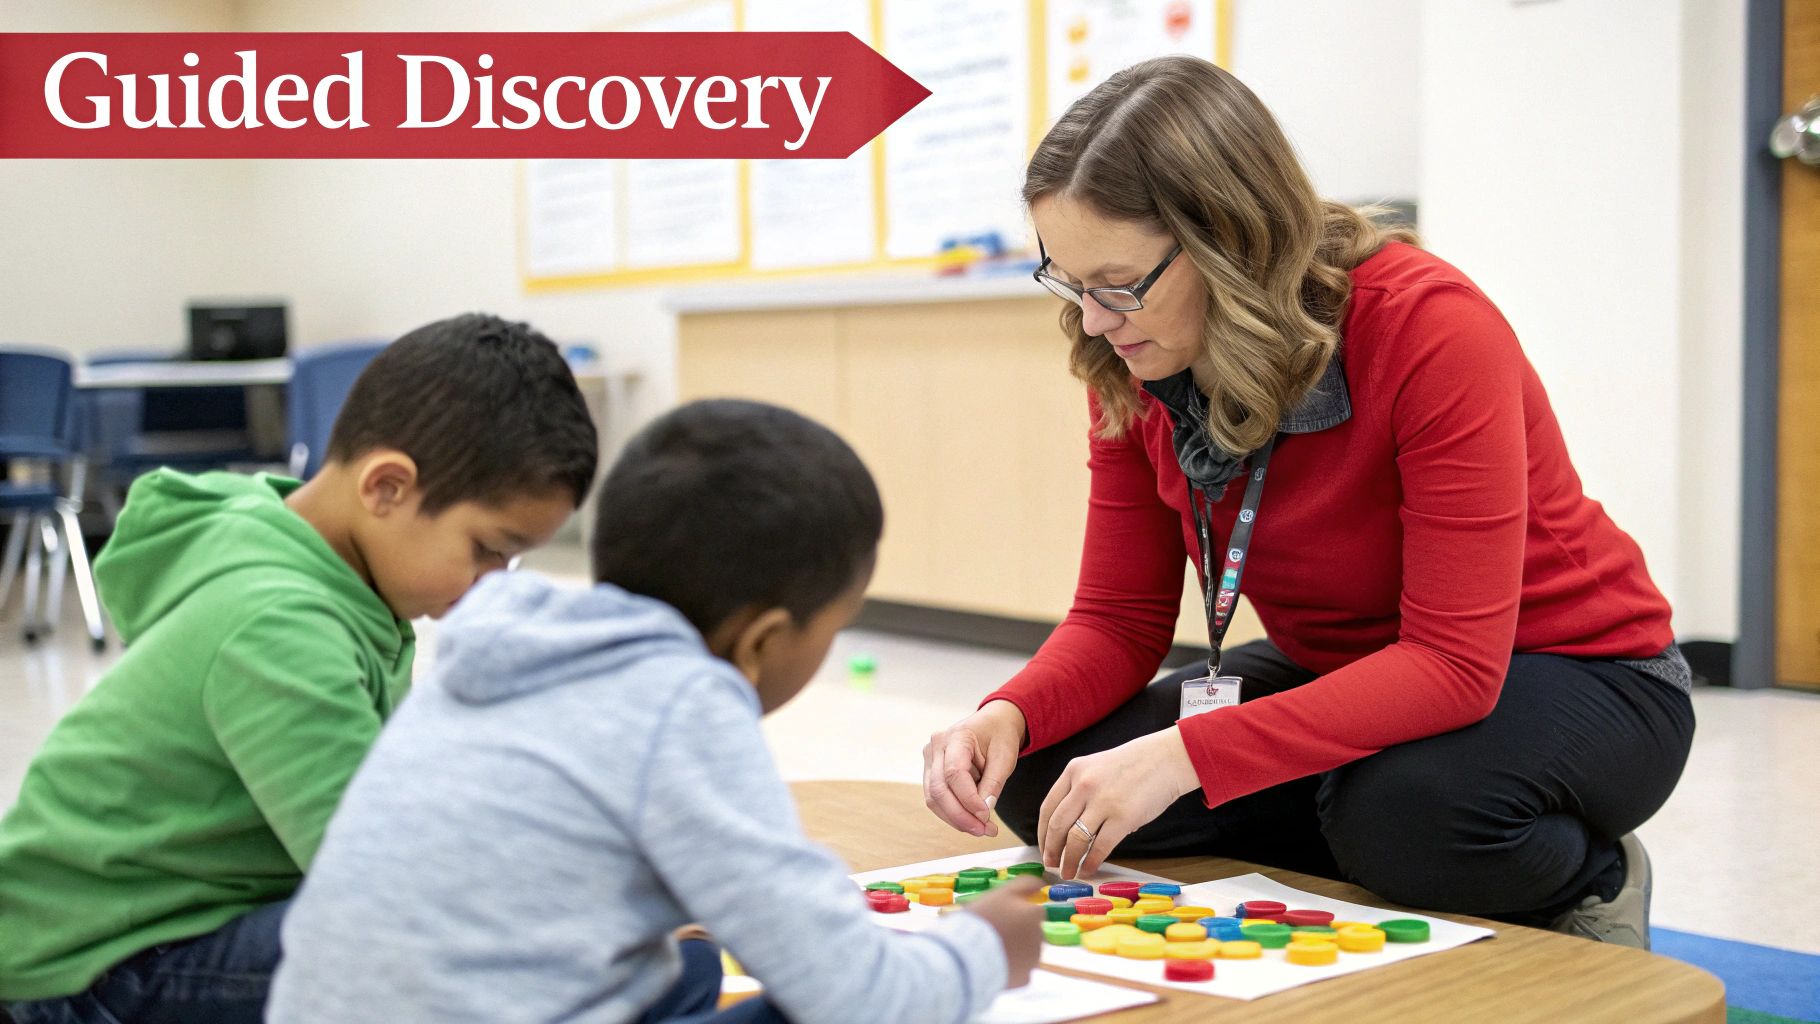
This turns the classroom into a dynamic space where curiosity can really take off. A well-organized room often has learning centers and specific materials designed to spark this kind of guided discovery. You can learn more about creating these spaces in our guide to preschool classroom setup ideas.
Common Scaffolding Strategies in School
Teachers have a whole bag of tricks they use every day to scaffold learning. These strategies are all about breaking down big ideas, building up confidence, and nudging students toward mastering new skills on their own.
Here are a few classic examples:
- Using Manipulatives in Math: Abstract ideas like addition can be tough for little minds to grasp. A teacher might pull out counting blocks or beads so students can physically group items together. This makes the concept of "adding more" totally tangible before they ever have to deal with symbols on a page.
- Shared Reading for Literacy: During story time, a teacher doesn't just read the book from cover to cover. They’ll pause and ask, "What do you think will happen next?" or "How is the character feeling right now?" These questions scaffold comprehension, guiding kids to think more deeply about the story.
- Structured Worksheets for Science: When it’s time for an experiment, a teacher might provide a worksheet with clear steps and guiding questions. This framework helps students follow the scientific method without giving away the conclusion, letting them feel that awesome thrill of discovery.
These methods aren’t about making the work easier; they’re about making it accessible. The support allows every child to connect with the material at their own level.
The Art of Responsive Teaching
The real magic of a teacher using scaffolding is their ability to be responsive. They are constantly watching, listening, and adjusting their level of support based on how a child is doing. This back-and-forth is where the most effective learning happens.
For example, research on shared book reading shows just how adaptive this process is. Teachers naturally adjust their support on the fly. If a kid answers a question correctly, the teacher might ask a follow-up to add a little challenge (an "upward scaffold"). If the answer is off-base, they might simplify the question or offer a hint (a "downward scaffold").
This responsive dance ensures the support perfectly matches the child’s immediate need, which is what scaffolding is all about.
Key Takeaway: In the classroom, scaffolding is a continuous conversation. The teacher provides a framework, the student gives it a try, and the teacher adjusts that framework in real-time.
This approach is proven to boost academic outcomes, especially in core areas like problem-solving and literacy. When educators skillfully scaffold learning, they do more than just teach a subject. They empower students with the confidence and strategies they need to tackle future challenges all by themselves, building a solid foundation for a lifetime of learning.
Your Scaffolding Questions Answered
Putting scaffolding into practice can feel like learning a new dance. You know the basic steps, but navigating the real-time rhythm of your child's learning can bring up a lot of questions. Let's tackle some of the most common ones.
This is where the theory hits the living room floor, and knowing how to handle these moments will make all the difference in your approach.
Isn't This Just Giving Them the Answer?
That’s a fantastic question, and it gets right to the heart of what scaffolding in child development is all about. The key difference is the goal. Giving the answer is about finishing the task. Scaffolding is about teaching the process so they can eventually handle it all on their own.
Think of it like this: if your child asks how to spell "house," just rattling off the letters is giving them the answer. Scaffolding sounds more like, "What's the first sound you hear in 'house'?" or maybe, "You already know how to spell 'mouse.' What part of that word sounds exactly the same?"
Scaffolding is a collaboration, not a rescue mission. Your role is to be a co-pilot who offers navigation tips, not a chauffeur who just drives them to the destination.
This keeps your child in the driver’s seat of their own learning. It prompts them to think critically and connect the dots, building the mental muscles they’ll need for the next challenge.
How Do I Know When to Step Back?
Knowing when to fade your support is probably the trickiest part of scaffolding. There's no magic formula, but there are definitely signals you can watch for. It's all about being a keen observer of your child's growing confidence and skill.
Look for these signs that it's time to pull back a bit:
- They're picking up speed: They start moving through the steps of a task more quickly and with way less hesitation.
- They self-correct: You see them catch their own mistakes and try to fix them before you even have a chance to jump in.
- They start using your language: You'll hear them whispering the same guiding questions you’ve used, essentially coaching themselves through the process.
- They anticipate the next step: They know what comes next in the sequence without waiting for you to prompt them.
When you spot these behaviors, that's your cue. Try offering one less hint than you did last time. Or just wait a few extra seconds before you offer help. The goal is a gradual release—just like letting go of the back of a bicycle once you feel them find their balance.
Is It Possible to Help Too Much?
Oh, absolutely. It's really easy to "over-help," and when that happens, it can actually get in the way of learning. When support is too constant or offered when it isn’t really needed, it can send an unintentional message: "I don't think you can do this on your own."
This is often called "rescuing," and it happens when our desire to see a child succeed (or our own discomfort with their struggle) leads us to take over.
Signs you might be over-helping:
- Jumping in too soon: You intervene the moment you anticipate a struggle, before they’ve even had a chance to try.
- Finishing tasks for them: They get a little frustrated, so you just finish the puzzle or tie the shoe for them.
- Using physical help when a verbal hint would do: You move their hand to the right puzzle piece instead of just asking, "What about that blue piece over there?"
To avoid this, try to make wait and watch your mantra. Give your child a moment to grapple with the challenge. That productive struggle is where so much of the real learning happens.
What If My Child Still Gets Frustrated?
Frustration is a totally normal—and even necessary—part of learning something new. It's a sign that your child is working at the very edge of their abilities, right in that sweet spot known as the Zone of Proximal Development. Your job isn't to eliminate frustration, but to help them learn how to work through it.
When you see those frustration bubbles start to rise, shift your focus from solving the problem to validating their feelings.
- Acknowledge the Feeling: Start with something simple like, "I can see this is really tricky, and you're feeling frustrated. That's okay."
- Offer a Reset: Suggest taking a short break. "Let's take a couple of deep breaths and look at this again in a minute."
- Break It Down Even More: The task might still be too big. Can you break the current step into an even tinier, more manageable piece?
- Reframe the Goal: Remind them that the effort is what counts, not getting it perfect on the first try. "I am so proud of how hard you are trying to figure this out!"
By navigating these moments together, you're teaching them incredible resilience. You're showing them that feeling stuck isn't a dead end—it's just part of the journey to learning something great.
At Playz, we believe learning should be a joyful adventure. Our science kits are designed to create those perfect scaffolding moments for you and your child. By working together on a fun experiment, you can put these principles into action, building crucial skills and amazing memories at the same time. Check out our collection and find your next learning adventure at the official Playz website.