


A child stacks blocks into a tower, watches it lean, then pulls two pieces away and tries again. Another child studies a pile of craft materials, deciding how to share them with a sibling. Someone else gets stuck assembling a model and tests a new approach instead of waiting for an adult to provide the answer. These ordinary moments are problem solving activities in action. Children learn by noticing a challenge, forming an idea, testing it, and revising the plan.
The activities below move from preschool-friendly exploration to increasingly structured elementary challenges. Each one is organized around a core skill and includes materials, setup, play steps, likely outcomes, suggested timing, differentiation, and optional hands-on props in a Playz style. You can choose based on a child's age, the size of the group, and what you already have at home or school. For additional low-stress mental practice, explore low-stress brain training at Play Solitaire Gaming.
Supervise children during play, especially when activities involve small parts, scissors, water, heat, or science materials. Choose age-appropriate supplies, keep small objects away from young children, and adjust the challenge when frustration starts to replace curiosity.
1. Brainstorming Sessions
Brainstorming helps children separate idea generation from judgment. Instead of deciding whether an answer is good too early, they produce several possibilities first. That makes this activity useful for open-ended questions such as, “How could we build a shelter for a toy?” or “How could our class make cleanup easier?”
The adult's role is to create a safe space where unusual suggestions are welcome. Write or draw every idea on paper, a whiteboard, or sticky notes. A teacher might ask students to propose science fair projects. A family might brainstorm weekend activities. A toy designer could use the same process to explore new STEM kit concepts.

How to run it
Place paper, crayons, blocks, cardboard, or craft sticks in the middle of the group. State one clear challenge, then give everyone quiet thinking time before inviting ideas. Use prompts such as “What if it were bigger?” or “What if we could only use three materials?”
- Materials: Paper, markers, sticky notes, blocks, cardboard, or craft supplies.
- Suggested time: Keep the first round short enough for young children to stay engaged.
- Learning outcomes: Practice divergent thinking, listening, flexible thinking, and respectful collaboration.
- Differentiation: Let younger children draw ideas, allow older children to explain advantages and limitations, and invite quieter participants to contribute privately on paper.
- Optional props: Add a Playz play tent, building pieces, or a science kit object as the starting point. Families can also find related ideas in these problem-solving games for kids.
After the ideas are visible, choose one or two to test. Don't evaluate while children are still generating possibilities. The final discussion should ask, “Which idea should we try first, and what would we change after testing it?”
2. SCAMPER Technique
SCAMPER gives children seven routes for changing a familiar object: Substitute, Combine, Adapt, Modify, Put to another use, Eliminate, and Reverse. The sequence works like a set of lenses. Each prompt directs attention to one kind of change, so children can move beyond the first idea instead of trying to invent everything at once.
Start with a cardboard box, toy storage bin, paper cup, or play tent. Present a simple design challenge, such as, “How could we make this more useful for reading or storing toys?” Let children examine the object, sketch possibilities, and explain which change might solve the problem.
A box could become a puppet theater, reading nook, or marble-run component. A play tent might serve as a quiet library, market stall, or pretend research station. Use the prompts as needed rather than requiring children to complete them in order:
- Substitute: Replace cardboard with fabric, paper, or another safe material.
- Combine: Join the object with a sign, pocket, window, or ramp.
- Adapt: Change it for a smaller child, another room, or outdoor play.
- Modify: Alter its shape, color, size, or opening.
- Put to another use: Turn a container into a sorting station or storytelling prop.
- Eliminate: Remove a part that makes the object difficult to use.
- Reverse: Try the object from the opposite direction or inside out.
Give children paper, drawing tools, and safe craft materials. Keep every suggestion visible, including impractical ones. Then ask them to choose one idea, build a simple prototype, and test whether it meets the original need. Sketching first helps children separate the proposed change from the decoration around it.
Younger children can choose between two prompts or dictate their plans. Older learners can compare advantages, limitations, and material choices. Allow a short design round followed by testing and revision. Families can apply SCAMPER to toy storage, teachers to a reading area, and STEM learners to a familiar experiment. Related inquiry-based learning activities can extend the same question-driven approach.
The main outcome is flexible thinking. A limitation is that children may focus on appearance, so adults should keep asking, “Which problem does this change solve?”
3. Six Thinking Hats
A family deciding whether to buy a toy can easily argue from different starting points. One child may focus on excitement, another on safety, and an adult on cost or storage. Six Thinking Hats gives everyone the same sequence, like viewing one object through six different lenses: White for facts, Red for feelings, Black for risks, Yellow for benefits, Green for creativity, and Blue for managing the process.
The method works because children temporarily share one thinking mode instead of defending separate positions. Use it for a concrete decision, such as, “Should we change our classroom layout?” Ask for available-space facts first, then feelings about moving seats, possible noise or safety risks, benefits of teamwork, creative arrangements, and a plan for trying the change.
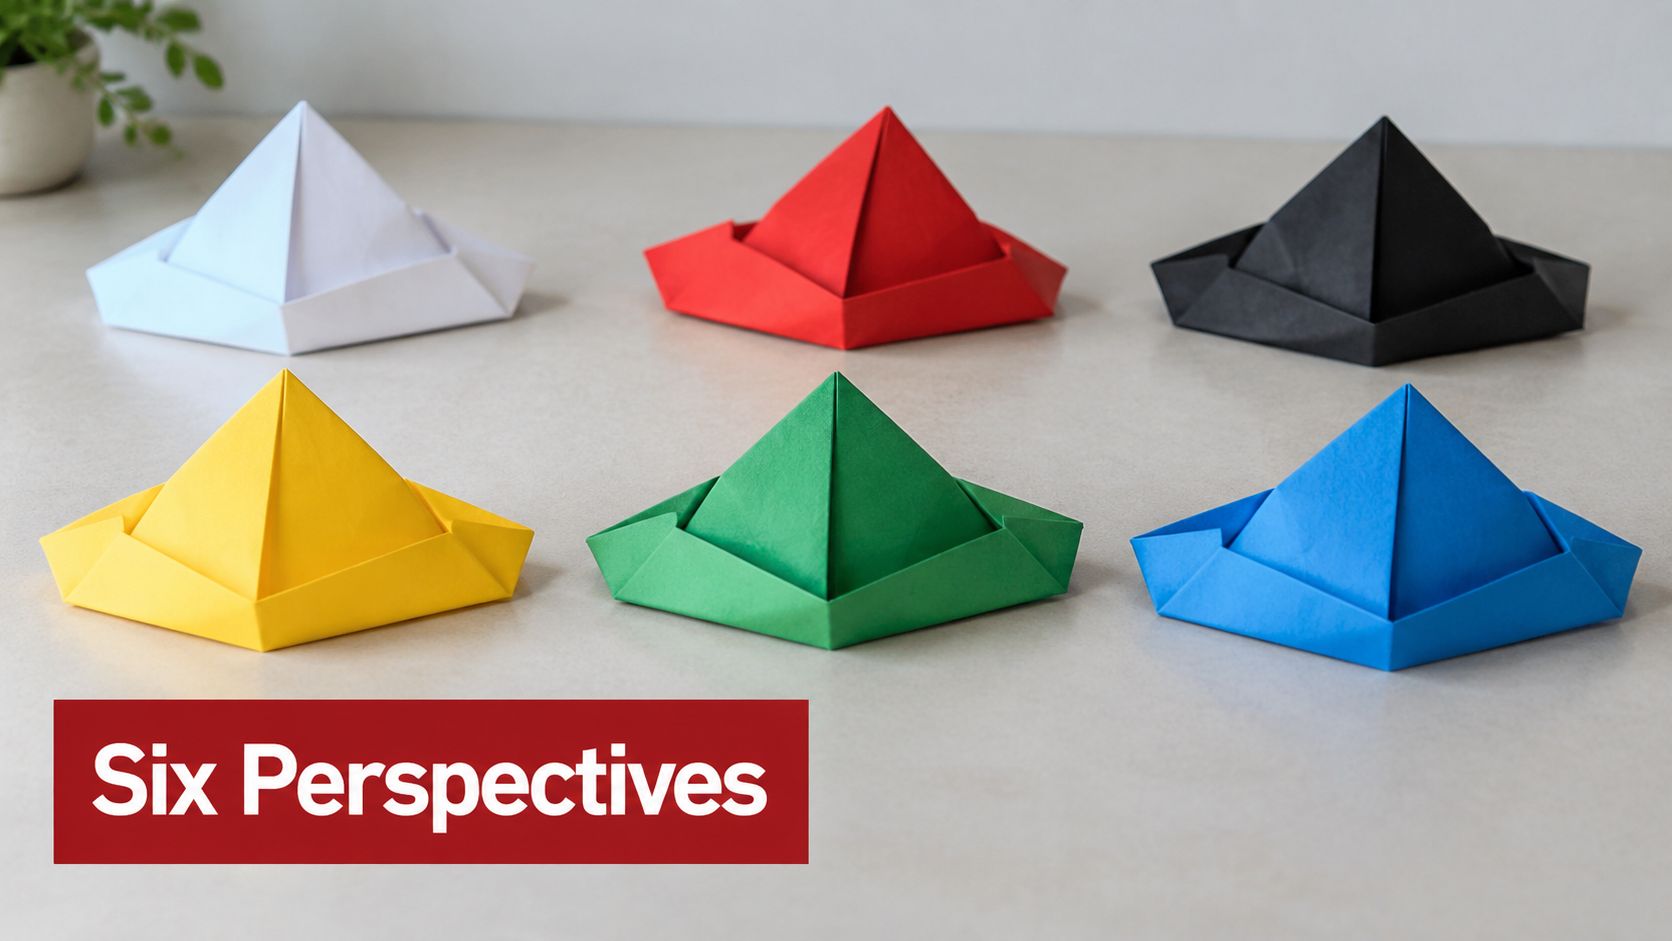
A six-color decision round
Make six paper hats or colored cards, and place them where everyone can see them. Introduce one color at a time. Children can draw, write, point to picture cards, or explain their response. Keep the question visible so each answer stays connected to the same problem.
- Materials: Colored paper, crayons, sticky notes, and one shared decision question.
- Play steps: Choose the question, move through the colors, collect responses, then use the Blue Hat to summarize and select a small test.
- Suggested time: Use a short round with preschoolers and a fuller sequence with elementary students.
- Differentiation: Younger children can choose between picture cards. Older learners can record evidence, risks, and unanswered questions.
- Optional props: Origami hats, puppets, or Playz products can represent the object being evaluated.
The activity develops perspective shifting and balanced decision-making. Its limitation is abstraction, especially for younger children, so use a real toy, classroom object, or role card. Ask, “What did each color help us notice, and what should we try?” Follow-up prompts for encouraging critical thinking can extend the discussion.
4. Mind Mapping
Mind mapping helps children break a confusing challenge into connected parts. Write the central problem in the middle of a large sheet, then draw branches for materials, people, steps, obstacles, and possible solutions. Like a map of roads, the page shows several routes without forcing ideas into one straight list.
Start with the hands-on question, “How can we create a safe model habitat for a small toy animal?” Place “model habitat” in the center. Children can add branches for shelter, food, water, materials, weather, and animal needs. Each branch can lead to smaller choices, such as “shade,” “paper,” “blocks,” or “dry.”
Build and test the map
Give each child a way to contribute. They can write a word, place a picture card, draw a symbol, or add a sticky note. Use colors to connect related ideas, but keep the central question visible. In a STEM project, branches might connect the experiment goal with materials, procedure, expected results, and alternate approaches. For family play, “family fun” can lead to interests, time, space, and available toys.
- Materials: Large paper, colored pencils, sticky notes, blocks, and small picture cards.
- Play steps: Choose the challenge, add the main branches, fill in details, then select one branch to test.
- Suggested time: Give younger children a short mapping round and continue the project later. Older learners can develop the map before testing.
- Outcomes: Children practise organization, association, planning, and verbal explanation.
- Differentiation: Offer prewritten branch cards to early learners. Ask older students to explain why each branch matters and which choice they would test first.
- Optional props: Use Playz building pieces, science materials, or a play tent as the object at the center of the map.
After the first attempt, return to the page. Children can cross out ideas, add branches, and mark what worked. This review connects planning with evidence, like updating a route after finding a blocked path. Mind maps support broad thinking, though some children may focus more on decoration than problem-solving. Limit the colors or give each color a purpose when that happens. Ask, “Which branch helped us most, and what should we change next?”
5. Role-Playing and Perspective-Taking
Two children reach for the same building pieces. One sees a sharing problem; the other sees an unfinished design. Role-playing helps children examine the same situation through different positions, then explain needs, feelings, and possible compromises. It suits sharing conflicts, confusing instructions, and design challenges.
Choose a familiar scenario, such as a student struggling with a science activity or a toy user unable to follow its instruction sheet. Prepare role cards for the builder, user, helper, or observer. First, let children act without interruption. Then switch roles and repeat the scene. Changing positions works like changing seats in a room. It reveals details that were easy to miss the first time.
After both rounds, discuss the experience:
- What did each character need?
- Which words or actions caused difficulty?
- Which solution treated everyone fairly?
- What could the group try in real life?
Parents can play the child to examine a recurring routine problem. Teachers can play students to spot unclear directions or rushed pacing.
Use role cards, name tags, safe props, and a clear scenario. Keep the first scene brief, then allow more time for reflection. Children practise empathy, communication, negotiation, and emotional vocabulary. Puppets can support shy participants, while sentence starters such as “I need…” and “Could we…?” make discussion easier. A Playz play tent can become a shop, clinic, laboratory, or reading area.
“Try the problem from the other person's side before you decide what the solution should be.”
Adults should focus on the discussion rather than acting quality. The performance provides evidence, but the debrief connects a character's experience to a real decision. Children may also need an observer role before acting, especially with sensitive conflicts. Stop or simplify the scene if participation feels uncomfortable.
6. 5 Whys Analysis
A child says, “The model will not assemble.” The 5 Whys method turns that complaint into a small investigation. Children state the problem, ask why it happened, record the answer, and question that answer in turn. Like following footprints backward, the chain can lead from a visible symptom to a change they can test.
Use cards, blocks, or a simple drawing. One child acts as investigator, another describes what happened, and an adult records each answer. Keep the question neutral: “Why did this happen?” invites evidence, while “Why did you do that?” can sound like blame.
For a STEM project that remains unfinished, the chain might look like this:
- The students lose focus.
- The objective is unclear.
- The instructions were misunderstood.
- The task lacks a visible example.
- The steps are too large to manage at once.
The fifth answer is a working hypothesis, not a verdict. Children can add a model, divide the task into smaller steps, or ask classmates to restate the goal. Then they observe whether the change helps. This makes the activity useful for developing problem-solving skills, because children connect questions with reflection and self-correction.
Try the same process with a toy that has lost appeal, a classroom routine that breaks down, or a science result that differs. Examine challenge level, repetition, timing, expectations, tools, measurements, and surrounding conditions. Stop when another question adds no useful detail. A fixed count provides structure, while evidence decides when the investigation is complete. Be careful with assumptions. Check observations before changing the materials or blaming a person.
7. Lateral Thinking and Random Word Association
Lateral thinking interrupts familiar patterns. Instead of asking for the next logical answer, give children a random word and ask them to connect it to the challenge. The strange connection often produces a new direction that ordinary brainstorming misses.
Write a problem such as, “How can we make a science lesson more engaging?” Choose the word “adventure.” Children might turn the lesson into a treasure hunt, create mission cards, or organize materials as expedition supplies. If the challenge is redesigning a play tent and the random word is “lighthouse,” children might add height, visibility, signaling, or a lookout role.
Follow the surprising connection
Choose words from a dictionary, a book, or a container of cards. Don't reject an idea because the link sounds silly. Ask the child to explain the connection and develop it for a few minutes before deciding whether it's practical.
- Start with the problem: State exactly what needs to improve.
- Add a random word: Choose one without trying to make it relevant.
- Make associations: List images, actions, textures, places, and feelings linked to the word.
- Build a solution: Combine one association with the original challenge.
- Evaluate later: Test the idea only after the creative phase ends.
Younger children can draw the random word and add one feature to a block structure. Older students can compare several associations and explain which one offers the strongest direction. This activity supports originality, but it can produce ideas that ignore safety, cost, or available materials. Pair it with a practical testing step rather than treating every creative leap as a finished solution.
8. Fishbone Diagram
A Fishbone Diagram, also called an Ishikawa Diagram, organizes possible causes around one clearly stated effect. Draw the problem at the fish's head, then add branches for categories such as People, Process, Product, Environment, and Equipment. The categories help children look beyond the first explanation.
For a failed science kit experiment, the head might say “The result didn't appear.” Branches could include unclear instructions, skipped steps, unsuitable materials, room conditions, or tools that weren't prepared. A classroom engagement problem might involve teaching style, student motivation, content relevance, available resources, and the physical environment.
Draw, sort, and prioritize
Begin by defining the effect in observable language. “Students are bad at science” is too broad. “The class didn't complete the observation chart” gives the group something concrete to investigate.
- People: Who needed information, help, or training?
- Process: Which step was unclear, rushed, or missing?
- Product: Did the object, material, or design fit the task?
- Environment: Did space, noise, temperature, or timing affect the result?
- Equipment: Were tools available, safe, and ready to use?
Invite children to add causes with sticky notes. Then sort them by likelihood or by how easy they are to test. Combining the diagram with the 5 Whys can help a group examine one likely cause more closely.
The diagram is valuable for group discussion because it gives every child a place to contribute. Its limitation is that children may list possibilities without checking them. Ask, “What did we observe?” and “What could we change in the next trial?” That turns a decorative diagram into a plan for action.
9. Reverse Problem-Solving
A reading corner becomes difficult to use when children cannot find a seat, understand the rules, or concentrate. Reverse problem-solving starts with that failure and asks, “How could we make nobody want to use this space?” Listing the worst choices exposes obstacles that a direct improvement question might miss.
The method works like inspecting a design through a cracked mirror. Children first create a deliberately poor version, then turn each flaw into a useful change. Poor lighting suggests a lamp or brighter location. Confusing rules suggest a clear sign. Constant interruptions suggest a quiet routine.
Run the challenge in reverse
Choose a familiar goal, such as building a stable tower or creating a welcoming reading area. Ask children to describe ways to prevent success. Record their ideas on paper, sticky notes, or a simple problem card. Keep unsafe ideas imaginary. A child may draw a hazardous structure, but should not build or test one.
Use this sequence:
- Materials: Paper, markers, blocks, sticky notes, and a problem card.
- Play steps: State the goal, reverse it, list obstacles, then convert each obstacle into a design decision.
- Suggested time: A short round fits well before a building or redesign activity.
- Outcomes: Children identify hidden assumptions, anticipate obstacles, and create preventive solutions.
- Differentiation: Offer picture cards and sentence starters for younger children. Older students can sort likely risks from ideas included mainly for humor.
- Optional props: A play tent, board game, or model structure gives the group something concrete to improve.
For example, children trying to protect a toy might suggest leaving gaps, using weak supports, or placing the toy where it can fall. They can then reverse those choices by closing gaps, strengthening supports, and selecting a safer position. Ask, “Which problem could happen in real use?” and “What change would prevent it?”
Some children may hesitate because they expect every answer to be positive. Explain that the group is not celebrating failure. It is treating failure as information. For further prototype and play-testing tips, connect the reversed ideas to a real trial.
10. Prototyping and Iterative Testing
Prototyping turns an idea into something children can examine. They build a rough version, test it, notice what happened, and revise it. The first model doesn't need to look polished. A cardboard mock-up, block structure, paper mechanism, or drawing with movable pieces can reveal problems that discussion alone won't expose.
Give children a specific design challenge, such as building a shelter for a toy, creating a bridge between two books, or designing a container that protects an object during gentle movement. Ask them to choose materials, make a first version, test one feature, and explain the change they'd make next.
Use a make, test, learn cycle
- Materials: Cardboard, paper, tape, craft sticks, blocks, string, cups, and recyclable packaging.
- Setup: Define the problem, the available materials, and one way to judge the result.
- Play steps: Sketch, build, test, observe, revise, and test again.
- Learning outcomes: Develop planning, measurement, persistence, communication, and evidence-based revision.
- Differentiation: Offer fewer materials and a simpler target for younger children, while older students can record predictions, observations, and design changes.
- Optional props: A Playz science kit, play tent, or creative building toy can provide a concrete context.
A teacher might pilot a new lesson with one group before changing the whole classroom. A parent might test a toy-storage idea for a day before reorganizing the room. The engineering design process becomes clearer when children explain not only what they built, but why they changed it. Learn more through engineering design process activities for kids.
Build the simplest version first. A rough prototype gives children something real to question.
Structured engineering design activities can support measurable problem-solving outcomes, but results depend on how the activity is implemented. One STEM intervention reported post-learning problem-solving performance of 24.48 points, or 76.5% of the rubric maximum, exceeding its 75% criterion, while also reporting creativity at 4.17 and scientific mind at 4.02 on its stated high-level scales. The intervention study supports a practical lesson, define the problem, allow iteration, and include evaluation checkpoints.
Problem-Solving Activities: 10-Method Comparison
| Method | 🔄 Implementation Complexity | ⚡ Resource Requirements | 📊 Expected Outcomes | 💡 Ideal Use Cases | ⭐ Key Advantages |
|---|---|---|---|---|---|
| Brainstorming Sessions | Low, simple facilitation and time-boxing | Low, whiteboard, sticky notes or digital tools | High volume of diverse ideas; requires follow-up evaluation | Early-stage ideation; open-ended problems; team engagement | Inclusive, low-cost, encourages divergent thinking ⭐ |
| SCAMPER Technique | Medium, sequential prompts to work through | Low, prompt sheets or facilitator guidance | Structured, actionable improvement ideas for existing items | Product refinement, process innovation, classroom exercises | Systematic prompts reduce blind spots; easy to teach ⭐ |
| Six Thinking Hats | Medium, needs coordination and facilitation | Low, visual aids (hat cards) and time for cycles | Balanced analysis with reduced conflict and clearer decisions | Strategic meetings, complex decisions, team alignment | Ensures all perspectives considered; speeds consensus ⭐ |
| Mind Mapping | Low–Medium, practice improves clarity | Low, paper or mind‑mapping software | Visual organization revealing connections and gaps | Planning, learning, organizing complex information | Enhances memory and shows relationships clearly ⭐ |
| Role‑Playing & Perspective‑Taking | Medium–High, scenario design and facilitation | Medium, space, participants, props, time | Deep empathy, behavioral insights, communication improvements | User testing, conflict resolution, empathy training | Reveals blind spots and builds interpersonal skills ⭐ |
| 5 Whys Analysis | Low, simple iterative questioning | Low, time and stakeholder input | Root causes identified quickly; simple corrective actions | Troubleshooting, process incidents, quick fixes | Fast, cost‑effective root cause analysis ⭐ |
| Lateral Thinking / Random Word | Medium, requires practice and creative prompts | Low, random word generators or prompt decks | Novel, unconventional ideas; may need heavy filtering | Breaking creative blocks; breakthrough ideation sessions | Generates truly original concepts; energizes teams ⭐ |
| Fishbone Diagram (Ishikawa) | Medium, structured mapping and categorization | Low–Medium, diagram tools and team time | Comprehensive map of potential causes; highlights areas for deeper analysis | Quality issues, complex failures, root cause workshops | Visual, organized cause exploration; supports follow‑up analysis ⭐ |
| Reverse Problem‑Solving (Inversion) | Medium, mindset shift and guided questioning | Low, facilitator/time to reframe problems | Reveals overlooked factors and practical countermeasures | Strategy sessions, entrenched problems, risk analysis | Reframes assumptions; uncovers obvious fixes often missed ⭐ |
| Prototyping & Iterative Testing | High, build‑test‑learn cycles and coordination | High, materials, user testers, time and iteration budget | Validated, user‑centered solutions with reduced launch risk | Product development, UX work, educational activity design | Real‑world feedback drives effective, tested solutions ⭐ |
Build a Better Challenge Routine
The best activity depends on the child's current way of thinking, not only on age. A preschooler may solve a meaningful problem by choosing blocks that support a roof, drawing a route through a pretend town, or negotiating who gets the red cup. An elementary student may be ready to compare causes, create a design rubric, or explain why a revision improved the result.
Start with one activity that matches the child's developmental stage and one core skill you want to practice. For younger learners, choose brainstorming, mind mapping, role-play, or a simple build-and-test challenge. For children who can explain sequences and causes, introduce SCAMPER, Six Thinking Hats, 5 Whys, Fishbone Diagrams, or inversion. For a stretch challenge, ask the child to combine two methods, such as using brainstorming to generate ideas and iterative testing to evaluate one.
The progression matters because problem solving isn't just about finding a correct answer. It includes trying, noticing, revising, and explaining. The OECD's PISA 2012 creative problem-solving assessment included 44 countries and economies, providing a broad cross-national baseline for non-routine tasks. Across OECD countries, 11.4% of 15-year-olds were top performers, while 31% reached Level 4 or higher. The same OECD summary reported that about one in five students could solve only straightforward problems connected with familiar situations. The OECD summary helps explain why children need repeated opportunities to work through unfamiliar, multi-step challenges.
Choose by primary skill
- Creative idea generation: Brainstorming, SCAMPER, and random word association give children room to produce alternatives.
- Perspective and communication: Role-playing and Six Thinking Hats help children consider facts, emotions, risks, benefits, and other people's needs.
- Organization and diagnosis: Mind maps, 5 Whys, and Fishbone Diagrams make complex problems easier to inspect.
- Testing and revision: Prototyping turns explanations into evidence and gives children a reason to revise.
- Collaboration: Pairs and groups can share understanding, divide effort, and coordinate knowledge. OECD research on problem solving highlights pair work, group work, computer-mediated collaboration, simulation, and gamification as relevant formats for developing these skills. The OECD report on the nature of problem solving provides useful background for educators designing group challenges.
Balance structure with freedom
Structure gives children a starting point. A prompt, role card, category, or testing rule can prevent the blank-page feeling and help adults observe the thinking process. Too much structure, however, can turn exploration into compliance.
Freedom encourages originality and ownership. It also makes outcomes harder to predict, and some children may need questions, examples, or a smaller first step. Research on active STEM learning reflects that balance. A systematic review found increasing use of STEM-centered active learning for problem solving, but the underlying studies were mixed, including an experimental paper that found no statistically significant improvement from STEM education alone. The systematic review supports using pre- and post-activity measures, explicit planning, testing, and modification cycles, plus facilitation that makes the process visible.
Choose safe household materials such as paper, cardboard, cups, blocks, fabric, and tape. Ask one question, let the child make a first attempt, and resist solving the problem too quickly. Children often learn more when an adult models curiosity, offers a guiding question, and gives space for self-correction instead of taking over. Research on parent-child problem solving also emphasizes perspective-taking, compromise, and guided interaction, while an ERIC study on homework described benefits when adults modeled, encouraged, and reinforced problem solving rather than directly instructing it. The parent-child problem-solving research offers a useful reminder: helping less can teach more when the activity is structured well.
Create the next challenge today. Put a few safe materials on the table, name a real problem, and ask your child or students to draw, build, act, question, and revise. Keep the final conversation simple: What did you try, what happened, and what will you change?
Playz offers play tents, science kits, and creative toys that give children concrete settings for screen-free problem solving, from imaginative scenarios to hands-on experiments. Visit Playz to choose a purposeful play resource and turn your next household or classroom challenge into an opportunity to build, test, and rethink.